Press Conference
This template tutorial was created using Effect House 2.5.0.
This effect creates a press conference effect by using the Look At component to configure a set of microphones to follow the movements of a face.
How to Use This Template
Open Effect House, go to Templates, click the Interactive tab, and select the Press Conference template.

Hierarchy
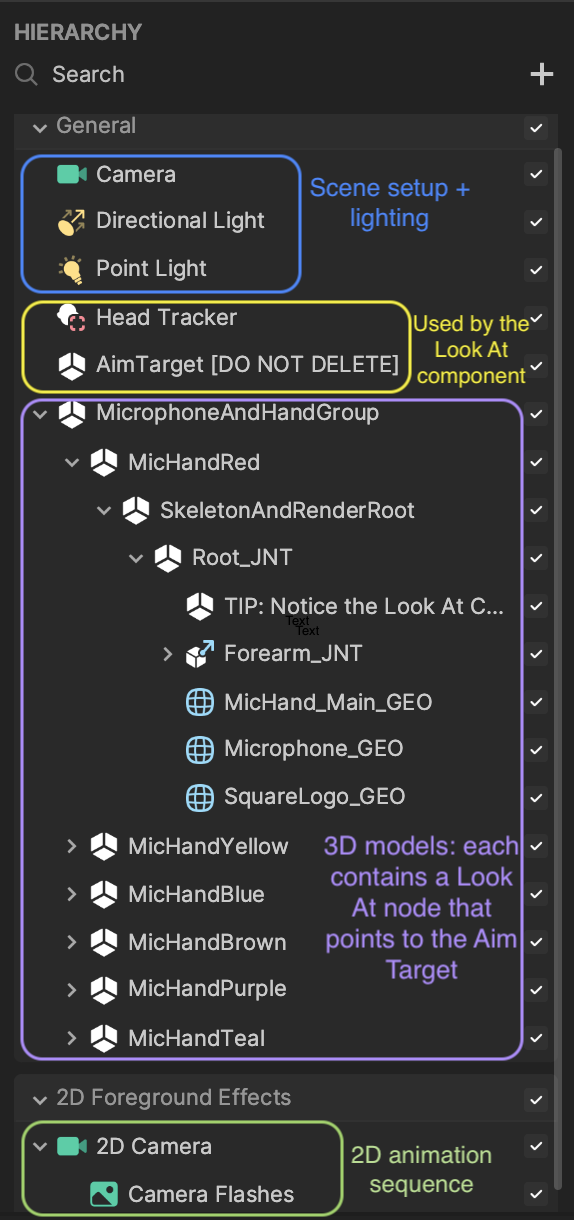
In the Hierarchy panel, you essentially have four sections that are responsible for the different parts of the effect. As shown in the following screenshot, the camera and lights define the scene and lighting, the Head Tracker and AimTarget objects are used by the Look At component, microphone objects make up the 3D models, and another camera controls the 2D animation sequence.
Look At Component
First take a look at the objects that are used by the Look At component-Head Tracker and AimTarget. The Head Tracker is used to determine where the user's head is and AimTarget, an empty object, is attached to the Head Tracker. The AimTarget is what all Look At components are pointing at.
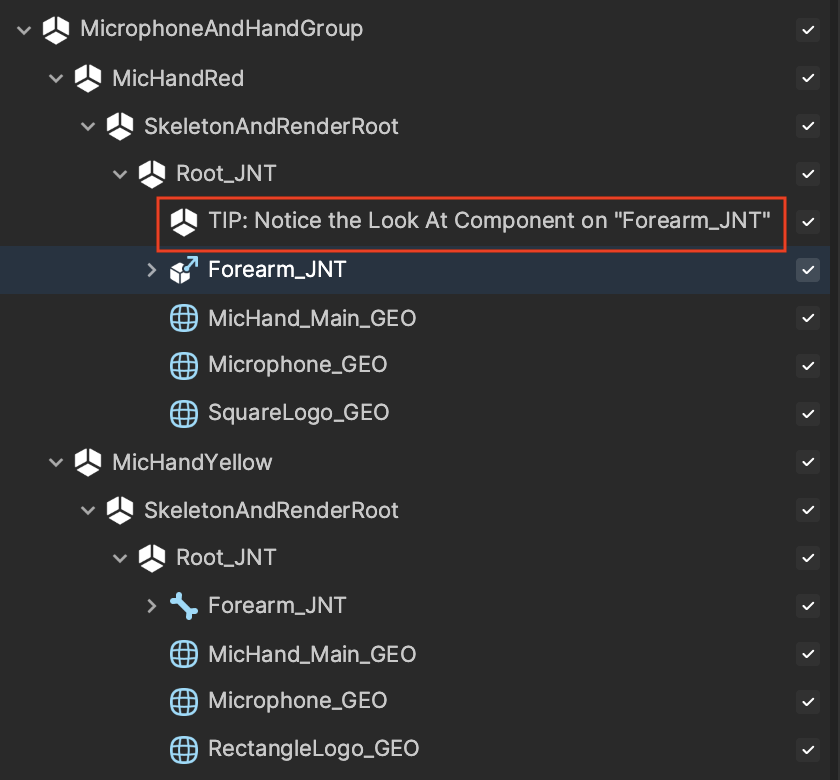
Under MicrophoneAndHandGroup, there are duplicates of essentially the same objects. If you expand the different microphone objects, you can find the same content with the exception of the logos.

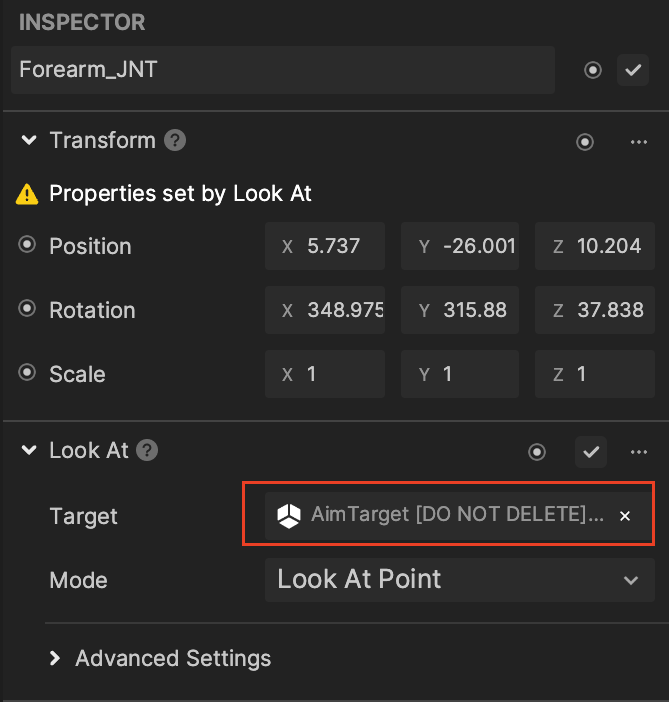
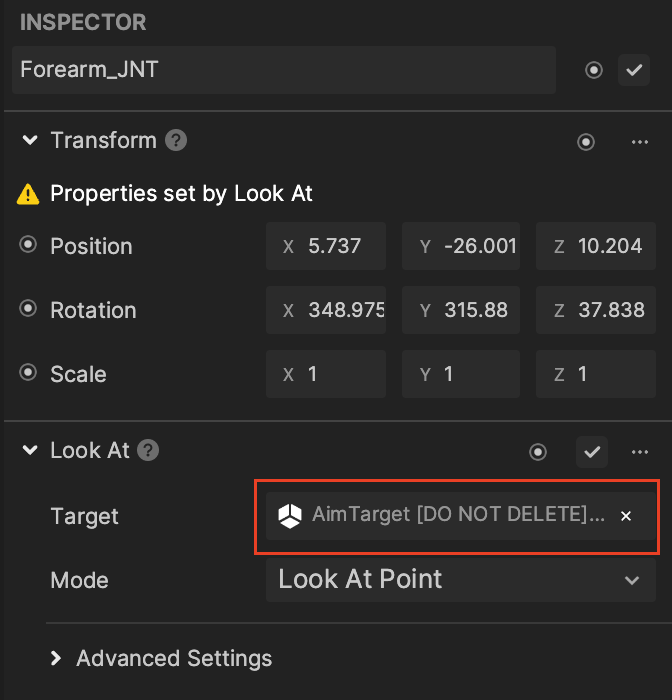
Notice that the Look At component is on the forearm joint, Forearm_JNT, for all microphone objects. If you click a Forearm_JNT object, you can see its Look At configuration in the Inspector panel. AimTarget is the assigned target and its mode is Look At Point, which allows the object to point at the transform of AimTarget.
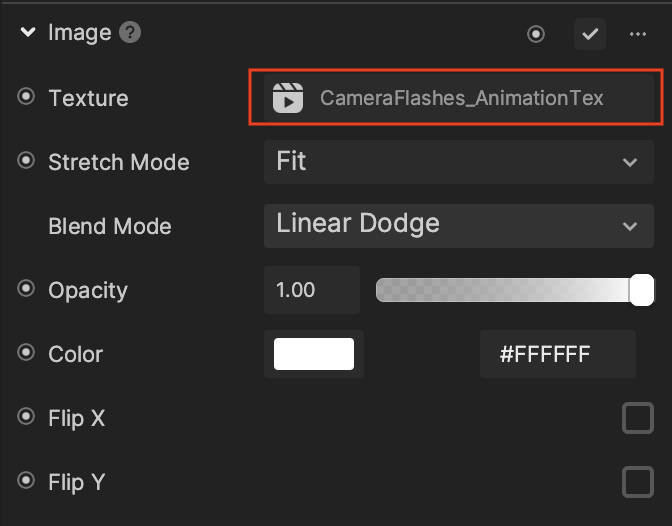
Camera Flashes
The 2D Camera, along with Camera Flashes, can be found in the 2D Foreground Effects render group. Camera Flashes plays the animation of the flashing effect to create a realistic press conference effect.

Visual Scripting
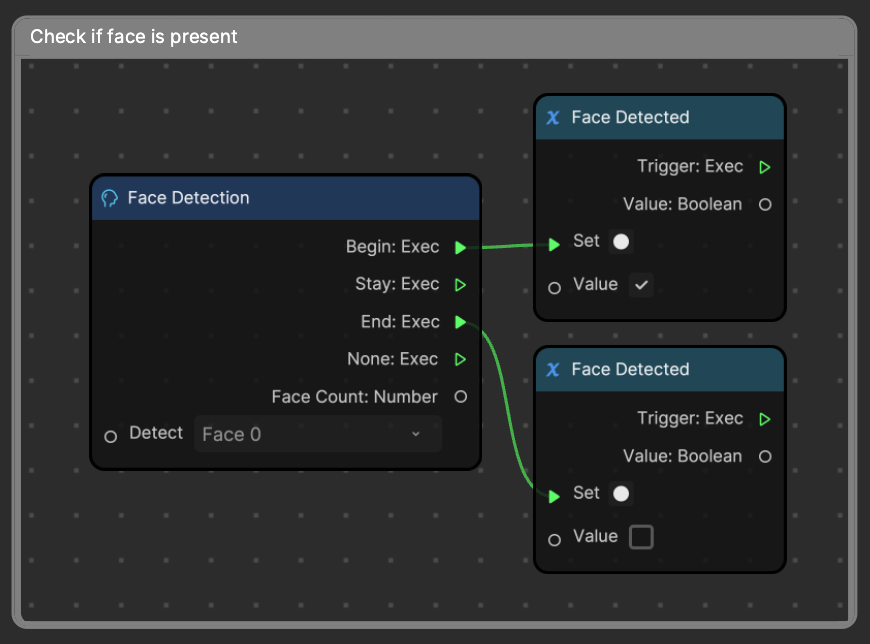
Start by checking if a face is present in the screen. The Face Detection node has 1 Face Detected variables and its value can either be true or false. This means that once the Face Detection node is kicked off, and a face is detected, then the Face Detected variable is set to true. If a face is not found by the end of the detection, then the Face Detected variable is set to false.
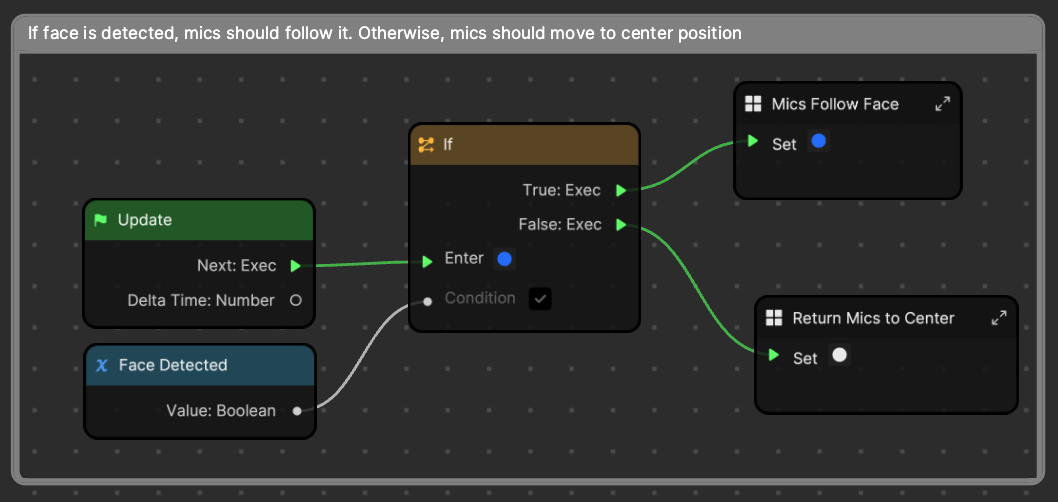
The Face Detected variable is then used in this next section to determine the behavior of the microphones' movement. If the value is true, then the Mics Follow Face subgraph is kicked off. However, if the value is false, then the Return Mics to Center subgraph is initiated.
Mics Follow Face Subgraph
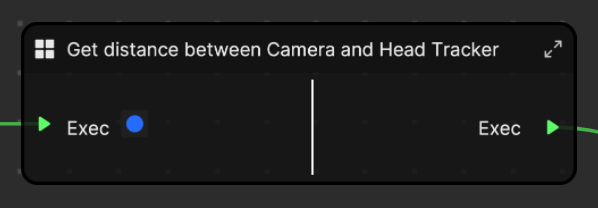
First the distance between the Camera and Head Tracker is determined to be used for the Current Distance Between Camera and Face variable.
After establishing the distance between the camera and face, the 2D position of nose is retrieved and converted to the world space with the Screen to World node. The Add node then determines the position the microphone should point at, and rather than touching the microphone objects, AimTarget is moved. The position of AimTarget is lerped to the new position with a step of 0.50 to create a smooth movement for the microphones.
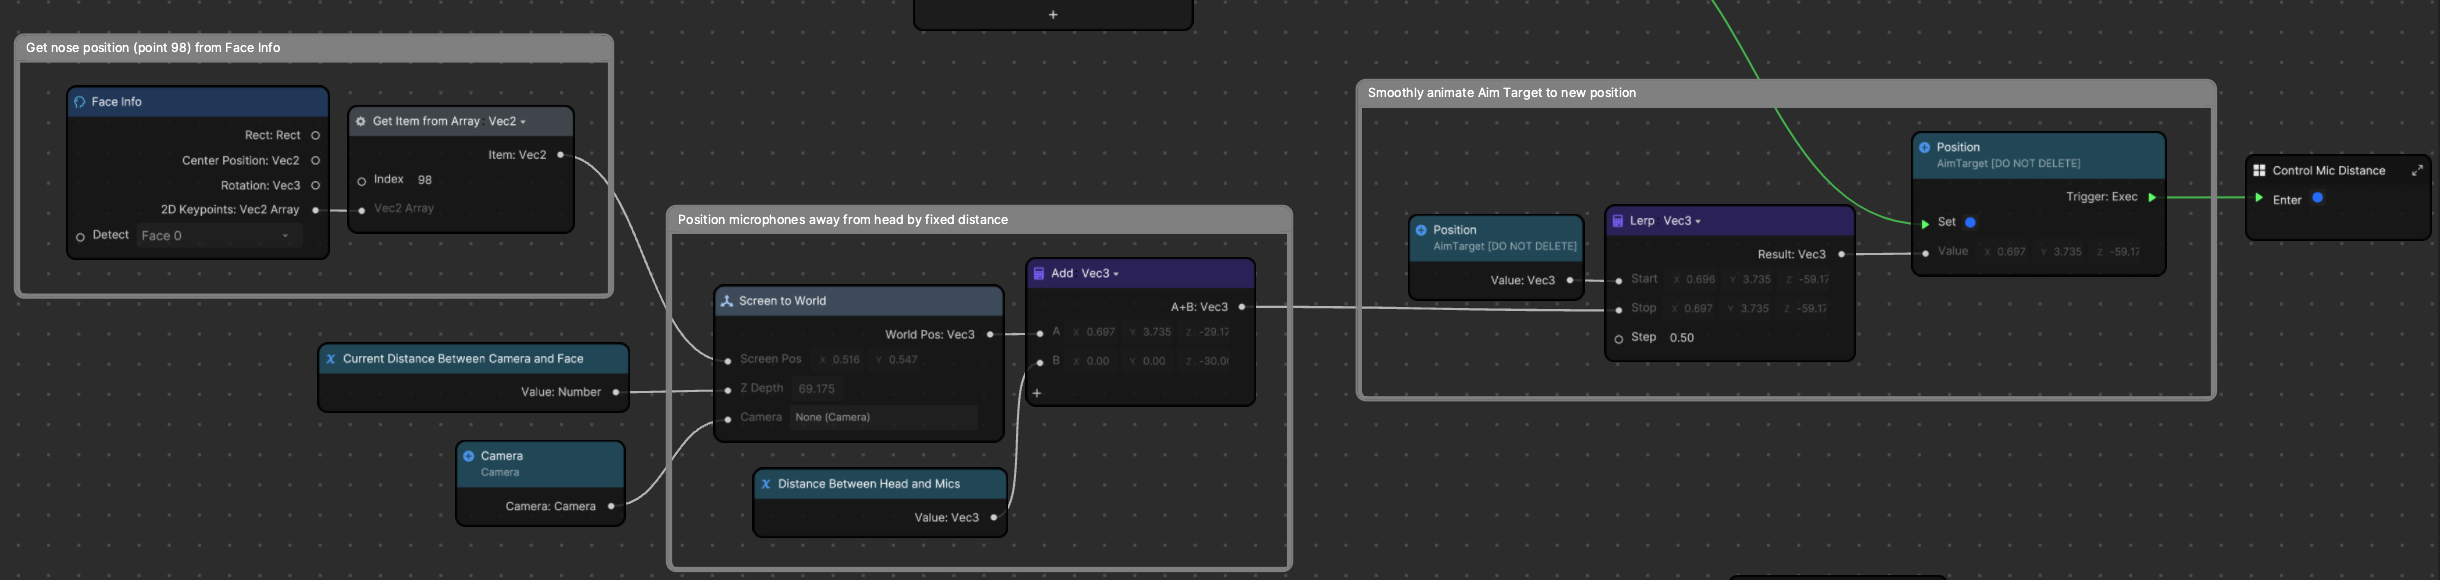
Then we enter into the next subgraph which controls the distance between the microphones and face.
Control the Mic Distance Subgraph
This subgraph checks to see if the face is too close to the camera. If it is, then the Minimum Mic Distance from Face variable is enforced.
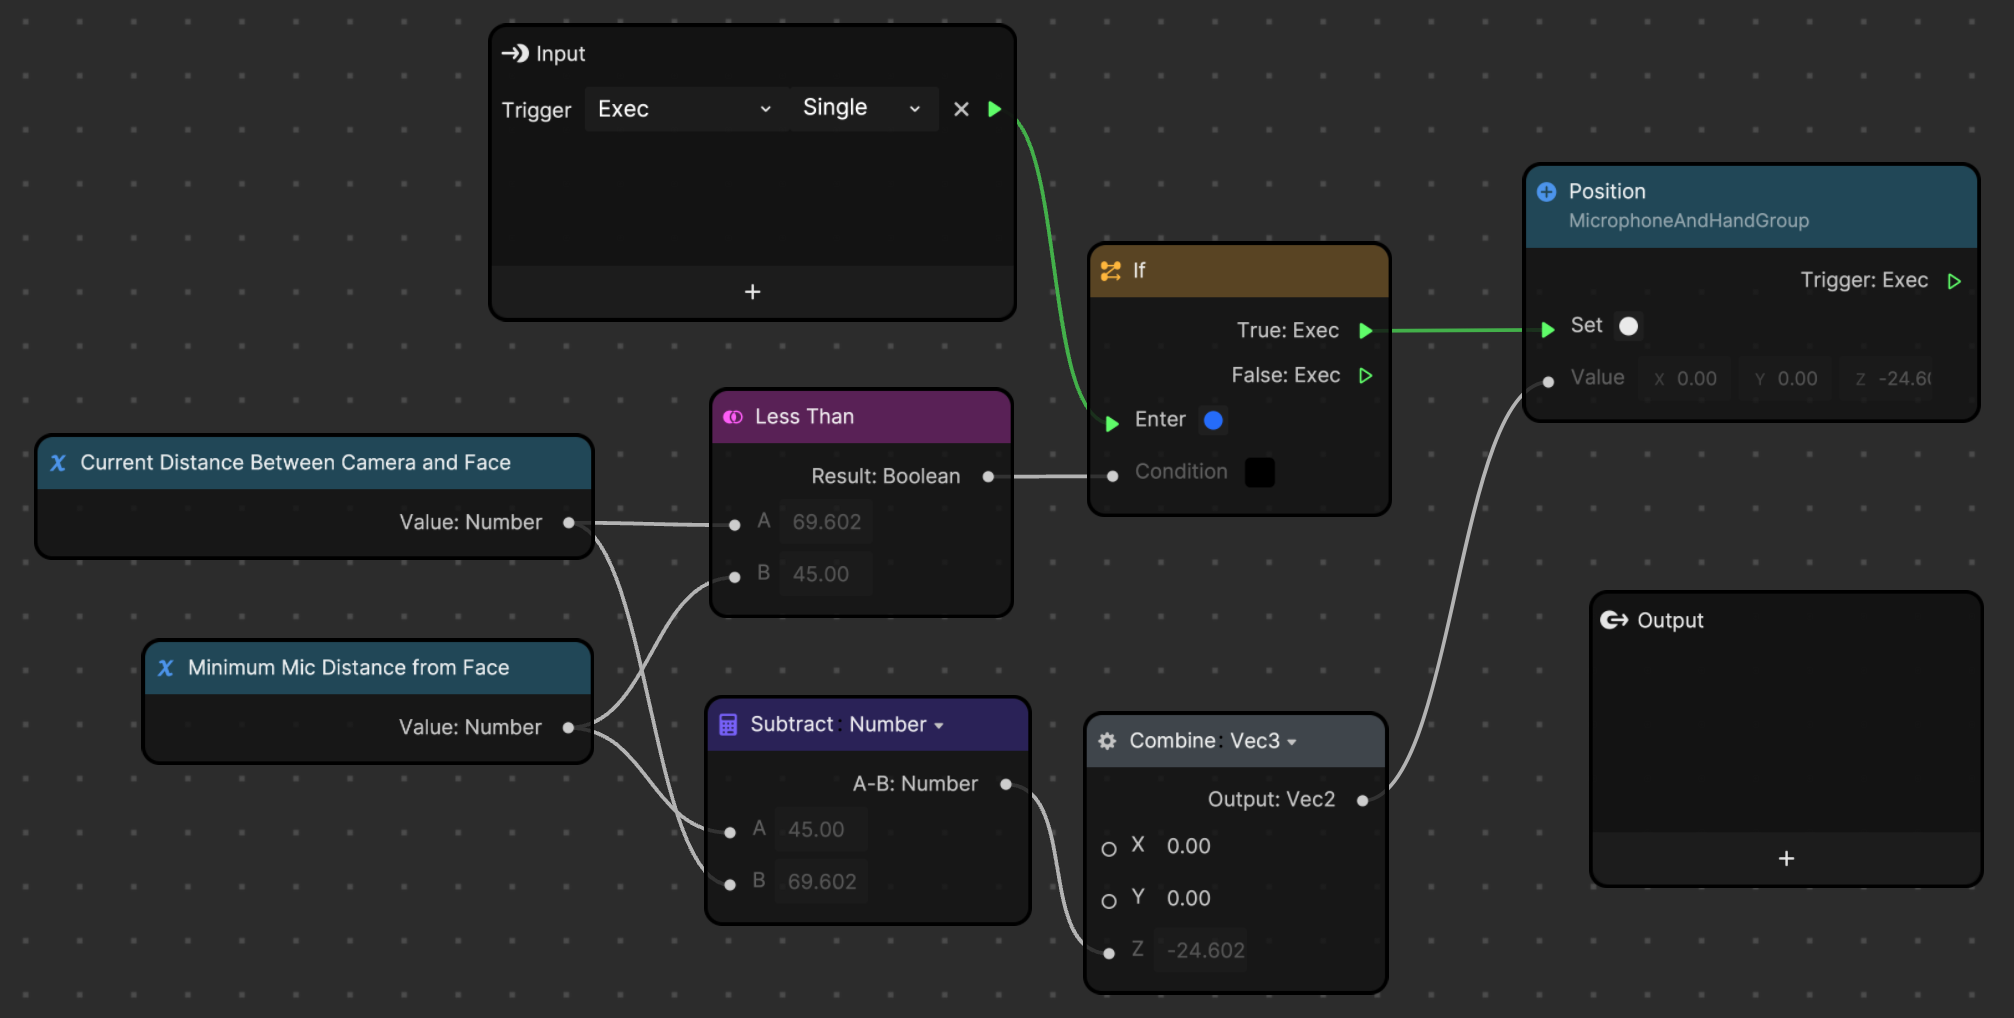
First the Current Distance Between Camera and Face variable is checked to see if it's too small, or less than the defined minimum microphone distance. If it is too small, then the Position of the entire MicrophoneAndHandGroup object is set (and not AimTarget). The current distance is subtracted from the defined minimum microphone distance to get a new Z value, ensuring ample room for the face and microphones.
Returns Mics to Center Subgraph
If a face is not detected, the position of AimTarget is pushed to the center of the screen. The position of AimTarget is lerped to the stop position that is hard coded in the Lerp node.
