Interactive Zoom
The Interactive Zoom template teaches you how to a create and customize a zoom-in-style effect. This template tutorial explains how this effect works and provide instructions for customizing the different aspects of the template to create your own unique effect.
Preview the Effect
To preview the template in Effect House, ensure that the preview media is set to one of the preset Hands videos. In the Preview panel, click the Preview menu, go to Hands, and select your preferred media.
How this Effect Works
The Interactive Zoom template works by zooming in on your face as soon as your palm appears on the screen. If the video is already zoomed in, tapping the screen will zoom out. Additionally, when the camera is zoomed in, it will focus on your face, meaning that the camera will follow the face on the screen.
The zoom function in this template is achieved through a simple technique. The render texture from the main camera is applied to a 2D image. This allows you to easily scale the 2D image and create the zoom effect. To follow the your head, the world position of the Head Tracker is obtained and used to move the image so that it tracks the you head movement.
Customize Zoom
When you take a look at the Visual Scripting panel, you’ll see that there are two main subgraphs in the template—TriggerToZoom and Center2DImageFromWorldPosition.
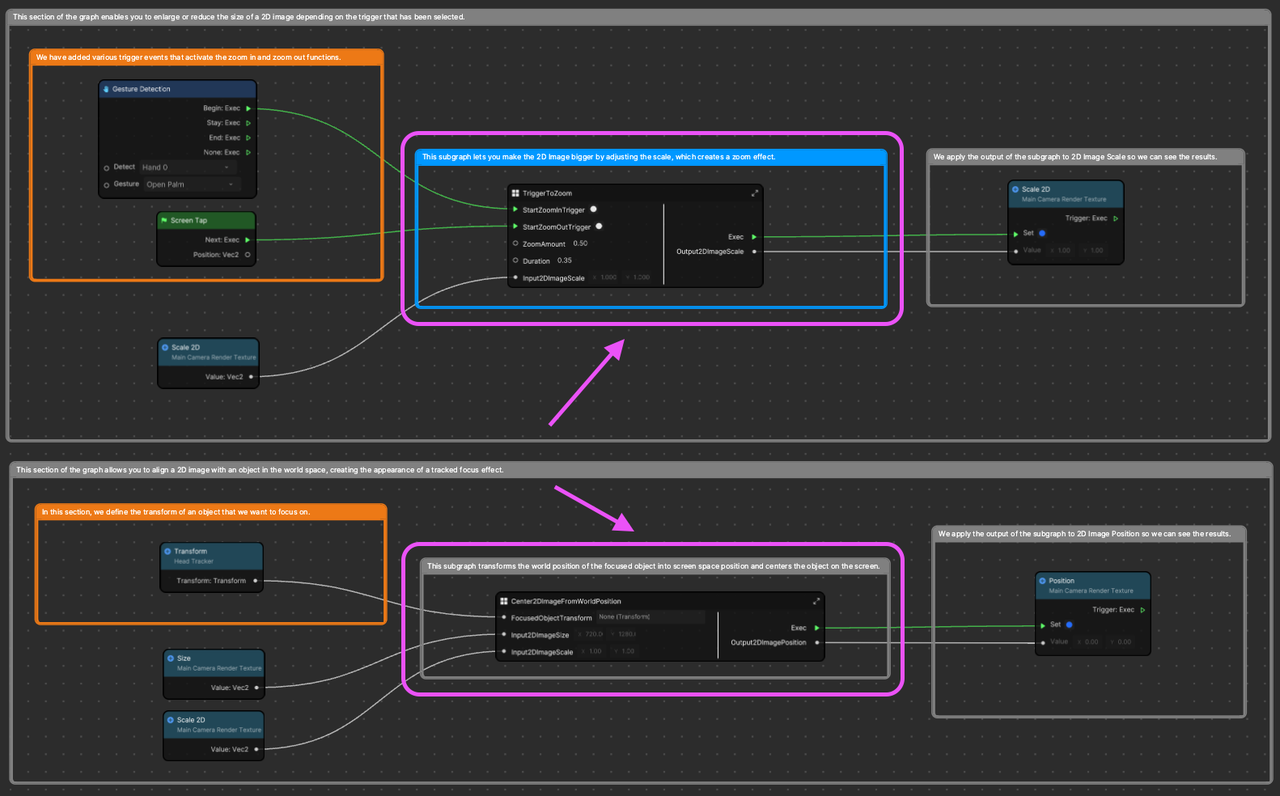
The first subgraph, located at the top in the image above, is named TriggerToZoom. This subgraph is responsible for managing the zoom-in and zoom-out functions, and enables you to easily adjust the ZoomAmount and Duration of the zoom effect according to your preferences.
Customize ZoomInTrigger
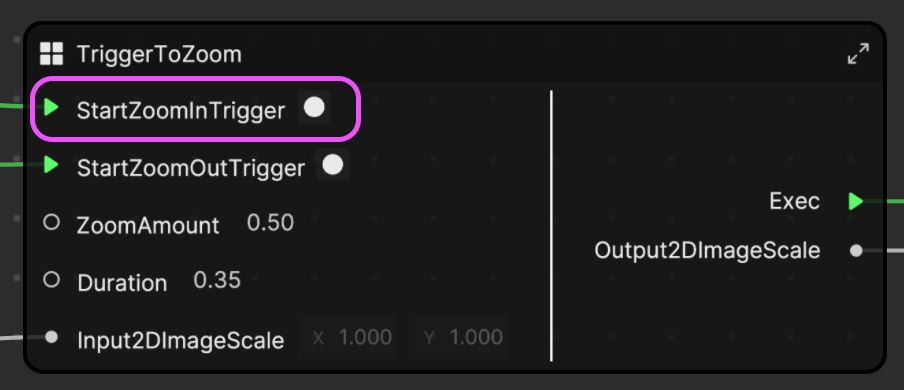
Upon closer examination of the subgraph, you’ll notice an input named StartZoomInTrigger. This input is responsible for detecting when the zoom-in event occurs. You can assign any event to this input, and whenever that event is triggered, the zoom-in effect will activate.
For example, you can customize the template to trigger the zoom-in effect whenever you blinks. To achieve this, remove the Gesture Detection node and replace it with the Facial Movement Detection node.
The Facial Movement Detection node sends an event whenever a selected Facial Movement occurs. In this case, choose Eye Blink Either from the Facial Movement dropdown, as you want the zoom-in effect to activate whenever you blinks. Then you can connect the Begin output to the StartZoomInTrigger input.
Now the zoom-in effect will trigger whenever the you blink.
Customize ZoomOutTrigger
The second input of the subgraph functions in the same way as ZoomInTrigger. The primary difference is that it is responsible for managing the zoom-out effect instead.
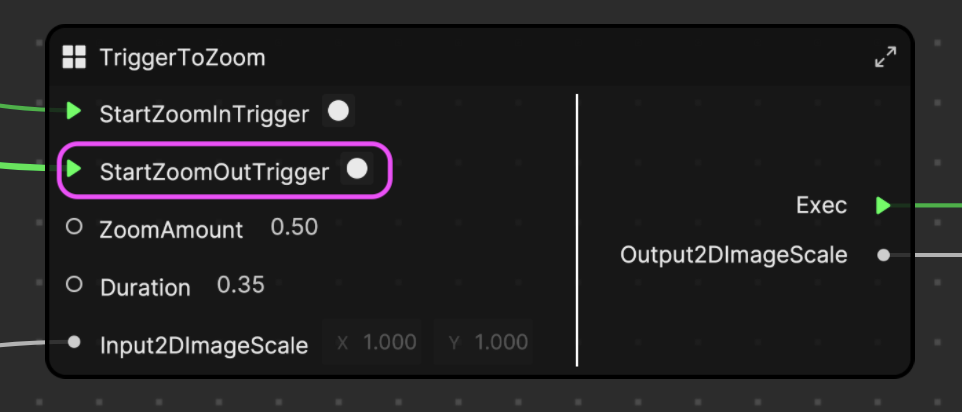
You can assign any event to the StartZoomOutTrigger input to customize what triggers the zoom-out effect. For instance, you can use an “open mouth” event to trigger the zoom-out effect.
Customize ZoomAmount
The ZoomAmount input determines the amount to which the image is enlarged or reduced each time the zoom trigger is activated.
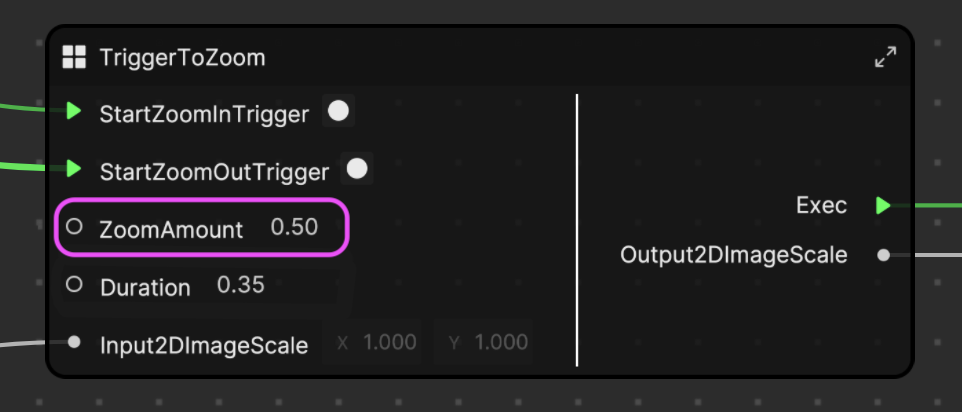
To increase the amount of zoom when the trigger occurs, adjust the ZoomAmount value to a higher number. Similarly, if you want less zoom, you can decrease this value.
Customize Duration
The Duration input determines the length of time it takes for the zoom-in or zoom-out effect to occur. In other words, it controls the speed of the zoom effect.
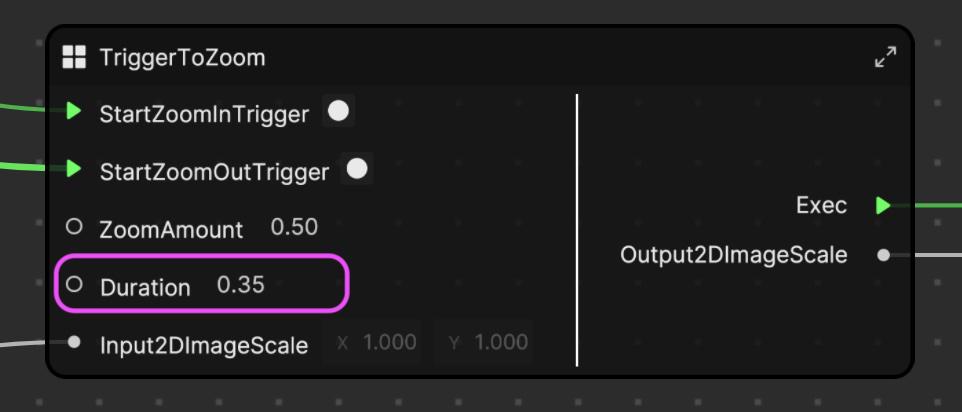
If you want to slow down the zoom-in effect, increase the Duration value in the ZoomIn subgraph. This will cause the zoom to happen more slowly.
To learn more about how the TriggerToZoom subgraph functions, double-click the subgraph node to open it and examine the individual nodes and their settings. This will give you a better understanding of how the zoom effect is created and how you can customize it further.
Customize Focus
The second subgraph included in the template is called Center2DImageFromWorldPosition.
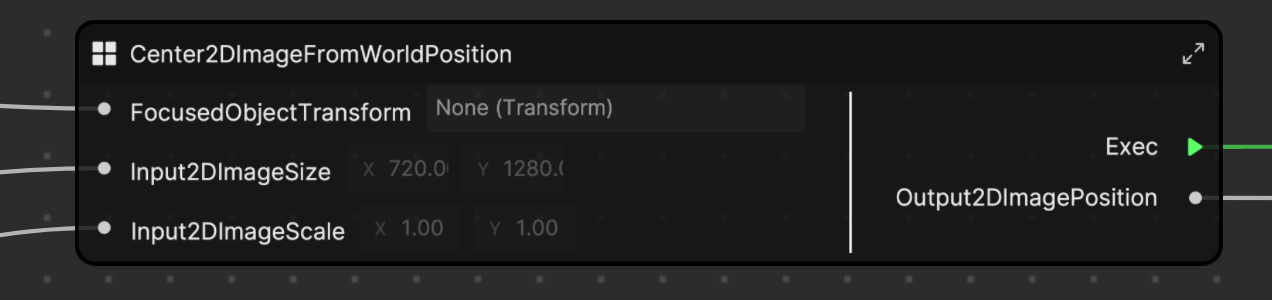
This subgraph is responsible for tracking the your head and keeping the image centered on your face as you move. This effect can be seen in action when the zoom in occurs, as the image follows your face. You can observe this effect in the following preview.
You can customize this subgraph to follow any object on the screen. Simply get a reference from the Transform of the object that you want to focus on and replace it with the Head Tracker. For example, if you the hand to be followed when the zoom in happens, first add a Hand Tracker object by clicking the Add button [+], going to AR Tracking, and selecting Hand Tracker.
Next, get a reference from the Transform of the Hand Tracker into Visual Scripting. To do that, delete the Transform node of the Hand Tracker in the Visual Scripting panel.
Then click the FocusedObjectTransform input and select Hand Tracker from the Scene picker.
Now whenever the zoom in occurs, it will focus on your hand!