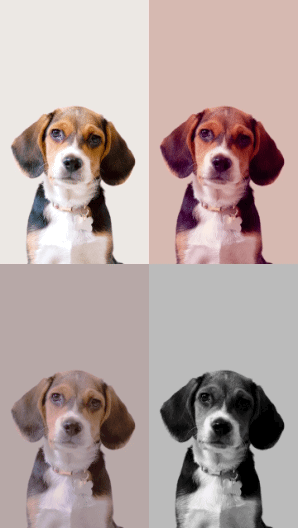
Photo Tiles
The Photo Tiles template places render textures with different post process effects and filters onto a grid layout. You can customize the filters and layout to your liking.
How to Use This Template
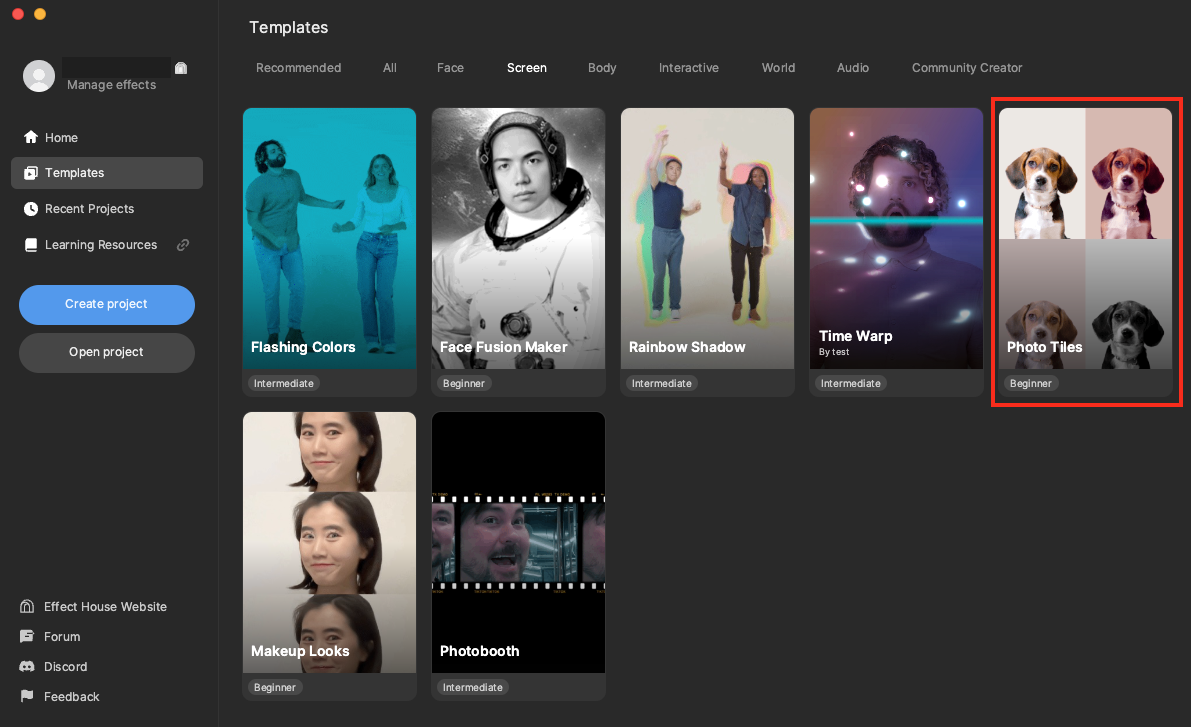
Open Effect House, go to Templates, click the Screen tab, and select the Photo Tiles template.
Hierarchy
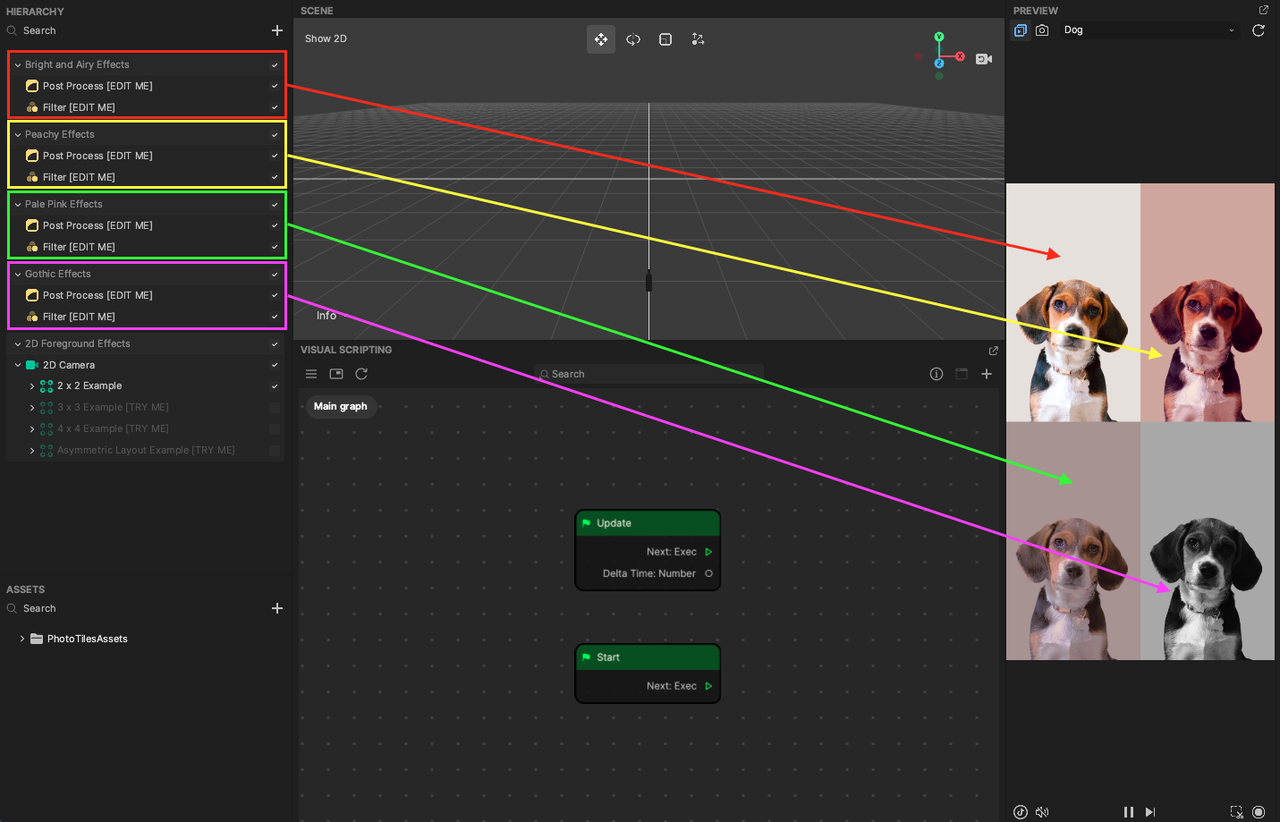
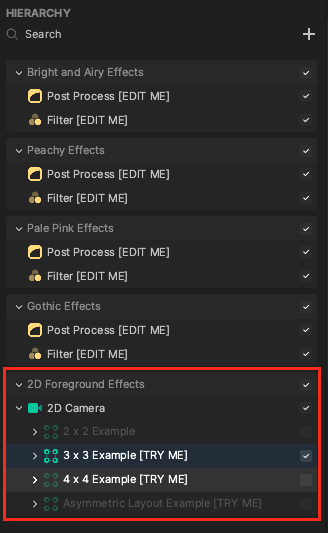
In the Hierarchy panel, there are 4 different render groups that are responsible for the filtered appearance of each photo tile. There is also a 2D Foreground Effects render group that controls the layout of the photo tiles.
Assets
Locate premade filters and render textures in the Assets panel. Expand the PhotoTilesAssets folder, then expand the Textures folder to find the Filters and RenderTextures folders.
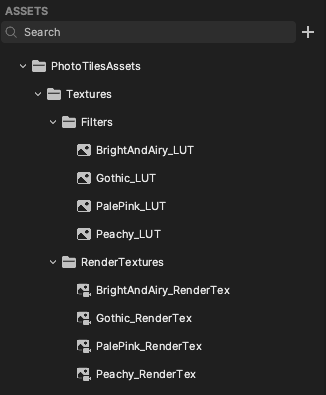
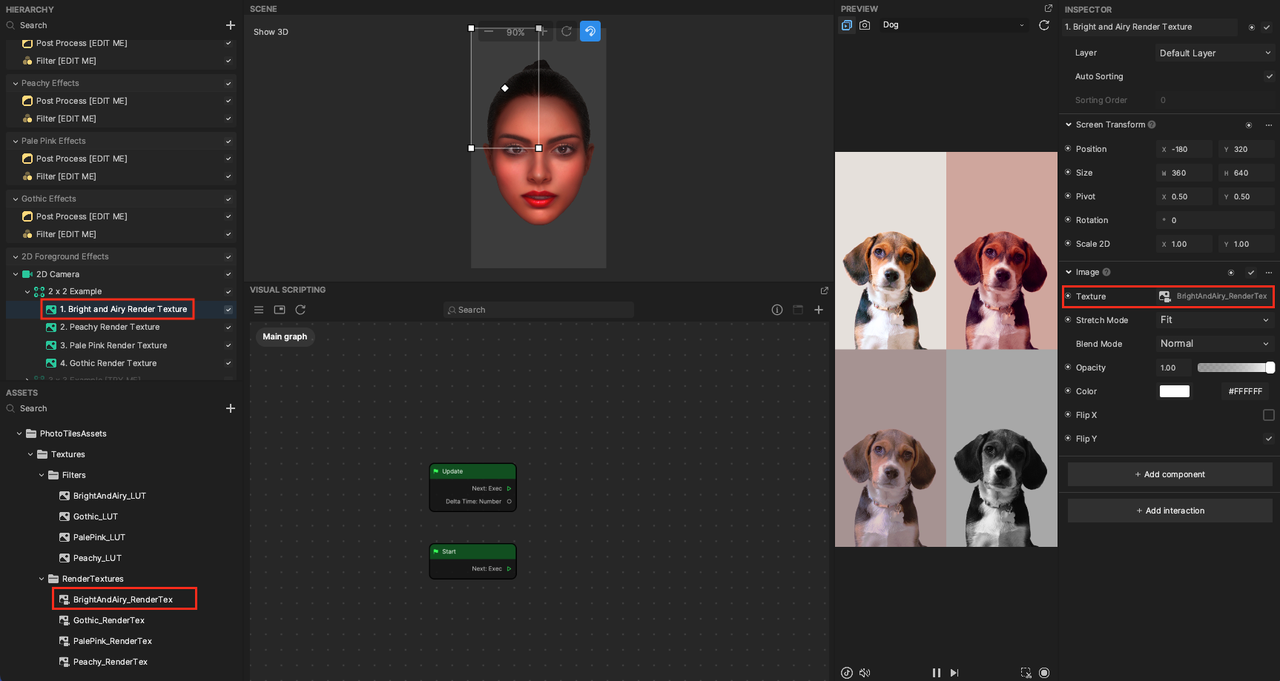
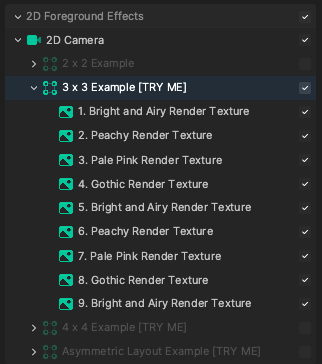
Expand the RenderTextures folder to access the render textures that correspond to each of the default photo tiles. These render textures are assigned to screen images in the 2D Foreground Effects render group.
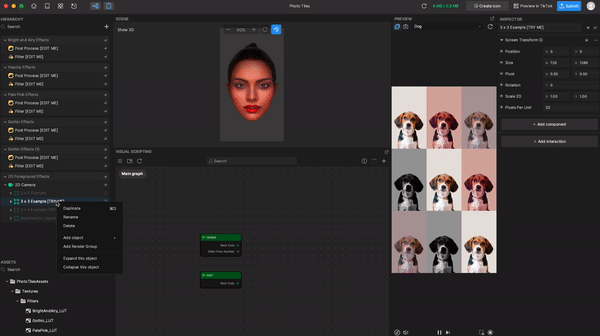
For example, expand the 2 x 2 Example layout option in the 2D Foreground Effects render group, then click 1. Bright and Airy Render Texture. Examine the Image component in the Inspector panel, and notice that its Texture property contains the BrightAndAiry_RenderTex asset. The Camera components of the Post Process [EDIT ME] and Filter [EDIT ME] objects in the Bright and Airy Effects render group also have the same render texture asset assigned.
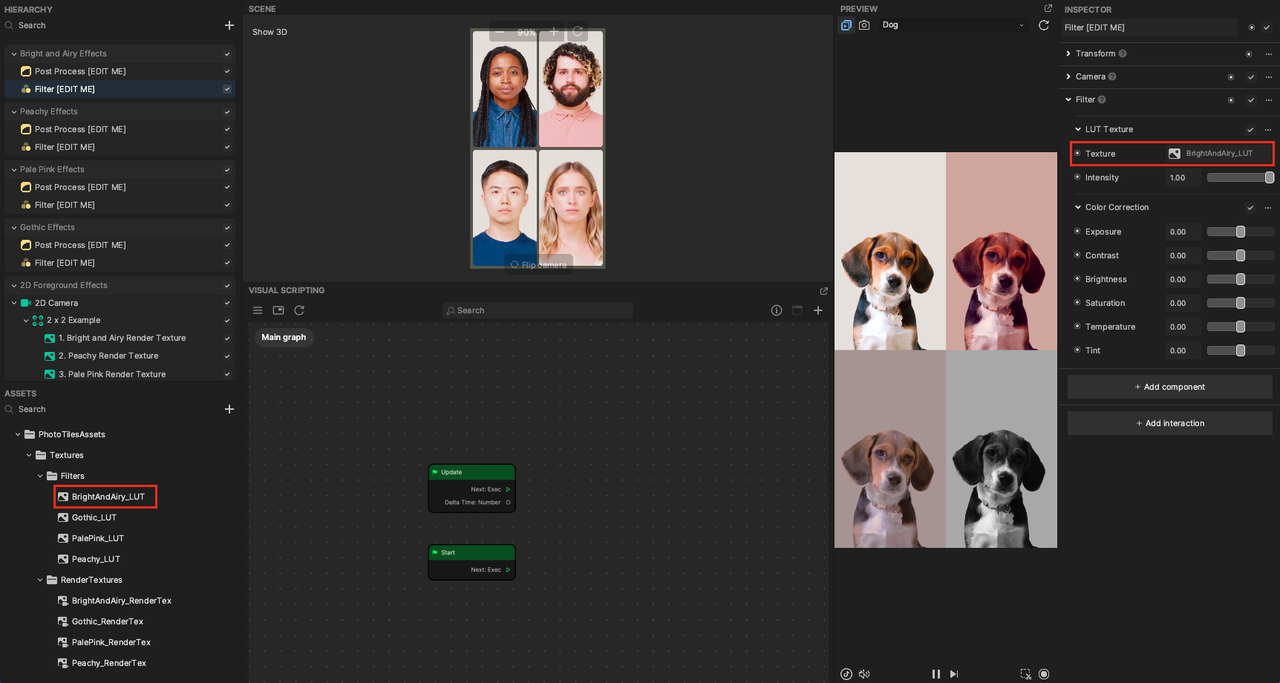
Expand the Filters folder to access the filters that correspond to each of the default photo tiles. These LUTs are assigned to each photo tile. For example, click the Filter [EDIT ME] object in the Bright and Airy Effects render group, and then go to the Inspector panel. Notice that the Filter component's Texture property contains the BrightAnd Airy_LUT asset. Learn more about LUT textures.
Customize the Render Textures
Choose one of the filter render groups to examine, like Bright and Airy Effects.
Post Process
Click the Post Process [EDIT ME] object, and then go to the Inspector panel.
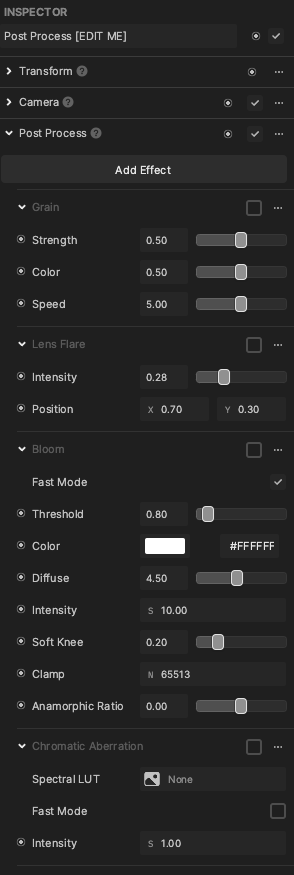
Adjust the Post Process component's settings to achieve your desired effect.
Click the Filter [EDIT ME] object, and then go to the Inspector panel.
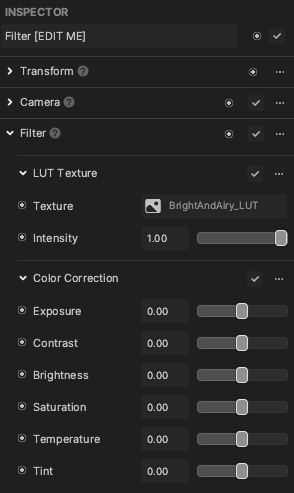
Filter
Customize the Filter component's properties to your liking. For example, you can modify Color Correction to change the filter's appearance. Learn more about the Filter component.
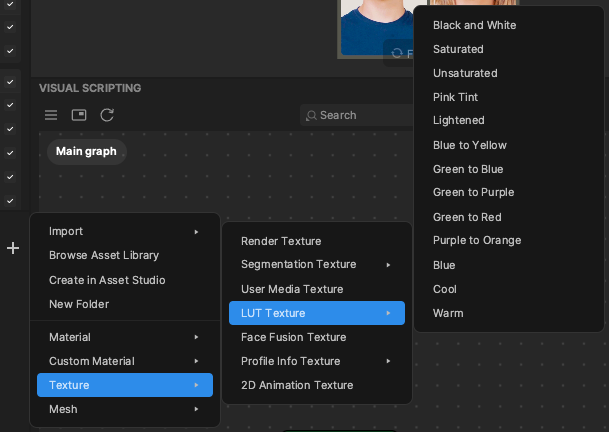
You can also add and use a different LUT texture by clicking the Add button [+], going to Texture, then LUT Texture, and selecting a LUT texture.
Then click the Filter [EDIT ME] object in the Hierarchy panel that you want to customize, go to the Inspector panel, and then click the Texture field. Choose the LUT texture you just added.
You can also create your own custom filtered effect. Duplicate one of the existing effect render groups. Then create a new render texture and assign it to the Camera components of the Post Process [EDIT ME] and Filter [EDIT ME] objects. Modify the post process and filter effects to your liking.
Modify the Layout
You can choose from several premade layouts. Make sure only one layout is checked in the Hierarchy panel.
Expand the example layouts to see which render texture corresponds to which photo tile.
To create your own layout, you can duplicate one of the example layouts. Resize and reorient the photo tiles in the Scene panel.
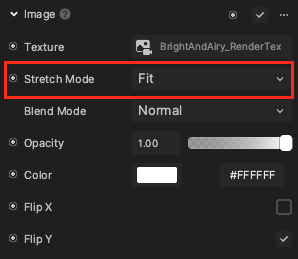
You can also customize how each photo tile fits into the grid by changing its Stretch Mode. Click on the photo tile's corresponding screen image object in the 2D Foreground Effects render group, and then go to the Inspector panel. Modify the Image component's Stretch Mode property.