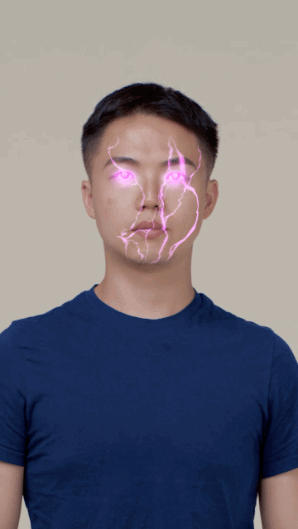
Lightning Face
The Lightning Face effect uses Animated Texture assets to project lightning on the user’s face using the 3D Face component. A static texture is combined with the Eye Color functionality to create a glowing iris, and a Filter is applied to provide contrast. The color of the whole effect changes when a blink is detected via visual scripting.
How to Use This Template
Open Effect House, go to Templates, and select the Lightning Face template.
The Lightning Face template comes with animated lightning textures pre-applied to a 3D Face object. A Filter is also set up in the Hierarchy panel.
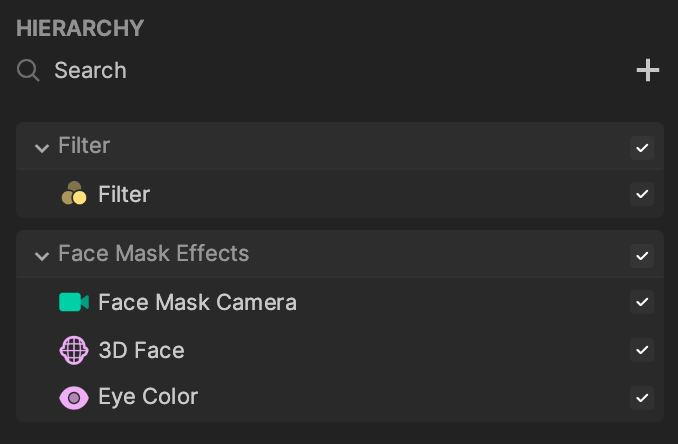
The Filter is placed above the Face Mask Effect in order to apply the lightning and eye glow effects on top of the filter. With this setup, the Filter only applies to the incoming video feed.
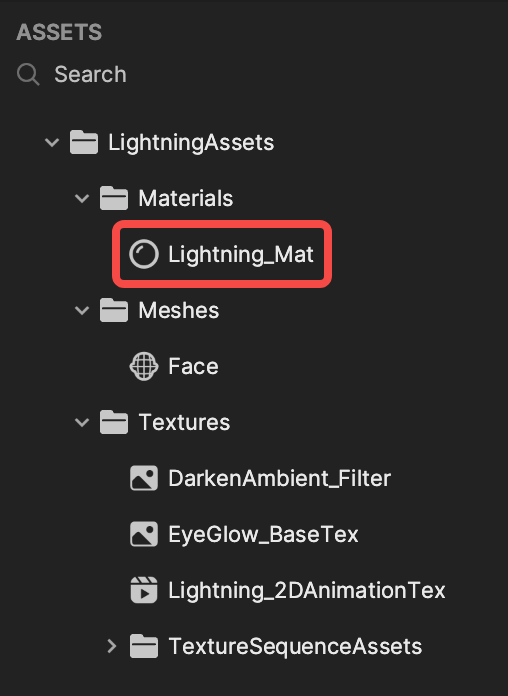
The core functionality is handled in the Lighting_Mat asset, which houses the animated texture and is manipulated by the Visual Scripting graph.
How to Create an Animated Material
To create the Lightning_Mat, start by creating a new material. Navigate to the Assets panel, and select the Add [+] button, Material, then Unlit.
To keep your project organized and easy to navigate, it can help to rename assets. In this case, you can rename the default material from Unlit to Lightning_Mat.
Then you need to import an animated texture. Again, navigate to the Assets panel, select + Import, then Texture Sequence. This will open a window and allow us to select multiple files.
The selected files will import in the order that they are listed. Make sure your files are listed in the correct order (i.e. from frames 0 to 10) when you import them.
Importing an animated texture will create two assets:
- Animated Textures: Contains animation information, including Loop Count, FPS, and Duration.
- Textures: Contains texture information, containing Resolution, and Size.
You can now apply the animated texture to the material. Then you can apply this material to a 3D Face object. The default Color of the Lightning_Mat is white, or #FFFFFF. You can modify this value with visual scripting.

How to Apply Custom Eye Textures
This effect also makes use of the Eye Color functionality. You can add an Eye Color object to the effect by navigating to the Hierarchy and selecting the Add [+] button, going to Face Effects, and then selecting Eye Color. Adding an Eye Color object will automatically add a Face Mask Camera if there is not already one in the scene.
In the Inspector panel, you can see that there are many modification options. For the Lightning effect, only the Eye Color and Opacity Texture components are relevant.
The Texture and Opacity Texture parameters require a texture that is designed for one iris, which can then be applied to one or both eyes. The default Eye Color Texture looks like this:

You will replace the default texture with a mostly white texture to mimic the glow effect. This texture is listed in the Assets panel of the template as EyeGlow_BaseTex. Then change the Opacity to 1.00. Now the Eye Color component looks like this:
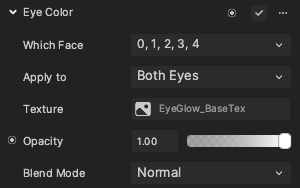
Finally, you can control the overall opacity of the eye with the Opacity Texture component. The default texture works for this effect, but the default color is a shade of green. Modifying the color to white ensures that you can change the color of the eyes with visual scripting.
How to Customize Colors Dynamically
Visual scripting is used to detect user’s eye blinks, and this triggers the color change of the animated texture.
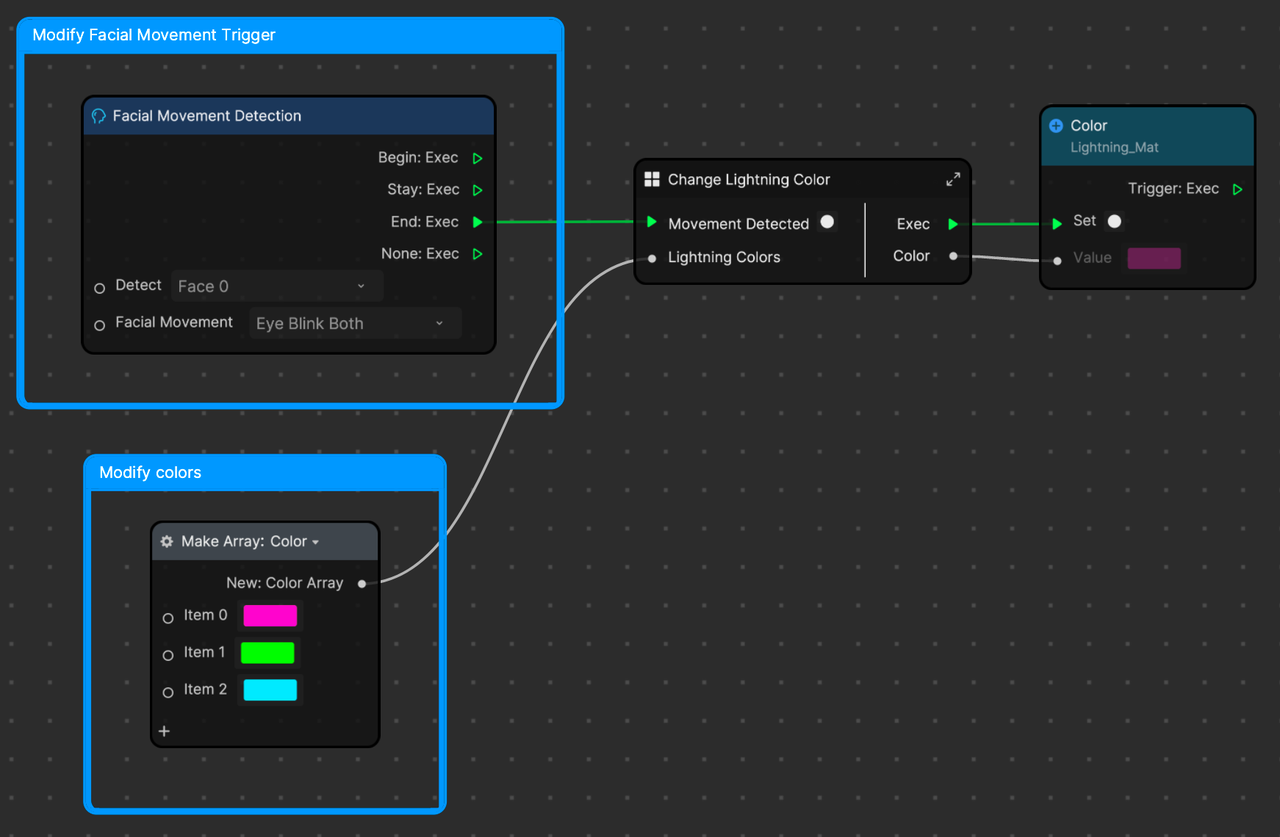
Use the Facial Movement Detection node to determine when the user blinks. This will trigger the Change Lightning Color subgraph, which iterates through the array of colors.
You can easily modify the action that triggers the color change by selecting the Facial Movement dropdown menu in the Facial Movement Detection node.
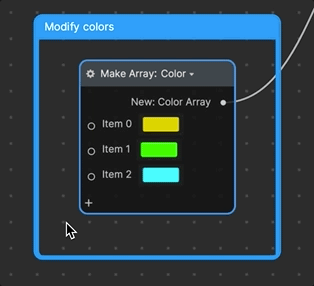
To change or add colors, simply modify the Make Array: Color node. You can modify the existing colors by selecting the array item.
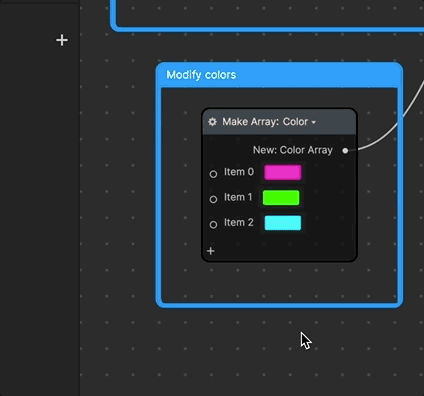
You can also add new items by selecting the [+] on the Make Array: Color node.