Custom Transitions
This template was developed using Effect House 3.1.0.
The Custom Transitions template allows you to simply create transitions between two different render groups.
You can choose from 10 different transition styles provided by the template.
How to Use This Template
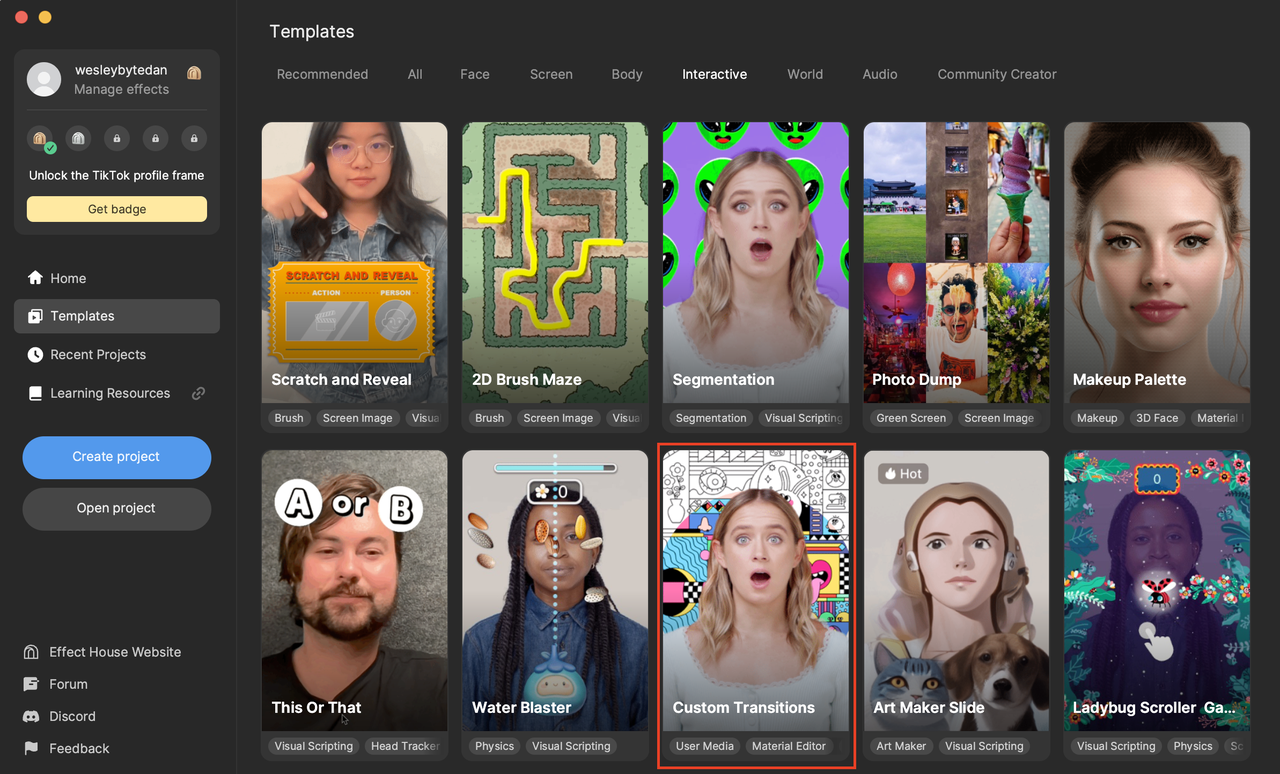
Open Effect House, go to Templates, click the Interactive tab, and select the Custom Transitions template.
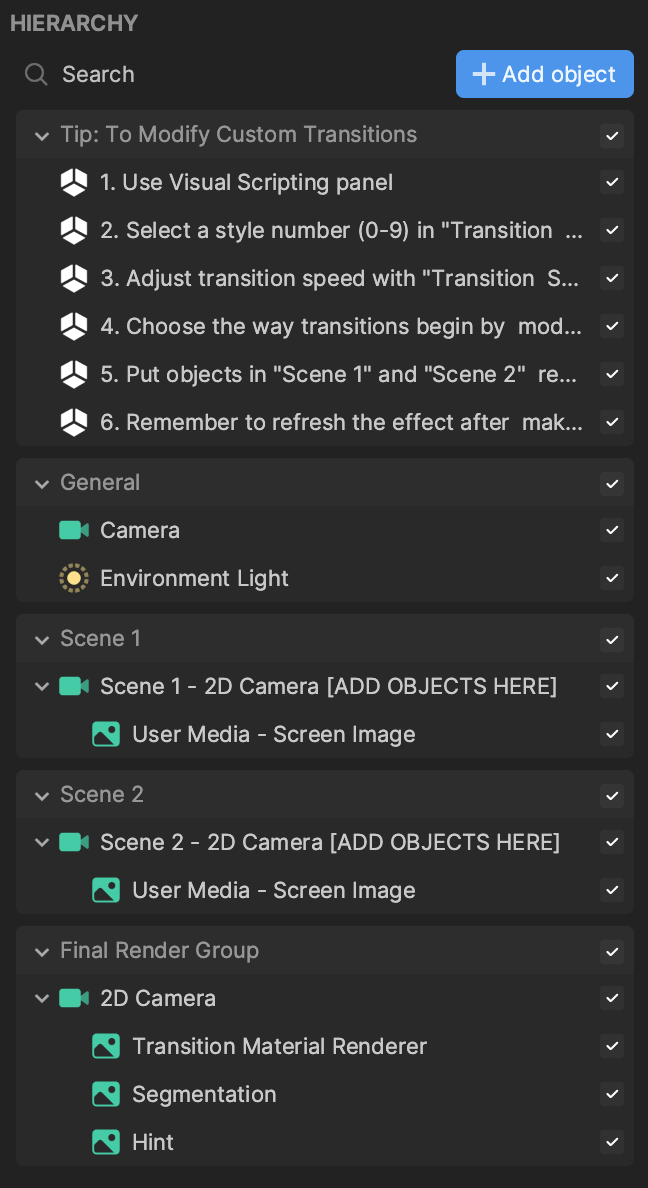
Hierarchy
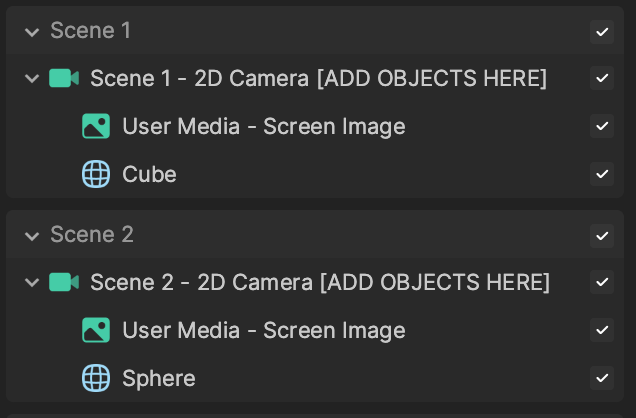
There are three main render groups responsible for creating this effect: Scene 1, Scene 2, and Final Render Group. Scene 1 and Scene 2 both contain User Media - Screen Image objects. The User Media - Screen Image objects contain built-in textures by default, but effect users can use images from their camera roll instead.
The Final Render Group gathers the necessary information to control the transition between the two scenes. You can deactivate the Hint and Segmentation if you don't want them to appear in the effect.
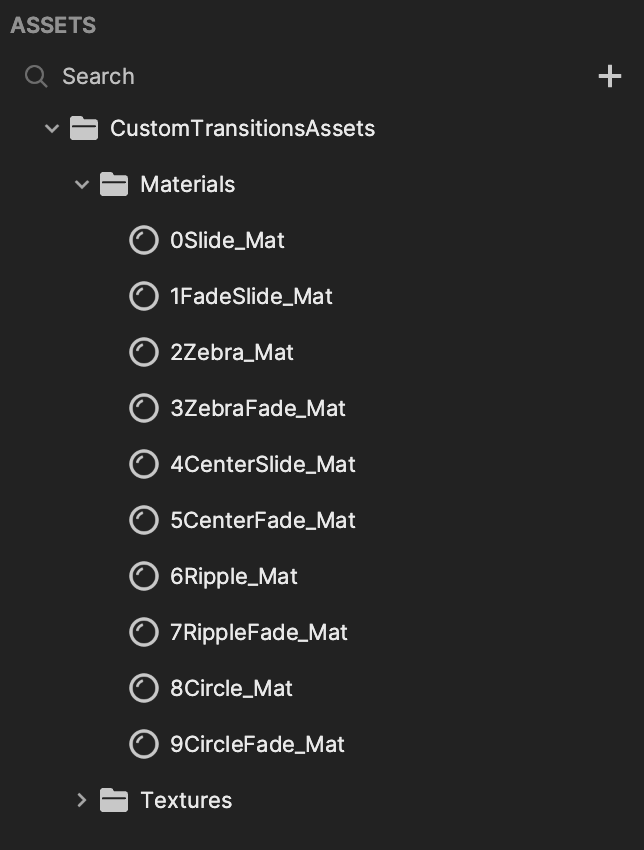
Assets
The Materials folder in the Assets panel contains 10 different materials that you can choose to change the transition style. You can also view or modify these materials in Material Editor. The Textures folder houses built-in textures for the screen images, portrait segmentation, and the hint.
Customize the Transitions
Transition Subgraphs
You can control the appearance of transitions by using the provided subgraphs in the Visual Scripting panel.
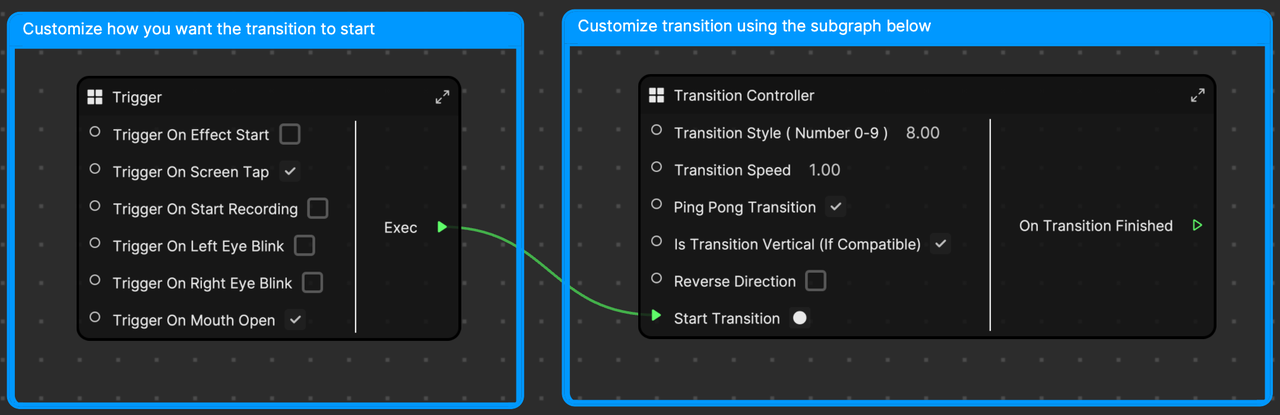
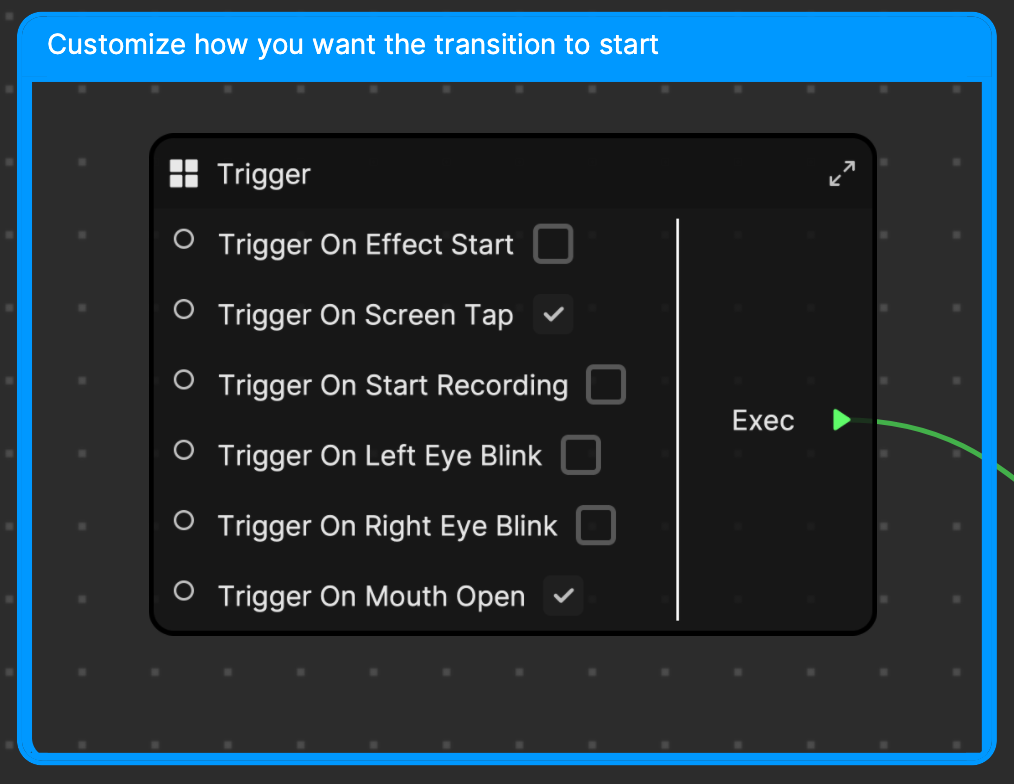
The Trigger subgraph allows you to modify the actions that will trigger the transition. Trigger On Screen Tap and Trigger On Mouth Open are activated by default, which means the transition happens when a person taps the screen or opens their mouth.
The Transition Controller subgraph lets you customize the transition style and speed.

The Transition Style parameter leverages different built-in materials to control the appearance of the transition. Choose a value between 0 and 9 to try out different transition styles.
You can also select the corresponding material in the Assets panel and make modifications to it in the Inspector panel or Material Editor.
Transition Speed controls the duration of the transition in seconds. Activate Ping Pong Transition to make the transition play both forward and in reverse.
Is Transition Vertical (If Compatible) allows you to change the direction of the transition, for select materials only. For example, when this property is activated, Transition Style 0 plays from top to bottom. However, when this property is deactivated, Transition Style 0 plays from left to right.
You can also reverse the direction of the transition with Reverse Direction.
Add Objects
You can also add objects to each scene. Be sure to parent the objects under the respective camera of each scene.
Your objects should show up in the effect with the transition.