Makeup Looks
The Makeup Looks template allows you to simultaneously try on three different makeup styles on side-by-side frames. You can use this template to customize makeup styles and the viewing layout.

How to Use This Template
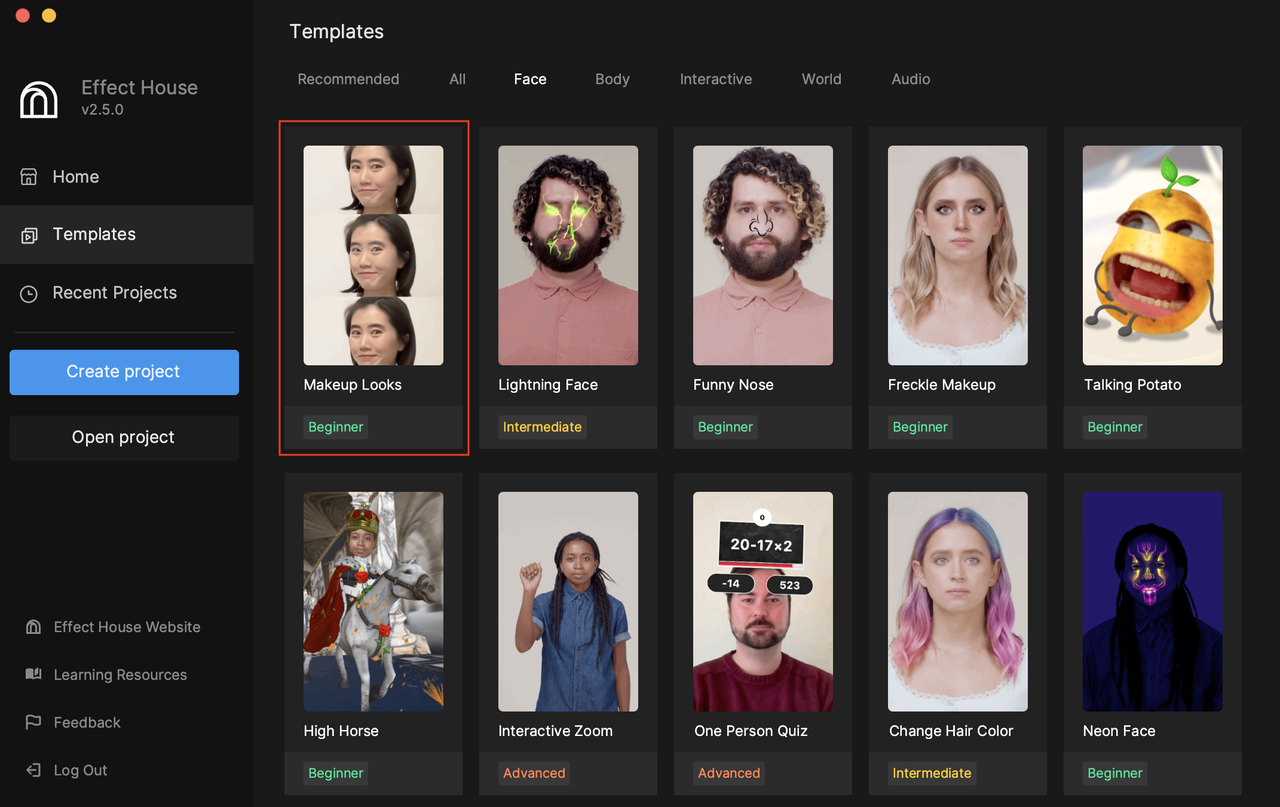
Open Effect House, go to Templates, click on the Face tab, and then select the Makeup Looks template.
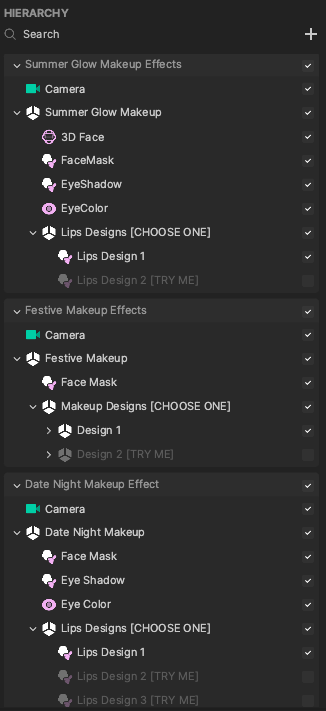
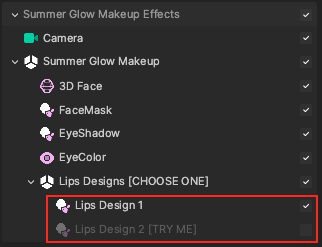
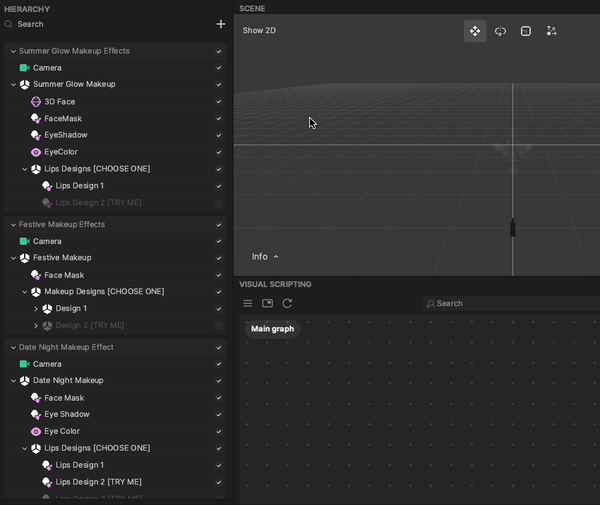
This template comes with three preset makeup styles in the Hierarchy panel: Summer Glow Makeup Effects, Festive Makeup Effects, and Date Night Makeup Effects.
At the bottom of the Hierarchy panel, there is also a 2D Foreground Effects render group with different layout options to choose from. Make sure only one layout is checked at a time.

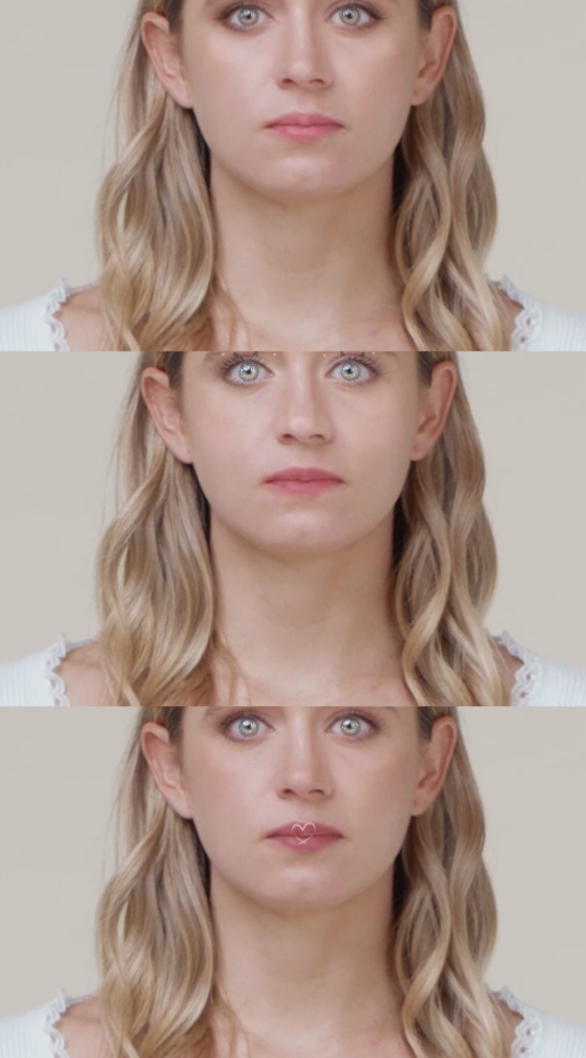
3 Row Layout
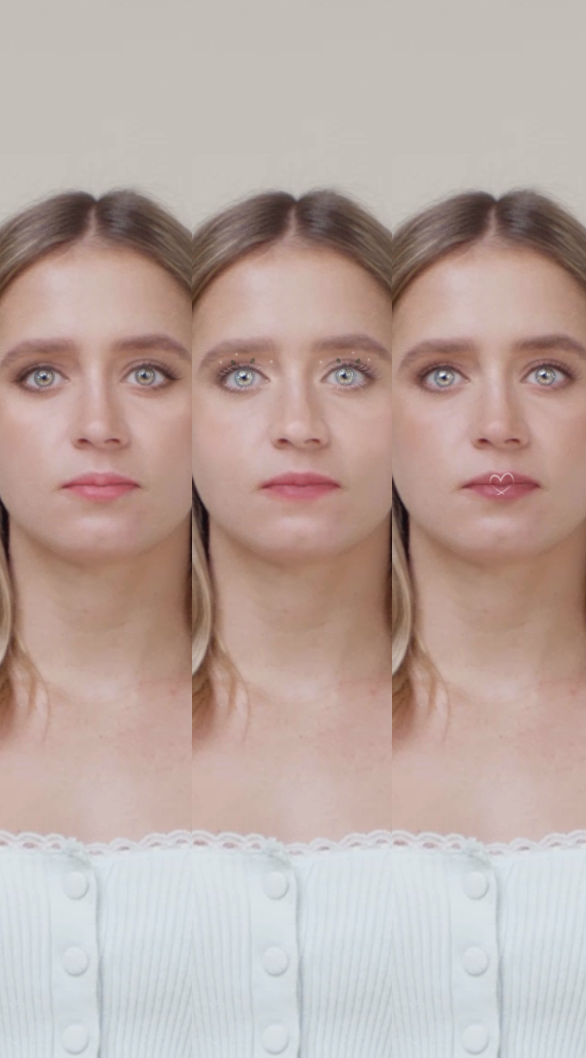
3 Column Layout
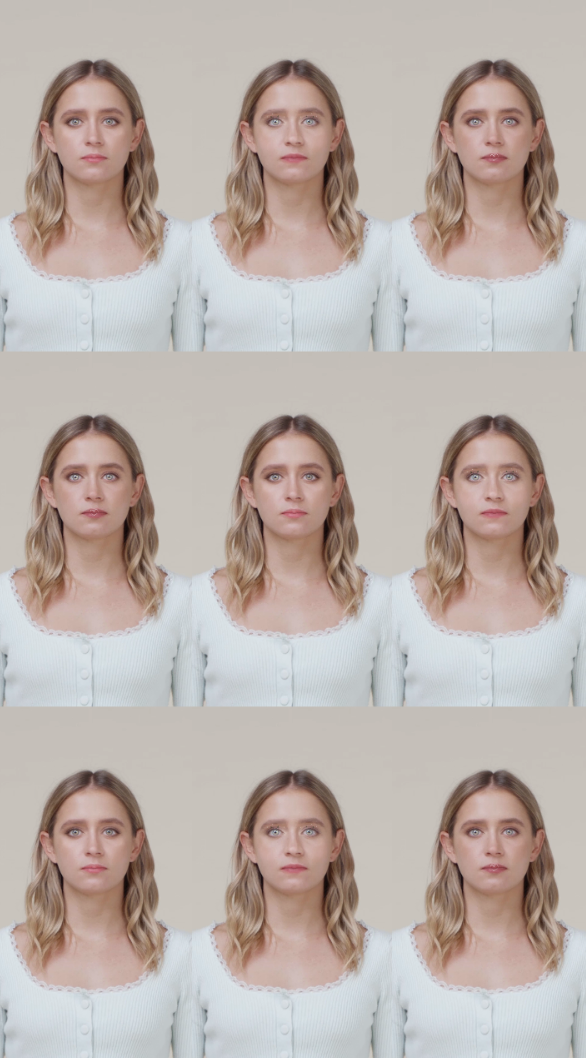
3 x 3 Layout
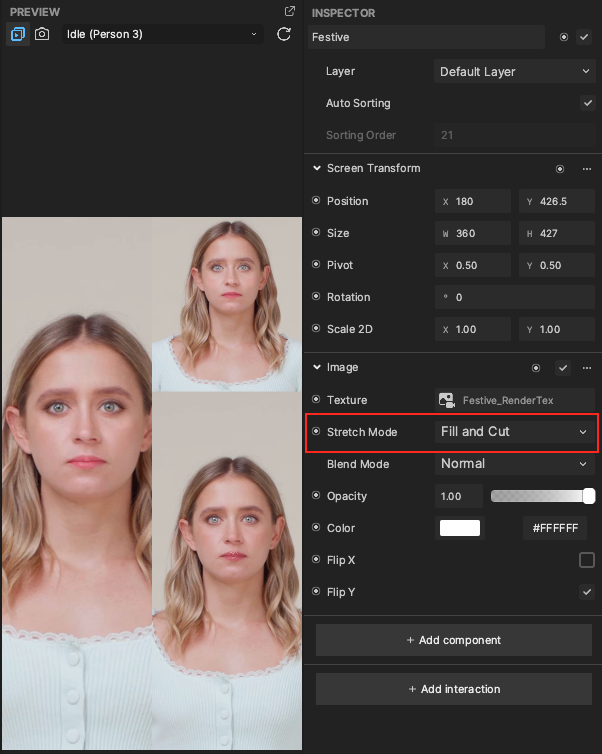
Makeup Effect Render Textures
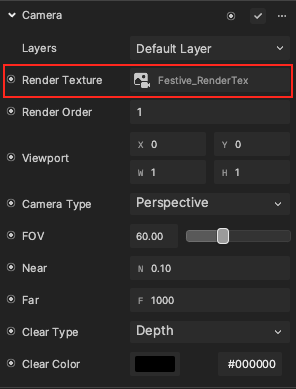
Each makeup effect render group has its own Camera object that renders the effect to its assigned render texture in the preview. For example, if you click on the Camera object in the Festive Makeup Effects render group, you will notice that it outputs to the Festive_RenderTex Render Texture in the Inspector panel.
Therefore, modifying or adding objects to one makeup effect render group will only affect that particular frame in the Preview panel, not the entire preview.
Customize the Makeup Effects
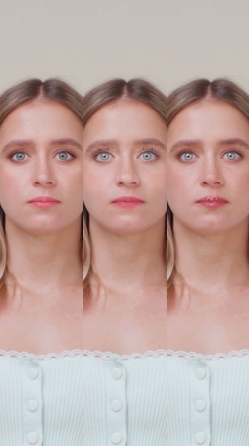
Each makeup effect render group has a few different designs you can try from. For example, the Summer Glow Makeup Effects render group has two different Lip Designs to choose from. For best results, have only one of the options checked in the Hierarchy panel. Check the respective frame in the Preview panel to view your changes.
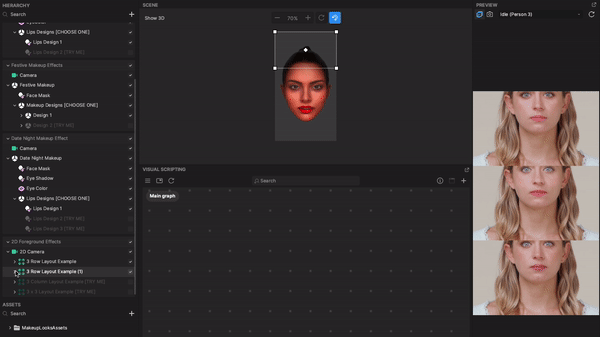
For best viewing results, scroll to the bottom of the Hierarchy panel and have the 3 Column Layout Example [TRY ME] as the only option selected. This allows you to clearly view each makeup effect side-by-side.
Add Your Own Face Effect Objects
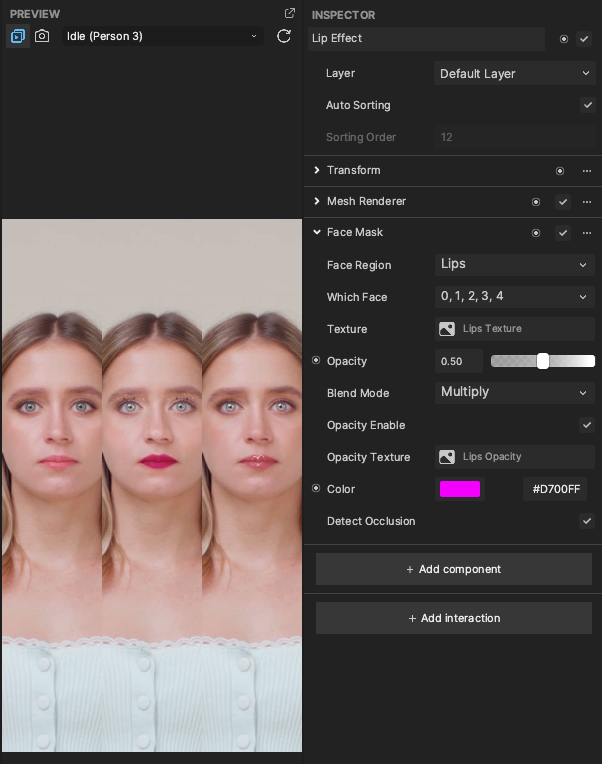
In addition to choosing between built-in makeup designs, you can also add and customize your own makeup effects. For example, if you want to add a Lip Effect object to the Festive Makeup Effects render group, you can simply click on the Add button [+], go to Face Effects, and select Lip Effect in the Hierarchy panel. Then drag the Lip Effect object on top of the Festive Makeup Effects render group to add it to that particular makeup look.
You can customize the objects in the Inspector panel to achieve your desired effect.
Add a Filter to a Makeup Effect
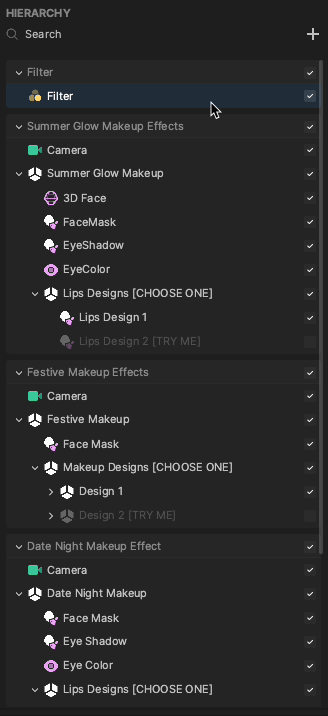
To achieve an even more unique aesthetic, you can add a filter to each makeup look. Click on the Add button [+], go to Post Effect, and select Filter in the Hierarchy panel.
Then drag the Filter object into your desired makeup effect render group and delete the original Filter render group. In this example, the Filter is added to the Summer Glow Makeup Effects render group.
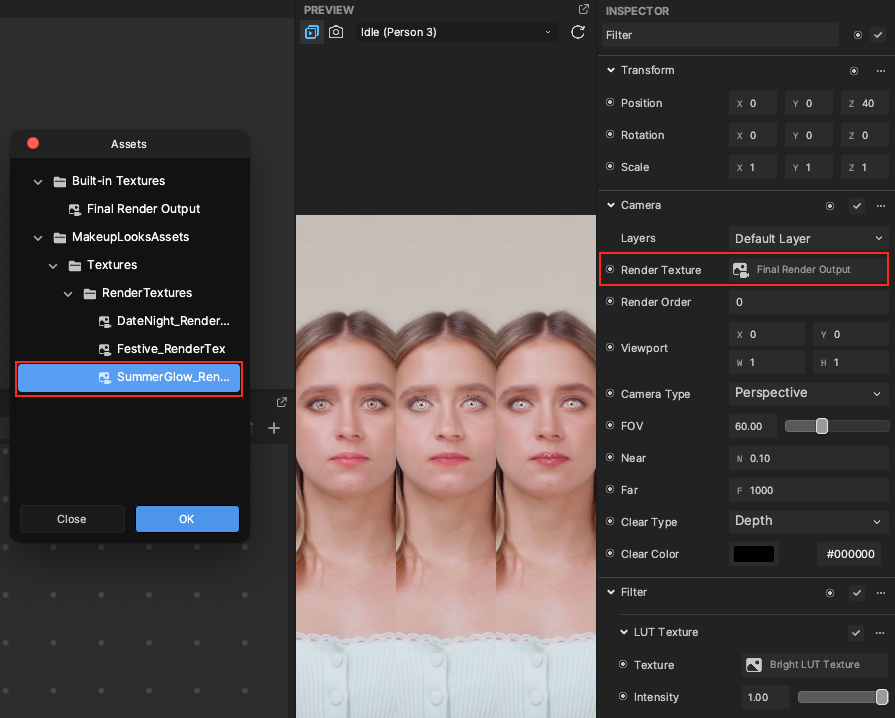
Right now, the Filter still applies to the entire preview. To make the Filter apply only to the render group its under, click on the Filter object, go to the Inspector panel, and expand the Camera component.
Then click on the Render Texture field, and select the corresponding Render Texture. In this case, since the Filter is in the Summer Glow Makeup Effects render group, SummerGlow_RenderTex is selected.
You can then customize the Filter properties in the Inspector panel to your liking.
Customize the Layout
You can also create a custom layout. To do so, select one of the built-in layouts as a reference, and duplicate it.
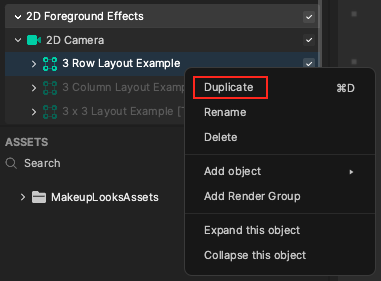
Expand your duplicated layout object to view the different frames in the Scene panel. You can resize and move the frames around to create a custom layout.
You can also change the Stretch Mode for each image to manipulate how it fits within the scene. Fill and Cut allows you to resize the image without distortion and crop it to fit within the bounding rectangle.