Face Morph
3D Face provides a 3D mesh that fits on the user’s face in real-time. It can be used to create different interactive face effects.
Prepare
Download Assets
Start by downloading the following package. You will see one texture folder and three FBX files.
Import a Designed 3D Face Morph Model
You can import a 3D face morph model by clicking the Add button [+] > Import > 3D Face Binding Mesh in the Assets panel. Then choose the faceMorph_facMask.fbx file. You will see the faceMorph_facMask imported in the Asset panel.
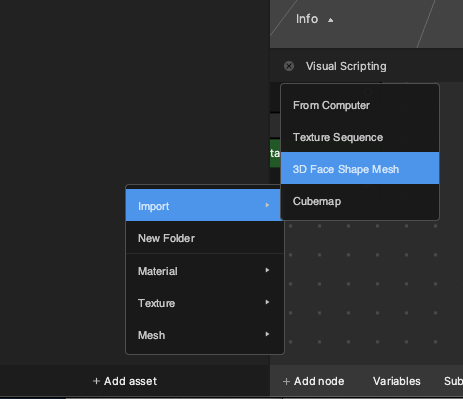
To use a mesh as 3D face mesh, you have to import it by clicking Import > 3D Face Binding Mesh, otherwise it will be treated as a normal mesh.
Import Other 3D Models and 2D Textures
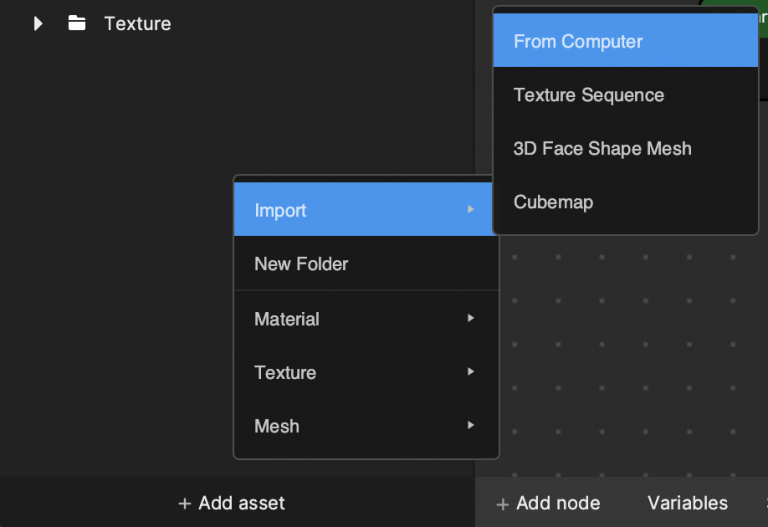
Next you can import other assets by clicking the Add button [+] > Import > From Computer or by directly dragging the assets to the Assets panel (you have to drag individual files instead of the whole folder).
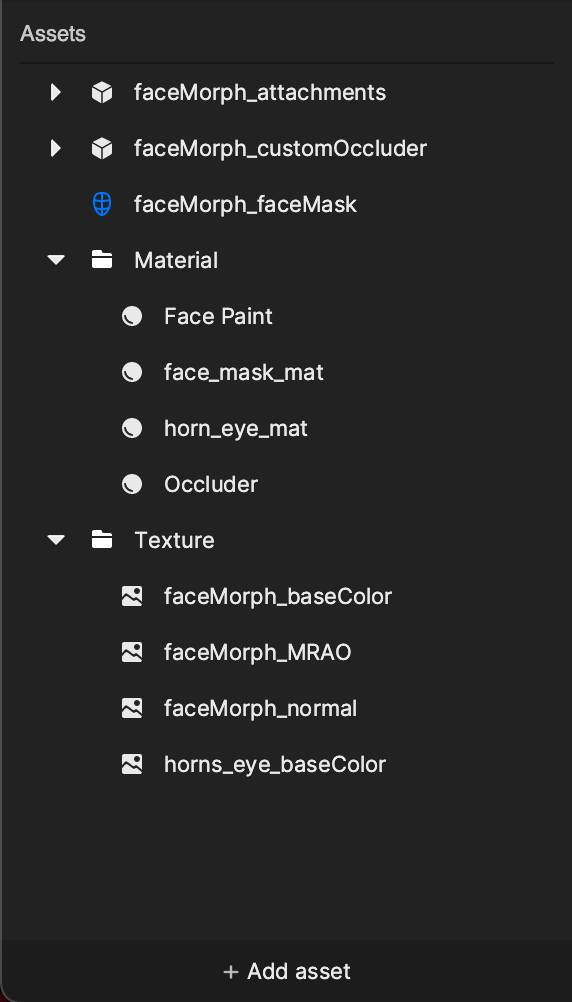
You will see all the needed assets have been imported into the Assets panel.
3D Face
Add 3D Face and Face Attachments to the Scene
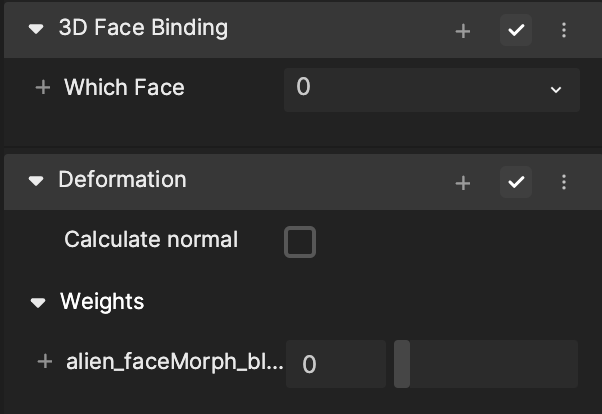
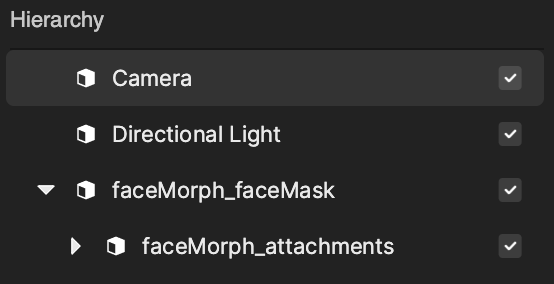
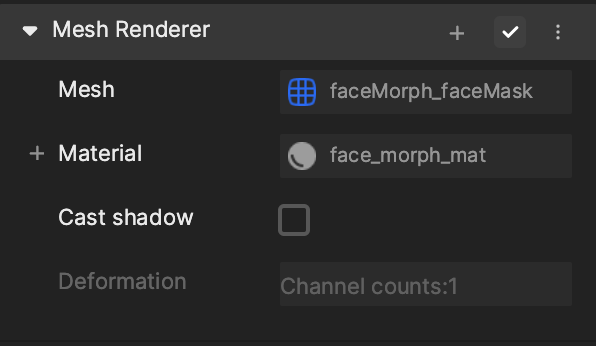
Drag the faceMorph_faceMask object from Assets panel to the Hierarchy panel. In the Inspector panel, you will find its 3D Face Binding component and Deformation component.
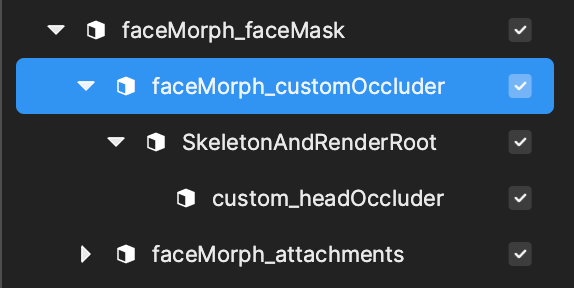
Next you can also drag the the faceMorph_attachments object from Assets panel to the Hierarchy panel, and then put it under the previous faceMorph_faceMask object.
After nesting faceMorph_customOccluder under faceMorph_faceMask, add an Occluder to the Asset panel by clicking the Add button [+] > Material > Occluder. Select the faceMorph_customOccluder object, find the Mesh Renderer in the Inspector panel, and change the Material to Occluder.

Then you will see the preview window like this.

Adjust and Assign Materials
You can then create a built in PBR material by clicking the Add button [+] > Material > Standard PBR in the Assets panel. Find the material in the Assets panel and rename it to face_morph_mat.
In the Inspector panel, go to Albedo, select the Texture On checkbox, and change the Texture to faceMorph_baseColor. In the same way, you can change the Normal texture to faceMorph_normal and the MRAO texture to faceMorph_MRAO. Then in Render State 0, deselect the Depth Test checkbox, and change the Blend Mode from Normal to Transparent.
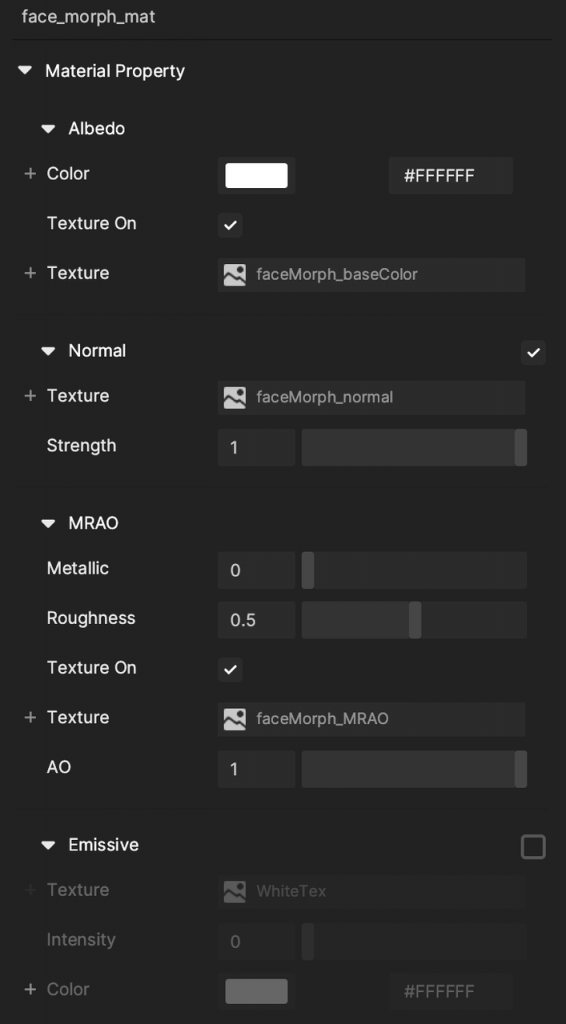
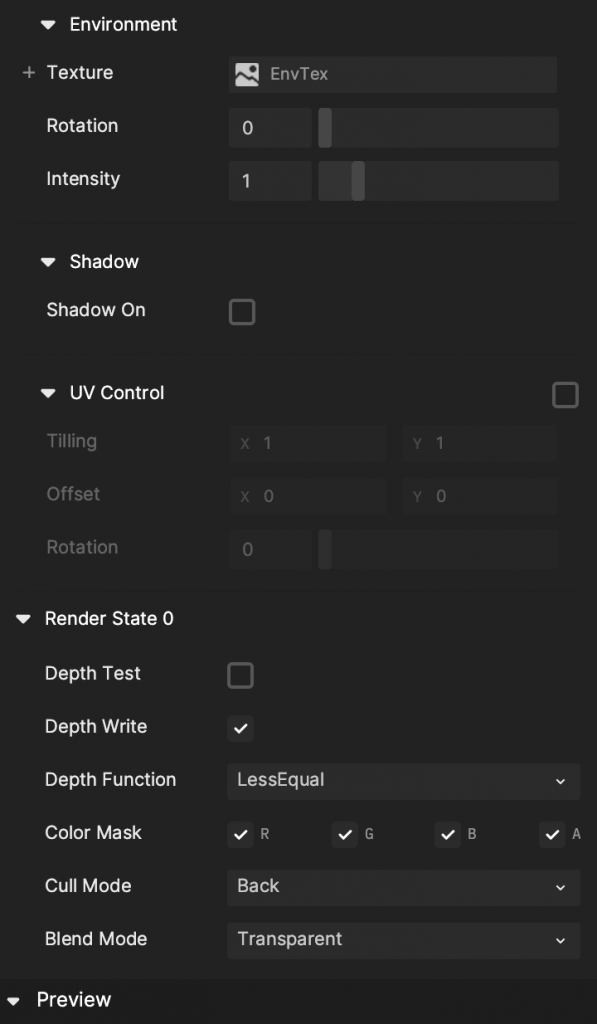
Tto show the face_morph_mat on top of others, you need to disable Depth Test.
Next you can select the faceMorph_faceMask object, find its 3D Face Binding component and change the material to face_morph_mat.
You can set up the horn material the same way. The only difference is that you don’t need to assign the MRAO and normal texture. You will also notice that after you drag the attachments assets to the Hierarchy panel, it automatically generates a lambert material and assigns it to the attachments objects.
You can directly rename this lambert material to horn_mat and change its Albedo texture to horns_eye_baseColor and set its MRAORoughness to 0.3. After this step, the preview window will look like this.

Add Another Base 3D Face
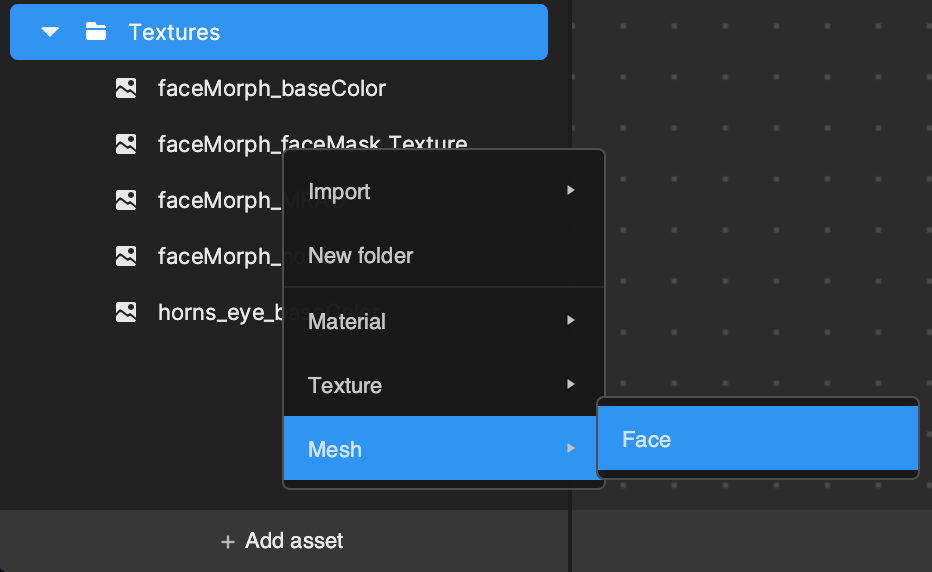
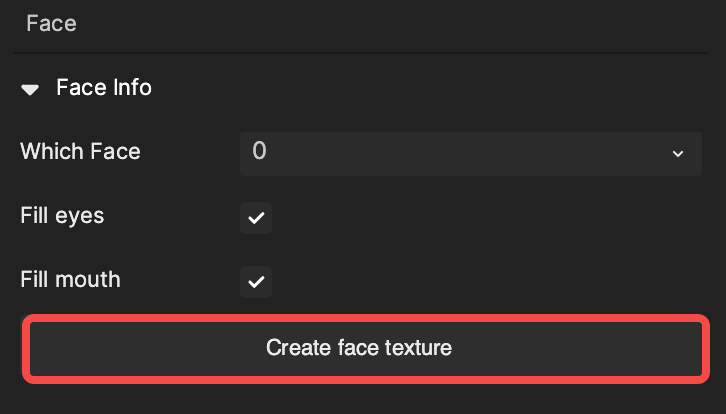
You also need to add another 3D face which has a texture. To do this, first add a built-in face mesh by clicking the Add button [+] > Mesh > Face. Then select the face mesh and in the Inspector panel, select Create face texture. It will create a Face Texture under the Textures folder.
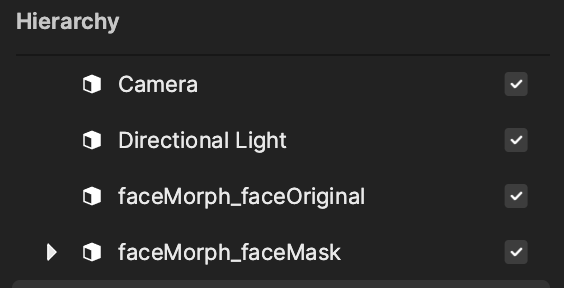
Then you can drag the faceMorph_faceMask object from Assets panel to the Hierarchy panel, just like you did in the previous step. However, this time you need to put the faceMorph_faceMask above the previous one, and you can rename it to faceMorph_faceOriginal.
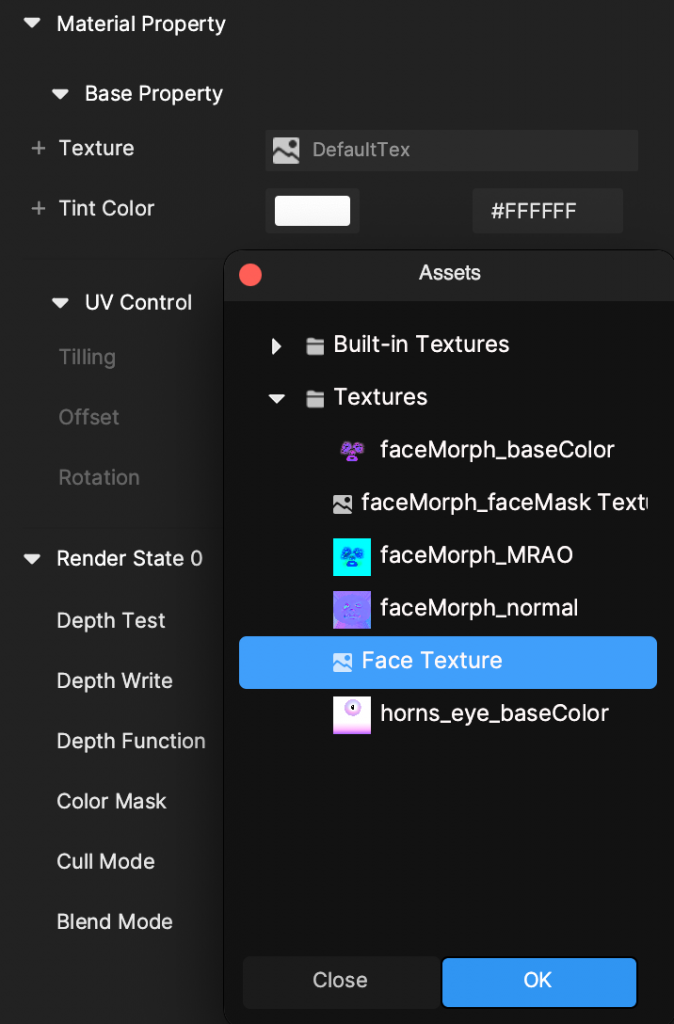
It will automatically create a Face Paint material, you can change the name to face_mat and change its Texture from DefaultTex to Face Texture, which you just created. Now you will see the following result:

Visual Scripting
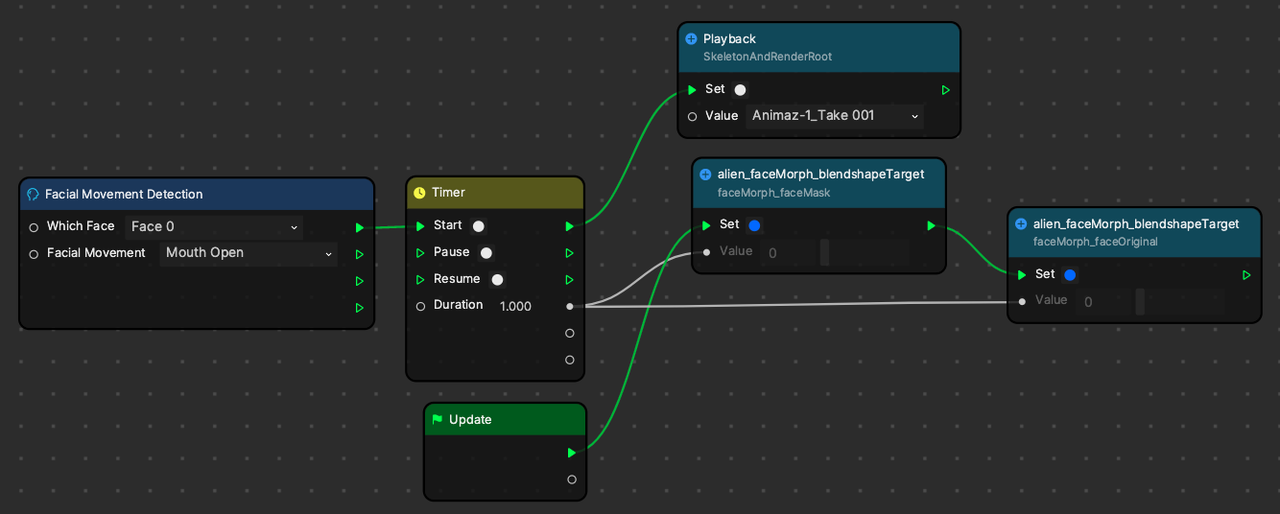
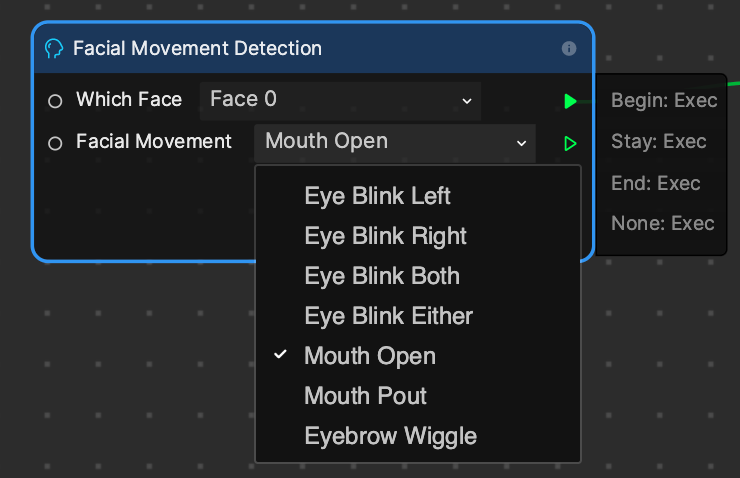
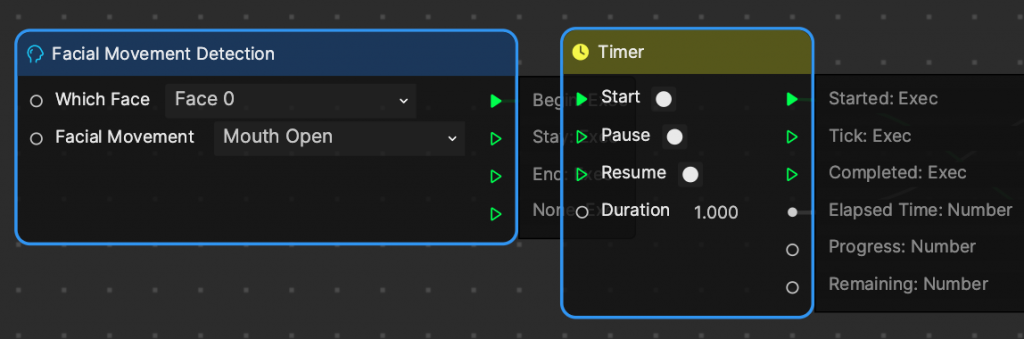
Now, you can set up the interaction by using Visual Scripting nodes. Open the Visual Scripting panel, add the Facial Movement Detection node, and change the Facial Movement to Mouth Open.
In the same way, add the Timer node, connect it to the Begin output of the Facial Movement Detection node and set the Duration to 1.
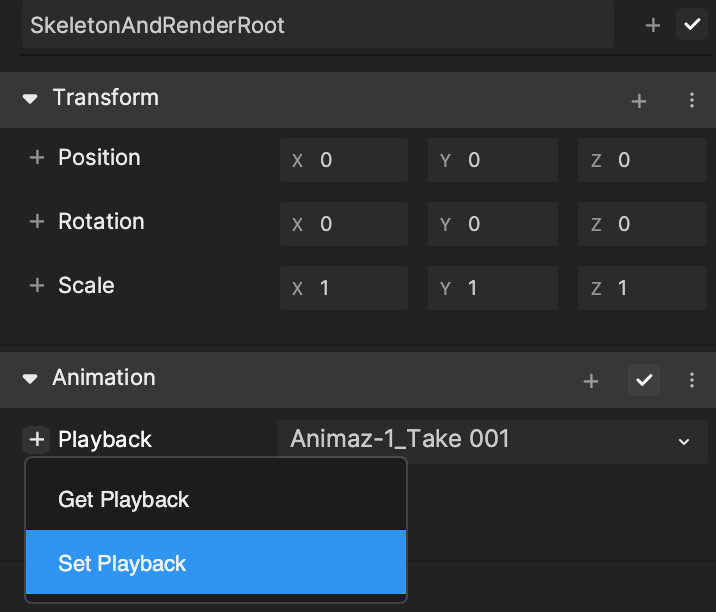
Select the SkeletonAndRenderRoot object under the faceMorph_attachments object and in the Inspector panel, select Set Playback from the Animation component.
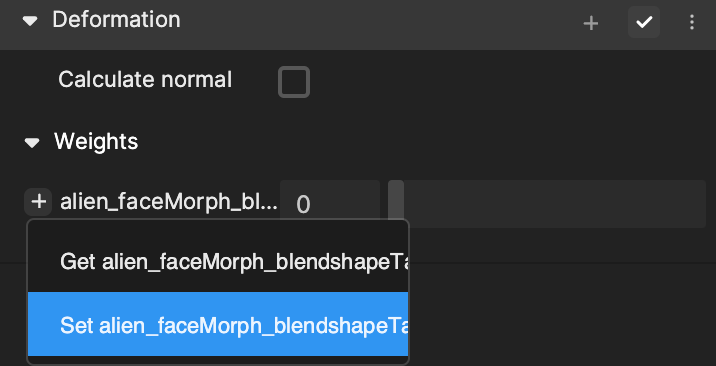
Select the faceMorph_faceMask object and in the Inspector panel, select Set alien_faceMorph_blendshape Target from the Deformation component. In the same way, select the same blend shape target from the faceMorph_faceOriginal object.
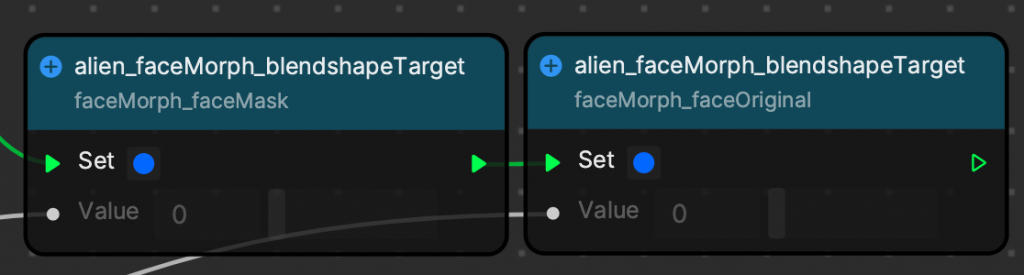
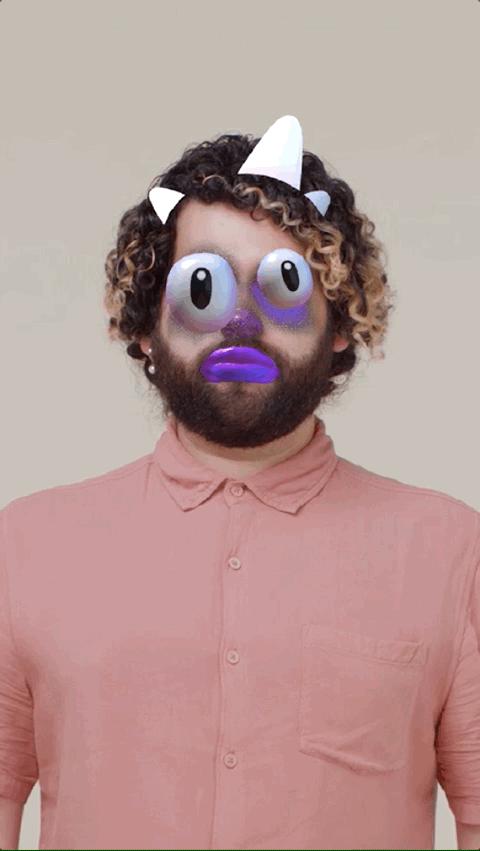
Now connect all the nodes together like this. Now every time you open your mouth, you will see the face morph and animation play.