Gaming Joystick
This MicroJam project was created using Effect House 2.4.0.
Add a Gaming Joystick to Your Project
In this guide, joystick assets, subgraphs, and sample projects are provided, as well as their purposes and functionality. The subgraphs create a bridge between the screenspace coordinates of a touch input on your mobile device and the dynamic operation of a visually appealing joystick on your screen. This guide will also provide a walkthrough of a collection of sample projects and various plugin subgraphs that will make the joystick output values usable in all kinds of scenarios, such as 2D movement, AR World 3D movement, rotation, and more. Let's dive in!

Download these files to follow along with the walkthrough of the joystick:
Open the sample project and locate the 2D Foreground Effects render group in the Hierarchy panel. This render group is comprised of the joystick, a touchable zone, and "feedback edges". To start, take a look at the core joystick pieces.
The joystick is made up of a Joystick object and Joystick Top object. If you want your joystick to be larger or smaller, select the objects in the Hierarchy panel and adjust the Size property of each object in the Inspector panel, rather than the Scale. The indicator object is an optional piece that gives users visual information at the joystick's edge to help them see which direction the joystick is moving and by how much. This is useful if your joystick is smaller than the user's thumb and if Joystick Top is covered by their thumb. In the GIF above, you can see the blue indicator gradually appear as the joystick moves outward.
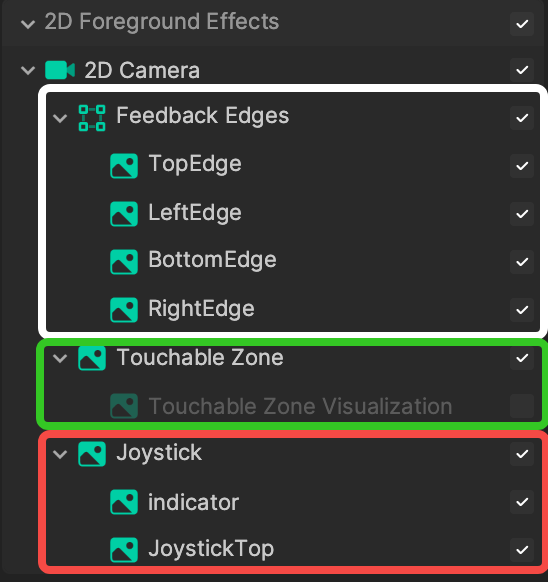
The Feedback Edges object is a more extreme variation of this and causes the edges of the entire screen to glow along with the joystick direction. Feel free to discard and remove any parts that are unnecessary for your project, but make sure to test on a mobile device to see how it really feels when a thumb is on the screen.
Touchable Zone is a 2D object that represents the parts of the screen that you can touch to use the joystick. Note that the actual object used has its opacity set to 0 as it must be enabled for the Screen Image Tap node to tell whether you've tapped on that area. Enable Touchable Zone Visualization in the Hierarchy panel to see an example of where this default touchable zone is, or increase the Opacit value of the Touchable Zone object.
If you're importing the Joystick subgraph into your project rather than using one of the sample projects as your starter template, you'll need to add Joystick, JoystickTop, and TouchableZone to the hierarchy, and then assign them in the subgraph. Once these are assigned, the subgraph will operate normally and output touch start, stay, and end events along with the values.
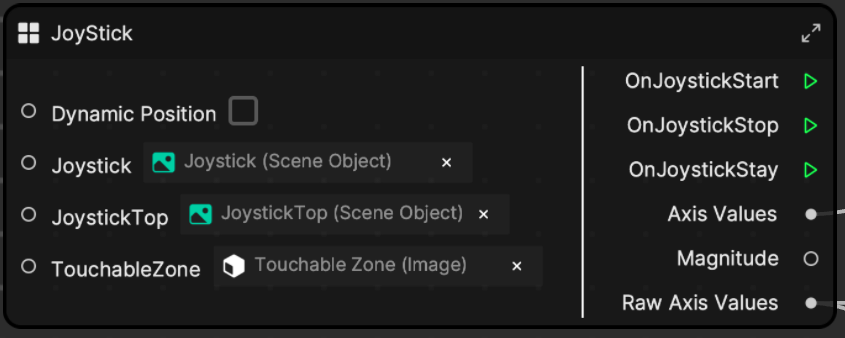
Joystick Subgraph Inputs and Outputs
Dynamic Position
When this option is selected, the joystick will appear wherever the user touches the screen and then disappear when they stop touching the screen. This is a great option to use if you're concerned about where the best placement is for the joystick. It will also only appear if the user touches in the touchable zone. Uncheck this box if you want the joystick to be permanently stuck to a specific part of the screen.
OnJoystickStart
This is an event signal that is sent one time during the frame when the user touches anywhere in the touchable zone to activate the joystick.
OnJoystickStay
This is an event signal that is sent every frame after the user touches anywhere in the touchable zone to activate the joystick, until the user stops touching the screen.
OnJoystickStop
This is an event signal that is sent once on the last frame when the user stops touching the screen to signal that the touch has stopped.
Axis Values
This is a Vec2 data that give the values of the X and Y axis. The values span from -1 to 1 (for example, -1 on Y means the joystick is being pulled directly down). This data is adjusted compared to the Raw Axis Values to clamp the values to a normalized vector. See below for a note explaining the difference further.
Magnitude
This is a value that represents how much the joystick is moved. 0 represents the joystick being completely centered, and 1 represents that it's pushed all the way to an edge, such as all the way to the left, right, up, down, or diagonal. You may use this to control how fast a character is moving.
Raw Axis Values
These values are similar to axis values except that they're not adjusted to solve common controller input problems. This means that if you are pointing completely diagonal, your X and Y values will both be 1 at the same time. A common problem this may cause is that your character will run much faster when they are running diagonally. Some common use cases you may use this for are if you only want to use the X or Y alone, or if your design benefits from moving faster diagonally.
Inside the Joystick Subgraph
This subgraph has a lot of compartments, but is organized in a way where you can find and alter what you need in the following 3 major sections:
- Initialization logic
- Touch begin/reset logic
- Touch stay/end logic
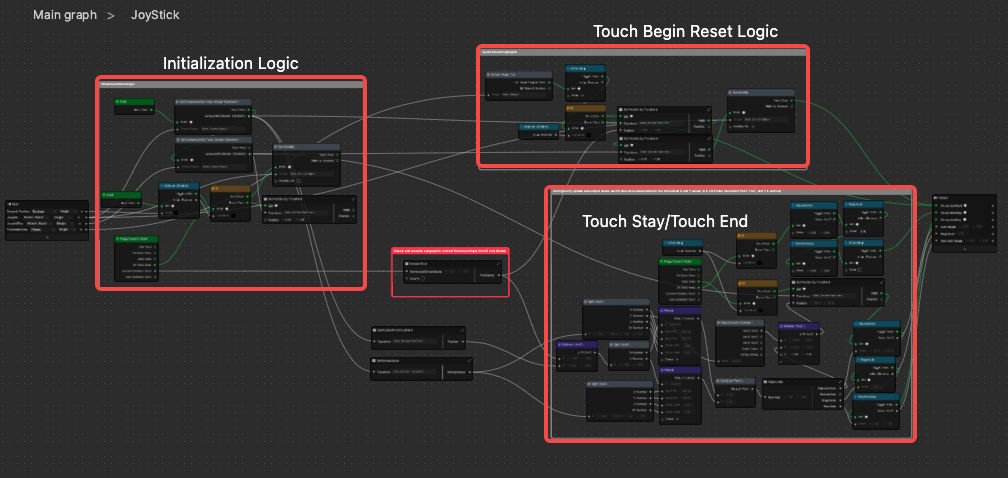
The initialization logic is mostly where some values are cached. In the "Touch Begin Reset Logic" section, you'll cache some values and reset some flags, such as the isTouching boolean subgraph variable. You'll also get signals from a Screen Image Tap node to tell when the user starts touching the "Touchable Zone." In the "Touch Stay/End" area, you'll take in the touch offset of the joystick in every frame and convert it to some usable normalized axis values. When the touch ends, this is also where most values will be reset to the default values so that the joystick doesn't have "stuck values" when you're not touching it.
You may notice some subgraphs that look like this:
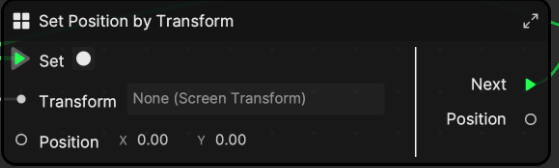
You can download this subgraph here:
↓ set_position_by_transform.subgraph
These are just some very simple subgraphs that save space and perform somewhat atomic functions. For example, setting just the position without altering the rotation of a transform. Simple helper subgraphs can tidy up a messy subgraph, so it's useful to build your own library of your favorite helper subgraphs.
One other useful subgraph is Screen2Pixel, which has appeared in most MicroJam projects. It takes in the touch input values which are in Screen Space. Left to right in screenspace is 0 to 1, and up to down is also 0 to 1. This is a common pattern in most engines, but it also means that up is 0 and down is 1, which seems inverted. Thus, this subgraph will convert the values to pixel space, which is what the Screen Transform component uses. For example, the center of the screen is 0 and the edges are -360 to 360.
The Showcase Project
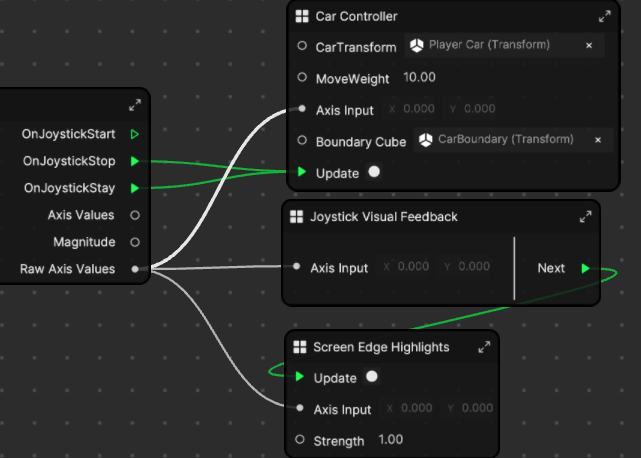
In the showcase project, the user will drive a car down a road left to right. A one-off subgraph was created for this case to show an example of how the simple joystick output can be used to move the car in a satisfying way. Notice that the car doesn't only move left to right, but it also turns a little bit while it's moving, and so do the front tires. These little details that mimic your subject are often things that you add after getting the first draft done.
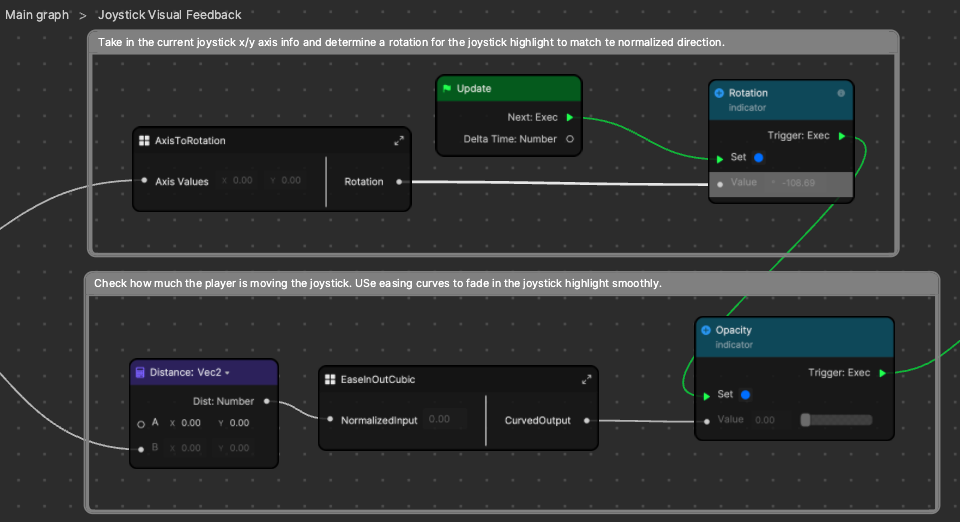
The Joystick Visual Feedback subgraph controls the glowing blue indicator on the joystick. Since this piece is controlled by an external subgraph, it is an optional piece if you want to recreate some joystick assets that match your project. It just has some mathematical conversion subgraphs to convert the axis value to a one dimensional rotation, and an easing curve subgraph to smooth out the glow of the indicator.
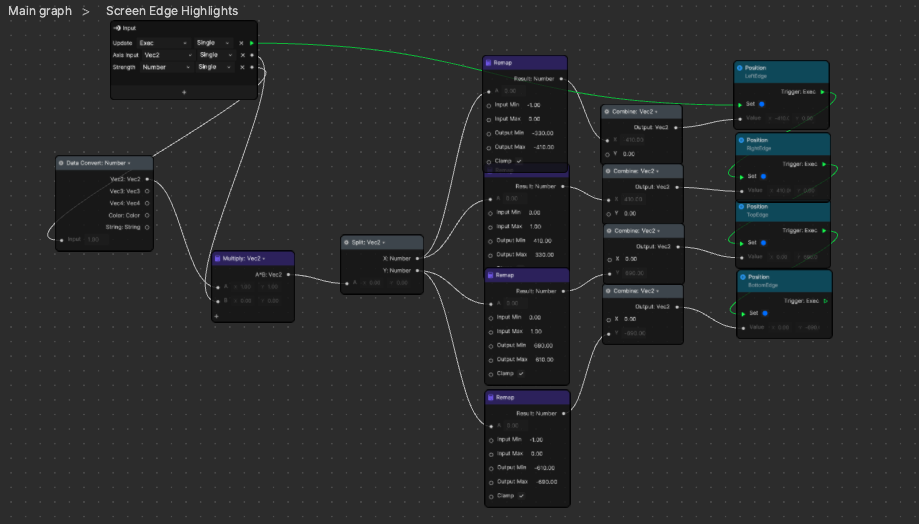
The Screen Edge Highlights subgraph will just remap the joystick axis output to shift some gradient images at the edge of the screen to make it look like the top of the screen is glowing while the joystick is pressed upward. This is also an optional piece of the project, but can be incredibly useful for mobile devices since the user's thumb will cover the joystick in a lot of cases and this is a way for them to still have some peripheral feedback for their touch input without having to see the joystick clearly.
Collision Subgraphs
In the showcase project, there is one very useful subgraph called Collide. To use this, first add a sphere to your scene. It must be the default built-in sphere from Effect House because the radius of that sphere is exactly 5 units. We use this information to calculate whether one sphere is overlapping or colliding with another. Note that you can attach these spheres to anything, scale them, rotate them, and even remove the mesh. Make sure that the scale is uniform, meaning x, y, and z are all equal, because the math inside the subgraph is just imagining spheres and not actually looking at the mesh.

The sphere mesh is purely for a visualization of simulated sphere colliders. It is highly recommended that you don't use any modified versions of this subgraph unless you are modifying them yourself. To use this subgraph, simply connect some of the output triggers to some other logic to make things happen when the two objects collide! Look at the project to see how they are used. When the car collides with energy pick-ups, it initiates a 3-second-long speedup phase.
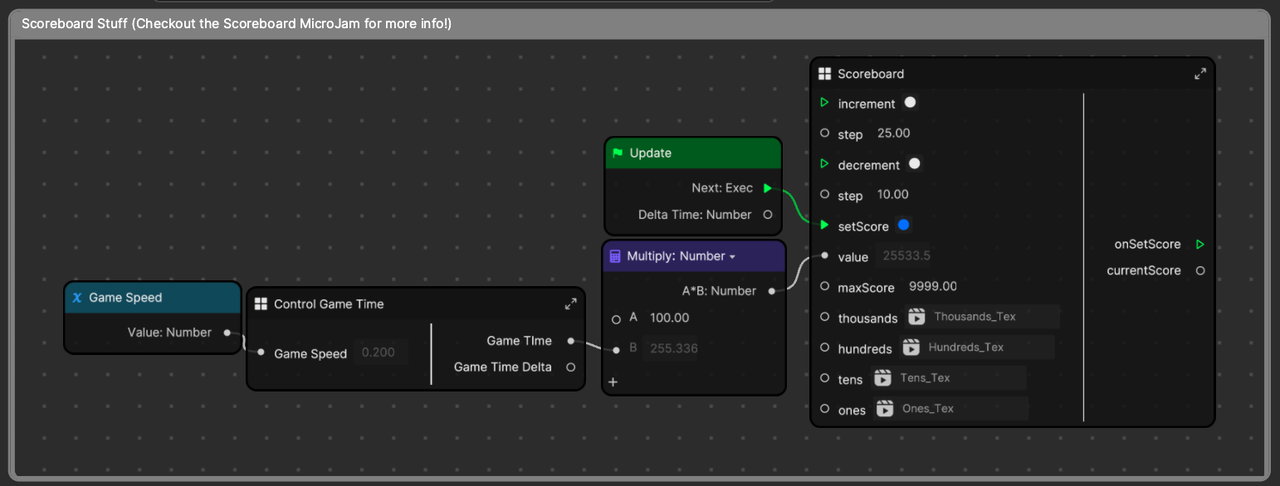
Scoreboard
You may notice the Scoreboard subgraph doing a lot of work simulating the score. Learn more about the scoreboard.
Template Projects
A set of simple template projects using different configurations, such as World AR, 2D, 3D, and Rotation, is provided to show that the joystick could be used in a variety of ways. Also provided are some subgraphs that serve as plugins that convert the output of the joystick to work best in each of these scenarios.
World AR Character
One of the most common use cases for an on-screen joystick is controlling a character or vehicle in the AR world space. The following section will walk through the AR Demo sample project along with the AR specific plugins (subgraphs).
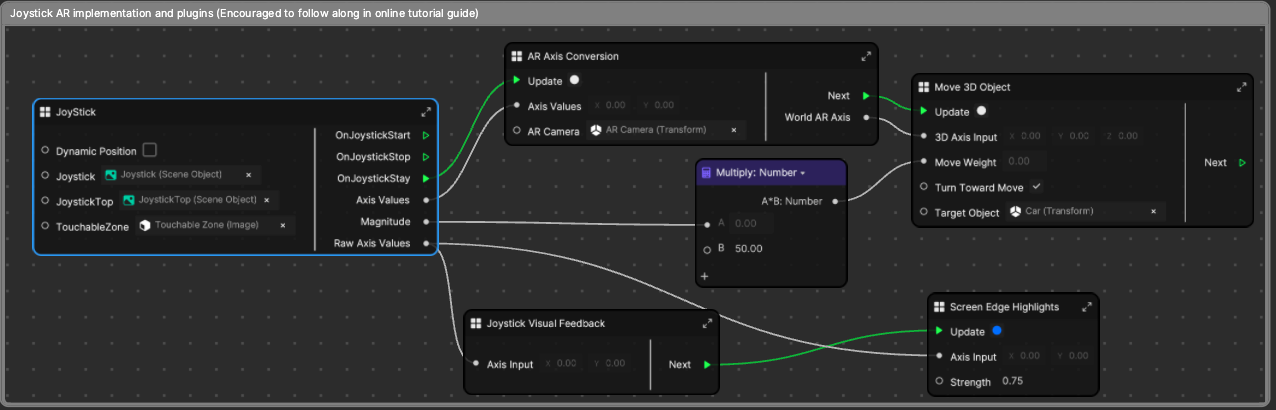
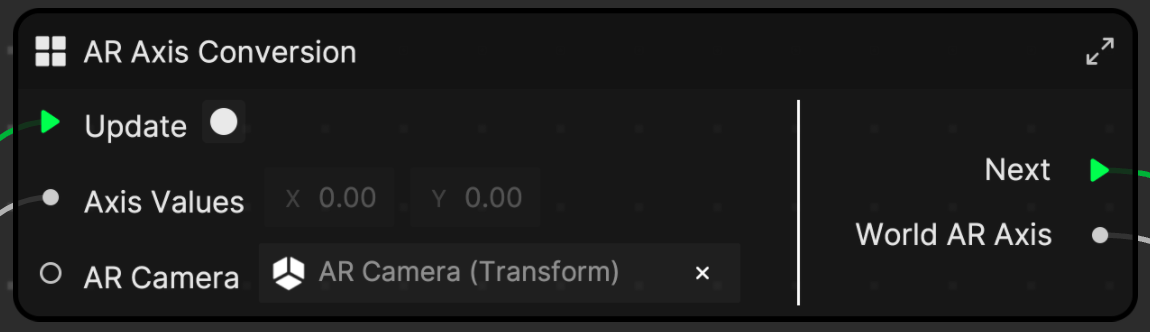
There are a couple extra subgraphs in this project that do a lot of heavy lifting, such as the AR Axis Conversion subgraph. This subgraph will convert your joystick axis value to change with the AR Camera's world perspective so that your joystick's left and right match up with the camera's left and right directions, even when the user looks around in different directions. Keep in mind that when you move the joystick up and down, it will move the character forward and backward, based on the camera perspective.
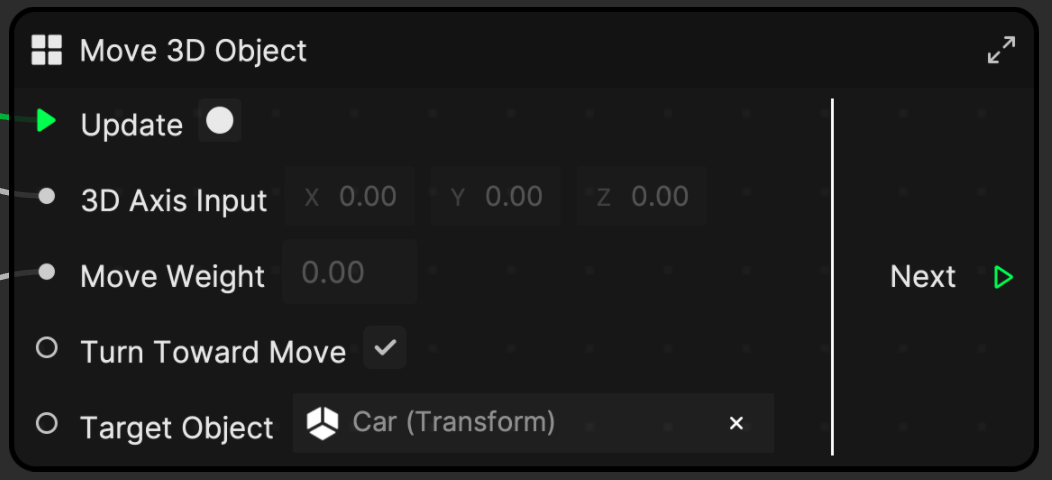
The Move 3D Object subgraph will take in any target object and allow the joystick to control that object. Notice that the input is a Vector3 value, which you'll get from the AR Axis Conversion subgraph. You can also just use the axis values from the joystick and map the x and y to x and z with a Combine node if you don't want to use the AR subgraph. Move Weight determines how fast the object will move and Turn Toward Move controls whether the object rotates toward the direction it is moving in.
Rotate
Some of the best ways to use the joystick require some outside-of-the-box thinking. In the 3D Rotate example, you can see how to rotate objects with the X and Y axis.

Axis
The X/Y axis information from the joystick subgraph.
Transform
The target object you want to rotate.
Rotate Y and Rotate X
Enable or disable the x and y joystick inputs for rotating along the y and x axis. (See the GIF above to see examples with Y enabled and disabled.)
Look at Direction
This is a separate mode and ignores the Rotate X and Rotate Y checkboxes. This mode rotates the object in the same direction the joystick is pointing.
Rotate Speed
This property equates to the rotation speed in degrees per second.
3D and 2D Movement
Some simple variations of projects have been compiled for you to use to move some 2D or 3D objects around the screen:
The joystick_3d_movement project file shows how to modify the AR example project so that the car is moving around the screen, rather than the AR world. The 2D version shows how to make a similar-looking effect with only 2D image assets. They both look like the following demo and have very similar subgraphs to the other projects.
Although a joystick is familiar and intuitive, always consider what you're making and the platform you're designing for. A joystick is not always the best solution for simple interactions, but you can still use the subgraphs and assets included in this project if they apply. Sometimes you may want to only use the raw X axis value and not the Y; other times, you may want to visually hide all the 2D joystick assets and have your game objects' movement serve as visual feedback instead. Consider all the possibilities and get creative to make some fun and intuitive effects!