Ball Drop Game
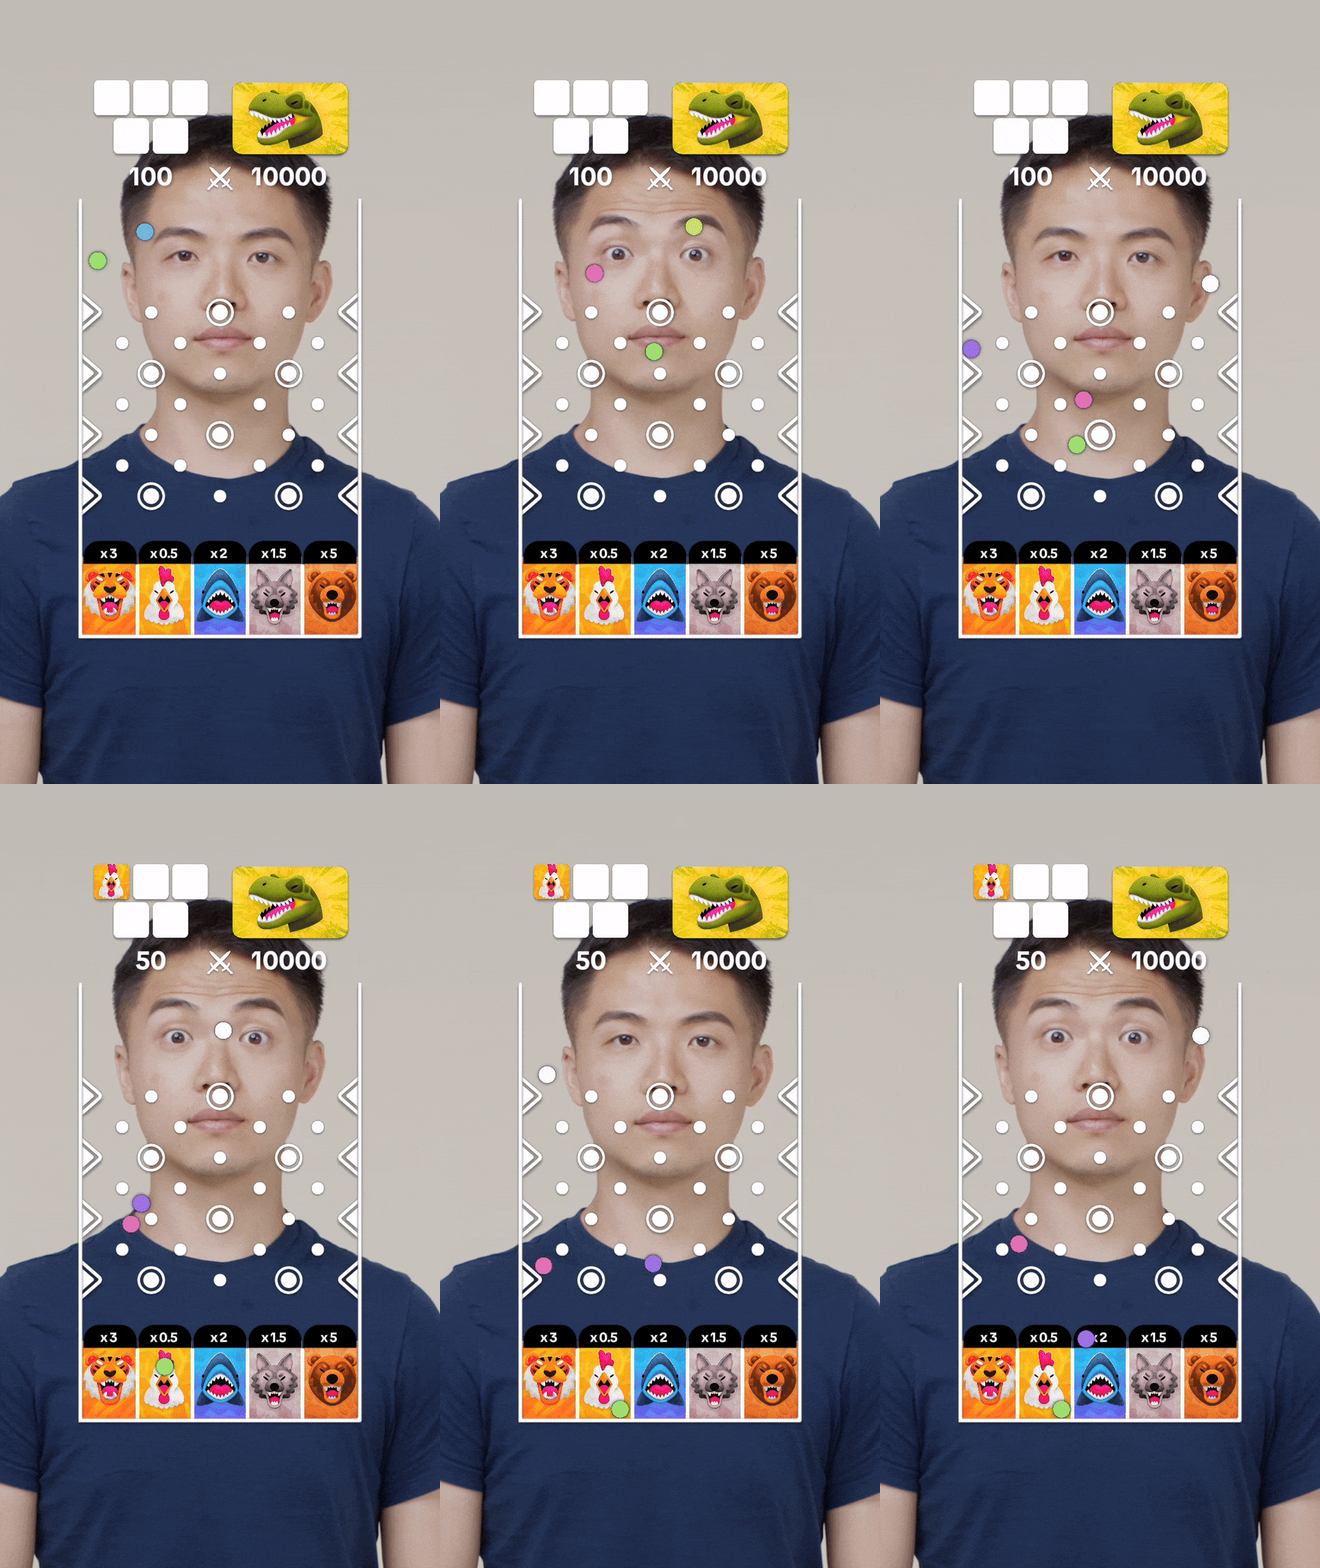
The Ball Drop Game template uses 2D Physics feature to bring you this game. Tap the screen to aim and drop the ball into boxes at the bottom to earn points. Each successful drop multiplies your score depending on where the ball lands. Any slot with a value less than one will decrease your score. Aim for the box with the bear to score the highest points possible, as they have a value of x5. Have your own ideas and images in mind for this game? Let's make it into your own!
Open the Template
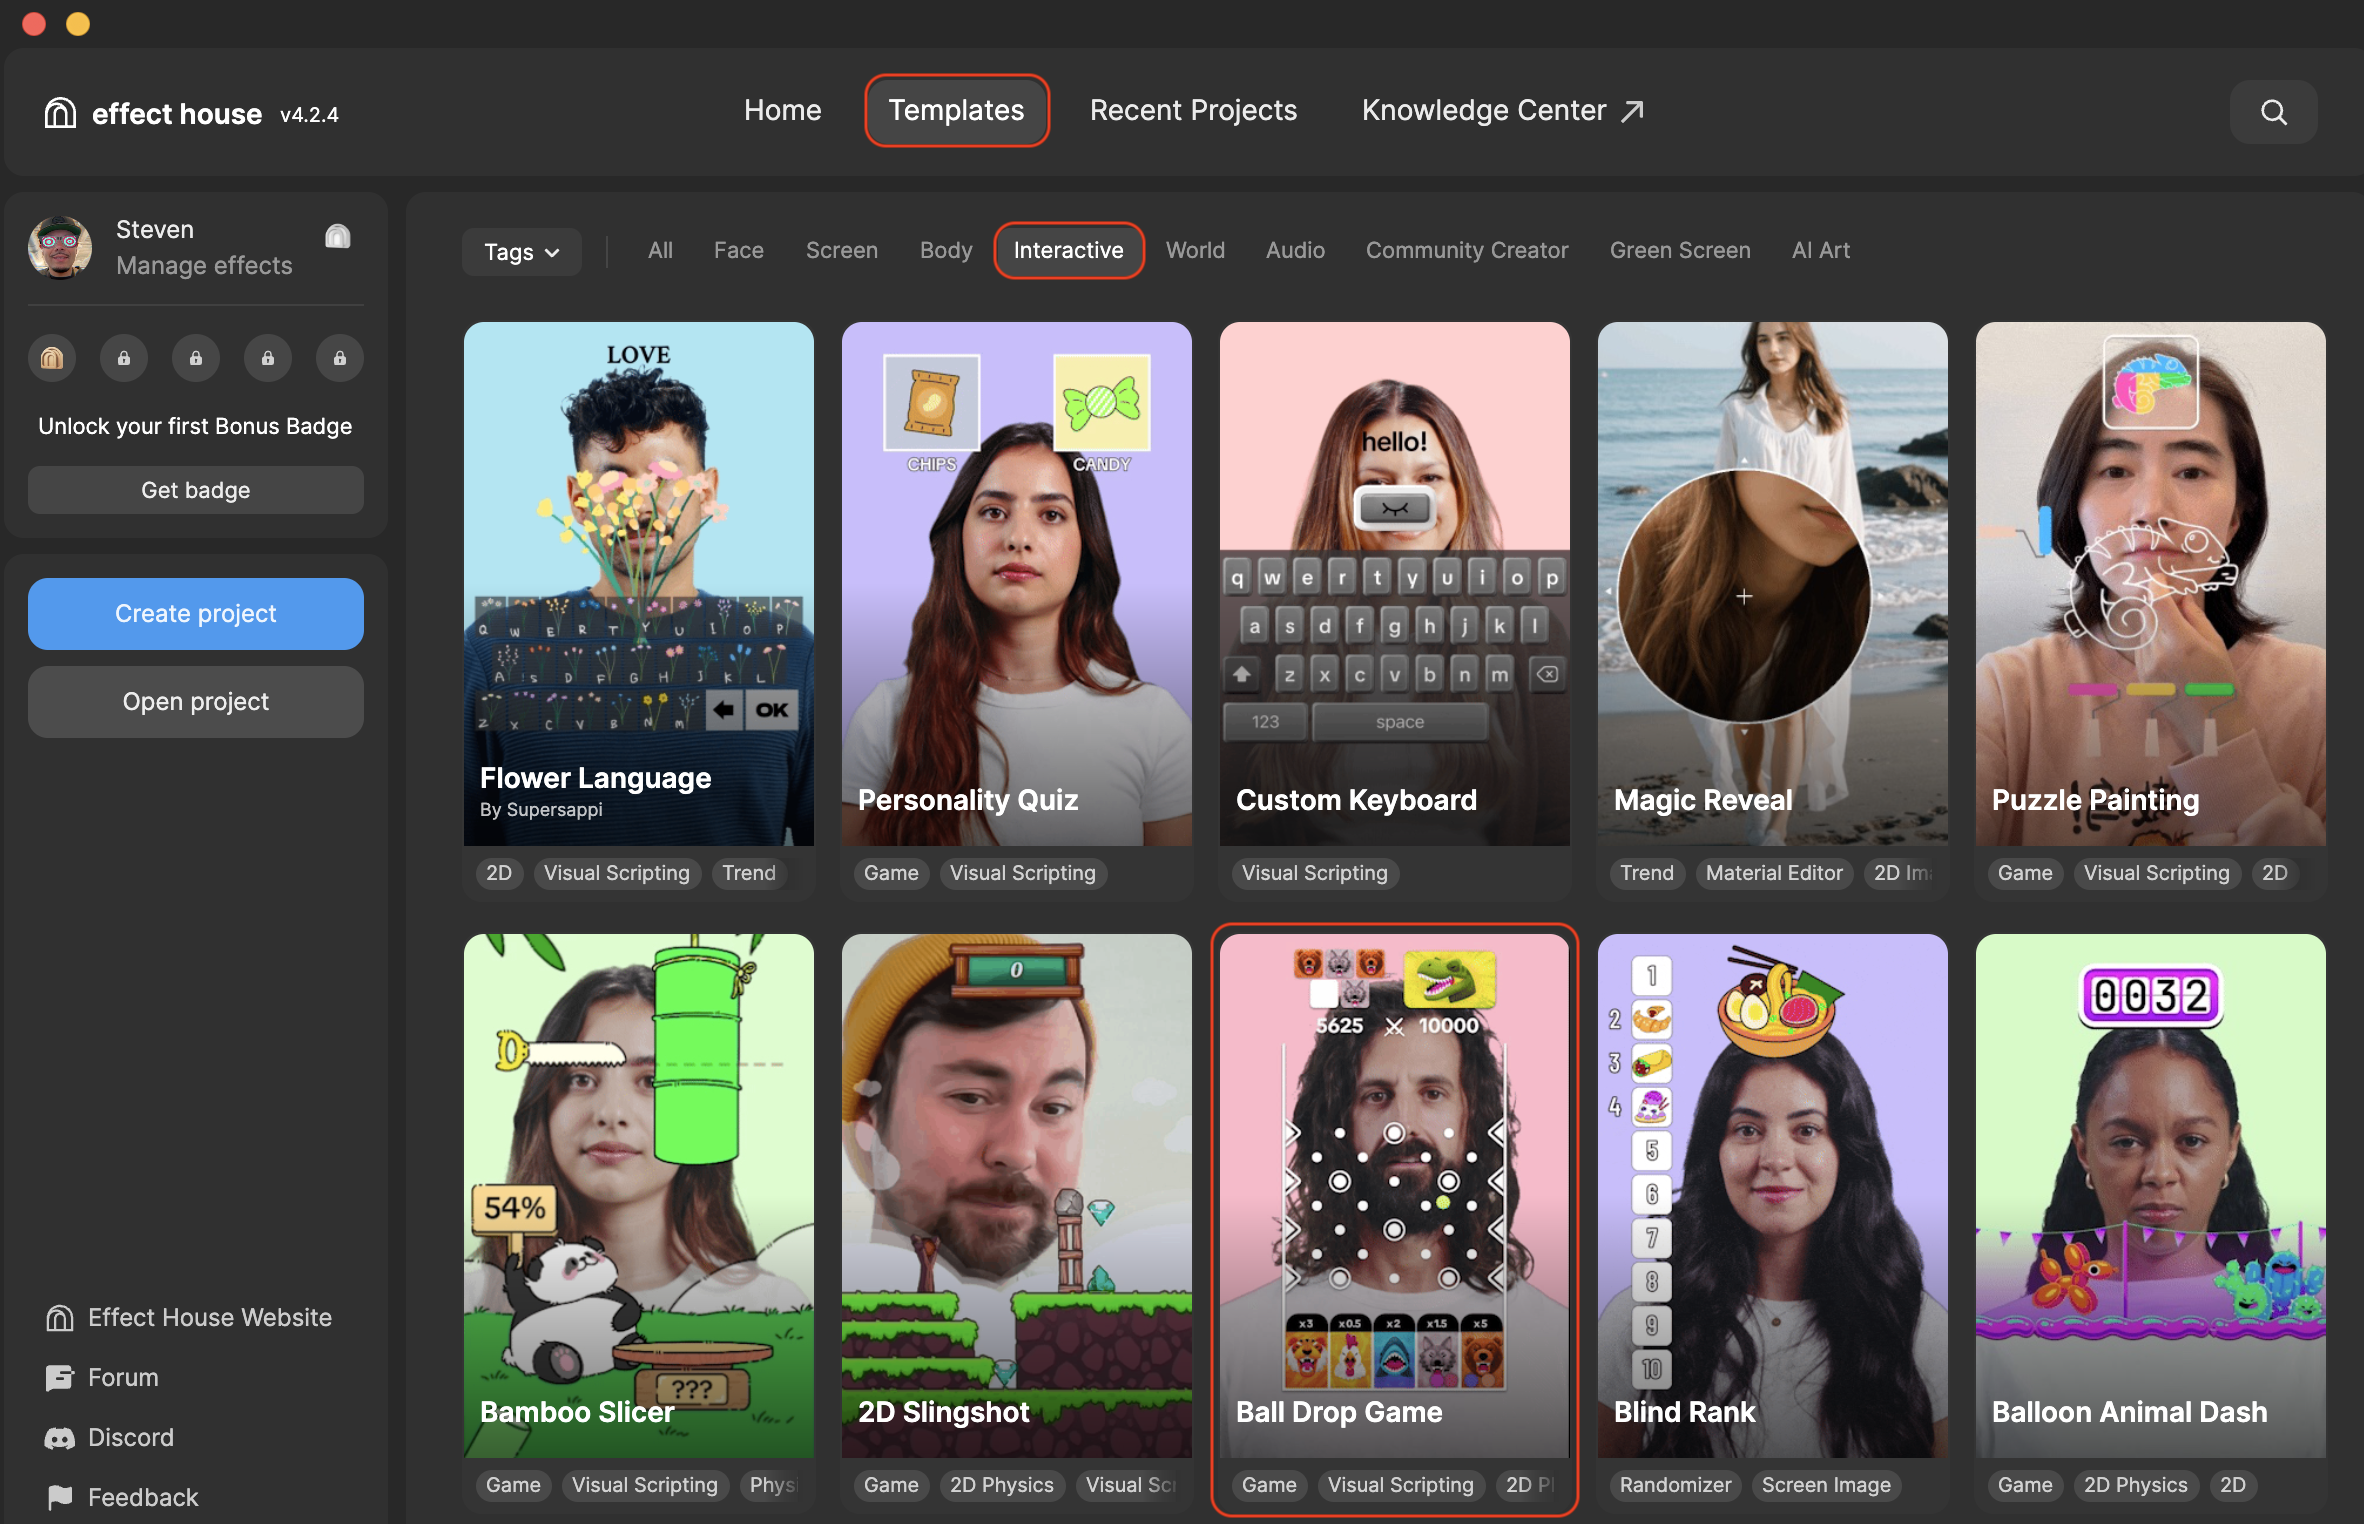
To use this template in your Effect House project:
- Go to Templates
- Click the Interactive tab
- Select the Ball Drop Game template
Hierarchy
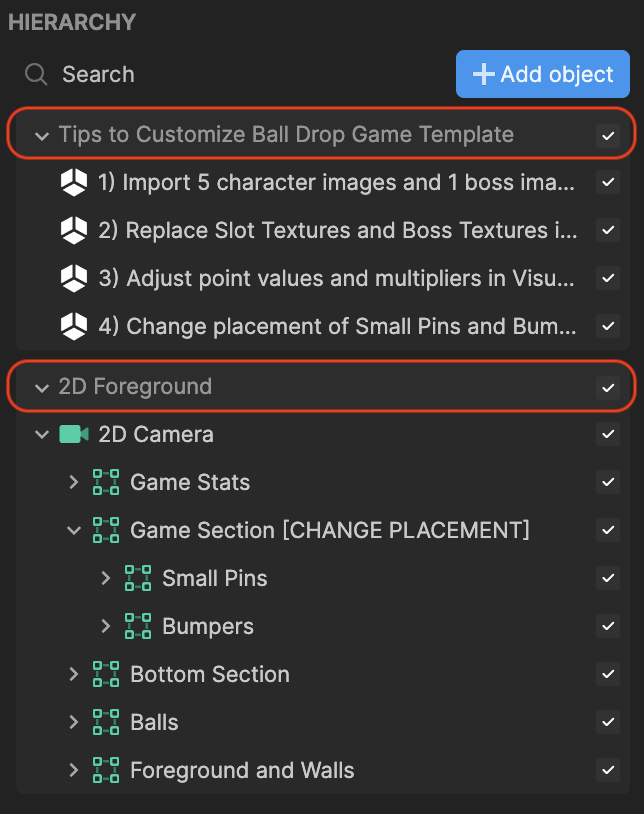
In the Hierarchy panel, there are two main render groups:
- Tips to Customize Ball Drop Game Template contains helpful hints to customize the game
- 2D Foreground renders the game stats, game section for all the pins, balls, bumpers, the bottom section, the foreground, and walls
Change the Game Images
You can customize this game by swapping out the games images with some of your own!
To import your own images and swap them out:
- Go to the Assets panel
- Click the Add asset button [+]
- Go to Import and click From Computer
- Select your images and click Open
To add multiple images at the same time, Command + click (Mac) or Control + click (Windows) onto the images you'd like to select before clicking Open. You can also simply drag the images directly from your computer folder into the Assets panel.
Now that your images are imported, you can now swap them out in the Visual Scripting panel
- In the Assets panel, click on one of your imported images and drag it into the Visual Scripting panel under Slot Textures and the image you want to swap out
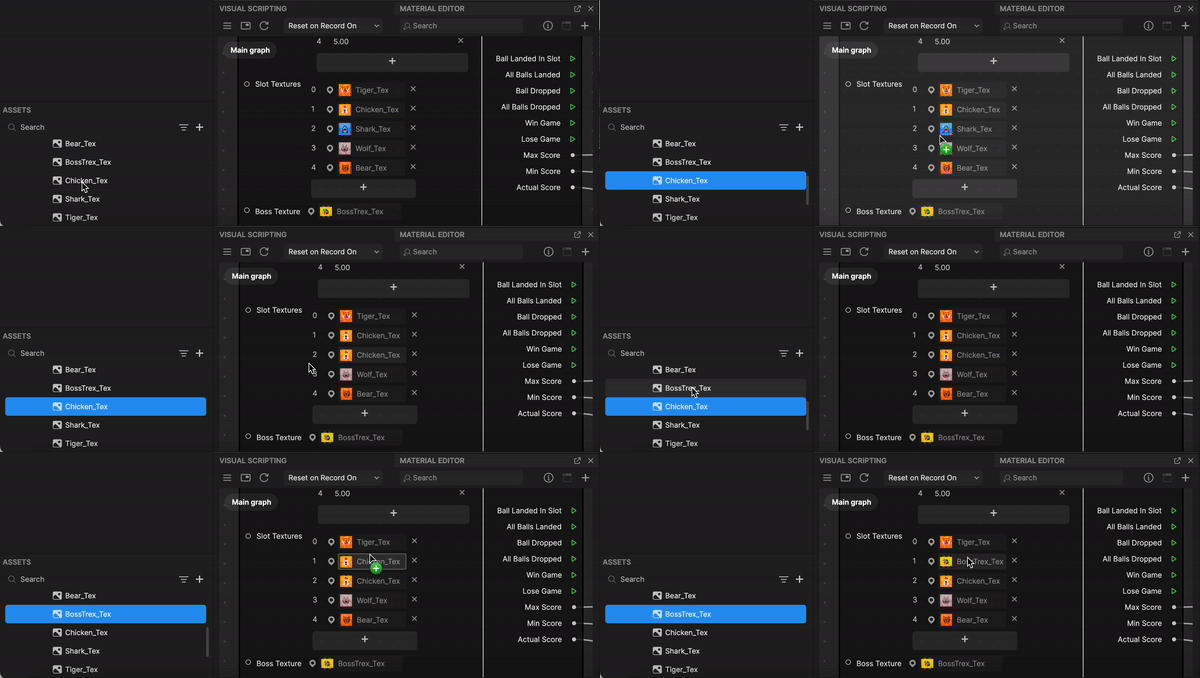
With the same logic described above, repeat this process for the other game images. You can also repeat this process to swap out the Boss Texture image with a different one.
Move the Pins and Bumpers
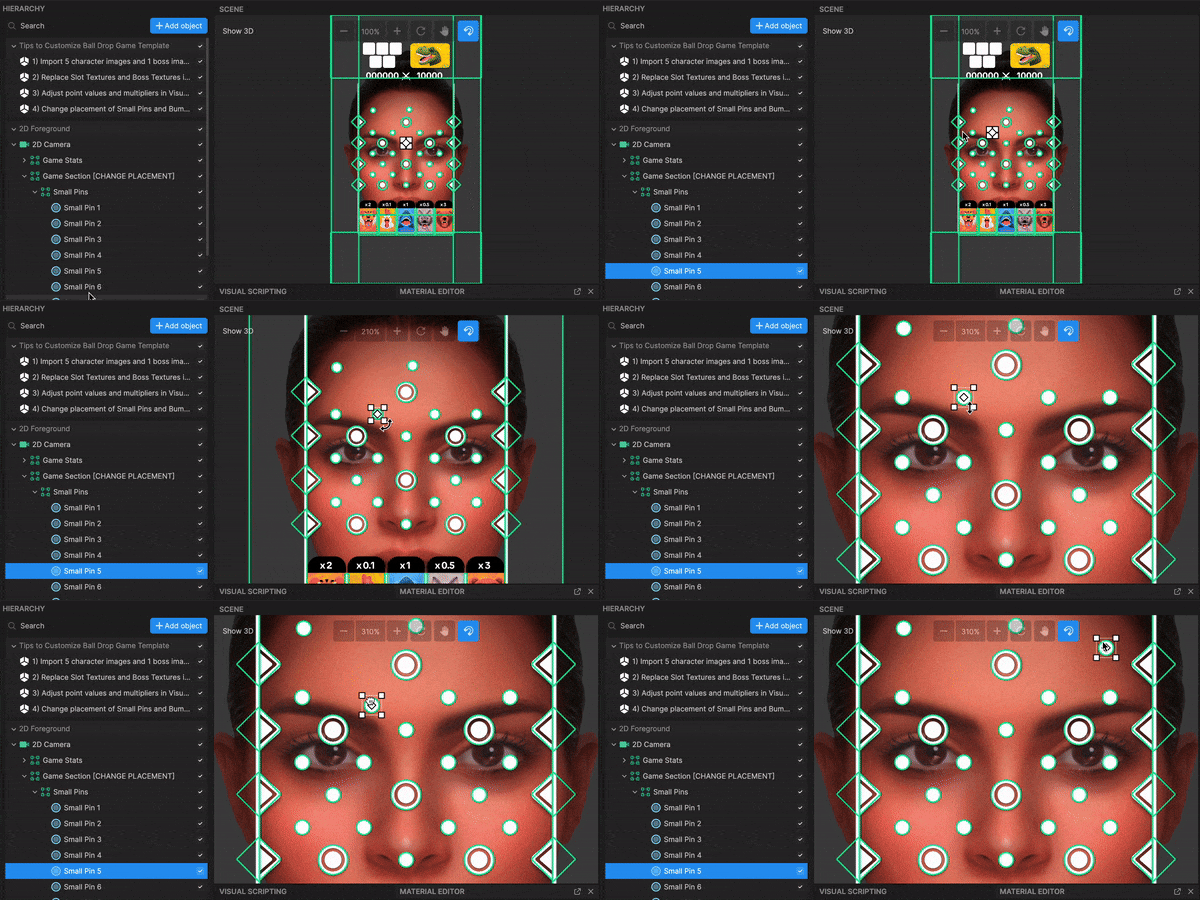
Challenge your players by moving the small pins and bumpers around to different areas on your screen!
To move the pins around to different areas:
- Go to the Hierarchy panel
- Go to Small Pins and click onto one of the pins
- Go to the Scene panel
- Click onto the highlighted pin and drag it to an area you'd like to move it to. Your pin is now relocated!
To move the bumpers, use the same logic above. The Side bumpers should remain in the area surrounding the box colliders placed on the left and right of your screen.
Add Additional Bumpers
This game has both Circle Bumper and Side Bumper objects that the ball can bounce off of. Let's try adding an additional bumper by duplicating one to the game:
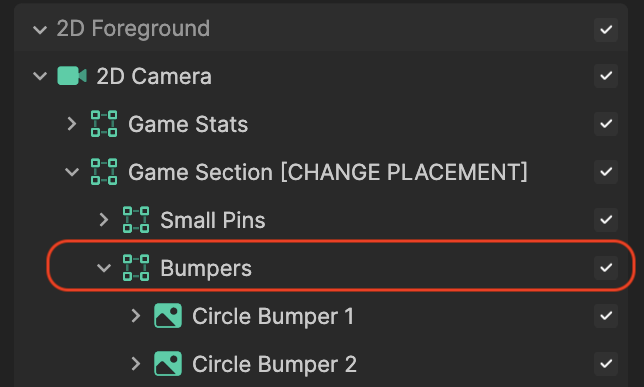
- Go to the Hierarchy panel
- Go to Bumpers and right-click onto one of the existing bumpers (Circle or Side) and click Duplicate. A duplicate bumper is created!
Now let's apply Visual Scripting to the new bumper you added!
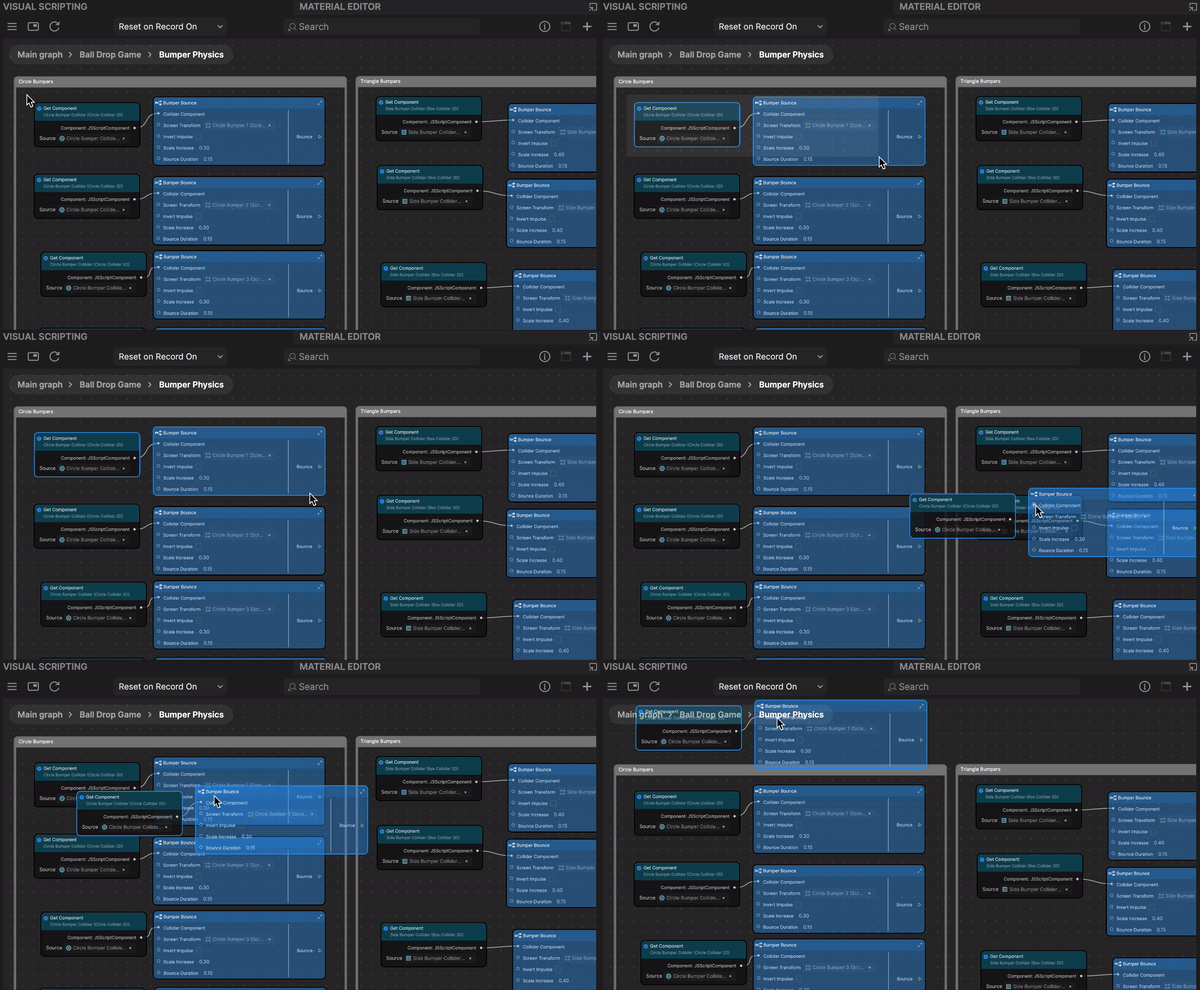
- Go to the Visual Scripting panel
- Double-click the Ball Drop Game node (A large graph will open on your screen)
- Navigate to the Bumper Physics subgraph at the middle of the Visual Scripting panel and double-click it
- Go to Circle Bumpers (for the Circle bumpers) or Triangle Bumpers (for the Side Bumpers).
- Select both the Get Component and Bumper Bounce nodes
Drag your cursor across the two nodes horizontally, creating a rectangle over them
- Duplicate the selected nodes by pressing Command key + D (Mac) or Control key + D (Windows). A duplicate of both nodes is now created!
Next, let's assign the duplicate bumper to the new subgraph!
- Go to the Hierarchy panel
- Drag the duplicate bumper into the Visual Scripting panel and onto Screen Transform within the duplicate Bumper Bounce node. The new bumper is now associated with the duplicate node!
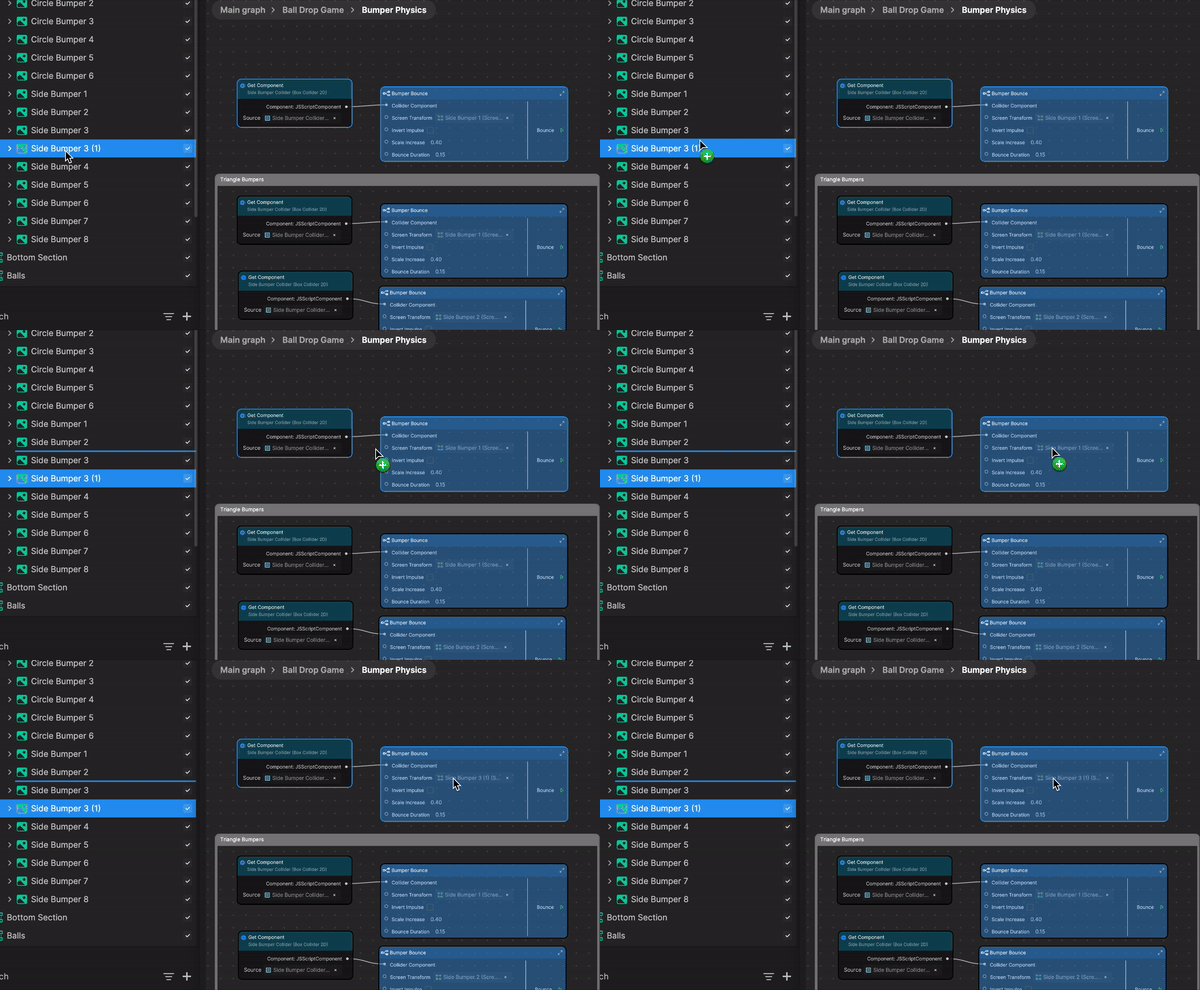
The final step is to assign the Side Bumper collider to the Get Component node!
- Go to the Hierarchy panel
- Go to your duplicate Side Bumper and expand it
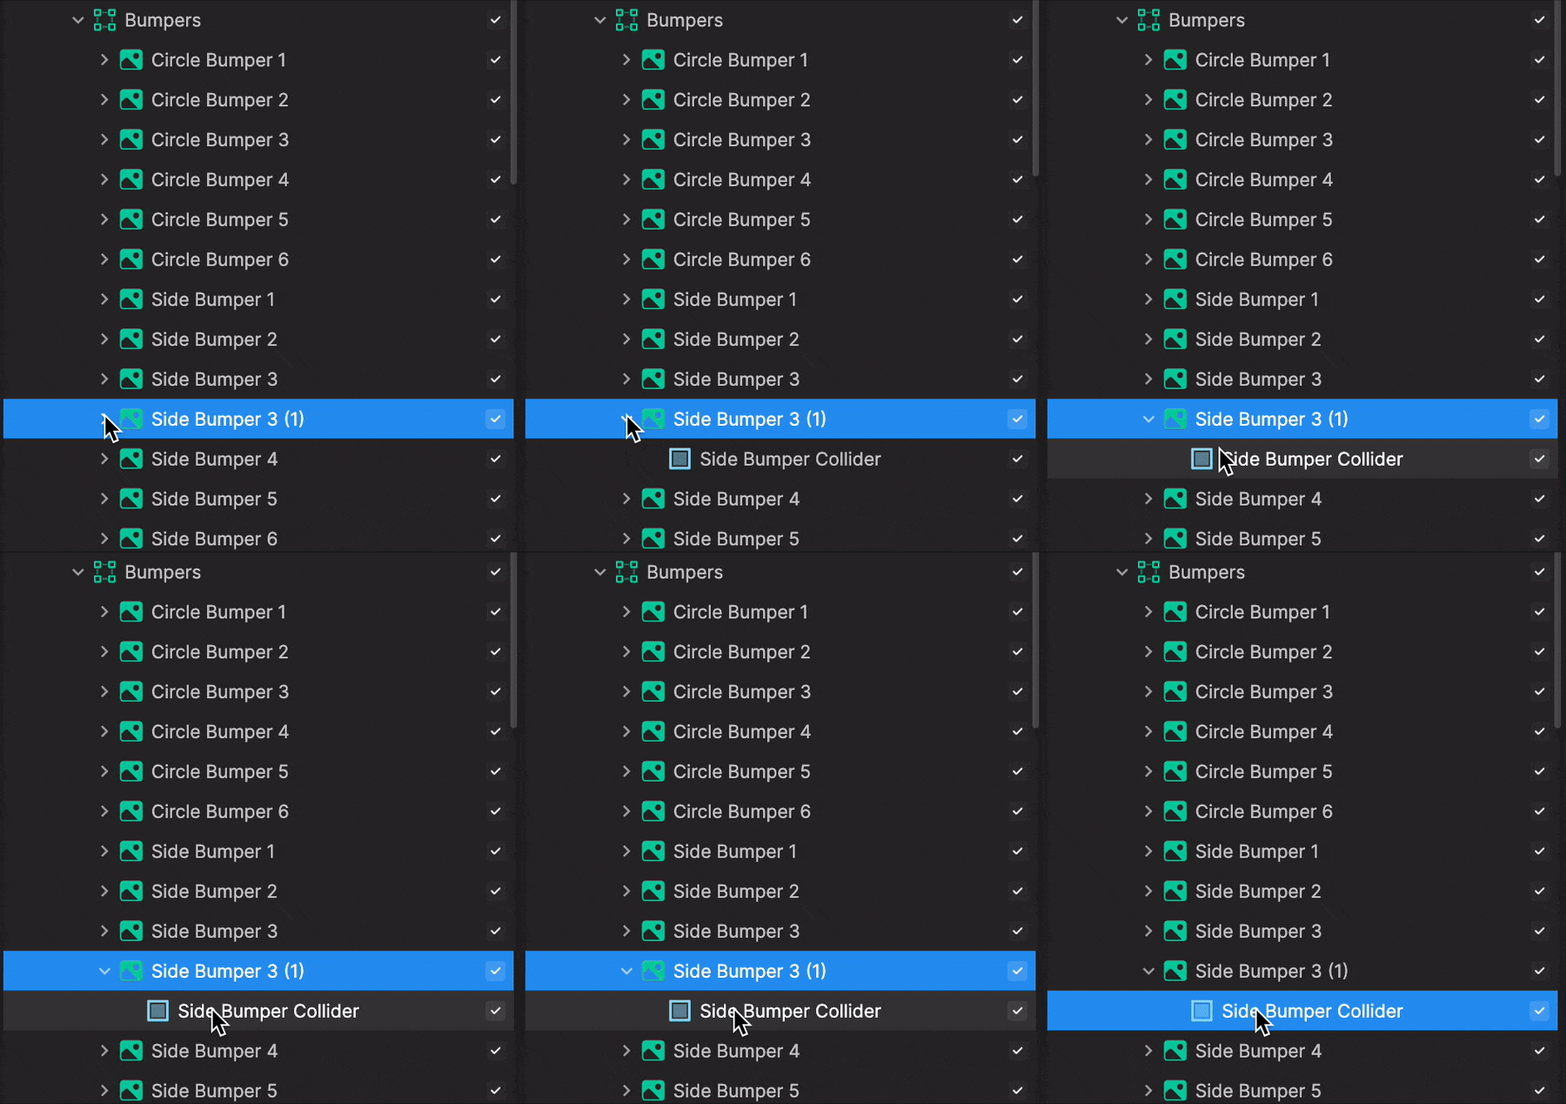
- Drag the Side Bumper Collider into the Visual Scripting panel and onto Source. The new Side Bumper collider is now associated with the Get Component node!

Now that you've created an additional bumper, in the Scene panel, move the bumper to your desired location!
Visual Scripting
In the Visual Scripting panel, you can make additional changes such as adjusting the point values and multipliers to further customize this game.
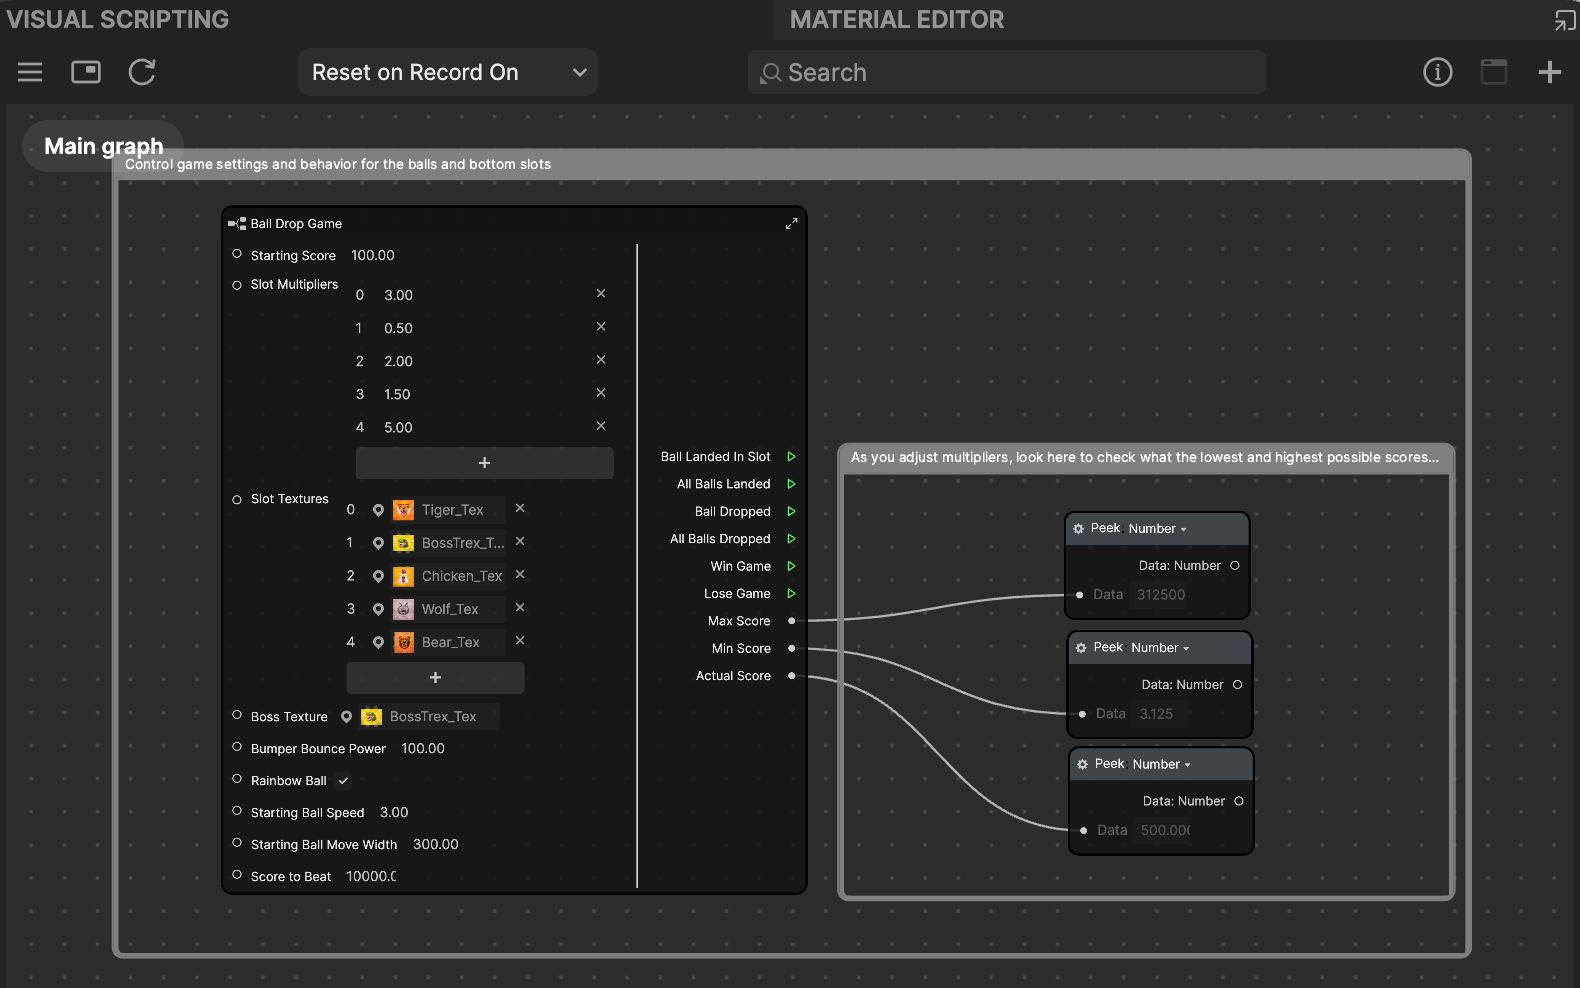
- Starting Score is the starting score value. When the game resets, it will start at this number.
- Slot Multipliers change the point value at the bottom of the game. The Slot Multipliers match up in the same order as the Slot Textures.
- Slot Textures change the images that appear at the bottom of the game. The Slot Textures match up in the same order as the Slot Multipliers.
- Boss Texture is the picture of the character that you're trying to beat in the game
- Bumper Bounce Power controls how much bounce power the ball gets when it hits a bumper. The bounciness of the ball itself can also be adjusted in a physics material.
- Rainbow Ball makes the ball cycle through various colors
- Starting Ball Speed controls the original launch speed of the ball when it is dropped when you first tap
- Starting Ball Move Width controls the width at the top of the screen that the ball moves within
- Score to Beat controls the challengers' score
Subgraphs
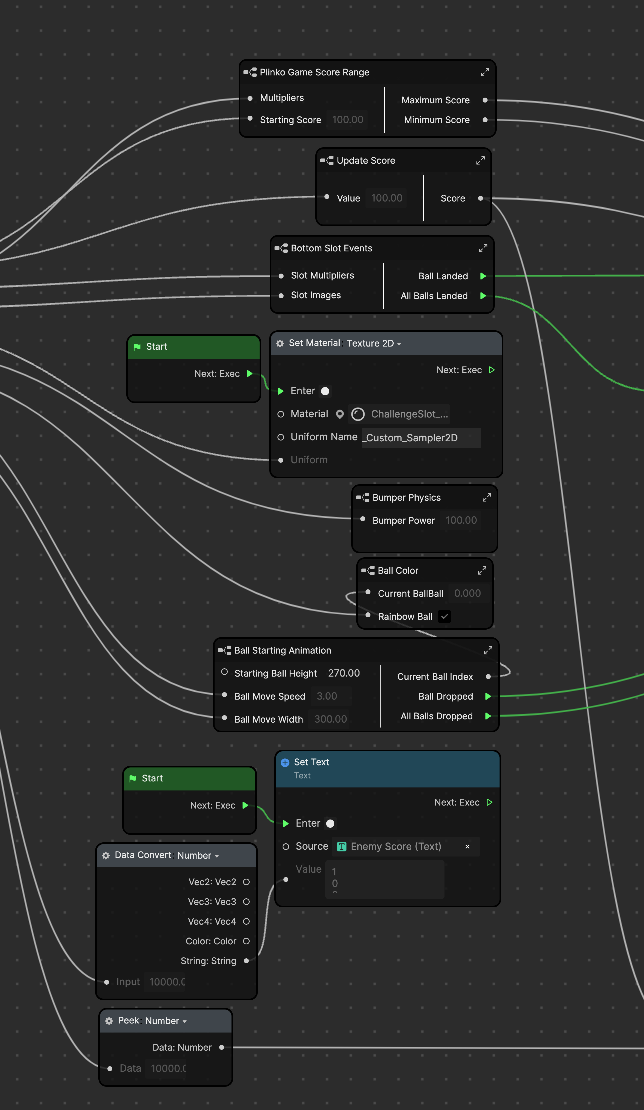
- Plinko Game Score Range calculates and displays the maximum and minimum score for this game. If you already have your points and your multipliers that you want, this subgraph isn't needed and can be deleted.
- Update Score takes the actual score and converts it into text for the text object
- Bottom Slot Events handles when the ball enters the intangible box colliders for each of the point slots at the bottom
- Bumper Physics controls the logic that operates the bumper interactions with physics
- Ball Starting Animation controls how the ball moves left and right and how it launches at the start of the game