Music Band
This effect allows creators to tap the various band members on the screen to create music, like an MIDI controller. This tutorial will show you how to import your own assets and attach them to the correct objects in the Music Band Template.
Prepare
Before we get started, prepare a set of PNGs for a texture sequence. They should all share the same aspect ratio and resolution for best results. There are two states that a band member can be in, so you’ll want a texture sequence for “Dance” and one for “Tap”. We’ve provided some additional music band texture sequences here:
↓ music_band_characters_additional_sequence.zip
You’ll also want to prepare some audio files. These must be .mp3 files that don’t contain copyrighted material or you’ll receive an error while uploading. Here is an example of an audio file.
Open the Template
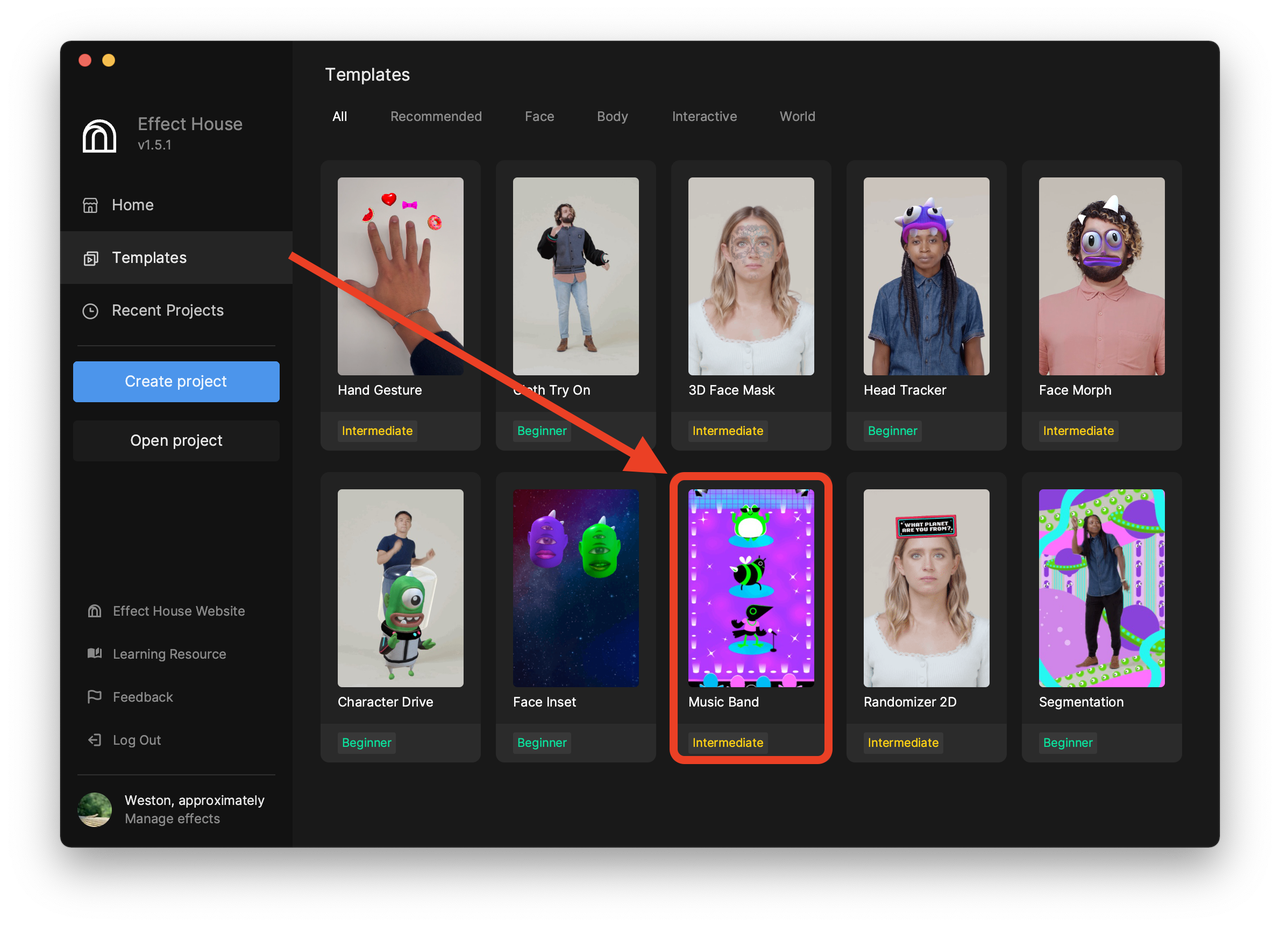
Start by opening Effect House, logging in with the account you want to use to publish your effect. Go to Templates and select Music Band.
Let the template load and then save your project to a folder of your choice to save your progress.
Import Assets
Import a new “Dance” texture sequence asset by clicking the Add button [+] > Import > Texture Sequence in the Assets panel.
Select all “Dance” images and click Open.
You’ll see a new texture sequence appear in the Assets window.

It’s recommend to rename and categorize your assets so you can find them easily. This is especially important when there are a lot of assets. To rename it, right-click > Rename and type the new name. Then click and drag it to the folder with the rest of the textures. You can delete the empty Textures folder.
Repeat these steps for the “Tap” version of your texture sequence as well.
Let’s import an audio file by clicking the Add button [+] > Import > From Computer in the Assets panel.
Select your audio file and click Open.
Wait for the audio file asset to import. Remember, if this file contains copyrighted material, it will fail to import.
Replace Assets
Let’s take a look at the Hierarchy panel to see how this project is setup.

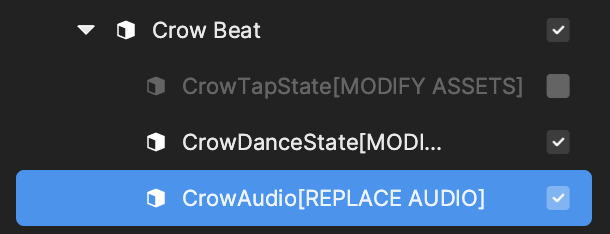
Each band member contains three objects: one audio object, one idle dance state object, and one tap state object.
Let’s replace the Crow Beat object with the new assets we just imported. Expand the Crow Beat by clicking the arrow next to the object, then clicking CrowDanceState.
Navigate to the Animation Sequence component in the Inspector panel of the object and click Texture Sequence, then select the Dance sequence from the pop-up Assets window.
When replacing the Texture Sequence for Tap State, remember to check the frame number and update it in the corresponding subgraph.
If the frame number of your Tap State sequence is 4, find the CrowTapEventController and change the number from 3 to 4 of the TapStateSeq_FrameNum property.
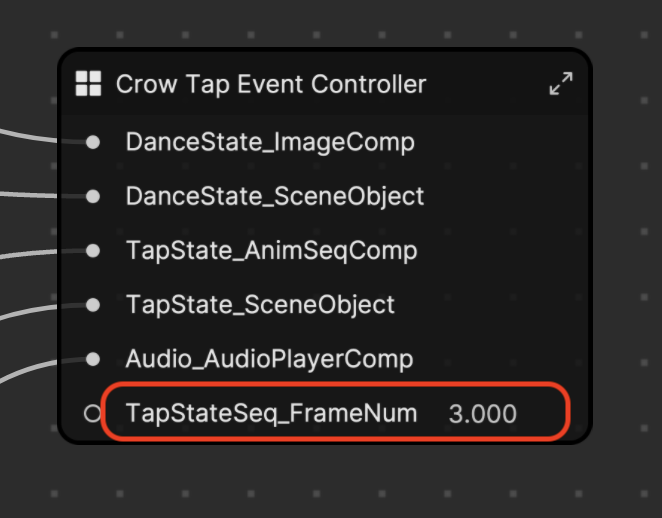
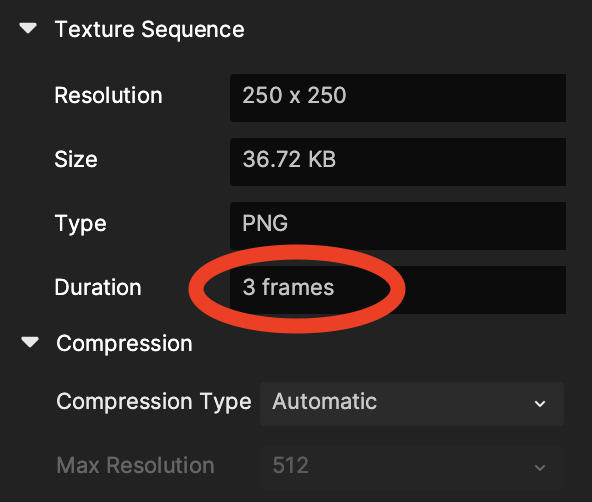
You can find the number of frames in the Duration field by clicking the Texture Sequence in the Hierarchy panel.
Now, you will replace the audio that is played when the character is tapped.
Click CrowAudio in the Hierarchy panel.
Navigate to the Audio Player component in the Inspector panel of the object and click Audio File, then select the audio file from the pop-up Assets window. There are some additional settings here, such as Play Mode and Volume.
Congratulations! Now you’ve customized the Music Band template and made it your own! If you have any questions, please feel free to reach out for help on our Discord.
Visual Scripting and Subgraph Deep Dive
Each of the following purple comment boxes is responsible for the behavior of a band member. Let’s take a closer look at the Crow Beat Control comment box.
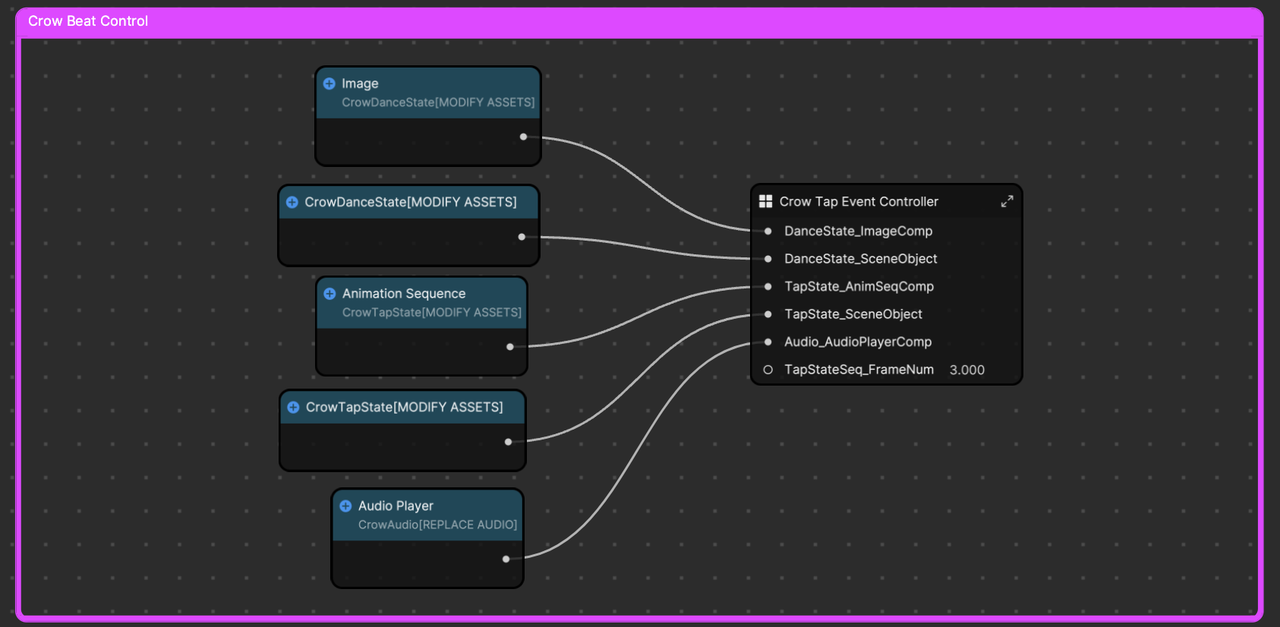
Here you can see all the references being passed into the subgraph. The first reference is the Image component of Dance State. The second is the Scene object of Dance State and the third is the Animation Sequence of Tap State. The fourth is the Scene object of Tap State and the last is the Audio Player from the crow’s Audio component.
To get a new reference, click the the Add button [+] next to a component’s details and select Get.
To inspect inside the subgraph, double-click it.

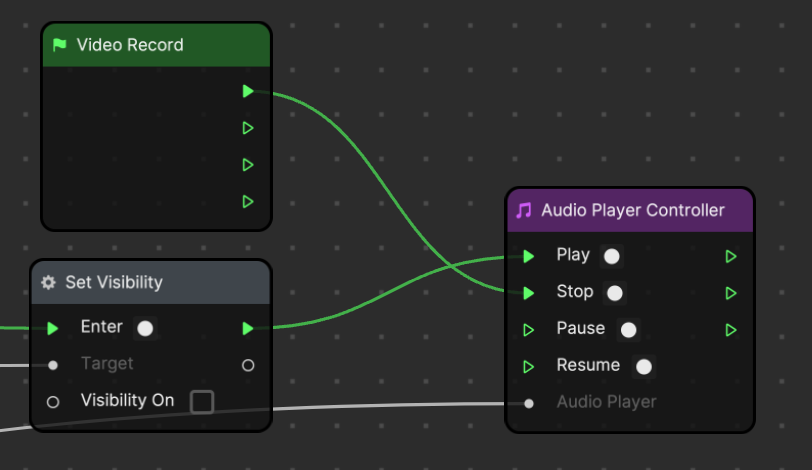
The node setup is relatively straightforward. Use the Image Tap node to Play the desired animation sequence via the Animation Sequence Controller. From there, you can simply toggle the visibility of the animation sequence to hide the one that is not currently playing. For example, when you tap the crow, it should show the “Tap” state animation sequence and hide the “Dance” state animation sequence.
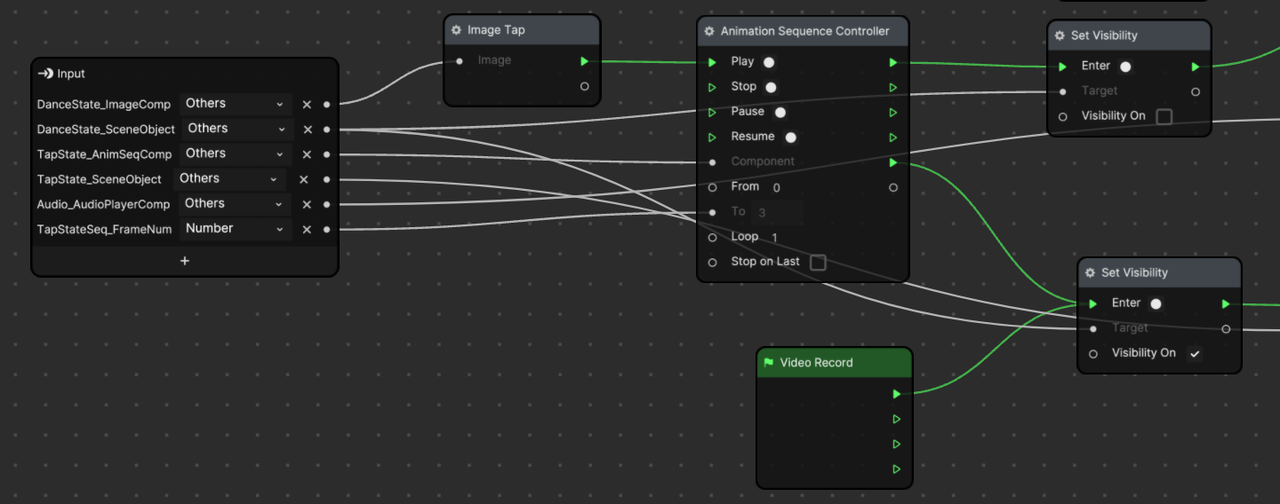
The Audio Player Controller plays the audio file connected to the Audio Player.