Face Fusion Maker
The Face Fusion Maker template takes an input texture, or an image, and morphs the provided face with it as soon as the trigger is called. Learn more about the Face Fusion object!

How to Use This Template
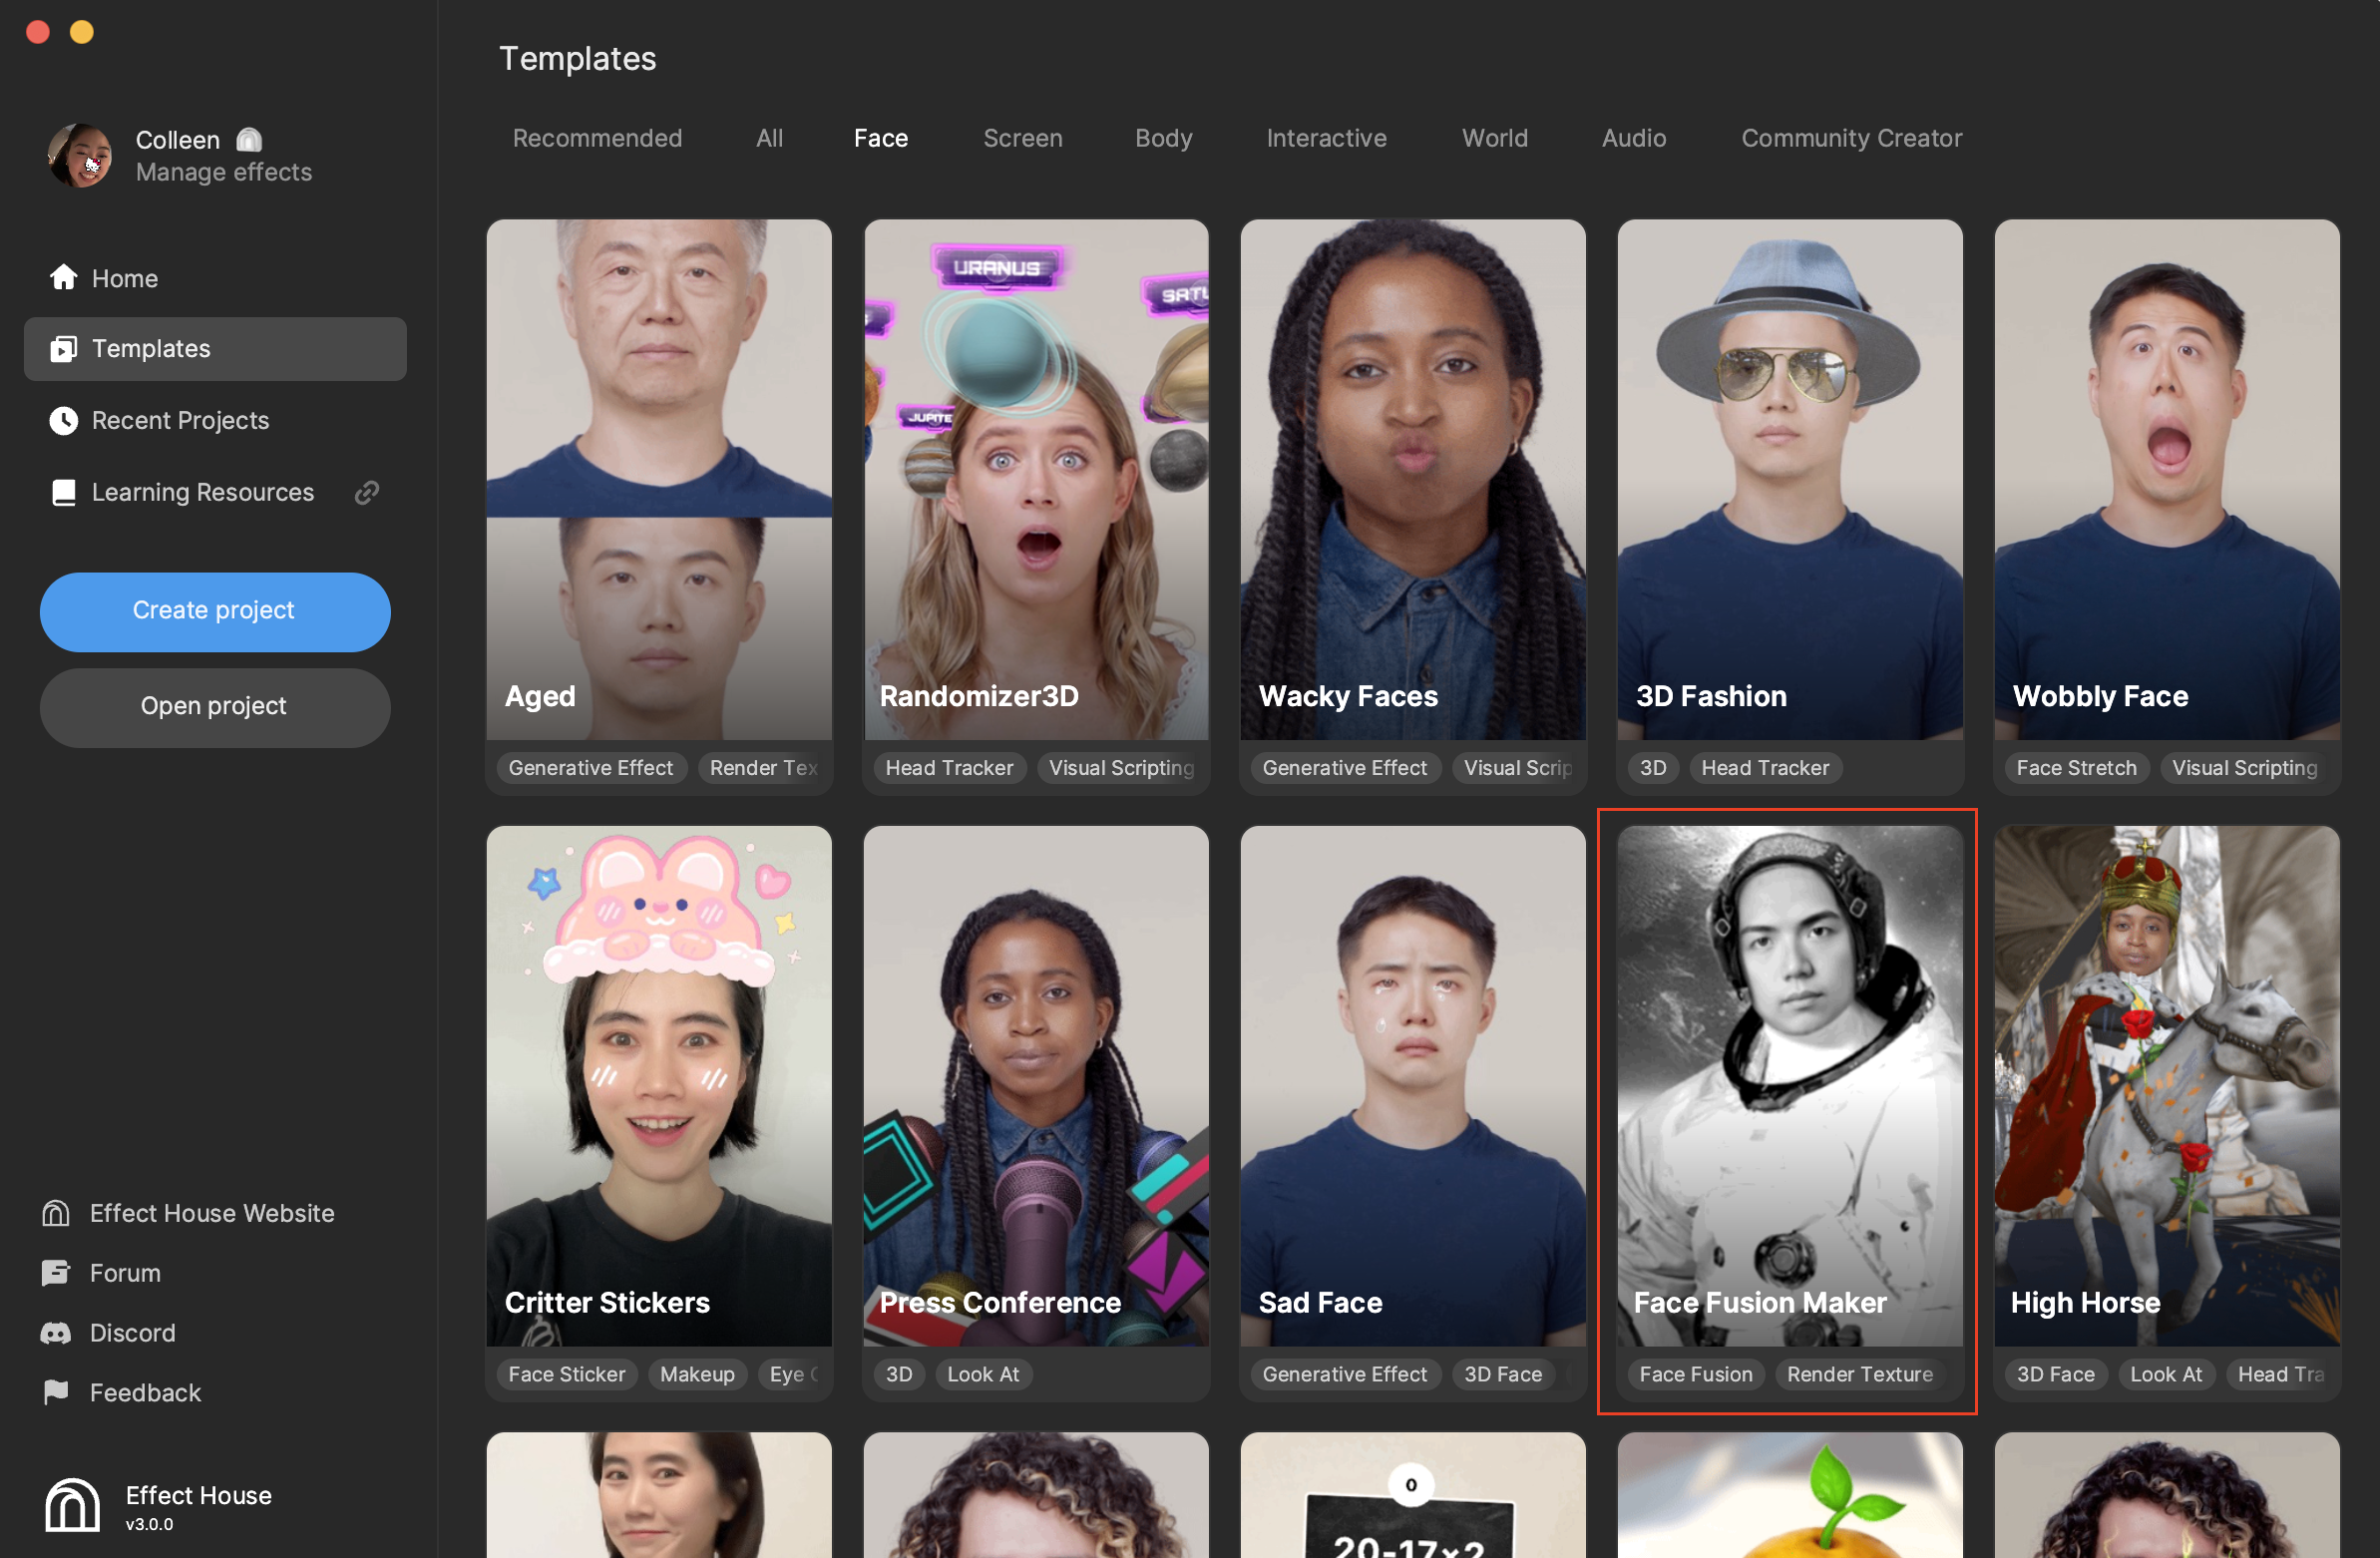
Open Effect House, go to Templates, click the Face tab, and select the Face Fusion Maker template.
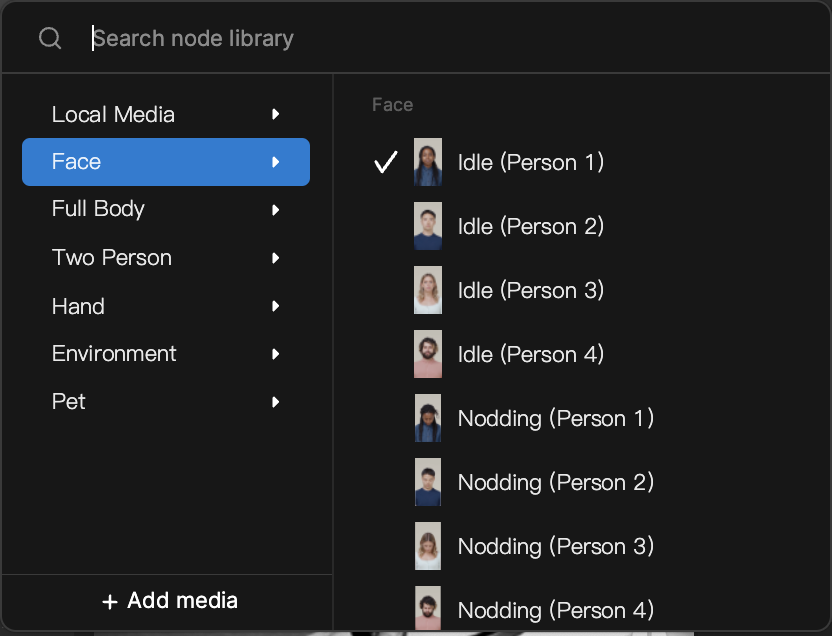
Once you open the project, select a single face as your media from the Preview menu, or select the camera to use your face!
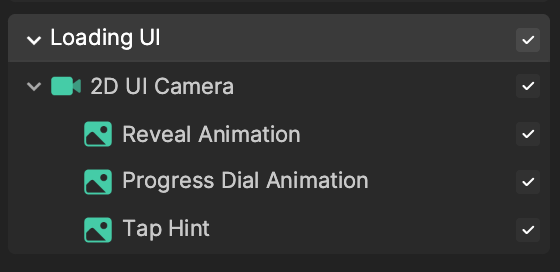
Hierarchy
In the Hierarchy panel, you can see a render group with quick tips to guide you. You can delete these tips from the project if you'd like.
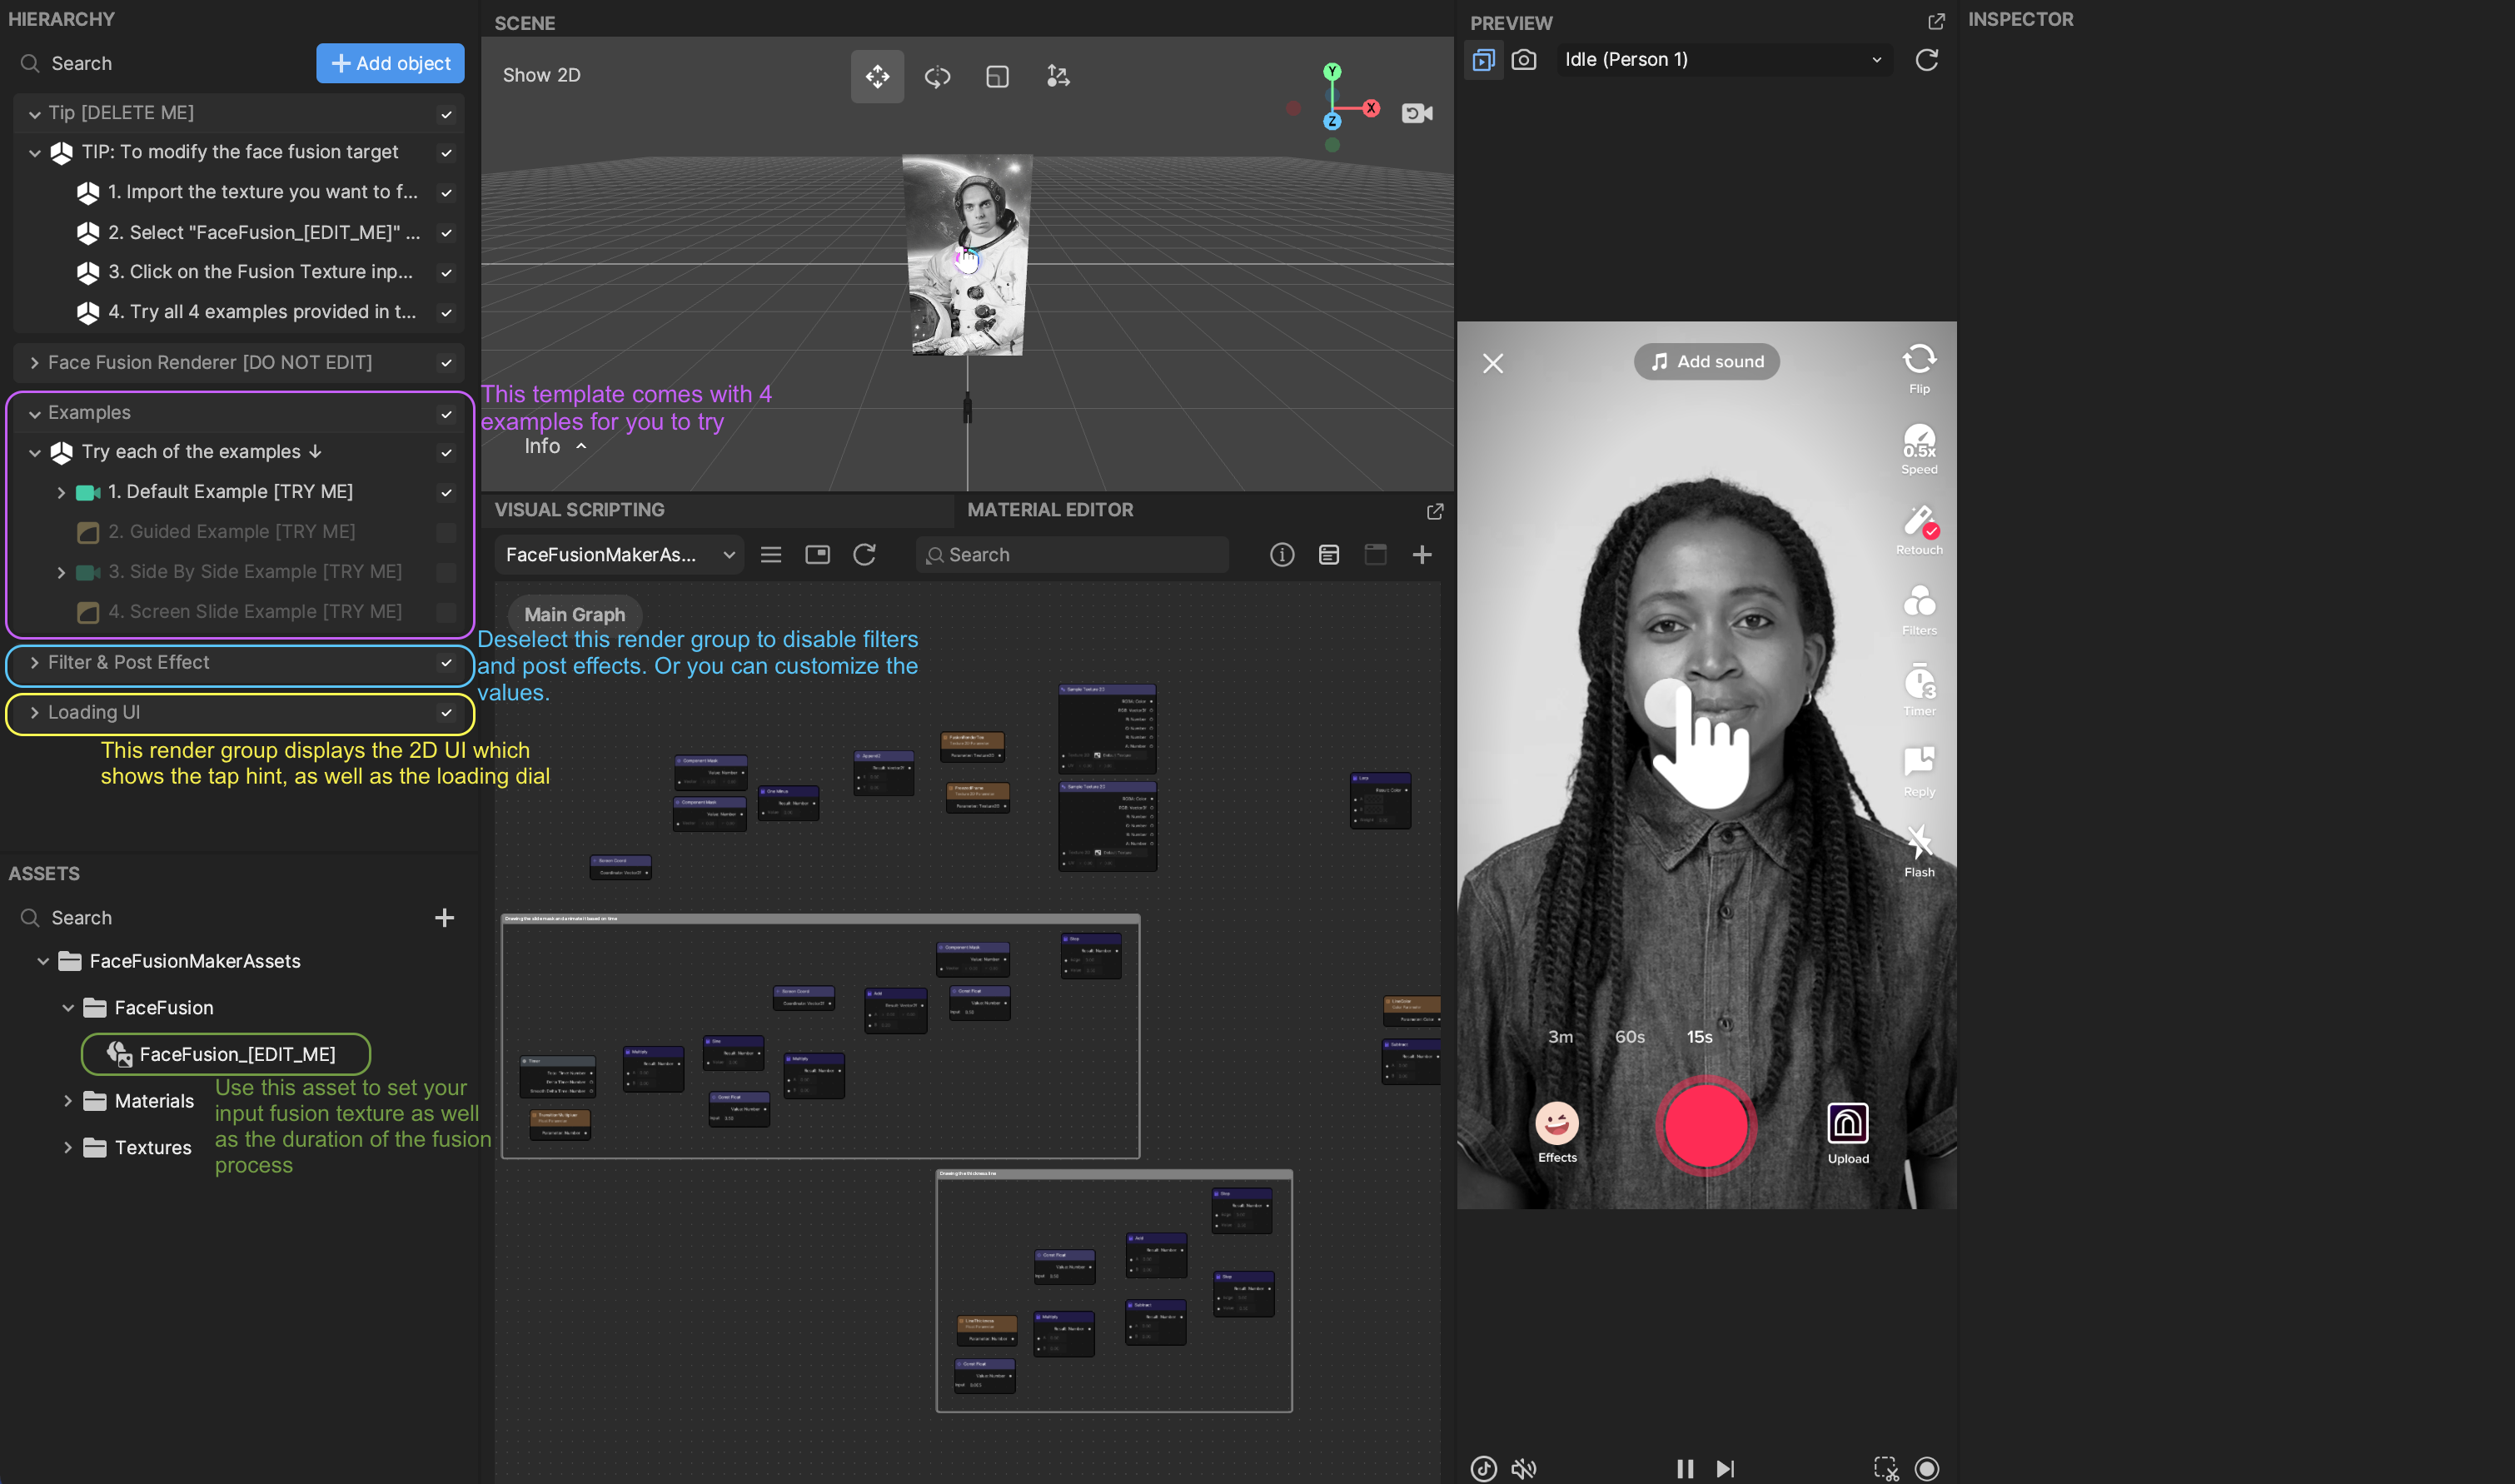
In the Examples render group, there are 4 examples of face fusion for you to play around with.
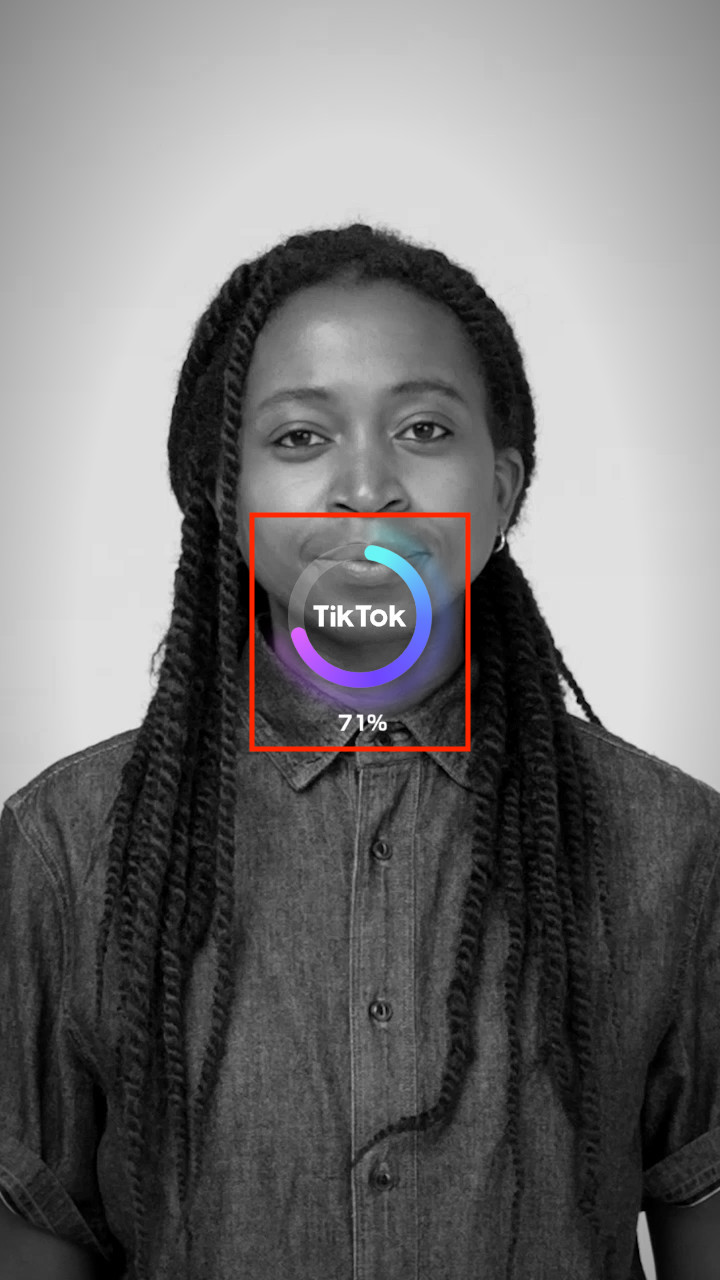
Default Example initially shows the provided face and requires a tap to trigger the face fusion.

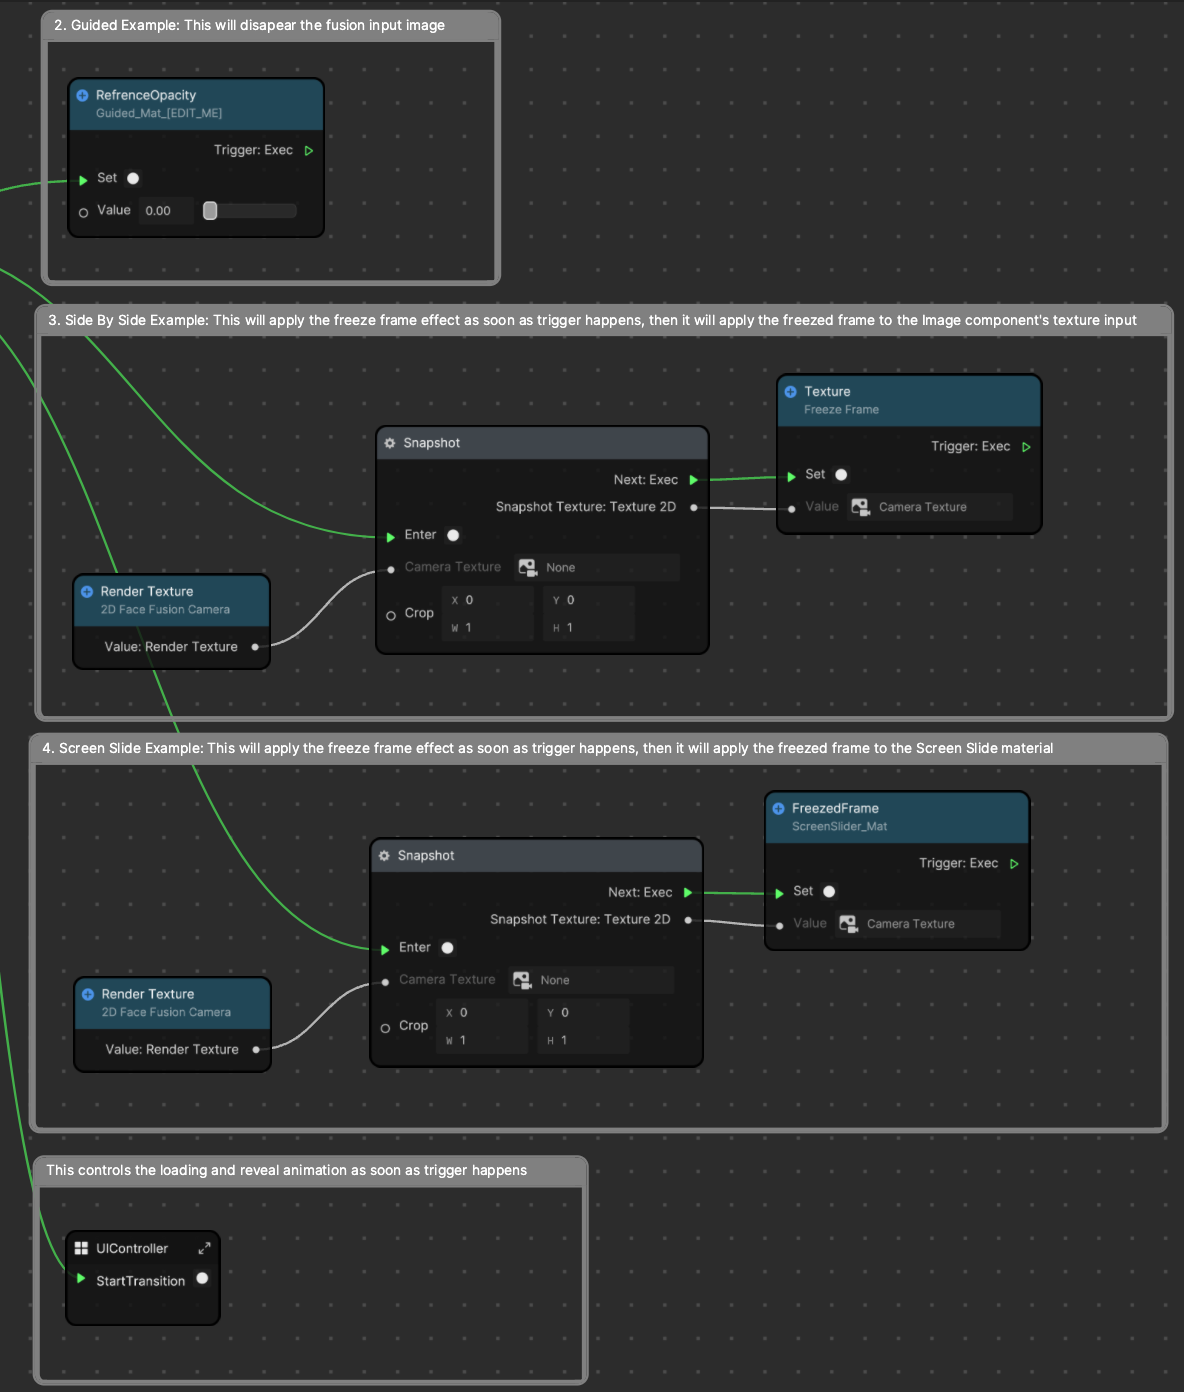
Guided Example initially shows the provided face in front of the input texture. With this example, you can control how the two faces are going to blend together.

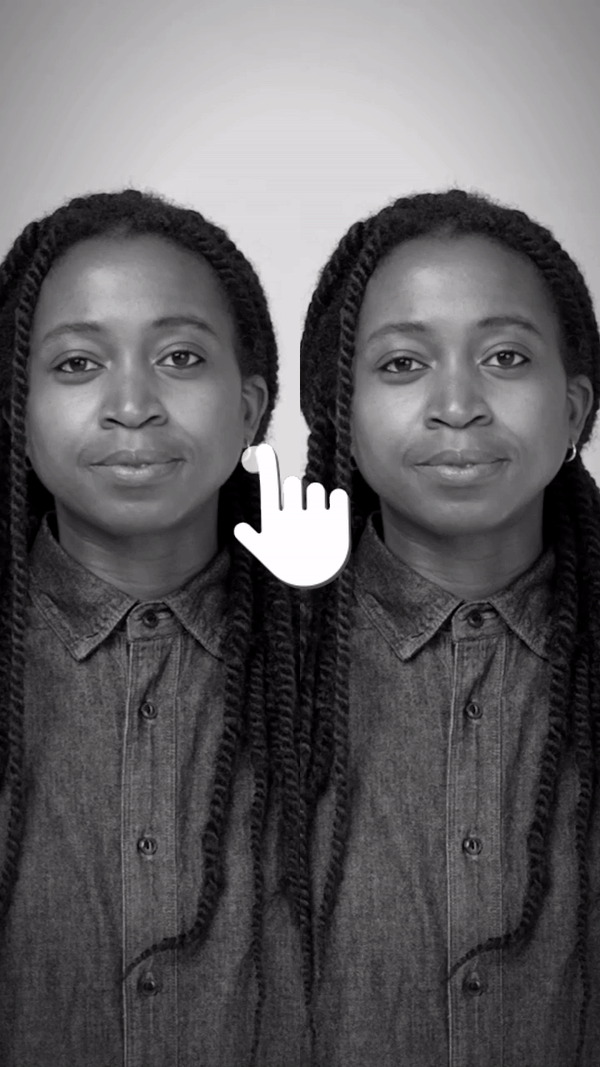
Side by Side Example initially shows split screens with the provided face. Once the screen is tapped, one side of the screen demonstrates face fusion, while the other screen shows the initial face.
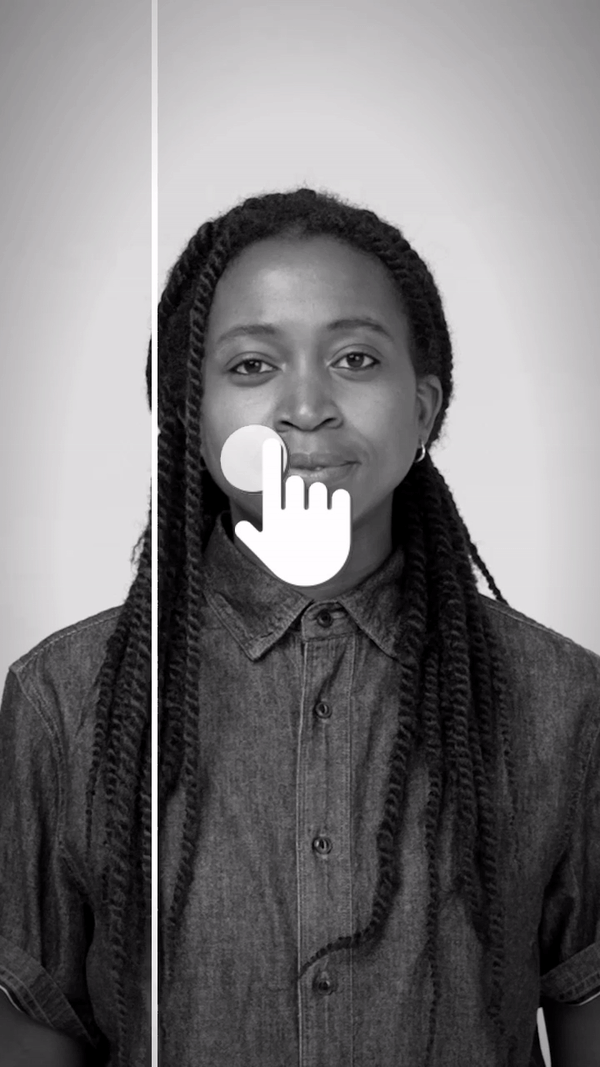
Screen Slide Example initially shows the provided face and a slider moving side to side. Once the screen is tapped, the screen alternates between the provided image and a screen grab of the fused face.
Now let's learn how to upload your own face fusion texture to incorporate into the face fusion.
Filters and Post Effects
A filter and post effect are enabled by default. You can disable this by deselecting the Filter & Post Effect object.

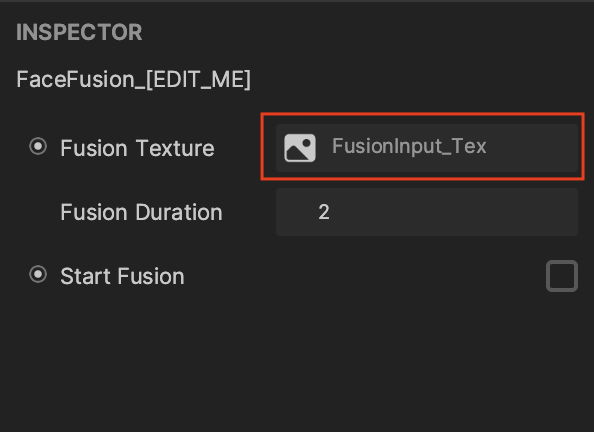
Use Your Own Texture
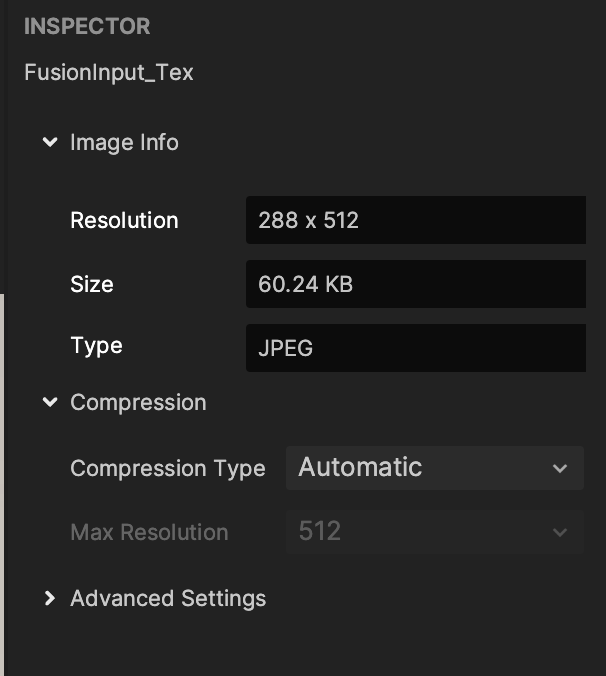
The resolution of your imported asset should be the same as the resolution of the provided FusionInput_Tex texture (found in the Textures folder of the Assets panel). In this case, it is 288x512.
You can replace the default texture by first importing your own. Start by clicking the Add button [+] and going to Import in the Assets panel. Then select FaceFusion_[EDIT_ME] under the FaceFusionMakerAssets folder.
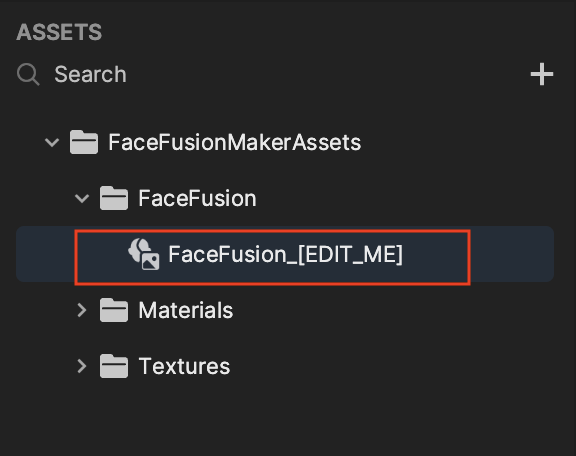
In the Inspector panel, click the Fusion Texture field, select your imported texture, and click OK.
Visual Scripting
First take a look at the UIController subgraph in the Visual Scripting panel.
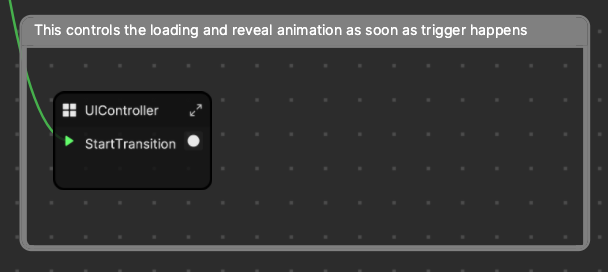
This controls the loading UI, including the reveal and progress dial animations.
To remove these control animations from your effect, simply disable them in the Hierarchy panel.
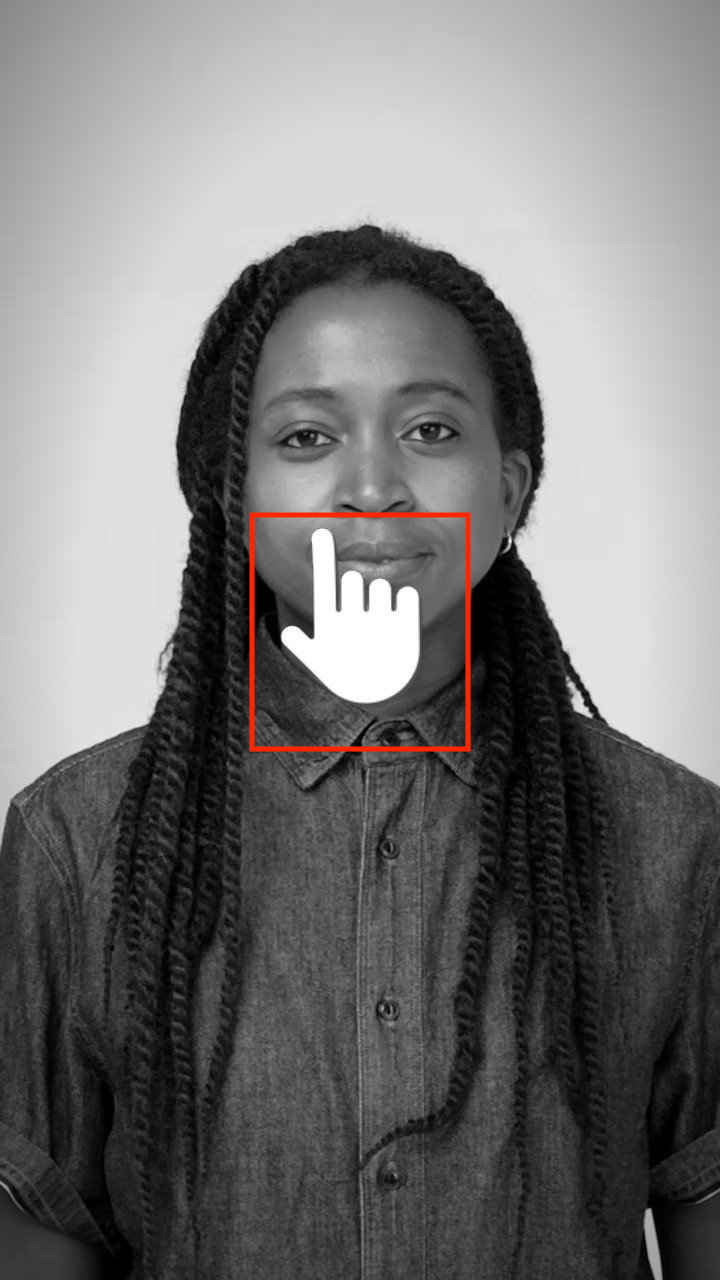
The Screen Tap node triggers the next node, the face fusion, once the screen is tapped on.
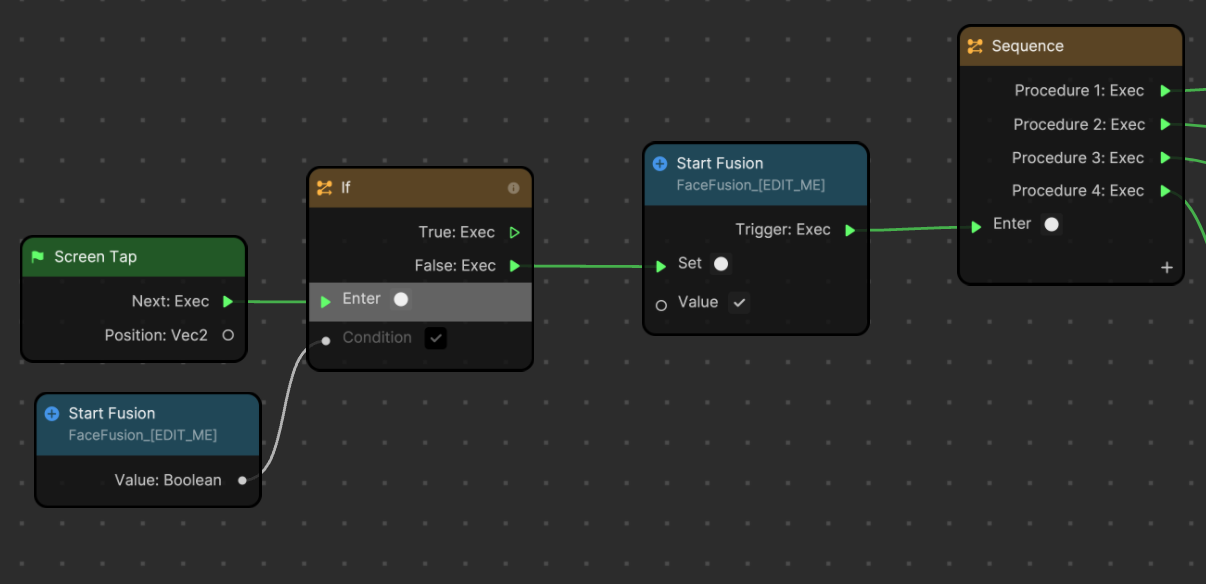
And depending on the example you've selected in the Examples render group of the Hierarchy panel, the respective visual scripting logic will be executed.