Hand Gesture
In this tutorial, you’ll learn how to use Hand Tracker to create customized hand tracking effects. You’ll also learn how to show different objects with the event and rotate objects using the Visual Scripting panel.
Prepare
Start by downloading the following package and locating the Unfinished_HandGesture project:
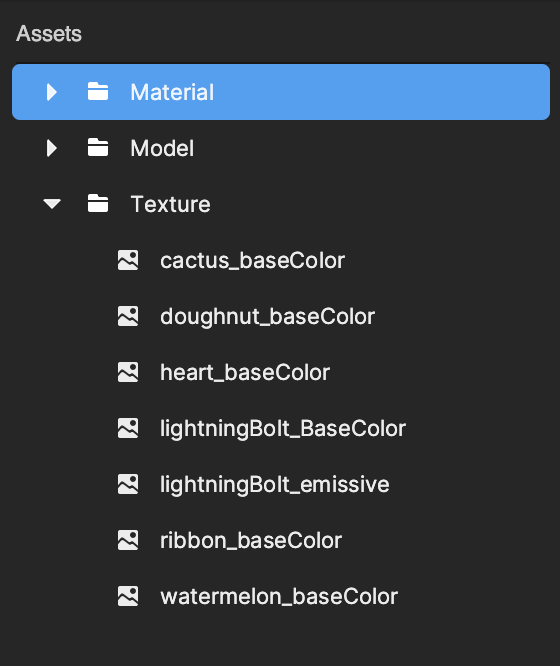
You will see all the required assets have been imported into the Assets panel.
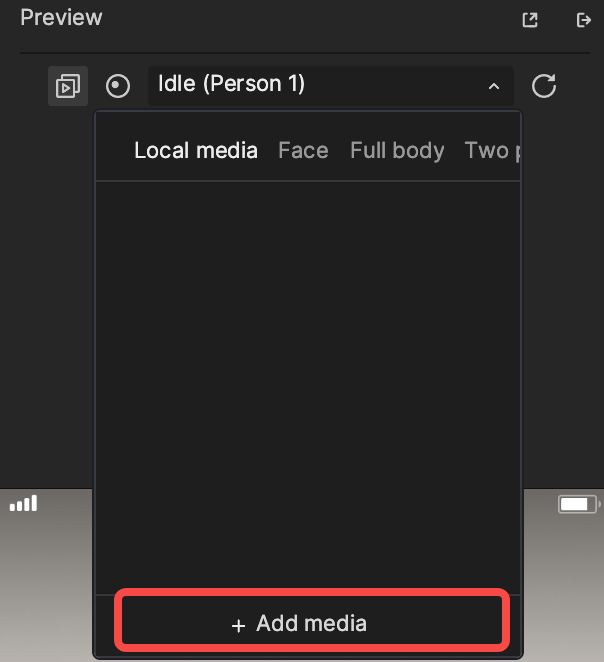
Open the Preview menu in the Preview panel, choose + Add media, and select the hand.mp4 file.
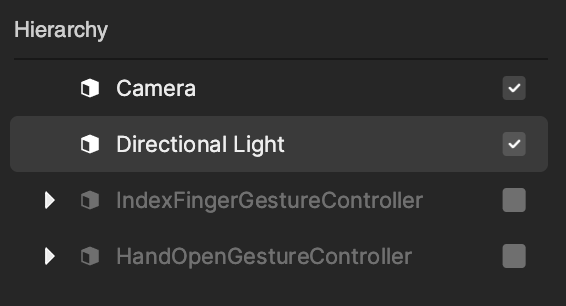
Index Finger Gesture Controller
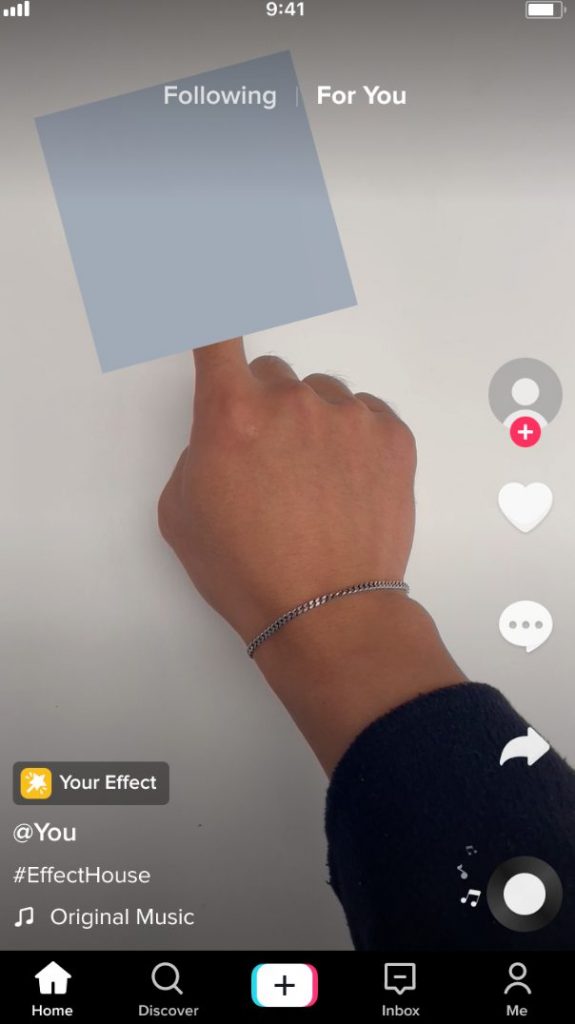
First, try to create an effect of a thunder sign attached to the index finger. It should only appear when it detects the index finger gesture.
Create an Index Finger Hand Tracker
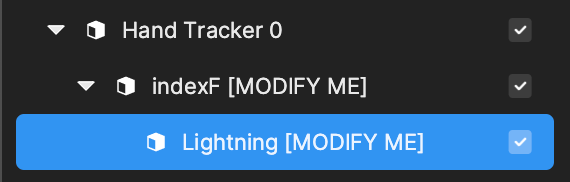
Start by adding a Hand Tracker object by clicking the Add button [+] > AR Tracking > Hand Tracker in the Hierarchy panel. Create an Empty object and nest the Hand Tracker under it. Create another Empty object and nest it under the Hand Tracker.
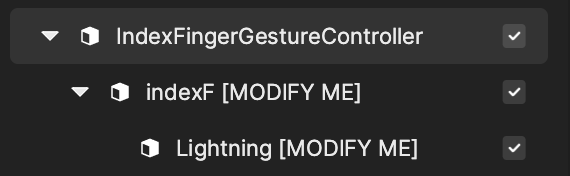
Rename these object like below or other names that are reasonable for your hand gesture controller (you don’t need to add the [MODIFY ME] suffix):
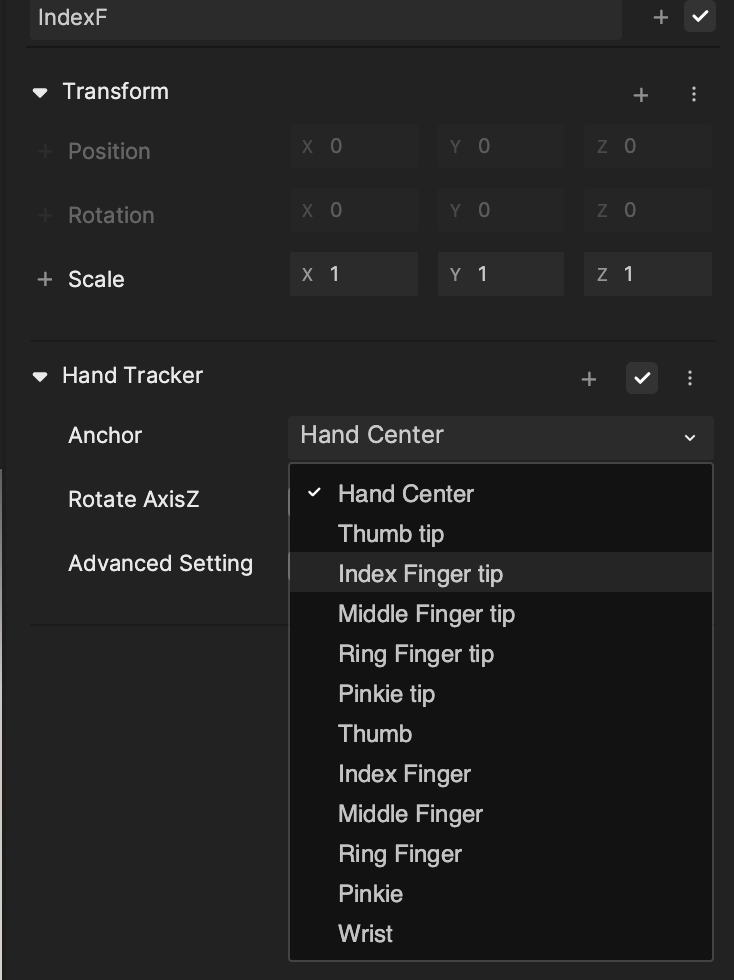
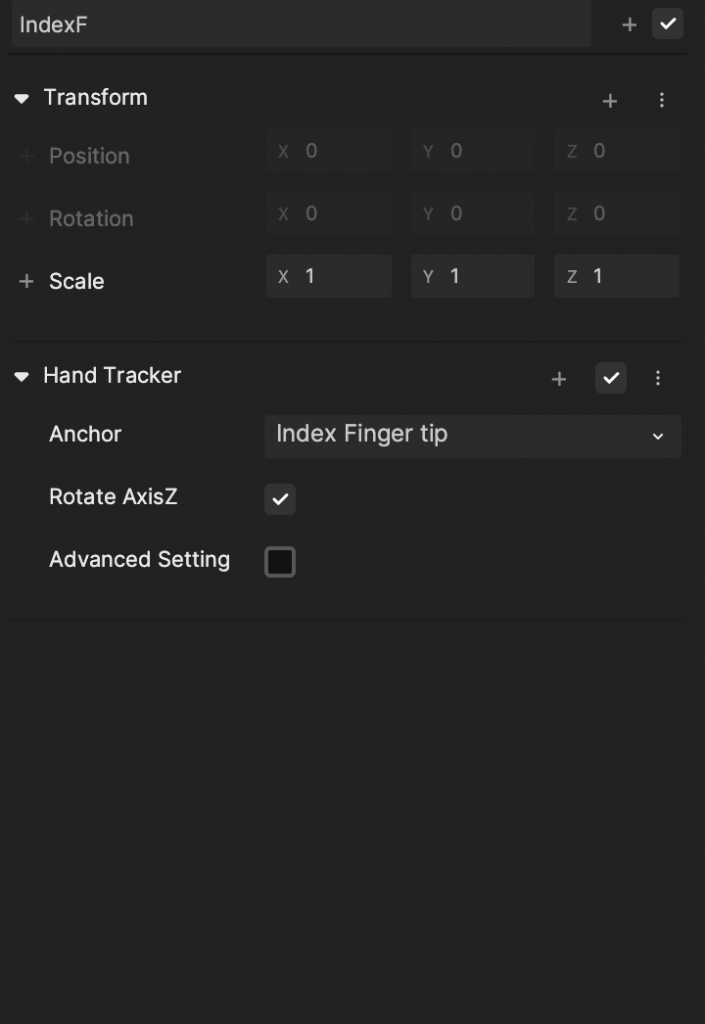
Select the IndexF object, or the object with Hand Tracker, and find the Hand Tracker component in the Inspector panel. Change the Anchor from Hand Center to Index Finger Tip. Then select the Rotate AxisZ checkbox so that the object will have the same Z rotation as the finger.
Adjust Model, Material, and Transform
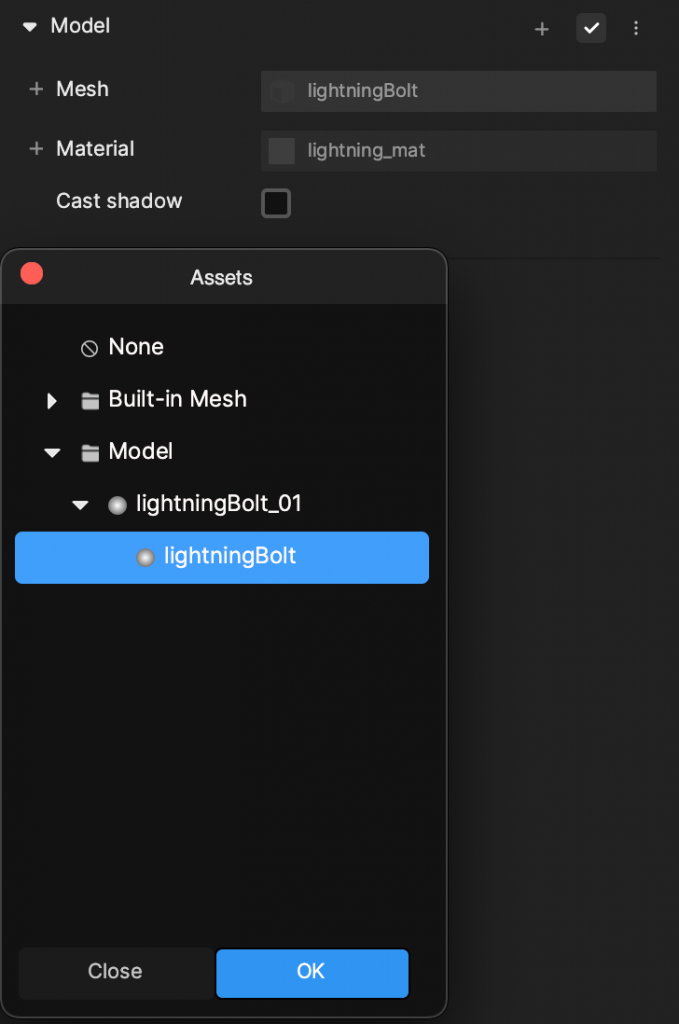
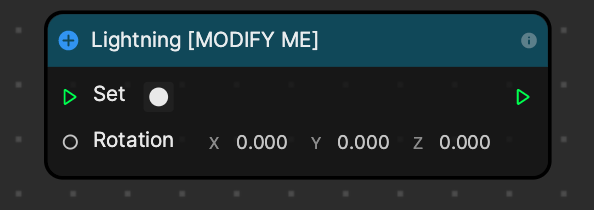
Select the Lightning object in the Hierarchy panel.
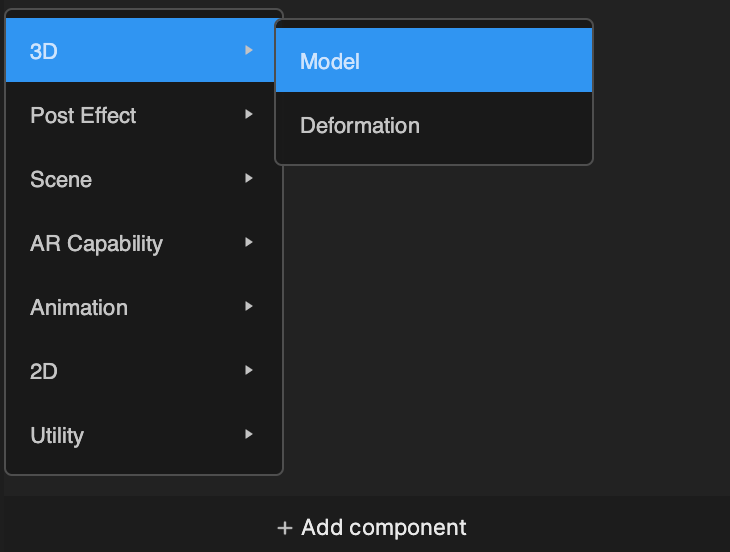
Add a Model component by clicking + Add component > 3D > Model in the Inspector panel.
In the Model component, change Mesh to lightingBolt, and Material to be lightning_mat.
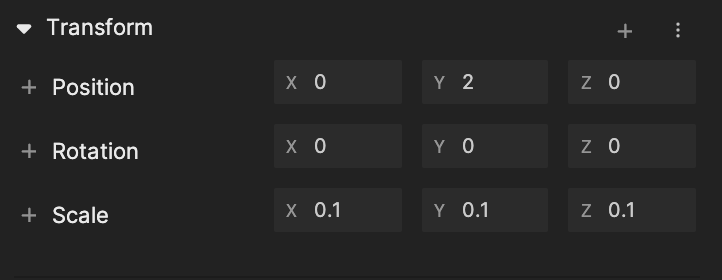
In the Transform component, change the Scale values, X, Y, and Z, to 0.1, and the Y Position to 2. This will create some distance between the fingertip and the lightning object.
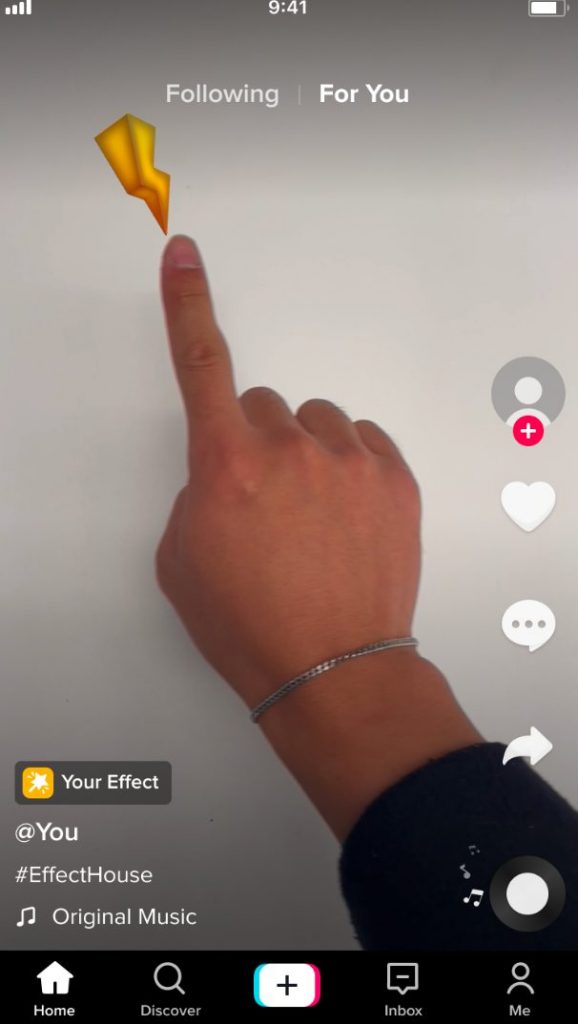
You will see the preview like this:
Control 3D Lightning Rotation With Visual Scripting
Next you need to control the rotation of the light object and keep it rotating all the time. Select the Lightning object to open the Inspector panel.
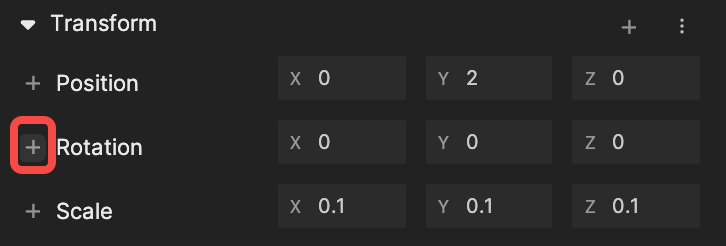
Find the Rotation parameter under Transform and click + to select Set Rotation. You can see the node was created in the Visual Scripting panel.
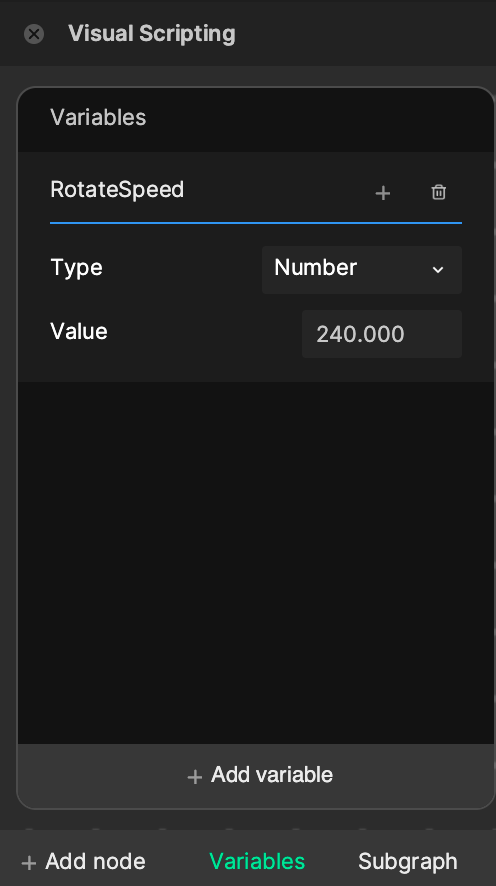
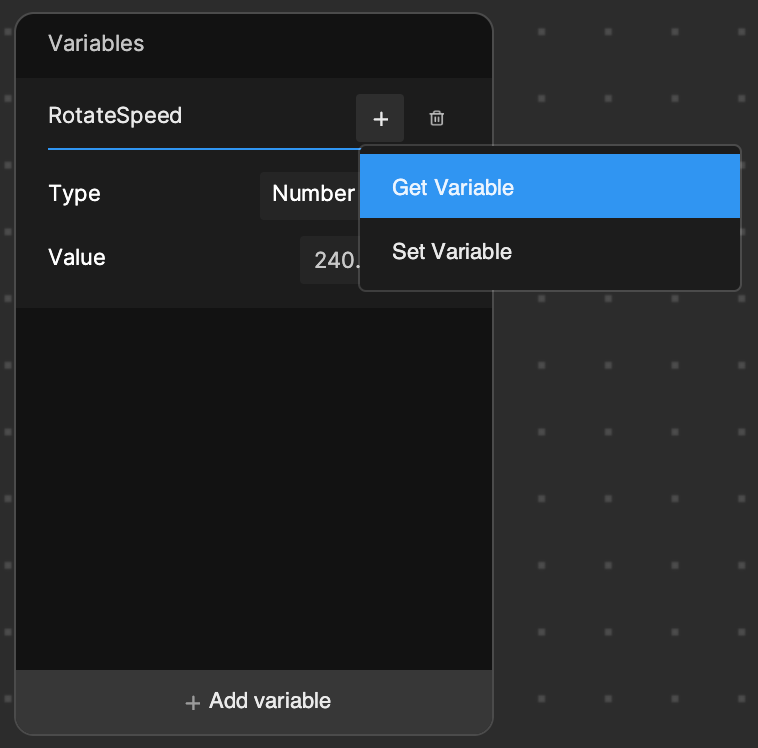
Next you need to control the rotate speed. To do this, you can go to the Visual Scripting panel, create a variable by clicking Variables > Add variable. Then change the variable name to RotateSpeed, Type to Number, and Value to 240 (240 degrees per second).
Next click the Add button [+] next the variable name and select Get Variable. This will create a variable node in the Visual Scripting panel.

Next you need to add the Get time node to control the rotation by clicking Add node > Time > Get time. In the same way, you can add the Mod and Multiply nodes.
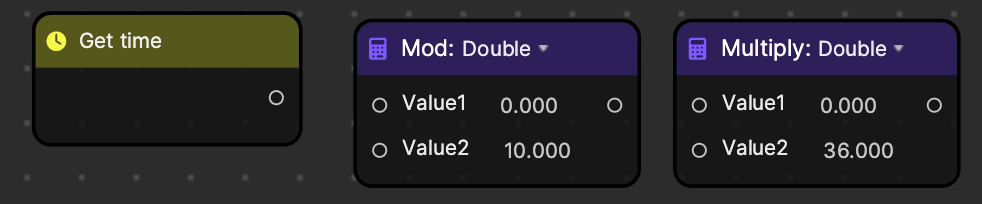
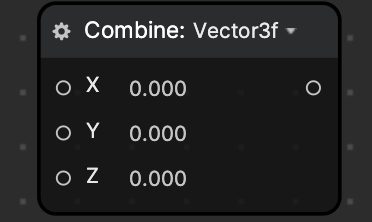
You also need a Combine node to convert these variables to Vector 3f. Add the Combine node and then click the data type on the Combine node and set the output data to Vector3f.
Now, let’s link the nodes together. Link trigger from the Update node to Set of Lightning so it will be updated every frame. Link the following together: Get time, Value1 of Multiply, RotateSpeed, Value2 of Multiply. Then link the value of Multiply to Value1 of Mod, to Rotation of Lightning. Change Value2 of Mod to 360, so that the Y angle will change between 0 and 360 (so it is smooth).

Feel free to change the RotateSpeed variable to control the speed of the rotation.
Control the Controller's Visibility
Next you need to hide and show the controller object using the Hand gesture Event. You can turn off the visibility of the Index Finger Gesture Controller to hide them at the beginning.
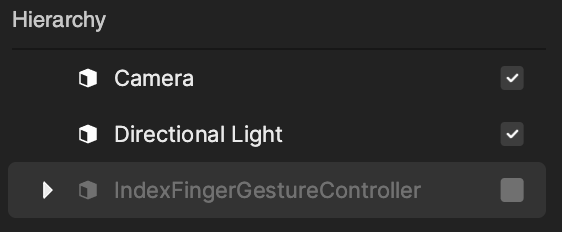
Let’s add the Gesture (Index Finger up) node by right-clicking the panel and selecting it from the Hand category and add the Set Visibility node from the Utility category. Duplicate the Set visibility node and check the Value. You’ll then need to drag the Index Finger Gesture Controller to the Visual Scripting panel and connect them together like below.

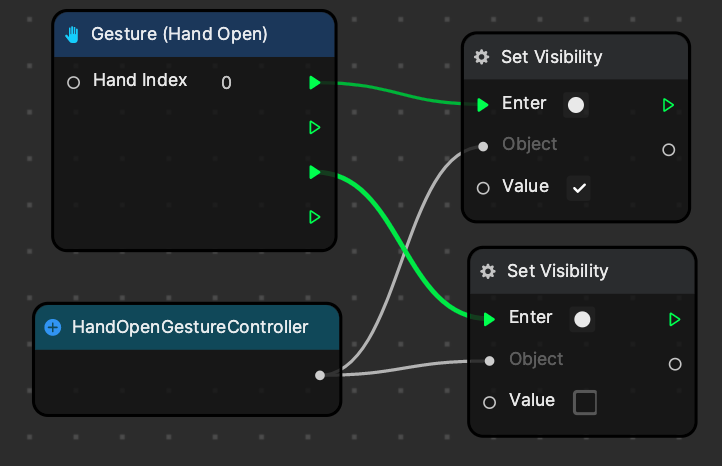
Hand Open Gesture Controller
For this session, we will try to implement the effect of having five accessories assigned to each fingers and they won’t show up until it detects the hand open gesture.
Create Five Finger Trackers
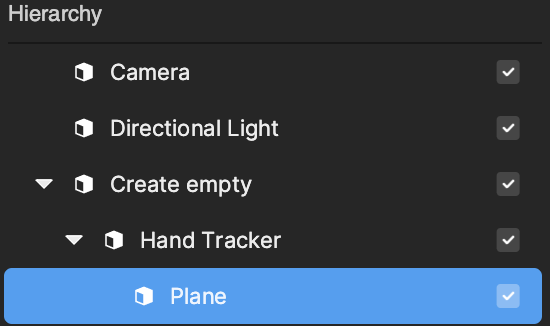
Just like you did in the Creating an Index Finger Hand Tracker section, you need to create another five finger tracker, but instead of adding the Lightning object, you need to add 3D Plane objects under each finger tracker.
You can start by adding a Hand Tracker entity by clicking the Add button [+] > AR Tracking > Hand Tracker in the Hierarchy panel. Then create an Empty object and drag the Hand Tracker under it.
In the same way, you can add a 3D plane by clicking the Add button [+] > 3D > Plane in the Hierarchy panel. Nest it under the Hand Tracker. Then you can change the name of each object to make it more sense (you don’t need to add the “MODIFY ME” suffix).
Go to the Hierarchy panel and select IndexF. Find the Hand Tracker component in the Inspector panel. Change the Anchor from the default Hand Center to Index Finger Tip. Select the Rotate AxisZ checkbox.
You will now see a default 3D plane following your index finger in the Preview panel.
Adjust Material and Transform
Now select the Plane object in the Hierarchy panel. Change the material from default to watermelon_matin the Inspector panel under the Model component.

In the Transform component, change the Scale, the X, Y, and Z values, to 0.258, and the Y value of Position to 2. This will create some distance between fingertip and the plane.

Add Other Hand Trackers
You can simply duplicate the index finger hand tracker 4 times, rename them and change the Anchor of each Hand Tracker component to Thumb Tip/Middle Finger Tip/Ring Finger Tip/Pinkie Tip.
Then change the material to cactus_mat/doughnut_mat/ribbon_mat/heart_mat. After these steps you will see the following in the Preview panel:

Control Controller's Visibility
Next you need to hide and show the controller object using the Hand Gesture Event. You can turn off the visibility of the Index Finger Gesture Controller to hide them at the beginning.
Let’s add the Gesture (Hand Open) node by right-clicking the panel and selecting it from the Hand category and add the Set Visibility node from the Utility category. Duplicate the Set Visibility node and select the Value checkbox. You’ll then need to drag Hand Open Gesture Controller to the Visual Scripting panel and connect them together like below.
Refresh the preview and now we can see your very own effect in the Scene and Preview!
The logic will be: when you show index finger up gesture, it will the 3D lighting object. When you show the hand open gesture, it will show the other 2D objects and hide the lighting object.