Eyebrow Editor
The Eyebrow Editor template helps you create unique and creative eyebrow effects using the Eyebrow Eraser generative effect and 3D Face features. The template includes eyebrow styles that you can try and learn from, as well as a reference texture to help you make your own custom eyebrow designs.
How to Use This Template
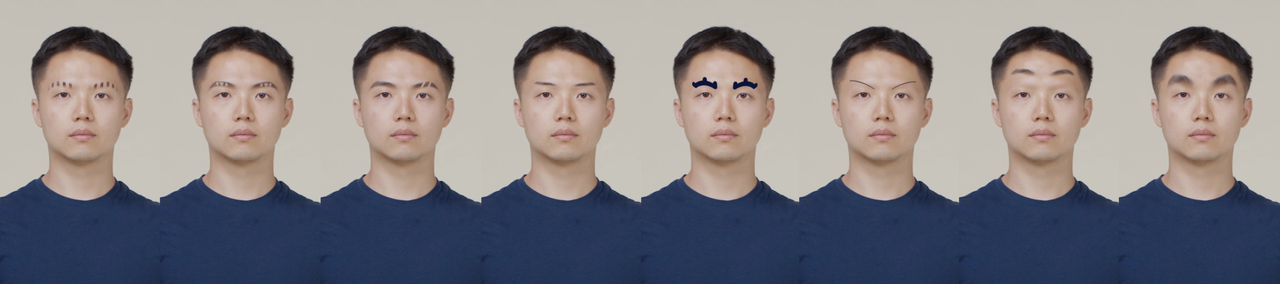
The Eyebrow Editor template comes with 8 different eyebrow styles. These examples are provided as materials, so you can try them and see how they work. When you open the template in the Hierarchy panel, you will see there are two render groups available.
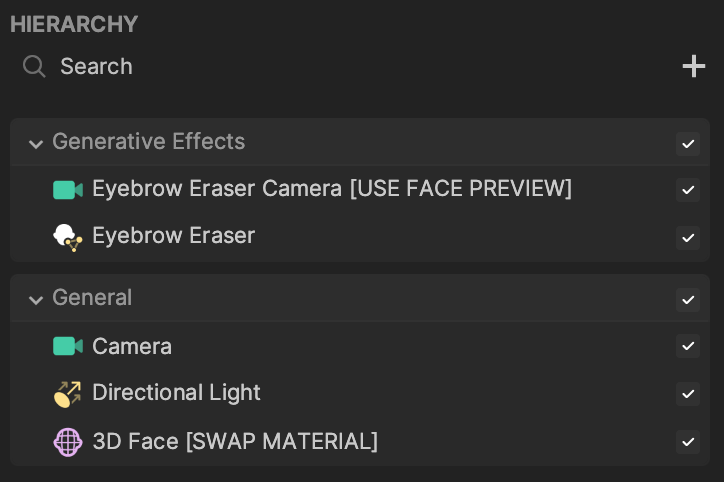
The Generative Effects render group, which includes the Eyebrow Eraser, is used to remove the original eyebrows from the user’s face. The General render group, on the other hand, is used to draw new custom eyebrows on top of the removed eyebrows.
Learn more about render groups and rendering order.
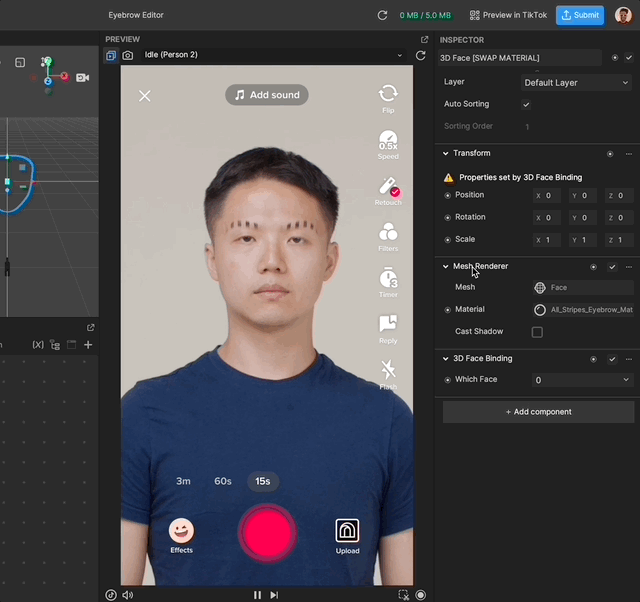
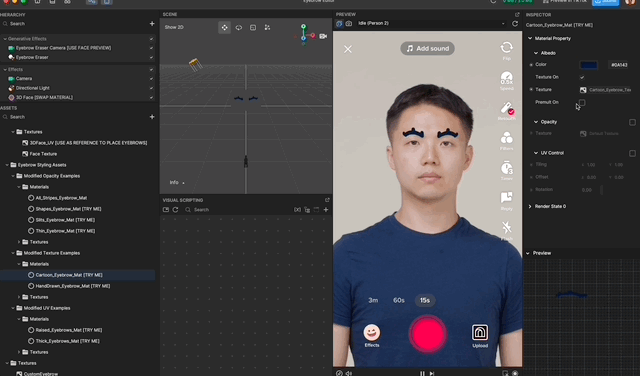
In this template, the render groups have already been set up, so you can just focus on the creative side. To customize the 3D Face, you will need to select the 3D Face [SWAP MATERIAL] object in the Hierarchy panel. This will allow you to explore the different examples and see how they look.
To check other examples, simply select the 3D Face [SWAP MATERIAL] object.
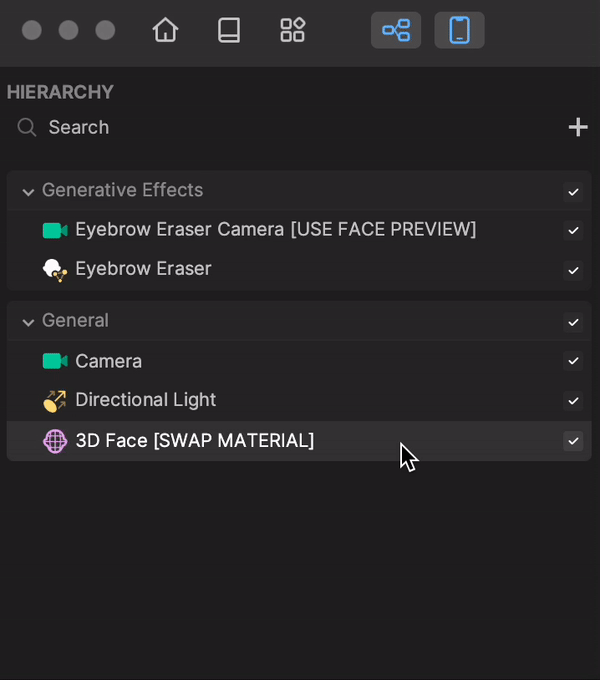
Then, in the Inspector panel, you should see a Mesh Renderer component. This component allows for rendering the mesh with the provided material.

To try the other examples in the Eyebrow Editor template, you need to swap the material that is currently applied to the 3D Face with the other provided materials.
To do this, click on the Material input in the Inspector panel. This will open a new window where you can select the material you want to use. From there, you can choose any of the provided materials and see how they look on the face.
By swapping the materials, you can quickly and easily see the different styles of eyebrows that are available, and get a feel for how they look on the face. This allows you to explore the different options and find the one that best suits your needs.

How to Create a Custom Eyebrow
The Eyebrow Editor template comes with a reference image that makes the animation creation process for the eyebrows much easier. To access the reference image, follow these steps:
In the Assets panel, open the 3D Face Assets folder.
Then in the Textures folder, you will see an image called 3DFace_UV [USE AS REFERENCE TO PLACE EYEBROWS] (or you can download the image below).
You can use this image in your image manipulation tool, such as Adobe Photoshop or GIMP, as a reference to know where the facial features are placed in the image as well as where to place the eyebrows on the face.
After creating your custom eyebrows in your preferred tool, export the image. Then, in Effect House, go to the Assets panel and click on the Add button [+] > Import > From Computer.
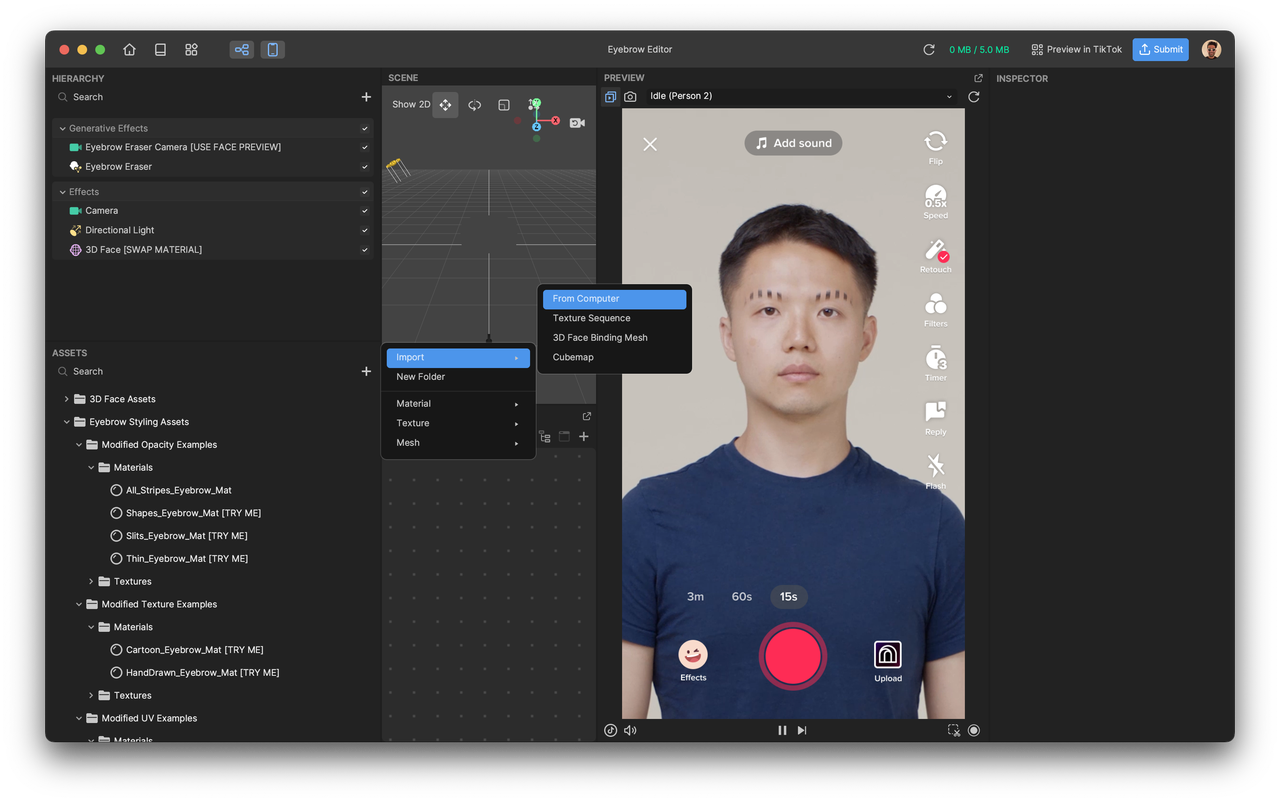
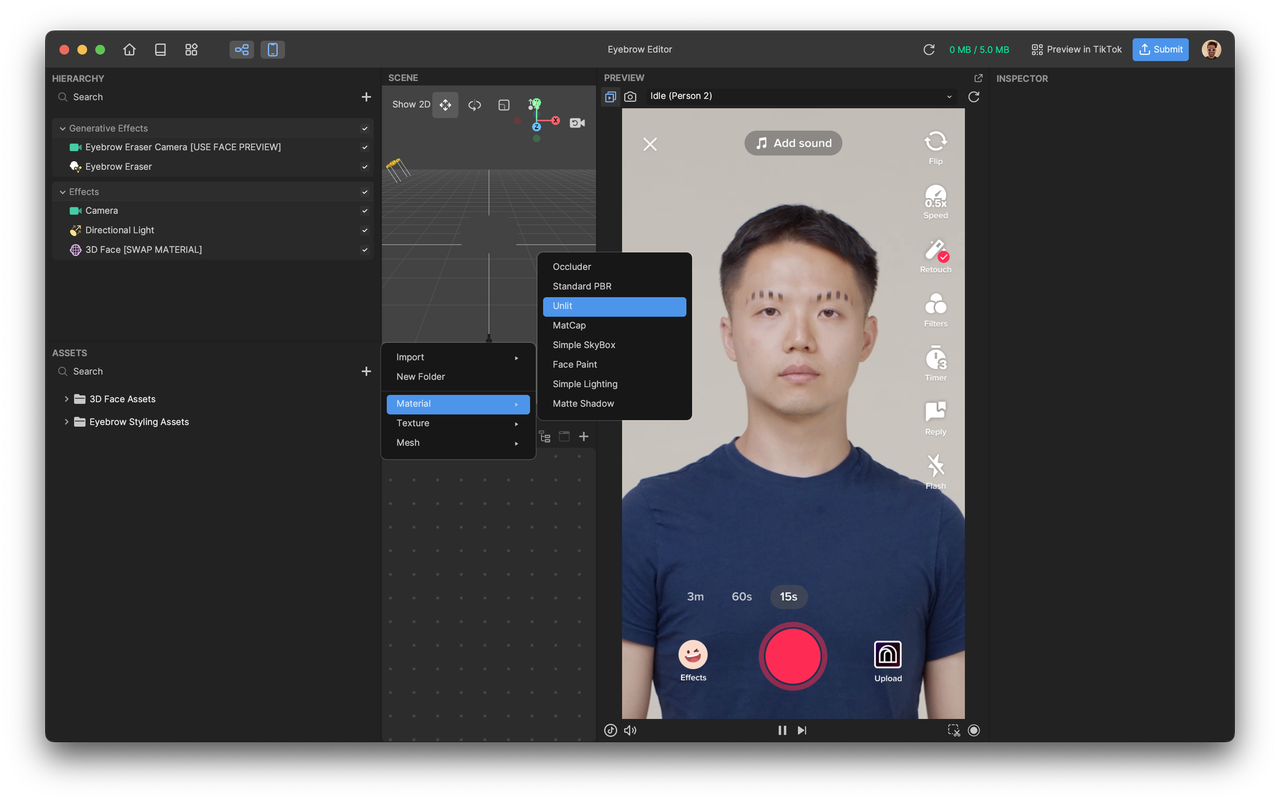
A new window will open, allowing you to select the image of your choice. Select the exported image and click Open. You will now have your texture imported from Effect House. Create unlit material by clicking on the Add button [+] > Material > Unlit.
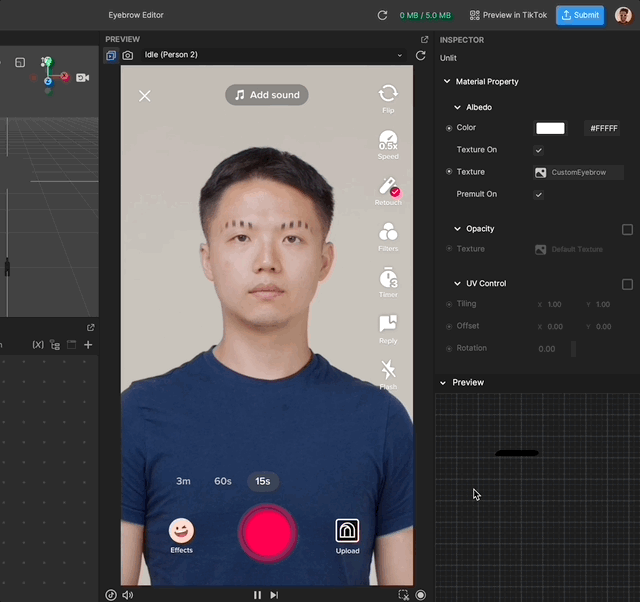
On the newly created material, select the Texture On parameter and set your imported texture as a texture on the material.
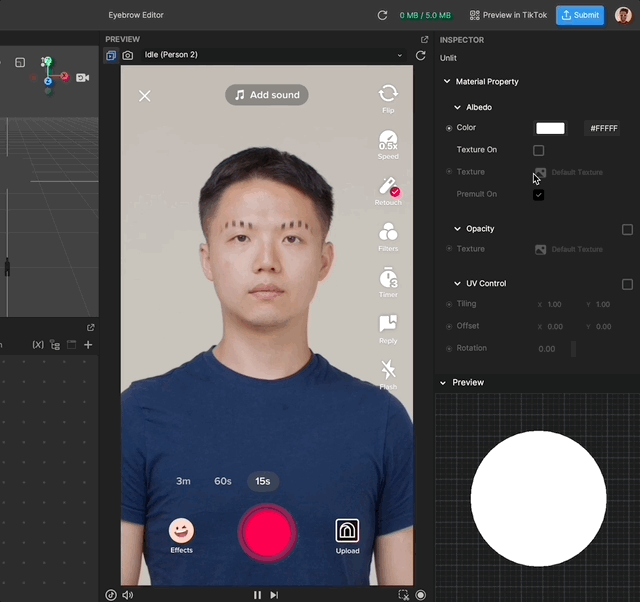
Now we need to make sure our material blend mode is set to transparent. In order to do that, expand the Render State parameters on the material and then set the Blend Mode to Transparent.
Now we just need to apply our newly created material to 3D Face. To do that, select the 3D Face in the Hierarchy panel. Then in the Inspector panel, you should see a Mesh Renderer component. This component allows for rendering the mesh with the provided material.
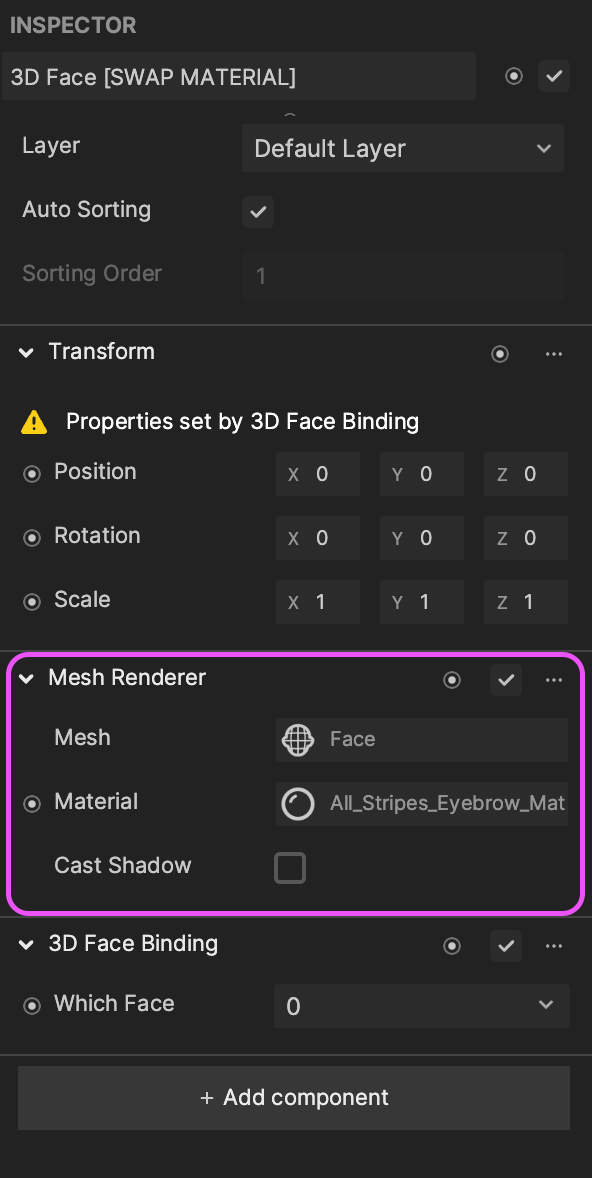
Click the Material parameter and in the newly opened window, select the custom material that we just created.
Now you have made your own custom eyebrow design!
Exploring Eyebrow Styles
The eyebrow styles in the Eyebrow Editor template are divided into three groups, which can be seen in the Assets panel. This grouping makes it easier to find the specific style of eyebrow you want to use and helps you to quickly try different styles.
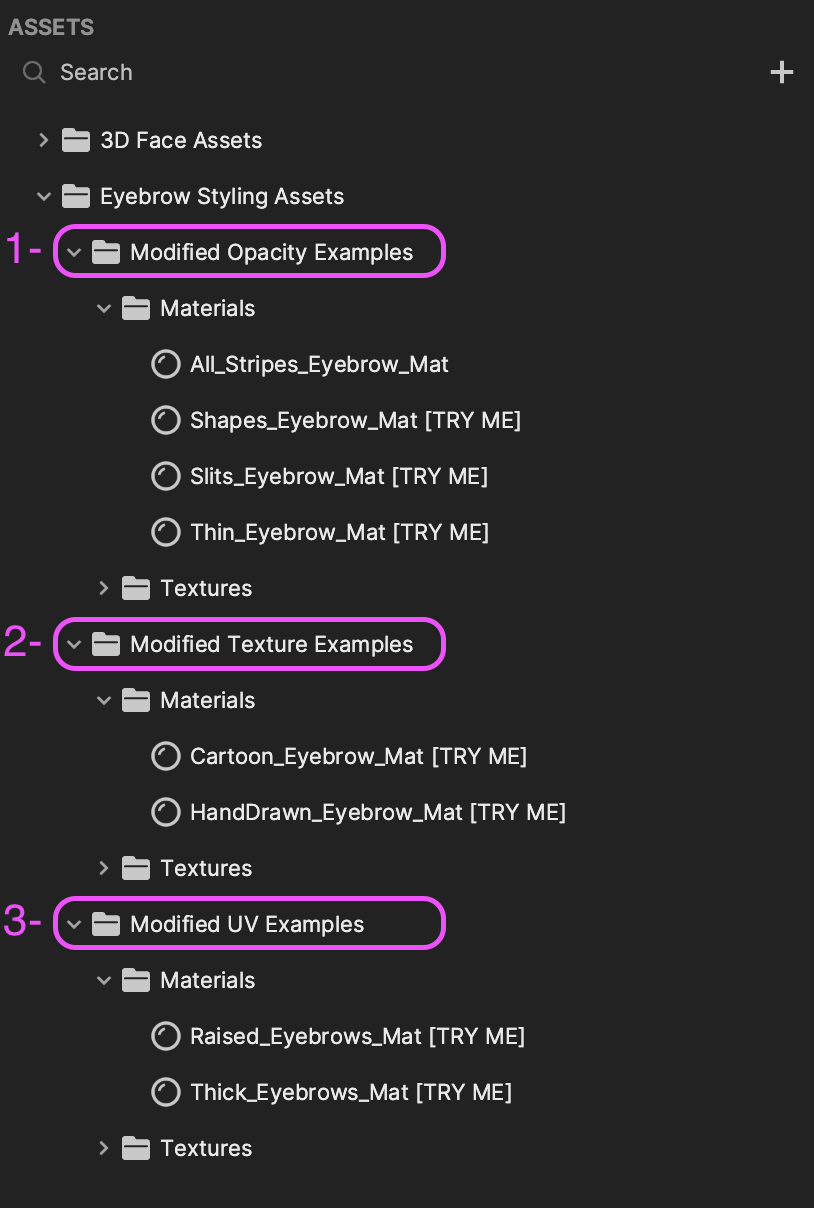
Modified Opacity Examples
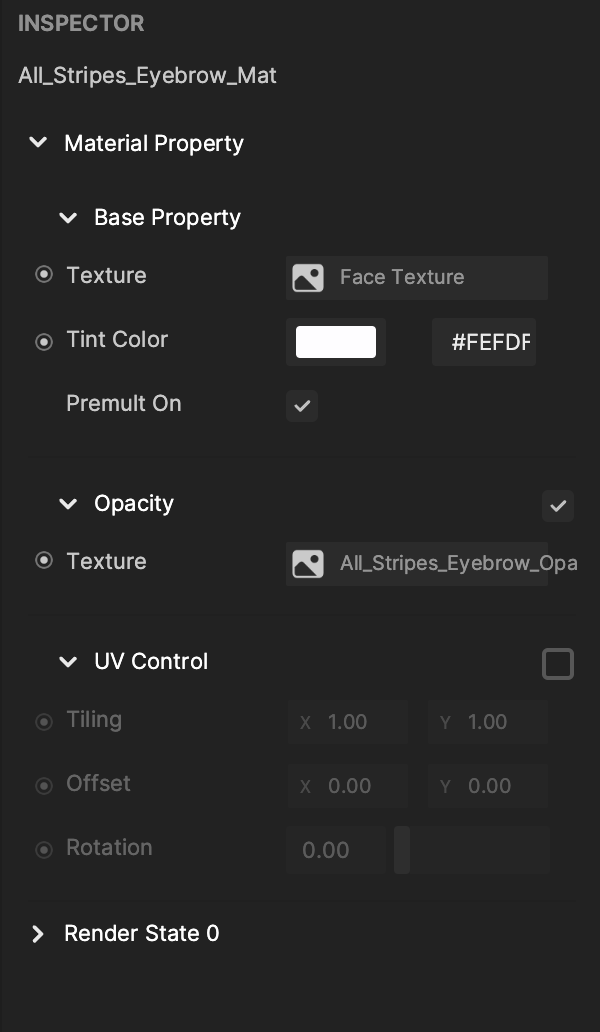
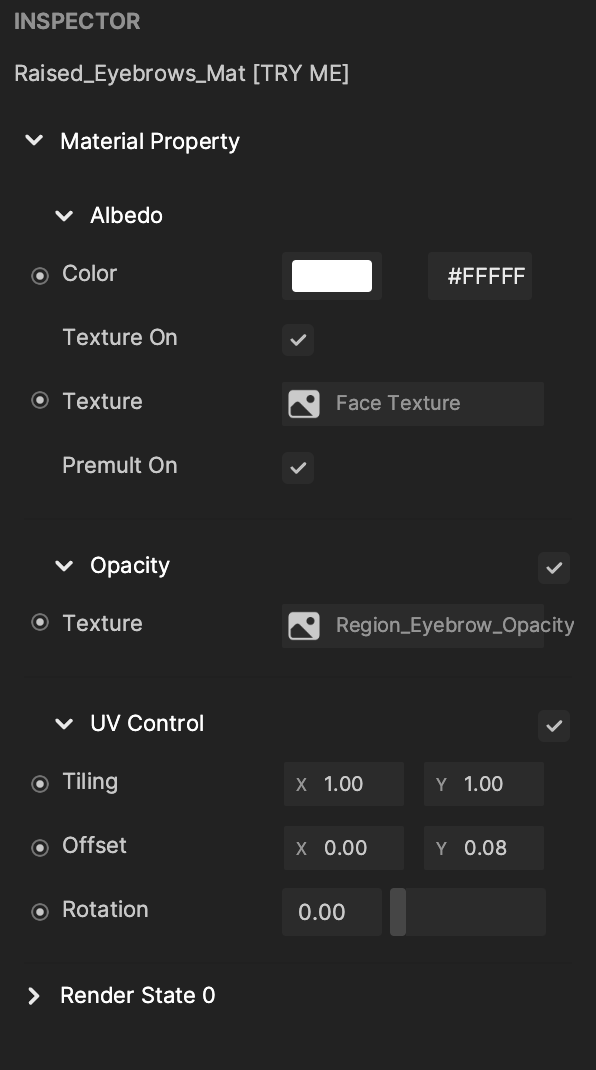
The Modified Opacity Examples in the Eyebrow Editor template are mostly designed using Face Texture as the main texture and then applying an opacity texture to mask out the parts that should or should not be shown on the face texture.
When you select one of the materials in the Assets panel, you can examine how the textures are assigned to the material. This will give you a better understanding of how the material is created and how it affects the appearance of the 3D Face.
The use of Face Texture and the opacity texture allows the example materials to seamlessly blend with the 3D Face, creating a natural and believable look. By understanding how these textures are used, you can create your own custom materials and achieve the same results.
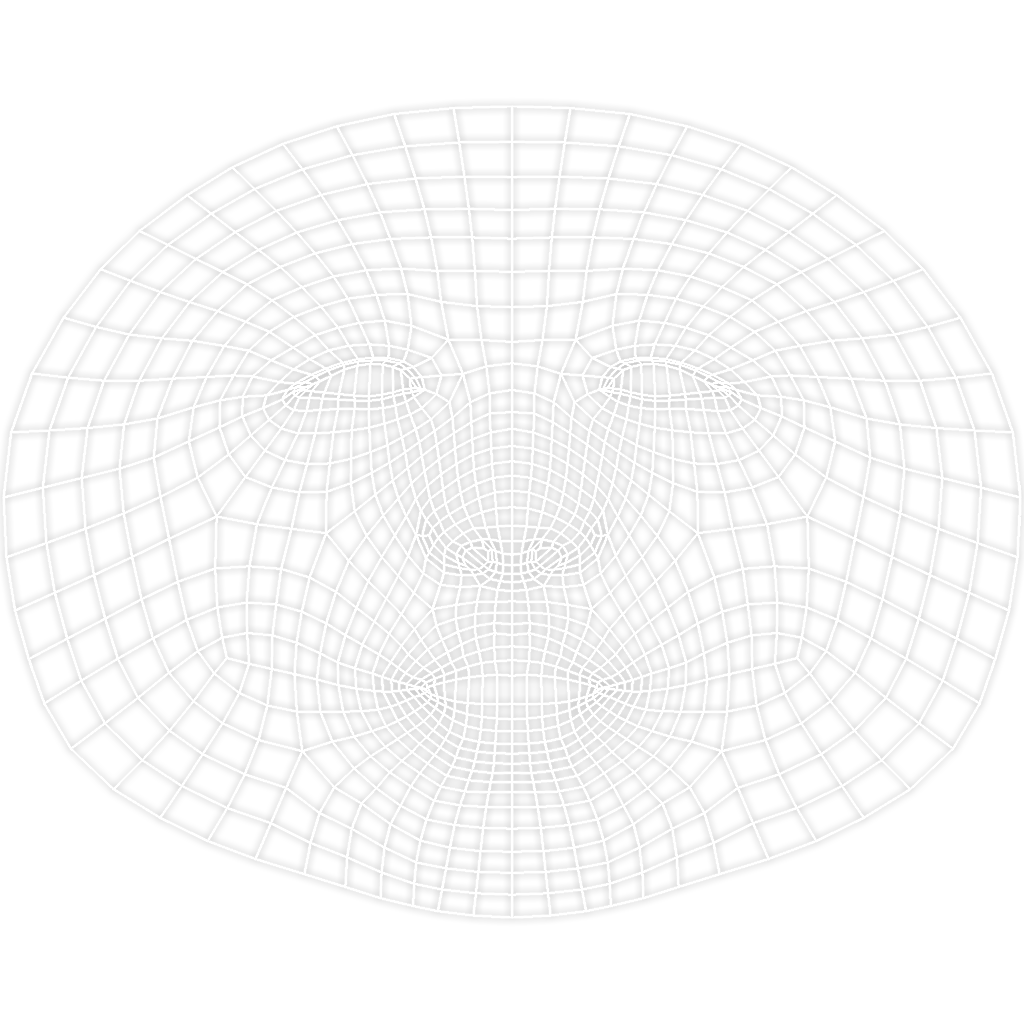
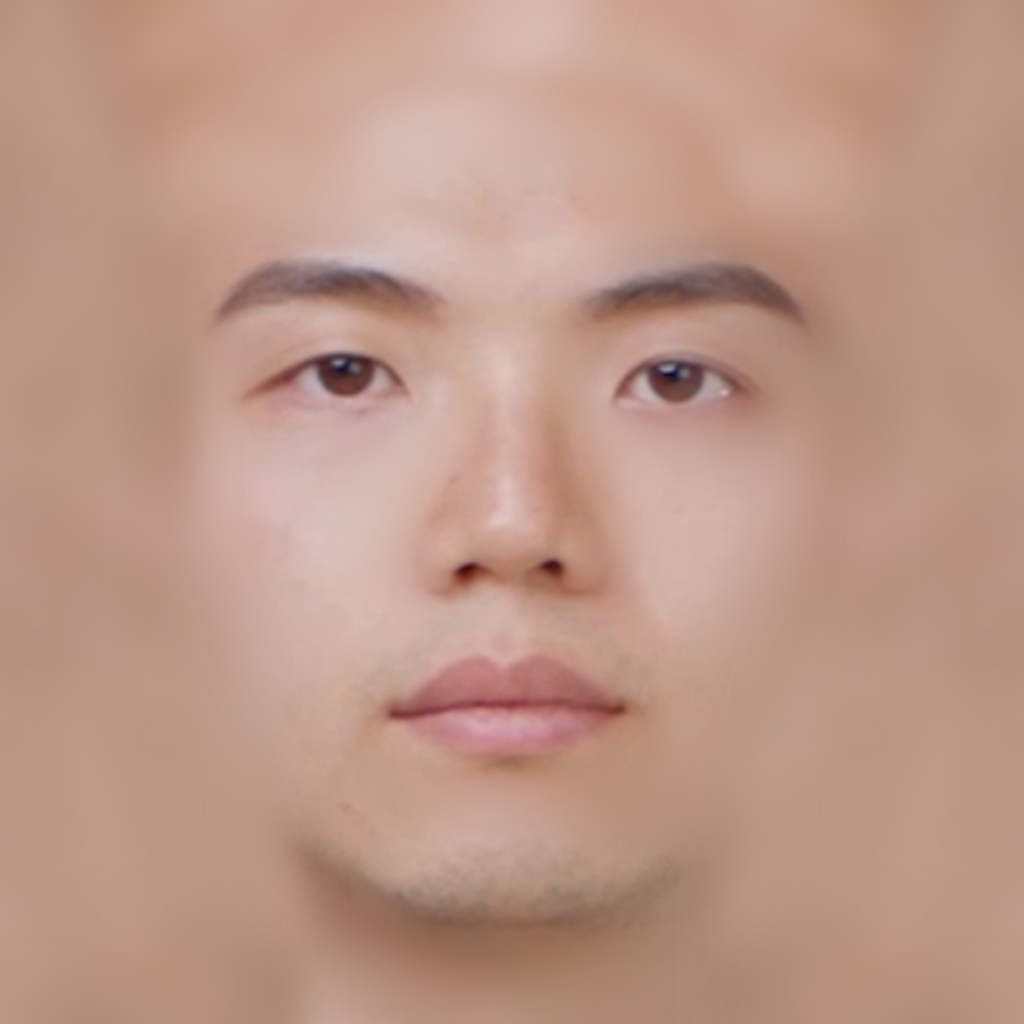
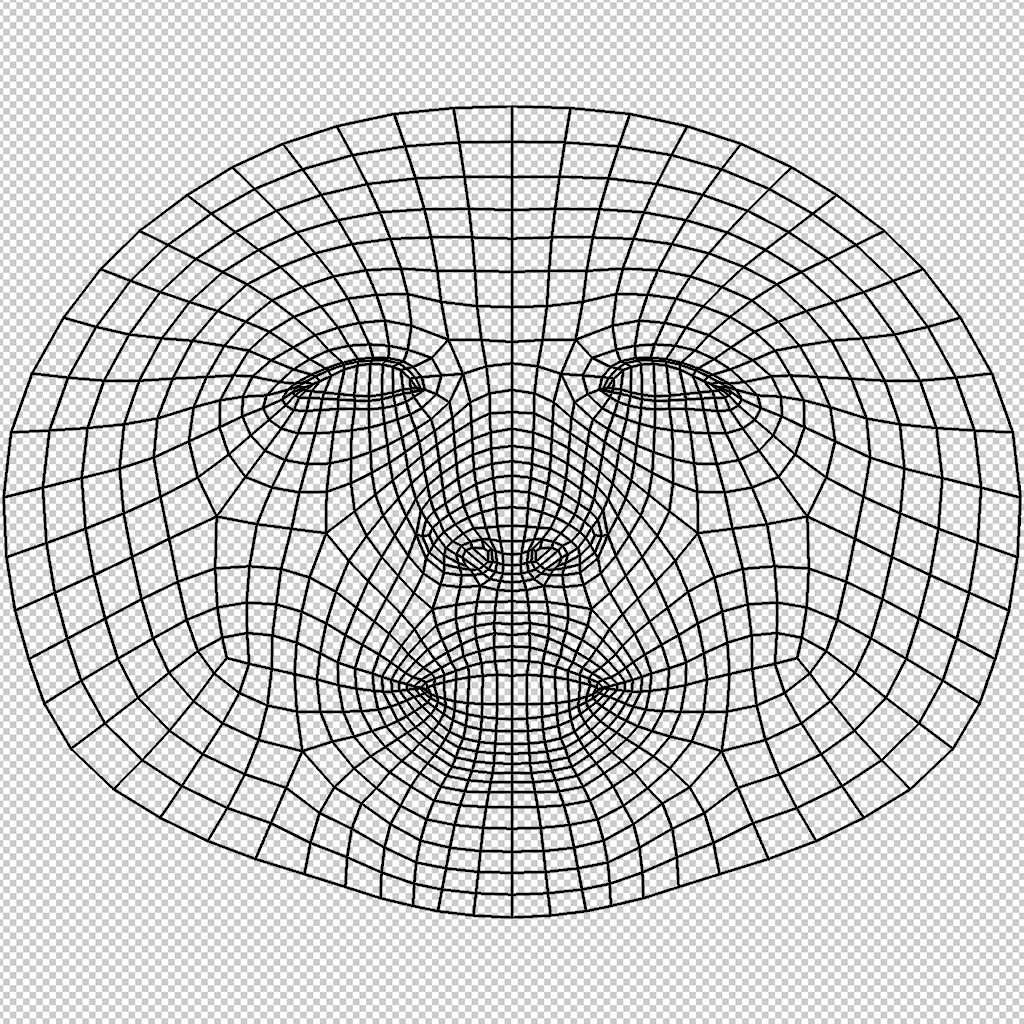
You can imagine the Face Texture as a texture that draws your face in real-time. It essentially captures the live video feed of your face and applies it to the 3D Face model in the Eyebrow Editor template. Face Texture looks similar to a normal image, with the difference being that it is generated in real-time based on the live video feed of your face.
This texture looks something like the one below.
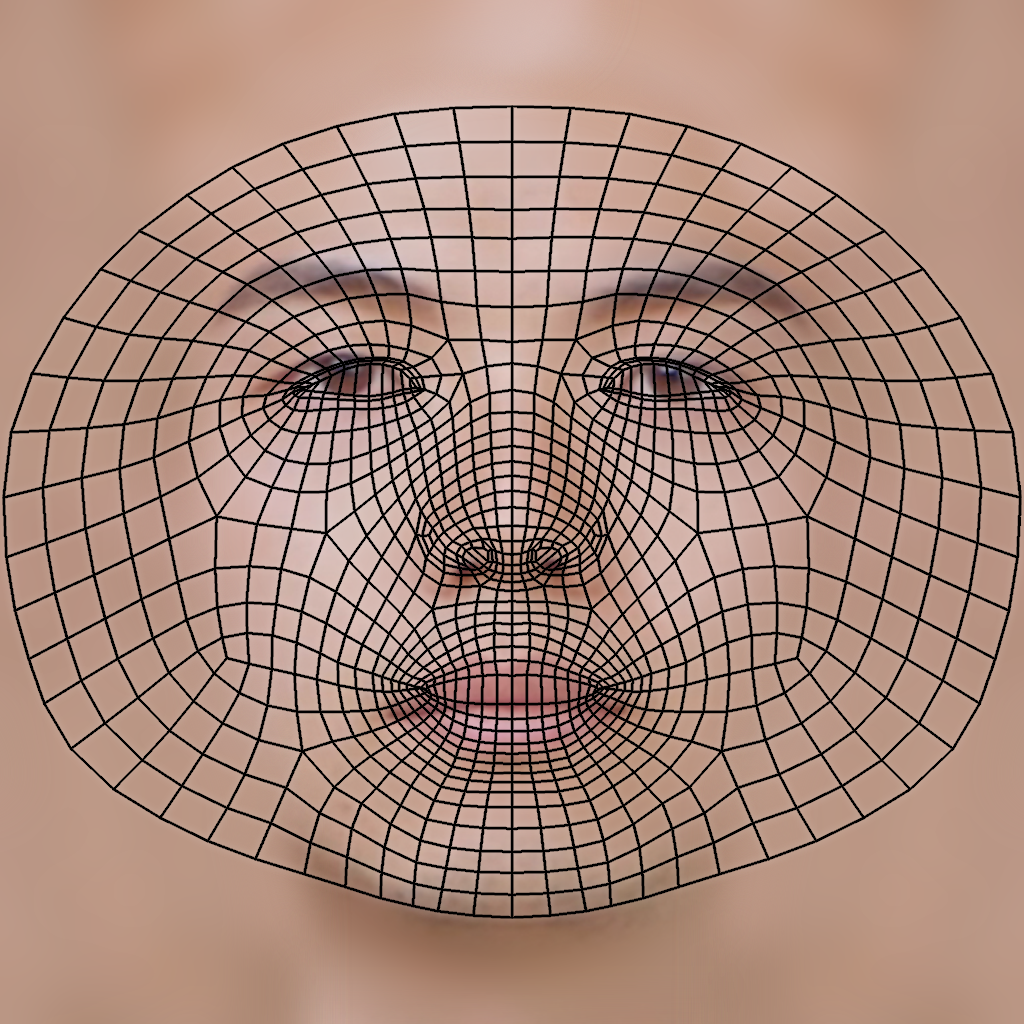
Based on the reference below, we evaluate where the eyebrows are on the 3D Face.
Now that we know the placement of the eyebrow, we can use that information to create an opacity mask that defines which parts of the Face Texture should be visible and which parts should be hidden. This is done by creating a black-and-white image, where white represents the parts that should be visible and black represents the parts that should be hidden.
The opacity mask can be created in any image manipulation tool of your choice, such as Adobe Photoshop or GIMP. With these tools, you can draw the opacity mask based on the information you have about the placement of the eyebrow.
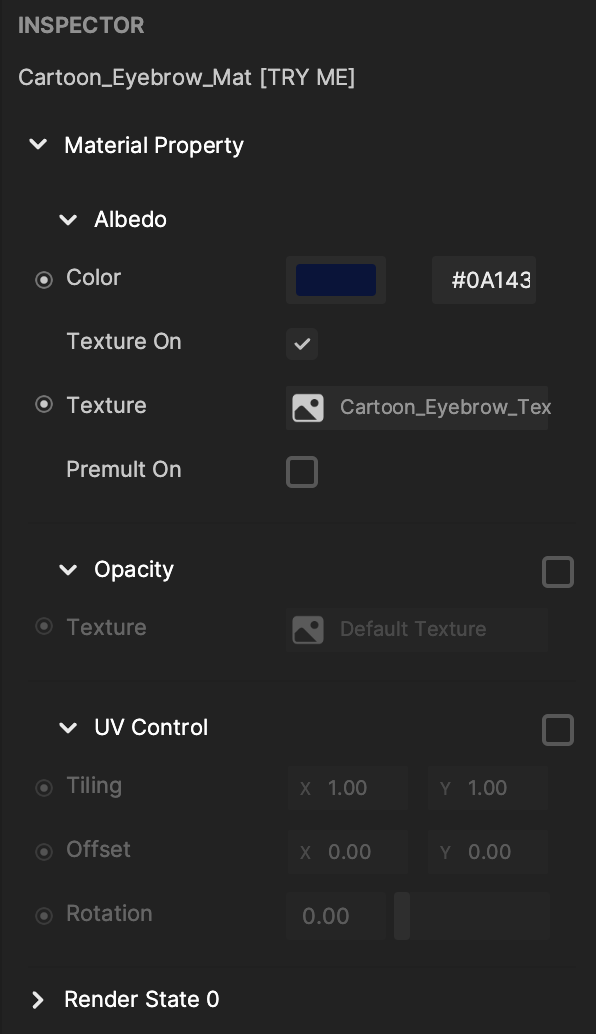
For example, below is the opacity texture that comes with the Shapes_Eyebrow_Mat [TRY ME] example.

By combining the Face Texture and the opacity mask, we can create a final material that defines the appearance of the custom eyebrows on the 3D Face model.
When we place Face Texture as the main texture and use the opacity mask, it results in a material that shows the custom eyebrows on the 3D Face model, based on the shape defined by the mask.
By using this material on the 3D Face, you can see the final result of the custom eyebrows on the 3D Face model.
In this way, we can use the Face Texture and the opacity mask to create custom eyebrows that look natural and believable on the 3D Face model.
Now that you understand how this technique works, you can use it to bring your amazing ideas to life in Effect House!
Modified Texture Examples
The Modified Texture Examples are some of the simplest examples to create custom eyebrows in Effect House. They only use the main texture property to draw the custom eyebrows on the user’s face.
These examples are a good starting point if you are new to creating custom eyebrows in Effect House, as they provide a simple and straightforward way to create custom eyebrows that look natural and believable on the user’s face.
To see how they work, you can select any of the materials in the Modified Texture Examples folder and examine the properties of the material in the Inspector panel. The main texture property is the only one being used in these examples, so you can see how the texture is utilized to create the custom eyebrows.
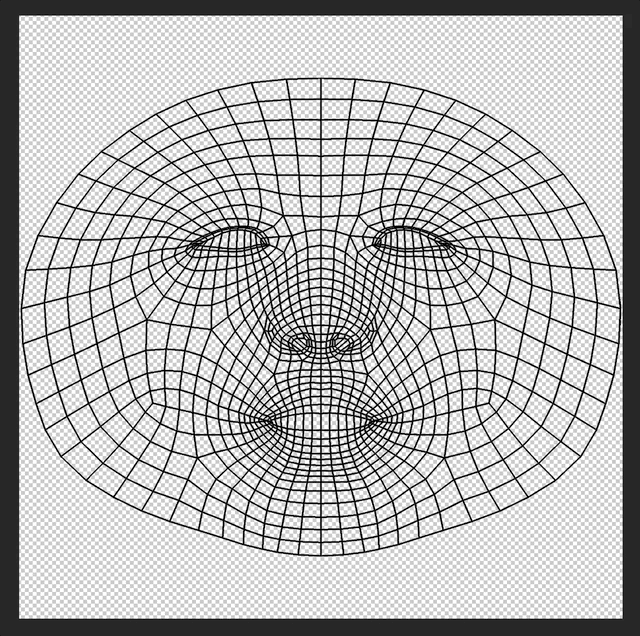
To modify one of the Modified Texture Examples in Effect House, you can start by referring to the Face Texture Reference Image. This image provides a clear and accurate representation of the face, which you can use as a reference when creating your custom eyebrows.
You can use the reference in any image manipulation tool of your choice, such as Adobe Photoshop, GIMP, or other similar tools.
Based on the Face Texture Reference Image, you can determine the placement and position of the eyebrows on the face. You can then design your own custom eyebrows using any image manipulation tool of your choice.
Once you have created the custom eyebrows, you can place them in the correct position on the reference, making sure that they align with the placement indicated by the reference image. After placing the custom eyebrows, you can disable the reference layer and export the final image as a texture to be used in Effect House.
By importing this custom texture into Effect House, you can assign it as the main texture for the 3D Face and see how the custom eyebrows look on the user’s face in real-time. This process allows you to create custom eyebrows that are perfectly aligned and positioned on the face, giving you a high level of control and flexibility in your design.
Please make sure the material’s Blend Mode is set to Transparent. Please refer to the Materials guide to see how you can make your material render transparent.
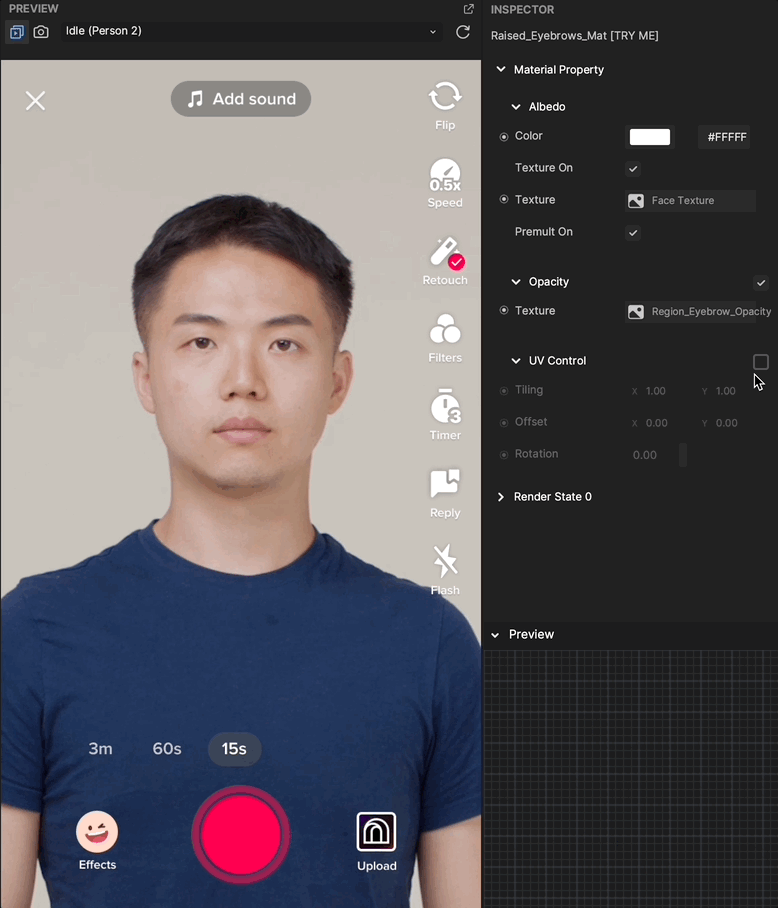
Modified UV Examples
The Modified UV Examples work similarly to the Modified Opacity Examples, but they use a combination of a main texture, opacity texture, as well as the UV Control parameters on the material to control the size and placement of the eyebrows.
By modifying the UVControl parameters, you can change the position and size of both the base texture and opacity texture on the mesh.
If you select any of the Modified UV Examples' materials, you can see how the materials work in the Inspector panel.
In these examples, we use face texture again.
Then based on the reference that we have, we evaluate where the eyebrow is.
Now that we know the placement of the eyebrow, we will draw a mask to only cover the eyebrow part.

Then when we place Face Texture as the main texture and use the mask in the opacity input, now we can go ahead and use the UV Control parameters to move and scale our eyebrows like below.
Now that you understand how the UV Control parameters work, feel free to experiment and create your own unique eyebrows.
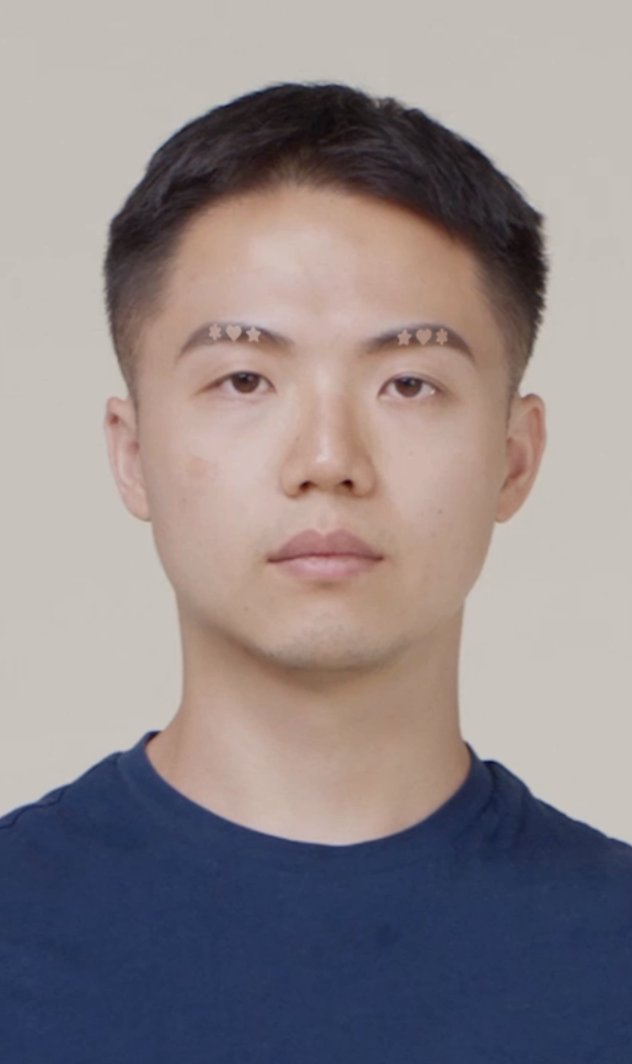
Inspirational Ideas
You can take advantage of all the other Effect House features + Generative Effects to create the inspirational look below: