High Horse
The High Horse effect combines a Head Tracker with the 3D Face object to place the user’s face in the 3D scene at a fixed position, while still allowing rotation. The face is placed in a scene with 3D elements, including the body, the horse, and the repeating background. There is also a looping animation sequence in the foreground. This guide demonstrates how to construct the effect from start to finish!

This guide covers how the assets were constructed before importing into Effect House, and requires some prior knowledge of 3D asset construction.
How to Use This Template
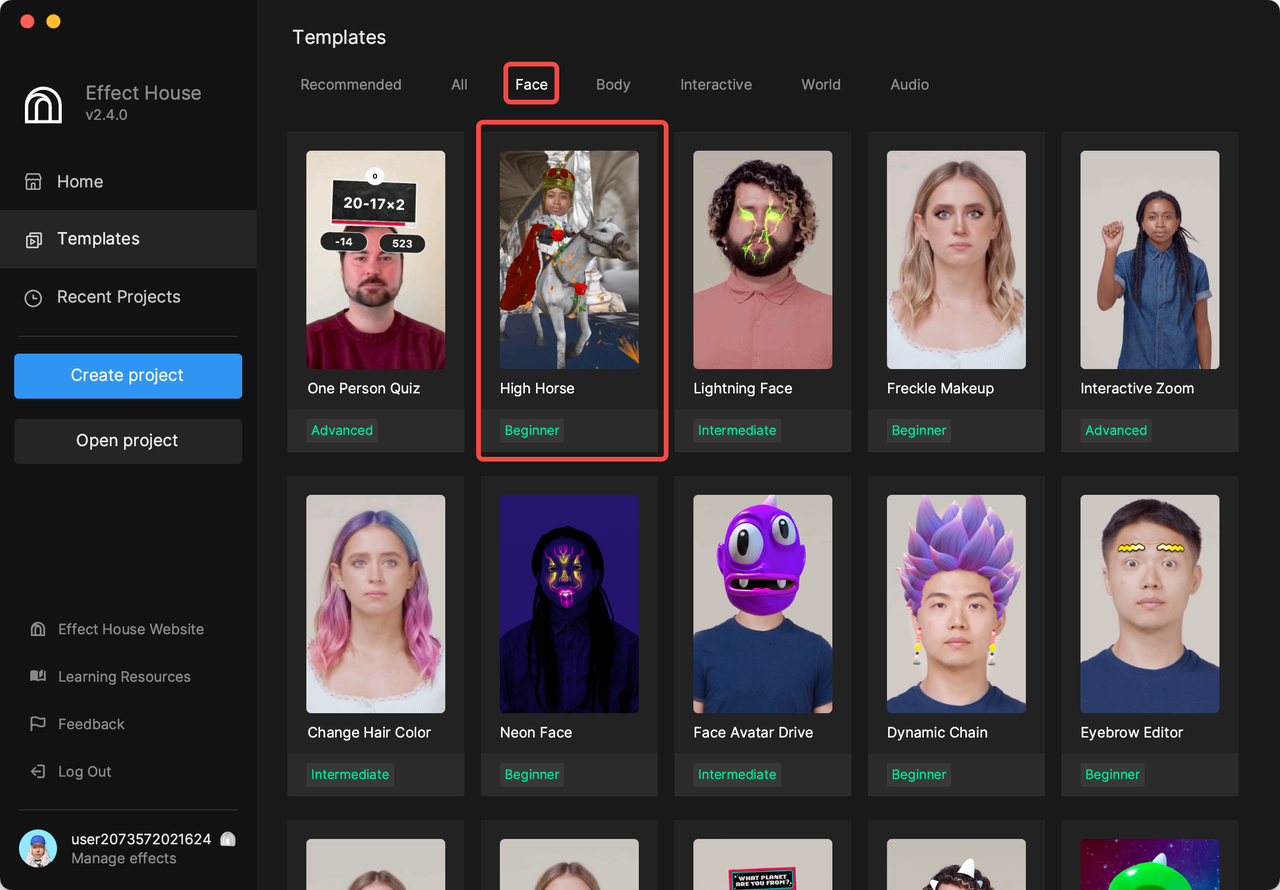
Open Effect House, go to Templates, and search for the High Horse template under the Face tab.
The High Horse template is a pre-assembled effect that contains 3D and 2D animated assets, and face tracking capability. These are all set up in the Hierarchy panel when the template is opened.
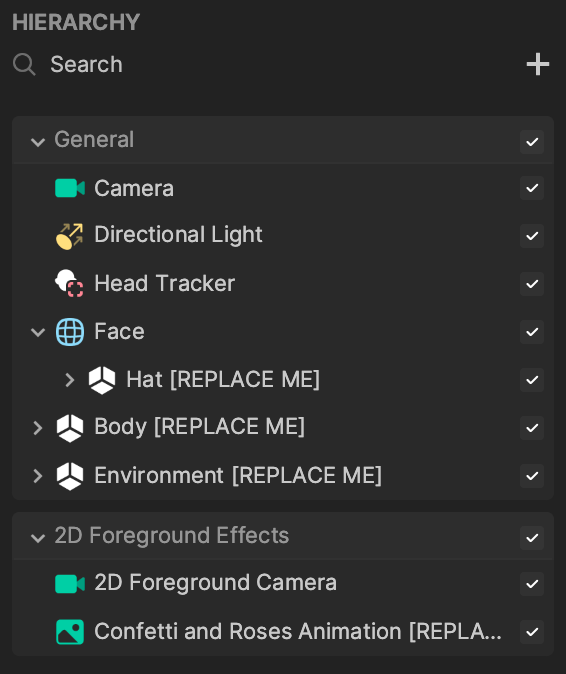
The project is organized into two groups. The General group handles the 3D assets, including the 3D Face and Head Tracker. The 2D Foreground Effects group handles the 2D animation.
The remainder of this guide covers how to recreate this effect from scratch, providing explanations on what each feature accomplishes within the effect.
How to Prepare the Assets
The Hat and Body
The simplest way to ensure the 3D assets fit the 3D Face is to download the 3D Face object and use it as a starting point.
Download the base Face Mask model and learn more about how it works.
The next step is to build and scale the assets around this face mesh to ensure a clean fit when the assets are imported into Effect House. After positioning and scaling, you can export each asset as an FBX.
You should export the crown and body separately so that the crown is not attached to the same skeleton as the body. If they are exported together, the position of the crown will be overwritten by the animation and will not be able to follow the user’s head.
The World
To create a seamlessly looping animated environment, the 3D scenery is constructed as a large wheel. When animated, the spinning wheel creates the illusion of an infinite hallway.
You can use the other 3D assets as a point of reference to accurately scale the hallway asset.
Import the FBX Files
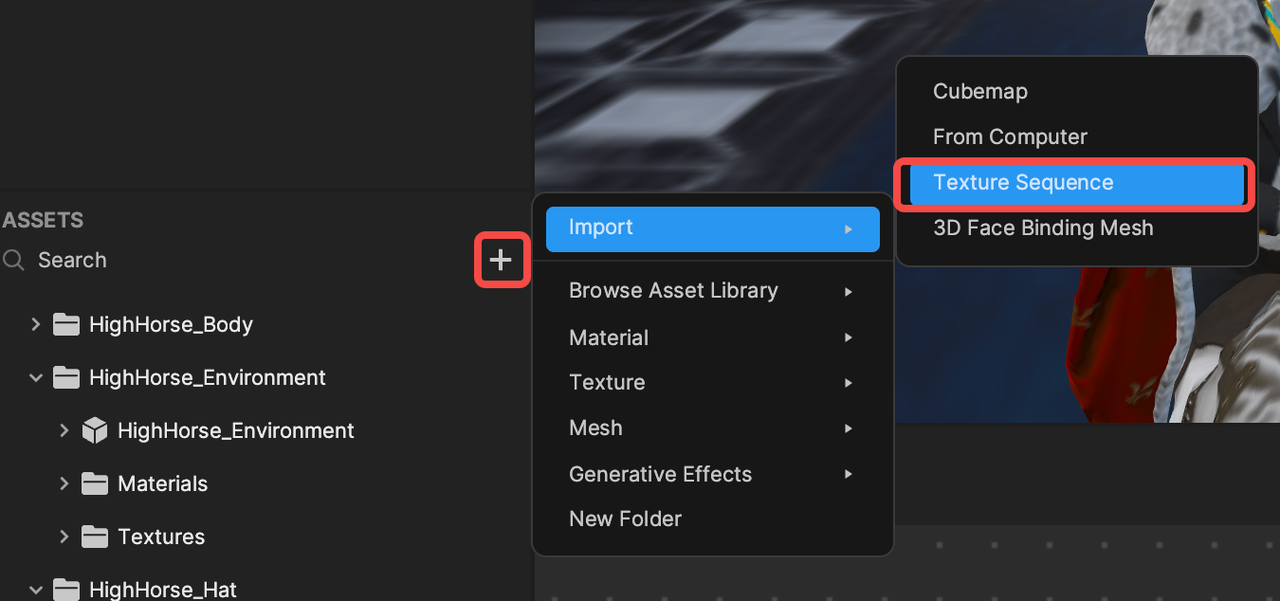
After the assets have been prepared, you can import them. Navigate to the Assets panel and click the Add [+] button, go to Import, From Computer, and then select an FBX. Repeat this for each of the three FBXs of the effect.
At the end of this process, you should have three different folders in the Assets panel, one for each asset.

Create and Apply Materials
The next step is to import the texture assets for the models. Following the same import process, import each of the texture assets provided below. You will need to unzip the folders first, and import the contents.
↓ high_horse_rider_texture.zip
↓ high_horse_environment_textures.zip
You can hold Shift to multi-select texture files, rather than importing them one at a time.
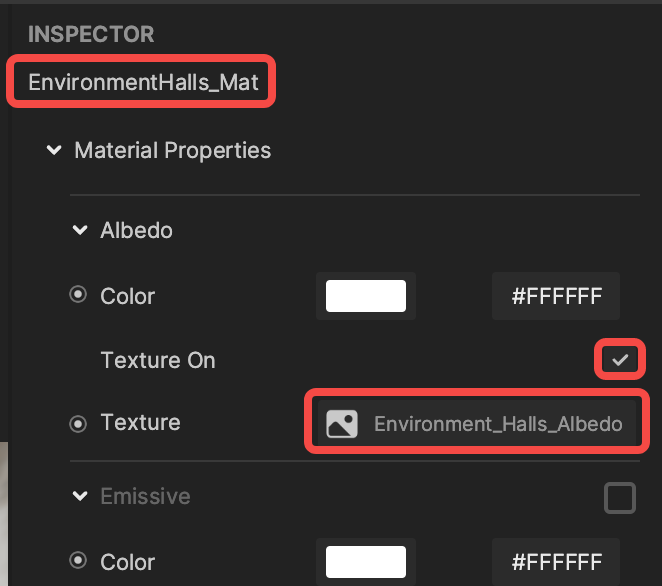
After importing the textures, you will need to assign them to materials. Each object will already have its own material assigned to it, so you simply need to apply the textures to the correct materials. To do this, select the material in the Assets panel, and navigate to the Inspector.
Here you can modify the relevant texture parameter. For example, the EnvironmentHalls_Mat material requires the Environment_Halls_Albedo texture.
For the Body_Mat and Hat_Mat, you will also need to assign the Normal and MRAO values. Both of these materials will use the same texture assets. When assigned the MRAO map, you will also set both the Metallic and Roughness values to 1.

At this point, the Body_Mat and Hat_Mat will be functionally the same. Later in this guide, you will modify the Hat_Mat to polish the final look of the effect.
You can now drag your assets into the Hierarchy panel! This will generate the assets in the scene at the origin point. Because you modified the materials that were generated when you imported the assets, the models should automatically have the correct textures applied. If you create new material, you may need to assign it to your asset’s mesh component. At this point, the effect will look like this:
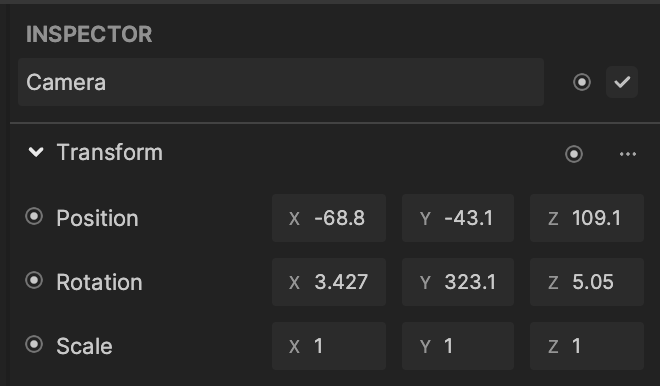
Move the Camera
Now that you have added all of the 3D assets, you can move the Camera object to a better position. For this effect, you should set the camera Position and Rotation as seen below, but you can modify this however you’d like. Be mindful of the Near and Far clipping ranges.
Add the Foreground Animation
To import a 2D animation, you need to have access to the individual frames of the animation. In this case, you will use a PNG sequence.
↓ confetti_and_rose_texture_sequence.zip
After unzipping the folder, use the import function to select all of the frames (be sure you are importing a Texture Sequence!).
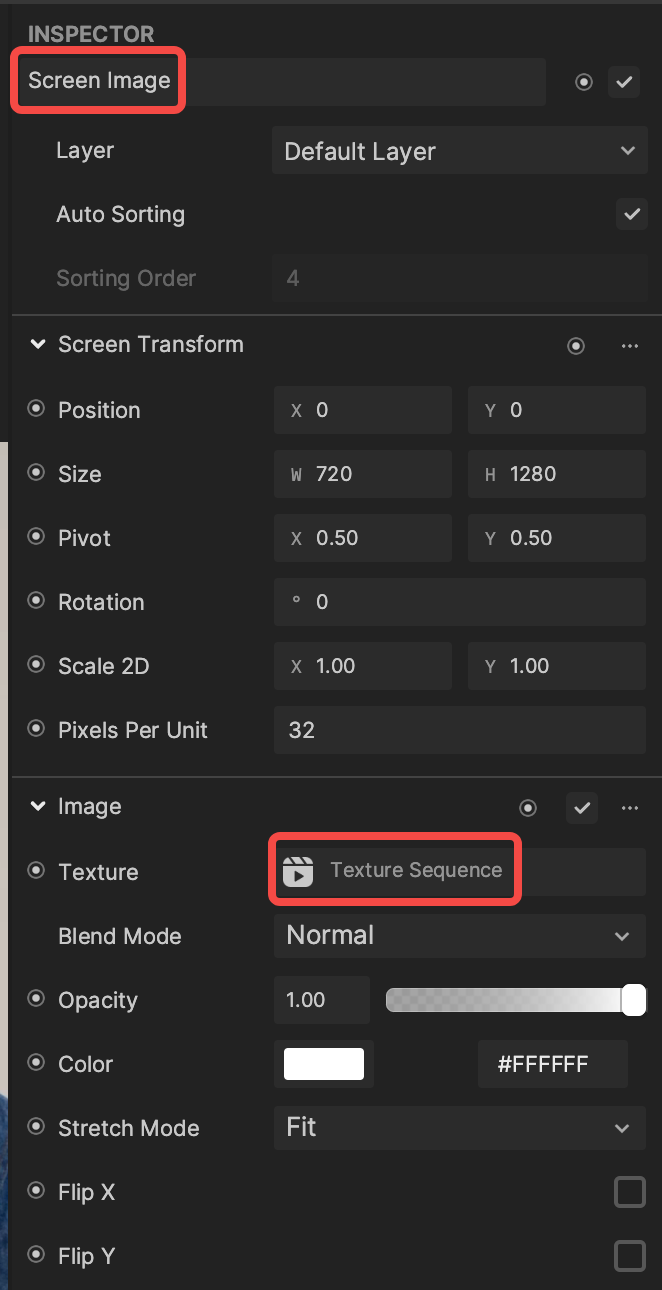
Importing a Texture Sequence generates an animated texture and a texture sequence in the Assets panel. Now you need to create an object in the Hierarchy to display the 2D animation. First add a Screen Image object, then navigate to the Inspector panel. Directly assign the imported Animated Texture to the Image component’s Texture property to apply the animation to the foreground.
Your preview should now look like this:

Add a 3D Face
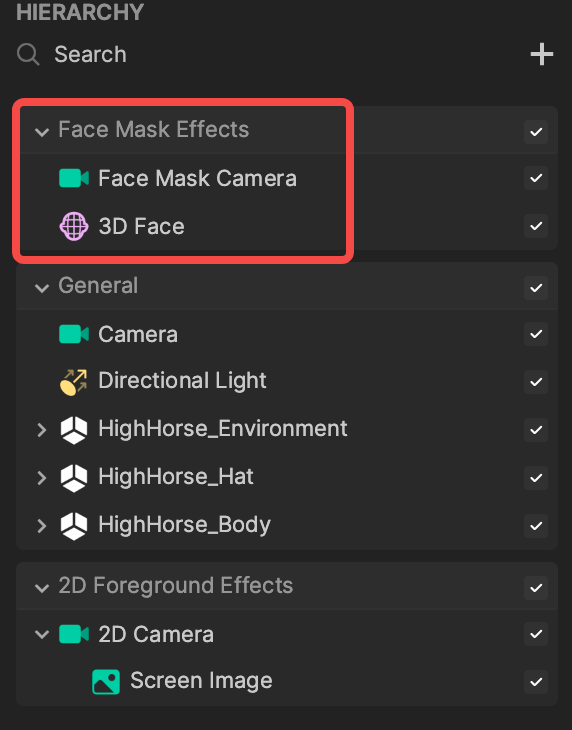
Add a 3D Face object in the Hierarchy by clicking on the Add [+] button, going to Face Effects, and then selecting 3D Face. This adds a new Face Mask Camera and 3D Face object to the scene.
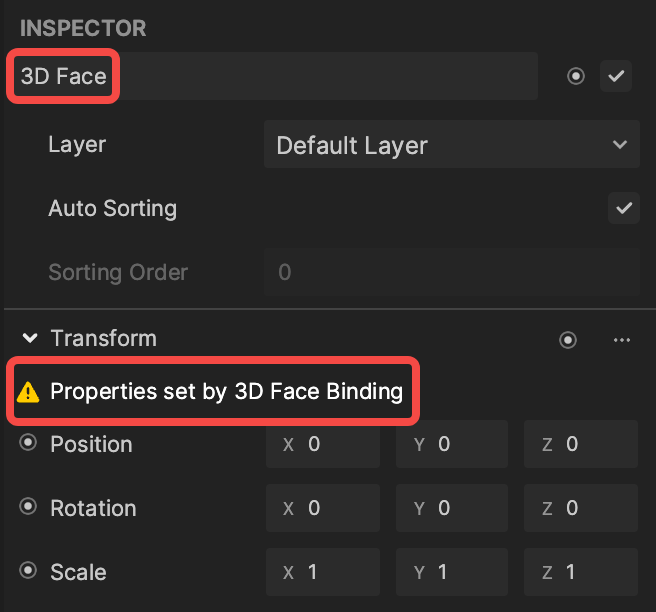
You will notice that although the 3D Face asset is visible in the Scene panel, it is not visible in the Preview panel.
This is because the Transform of the 3D Face is being controlled by the 3D Face Binding algorithm. The next section will cover how to get around this binding.
How to Create a 3D Face at a Fixed Position
By default, the 3D Face object does not work for these purposes. You do not need the whole Transform of the user’s face, but you do need the Mesh and the Material. Fortunately, the 3D Face gives you access to this information.
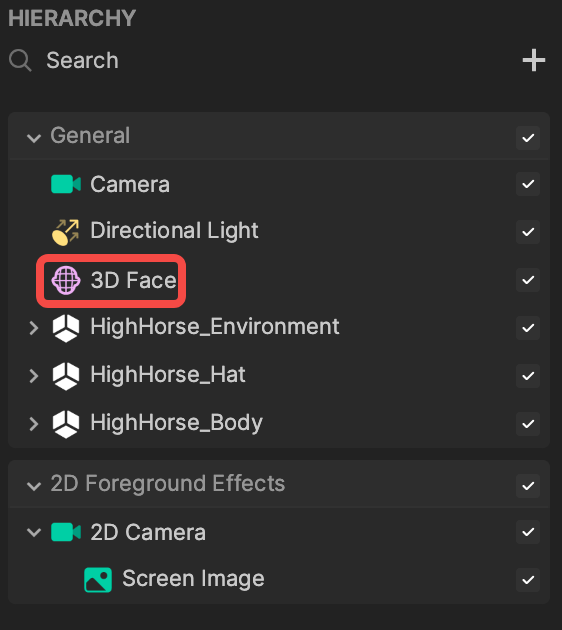
First of all, you do not need a second camera, so you can drag the 3D Face to the General render group, and delete the Face Mask Effects render group, including the Face Mask Camera.
To turn off the 3D Face Binding, simply select the 3D Face, navigate to the Inspector, and delete the 3D Face Binding component. Afterwards, the face mesh will be visible in the Preview panel.
By default, the 3D Face not only generates the mesh, but also adds the Face Paint material. This material allows you to paint your face on an object. This shows a checkerboard texture by default.
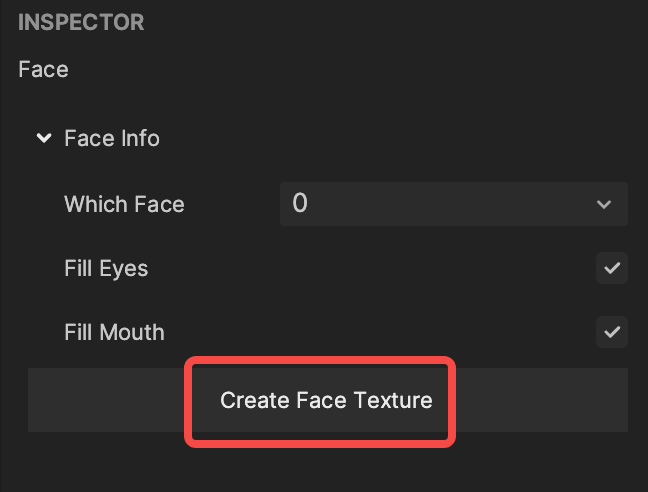
To apply the user’s face texture, you need to perform an extra step. Navigate to the Assets panel and select the Face mesh object. Then click the Create Face Texture button in the Inspector panel.
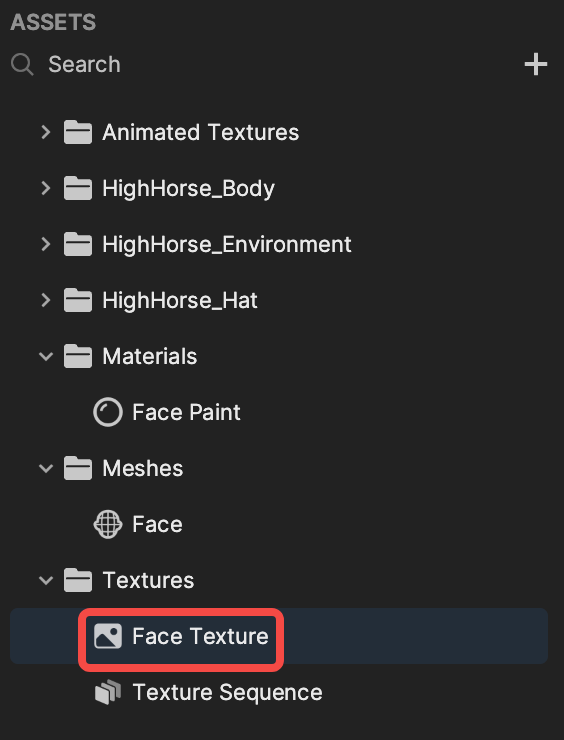
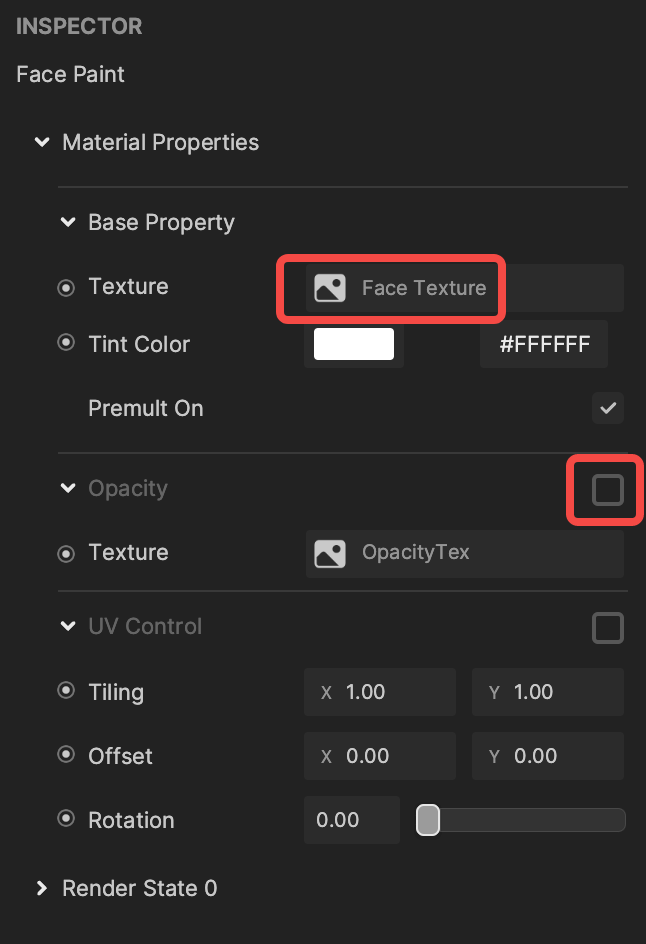
This generates a new texture in the Assets panel called Face Texture. Once you apply this texture to the FacePaint material, you will see the face projected onto the Face mesh. You will also want to turn off the Opacity parameter in the Face Paint material to remove the default feathering.
You also want the user’s face to follow the head rotation. To do this, you need to access information on the user’s head rotation. The fastest way to do this is to add a Head Tracker component from the AR Tracking group in the Hierarchy panel. This automatically adds a Head Tracker, a child object called Head. You don’t need the Head child object, so delete it.
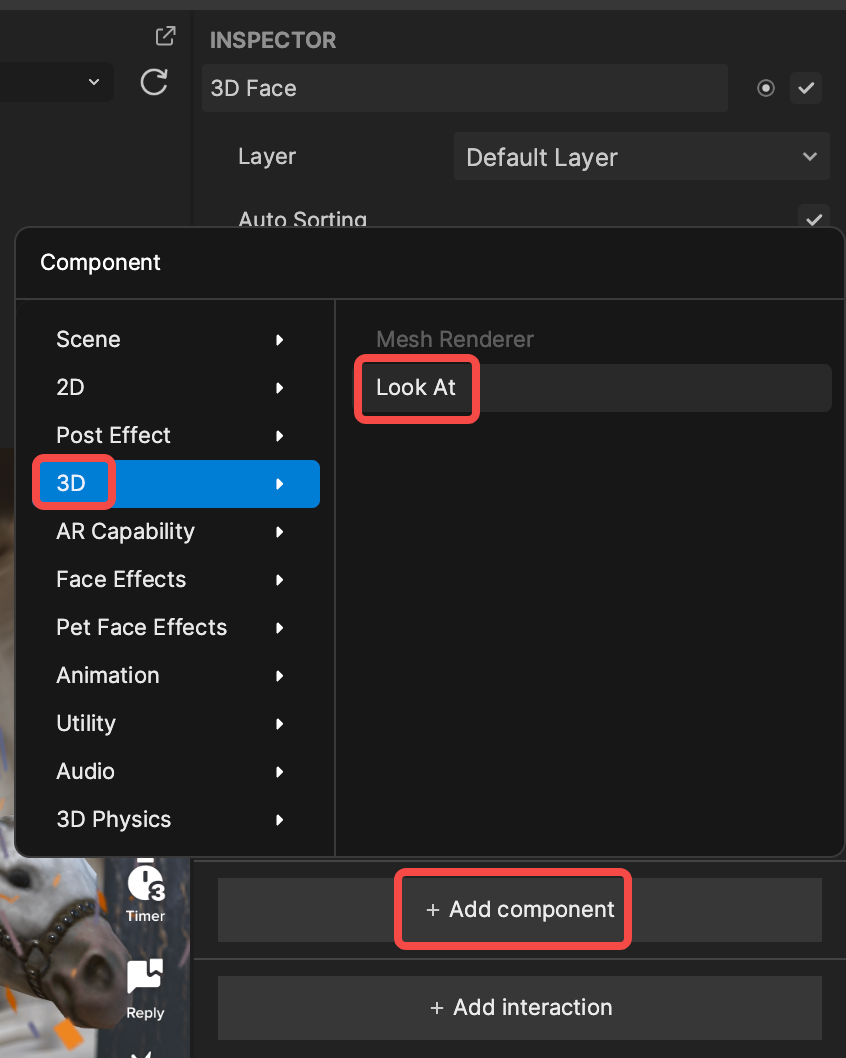
The Head Tracker controls the position and rotation of the user’s head. Only the rotation is relevant in this case. To apply the head’s rotation to any object, select the 3D Face object, and navigate to the Inspector panel. Then click + Add component, go to 3D, and select the Look At component.
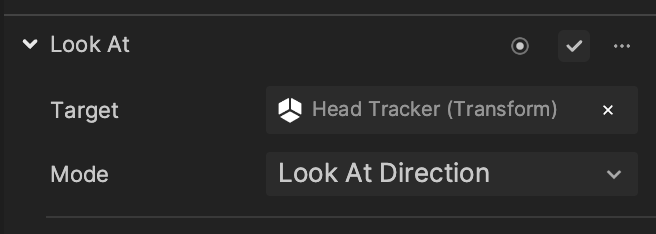
The Look At component needs to be modified. First set the Target property to the Head Tracker. Then change the Mode property to Look At Direction.
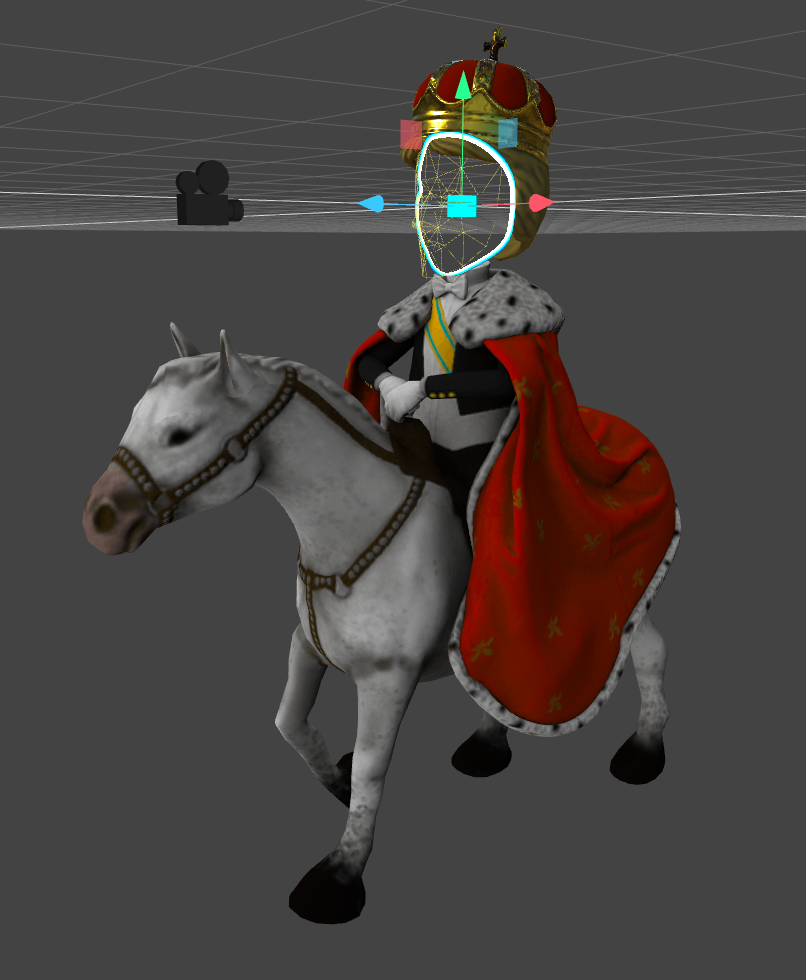
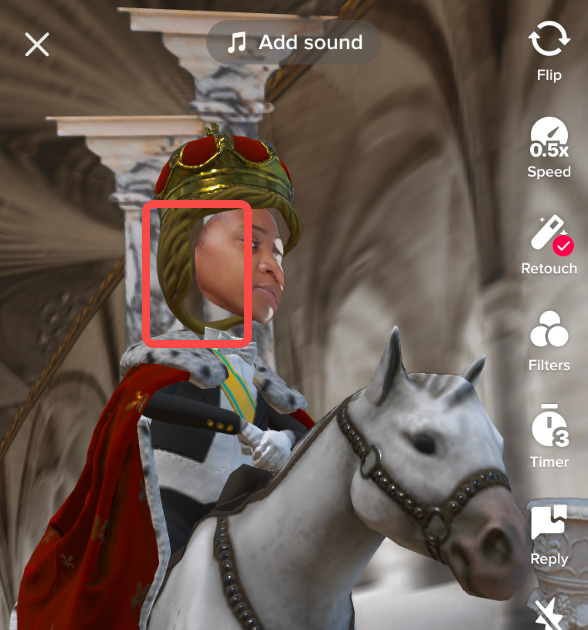
To get a better idea of how the tracking works, change the preview media to Head Turned.

At first, the crown does not the head. To fix this, simply drag the HighHorse_Hat object in the Hierarchy panel onto the 3D Face object to parent it. Then the crown will follow the subject’s face.
How to Render Both Sides of a Model
In the preview, the inside of the crown object does not render at first. This must be fixed.
To solve this, navigate to the Hat_Mat in the Assets panel. In the Inspector, scroll all the way down to the Render State 0 group. Expand the group, and modify the Cull Mode parameter to None. This tells the material to render both sides of the mesh.

Rendering both sides of the mesh is intensive, so for better performance, only use this when necessary. This is why there are separate materials for the crown and body. You don’t need to render both sides of any other object.
With that, you have completed the High Horse effect!
How to Swap Assets with the Asset Library
An easy way to customize your effect is to swap assets using the built-in Asset Library! There are many assets available, so feel free to try whichever you like. For this guide, you will replace the 2D animation assets.
Select the Asset Library icon at the top left of the Effect House menu bar.
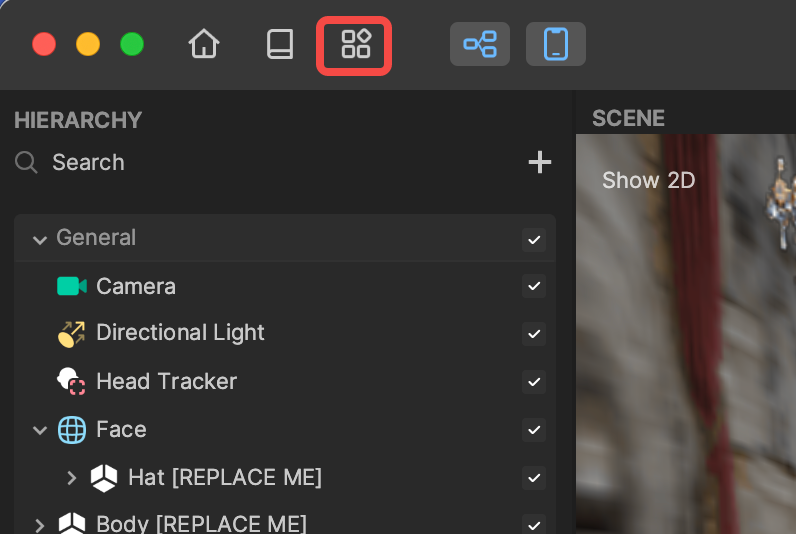
This will open Asset Library.
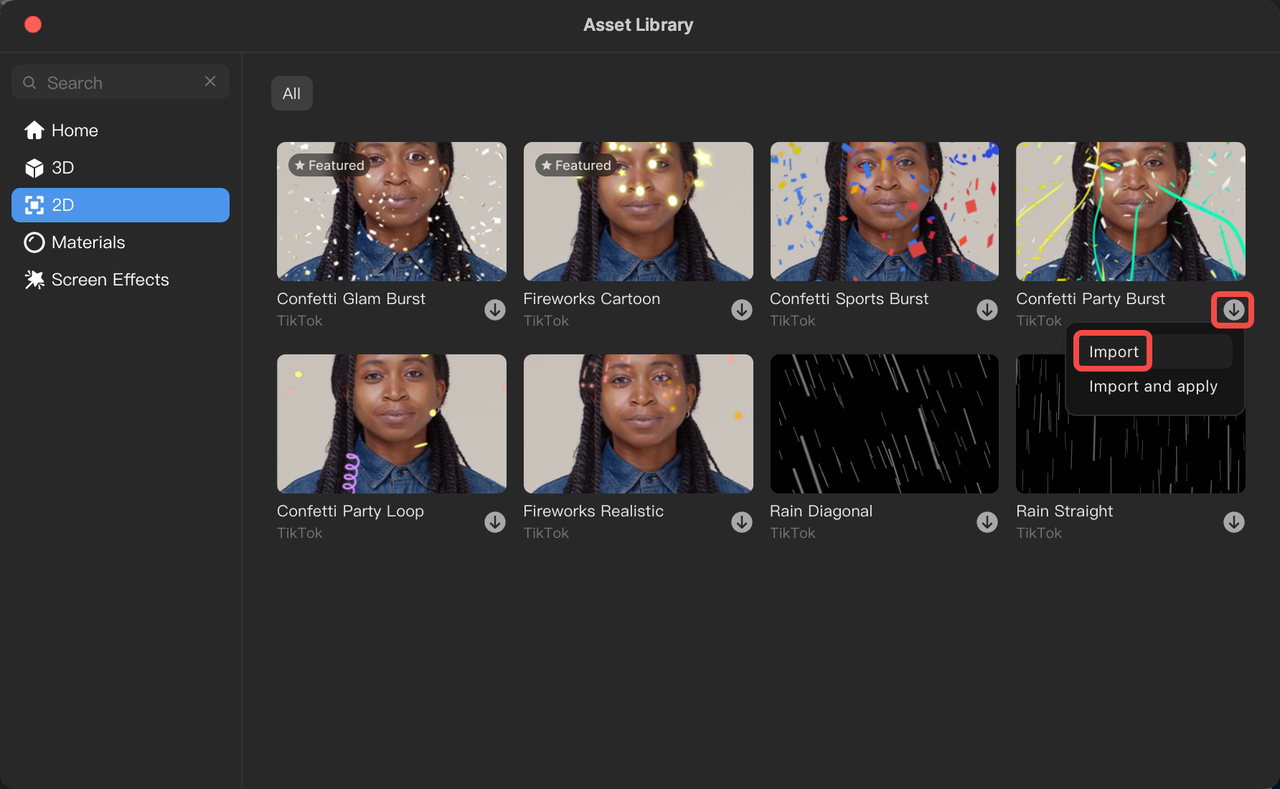
For 2D animations, select the 2D tab on the left. From the resulting menu, you will select the Confetti Party Burst animation. Clicking Import will add a new folder to the Assets panel. This folder will contain two objects called ConfettiPartyBurst_AnimationTex, and a prefab called ConfettiPartyBurst.
From here, you have two options.
- Drag the ConfettiPartyBurst prefab into the Hierarchy panel. Since the prefab comes with its own camera object, you can delete 2D Foreground Camera and the Confetti And Roses Animation objects.
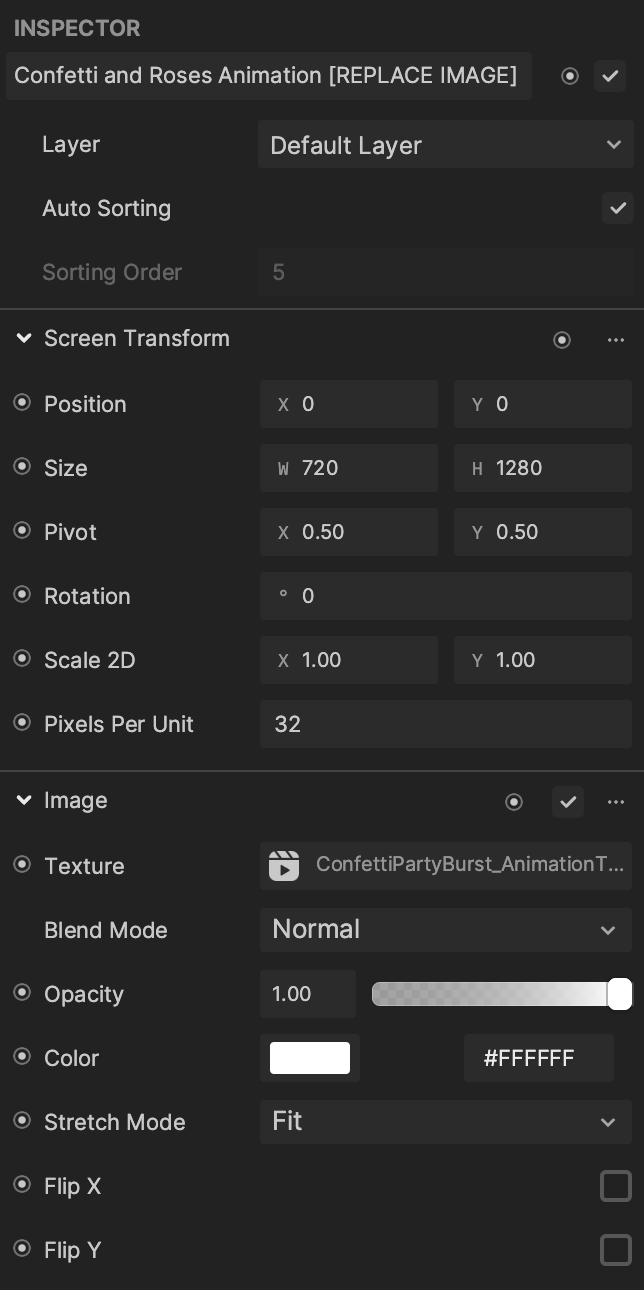
- You can select the Confetti And Roses Animation object and navigate to the Inspector panel. There, you can modify the Image parameter's Texture. By setting it to ConfettiPartyBurst_AnimationTex, you can easily swap the animation.
With either method, you have successfully swapped the 2D foreground animation!