Portrait Segmentation
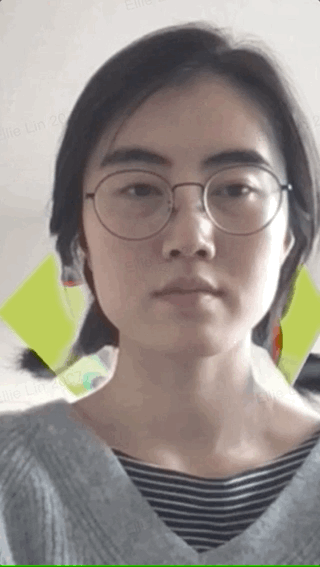
Portrait Segmentation detects and isolates the subject in the frame, so customized textures and effects can be applied to the background.

Requirements
Segmentation has a very high performance impact on iOS devices. Segmentation should not be combined with many other features as doing so will cause low FPS and may subsequently lead to not passing QA.
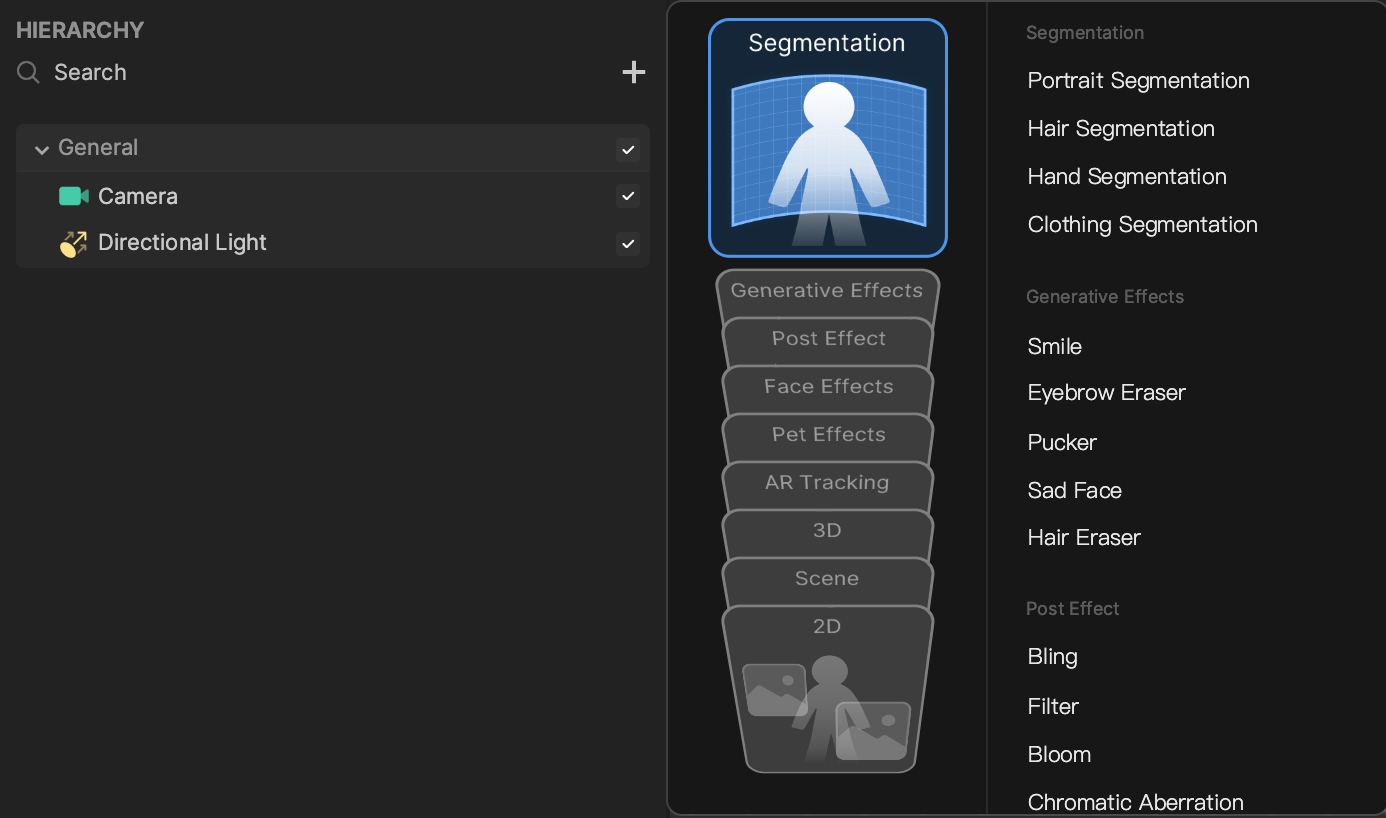
Add Portrait Segmentation
To add a Portrait Segmentation object:
- Open Effect House.
- Go to the Hierarchy panel.
- Click the Add object button [+].
- Go to Segmentation.
- Select Portrait Segmentation.
Portrait Segmentation in the Hierarchy Panel
The Portrait Segmentation object appears in the General render group in the Hierarchy panel. Learn more about render groups.
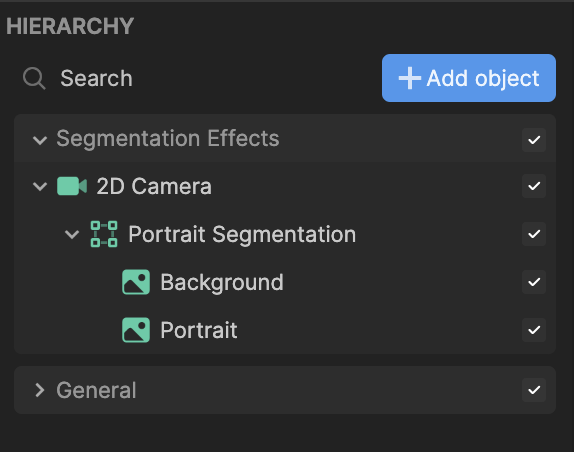
Use Portrait Segmentation
A Portrait Segmentation with Portrait and Background objects will show up in the Hierarchy panel whenever you add Portrait Segmentation:
- Portrait Segmentation is a container object with a Screen Transform.
- Portrait is essentially an image. The Image component of this object has been automatically assigned with the Portrait Segmentation Texture, which you can find in the Assets panel.
- Background is essentially an image. The Image component of this object has been automatically assigned with Background Texture. You can make it animated by using an Animated Texture.
A Segmentation material will automatically be added to the Material property of the Image component when adding a Portrait Segmentation object. Segmentation material is useful for quickly adding commonly used segmentation effects to the scene.
Components
The Portrait Segmentation object is made up of the following components, found in the Inspector panel:
Demo Effect: Add a 3D Object In Between the Portrait and Background
Add a 3D object in front of or behind the segmentation layer by changing the render order of the cameras.
Download the following file to follow along:
↓ Add3DObjectToSegmentation.zip
To add a Portrait Segmentation object:
- Go to Hierarchy panel
- Click the Add object button [+]
- Go to Segmentation
- Select Portrait Segmentation
To add a Sphere object:
- Click the Add object button [+]
- Go to 3D
- Select Sphere
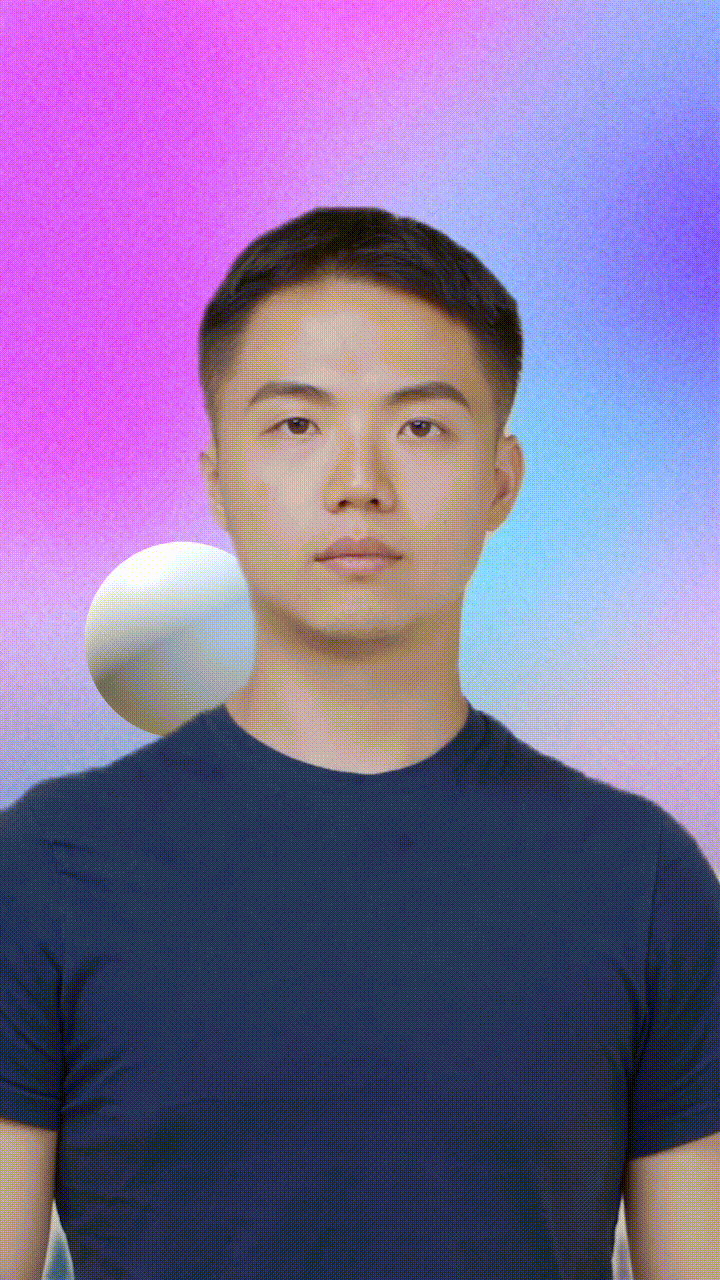
You can see that the Sphere object is rendered on top of the Portrait and Background objects.
Make sure that the Sphere object you added is on the same layer as the Camera object.
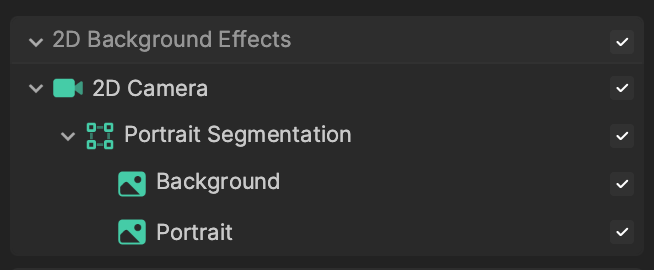
Render the Segmentation and Background Images Separately
To move the sphere between the Portrait image and the Background image, you must have two 2D cameras to render the two images separately. Then the sphere can be rendered in the middle.
- Go to the Hierarchy panel and duplicate the 2D Background Effects render group, or the container with the 2D Background Camera and Portrait Segmentation objects and its child objects.
- Rename the duplicated render group by right-clicking it and clicking Rename.
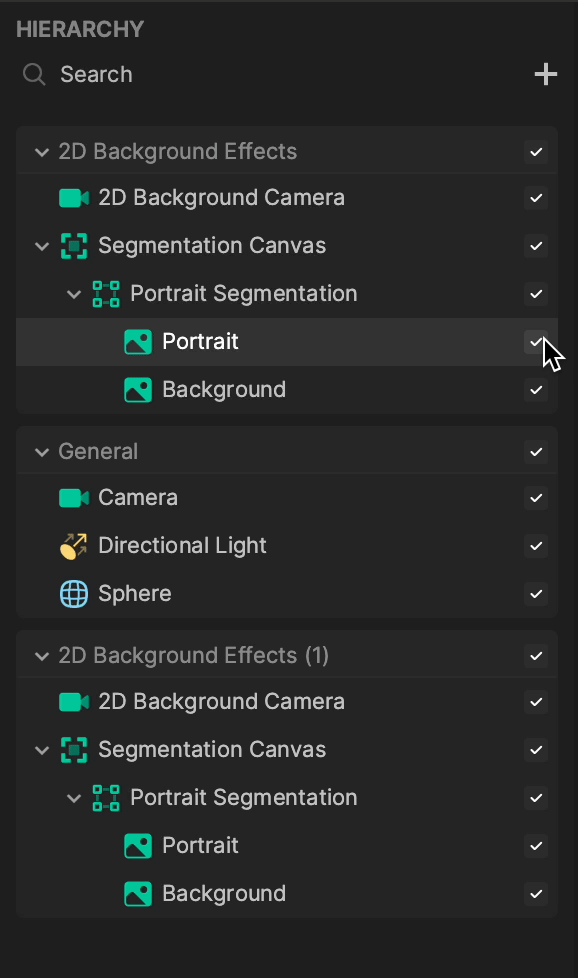
- Drag and drop the duplicated render group under the General render group, or the container with the Sphere object, in the Hierarchy panel.
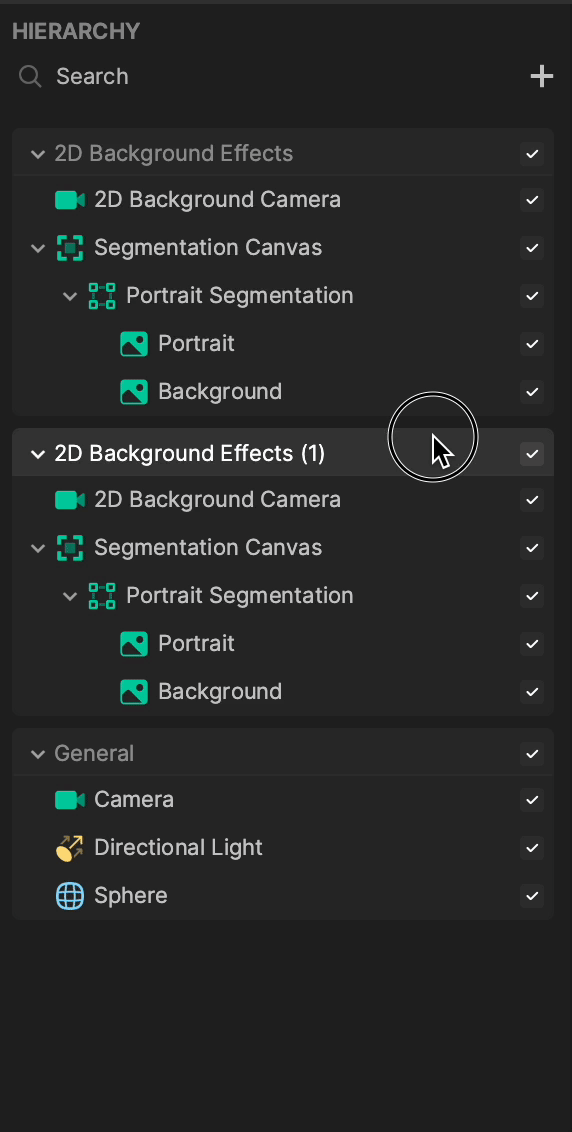
- Disable the Portrait object in the original segmentation canvas and then the Background object in the duplicated segmentation canvas.
You can see that the sphere now moves in between the Portrait and Background images.