Material Editor Overview
Starting in Effect House 2.5.0, you can use Material Editor, a powerful, node-based creation tool that allows you to build and manipulate materials ranging from simple color modifications to intricate textures and finishes. With Material Editor, you can create materials ranging in appearance from hyperrealistic wood to blocky cartoons. You can also use Material Editor to create materials that change the appearance of your camera feed.
Material Overview
A material is an asset that defines how the object looks and reacts to lighting. A material contains information about things like color, shininess, transparency, surface texture, and shading. In Effect House, materials are often applied to 3D models to give them a realistic appearance, but can also be applied to the camera to apply a visual effect layer. Materials use programs called shaders, which are instructions that run in the graphics-processing unit (GPU) to determine how the final surface of the material should look in response to lighting.
Material Types
There are two types of materials you can create in Effect House: 3D materials and post-process materials.

- 3D materials are applied to a mesh, which provides the structure of the object. For example, if you have a material that looks like wood, you can apply it to a cube mesh to create a wooden block.
- Post-process materials are applied to the camera. Think of them as different lens filters that you can add to your camera to modify the picture it takes. You can create post-process materials that make the camera feed pixelated or color-tinted.
Material Editor Interface
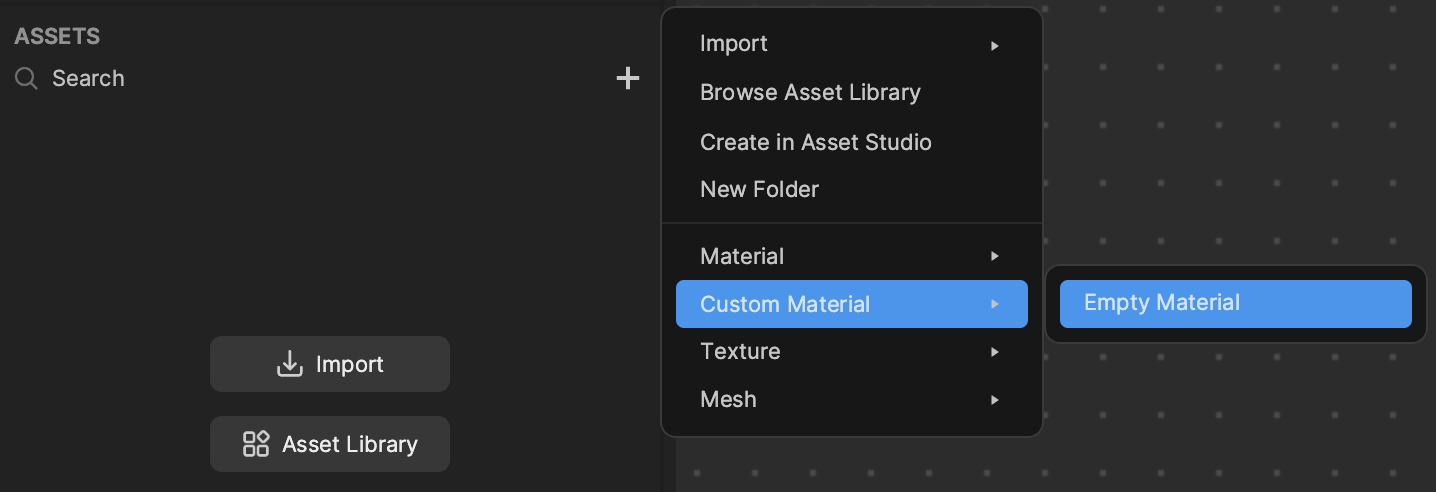
To create a custom material, click on the Add button [+] in the Assets panel, go to Custom Material, and then select Empty Material. This opens up Material Editor. To switch between the Visual Scripting panel and Material Editor, simply click on the desired tab.
You can also rename your new material the Assets panel.
Material Editor Toolbar

The Material Editor toolbar contains features that help you navigate the space and manage node controls.
- My Items: Allows you to add parameters to your material and manage subgraphs.
- Minimap: Gives you a bird’s-eye view of the entire Material Editor, allowing you to quickly navigate through sprawling graphs.
- Reset view: Resets the view to its default, center position.
- Searchbar: Lets you search for existing nodes or subgraphs by name.
- Details: Allows you to adjust the parameters of the selected node, when possible.
- Compile: Compiles your changes to save an updated version.
- Add Comment: Lets you select multiple nodes and add a comment box surrounding them.
- Add node: Opens the Node menu.
- Undock: Allows you to undock Material Editor into a separate window.
If you have multiple custom materials, you can switch between them using the dropdown in the toolbar.
Nodes
Nodes can be added and connected to create logic flows that modify your material’s behavior. There are three ways to access the Node menu in Material Editor:
- Click on the Add node button in the toolbar.
- Right-click anywhere in the dotted space, then select Add node.
- Double-click anywhere in the dotted space.
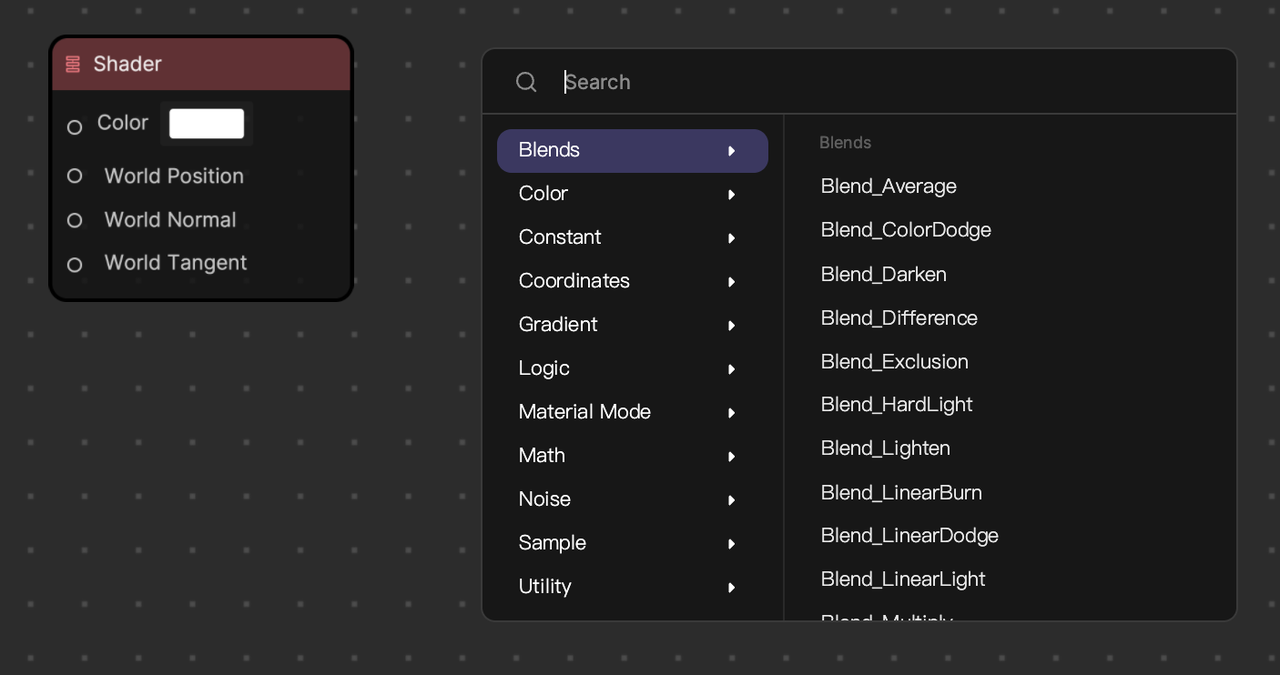
The Shader node is added by default to Material Editor. All logic flows input into the Shader node, which controls the final look of your material and how it reacts to lighting.
Material Properties and Parameters
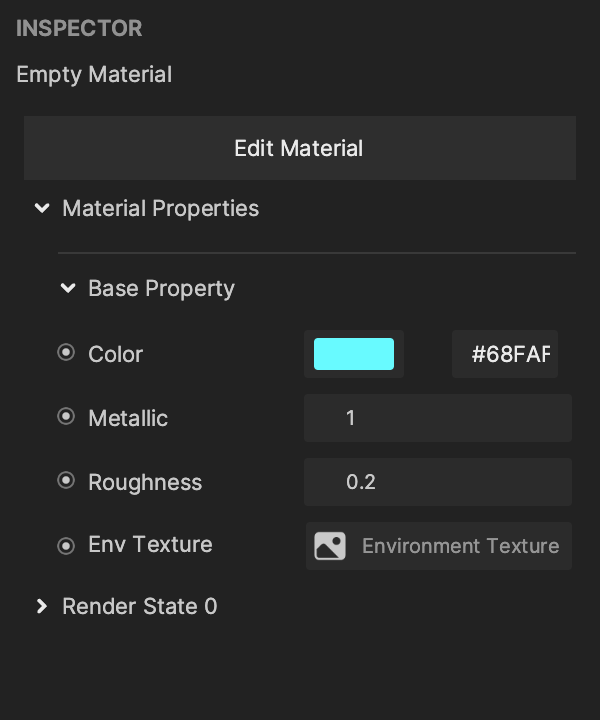
You can use parameters to build custom properties. When you first create a new material and have it selected in the Assets panel, the Inspector panel appears empty. However, as you begin to add nodes and create connections to build your material, the respective properties will populate the Inspector panel.
To add a parameter, click on My Items, click on the Add button [+] next to Parameters, and then select the desired parameter type. To add your new parameter as a node, click on the button next to it.
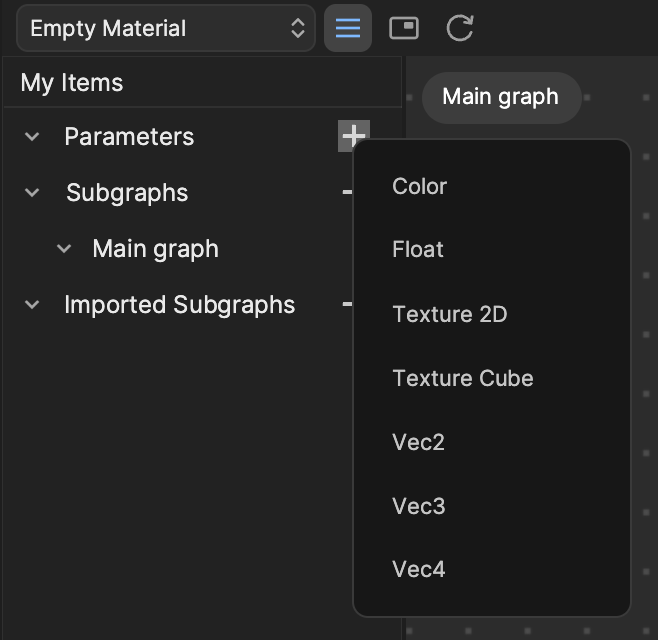
When you add a parameter node and use it as an input for your material, it shows up in the Inspector panel as a property with retrievable Get and Set variables that can be used in the Visual Scripting panel. This allows you to create interactions with your custom material using visual scripting. Learn how to use Material Editor to create your first custom material!