Make Your First Custom Material
With Material Editor, you can easily create materials from scratch by defining your own properties and connecting nodes. This guide walks through the general process of creating a basic 3D material that you can apply to an object.

There are two types of materials you can create in Effect House: 3D materials and post-process materials. This guide demonstrates how to create a 3D material that gets applied to a mesh.
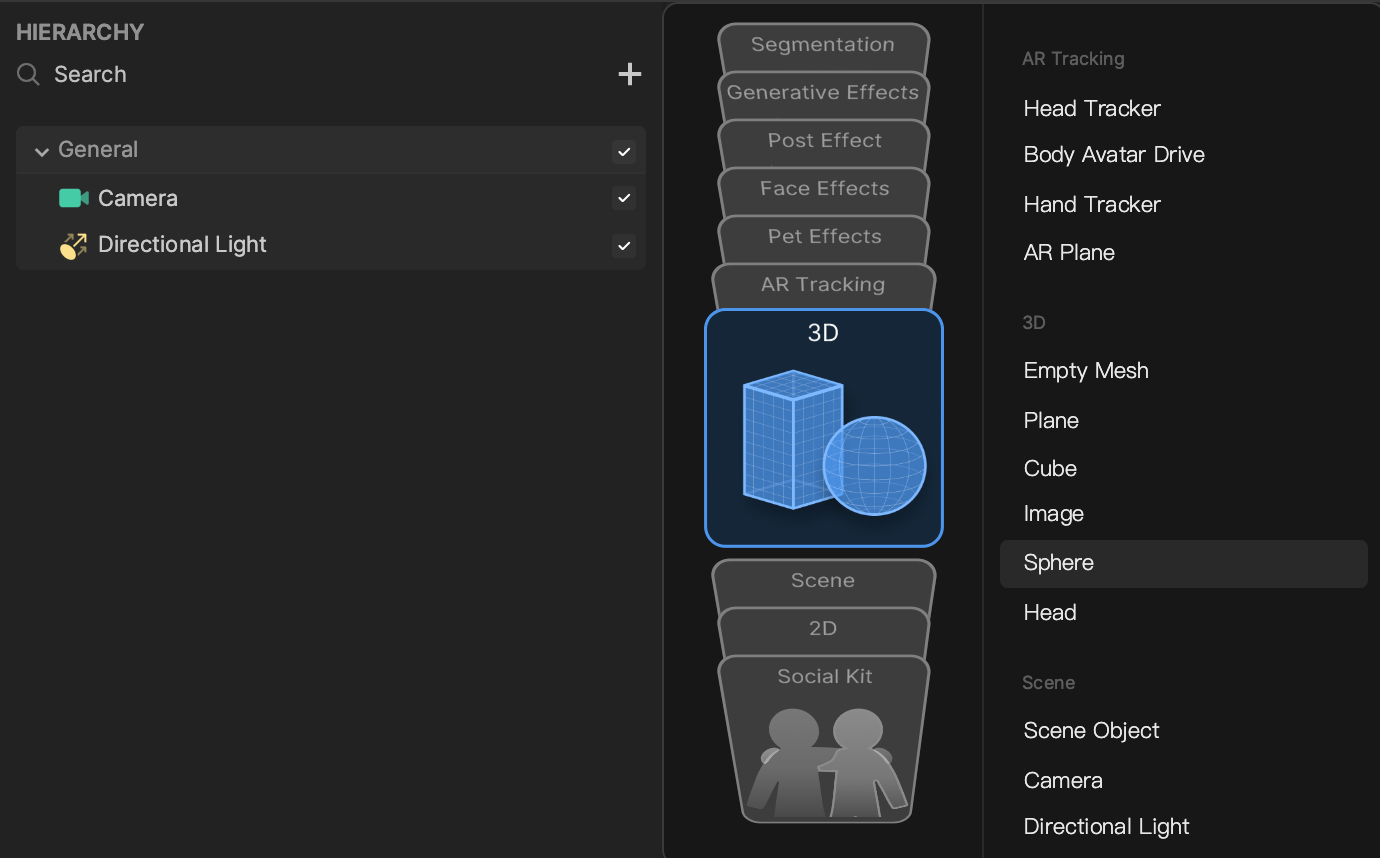
Add a 3D Object
Before you use Material Editor, add a 3D object to the Hierarchy panel, like a Cube or a Sphere. You will eventually assign your custom material to this object, so you can view its appearance in the Preview panel. Alternatively, you can import your own 3D model in the Assets panel to use, or open the Dynamic Chain template and use the built-in 3D hair model.
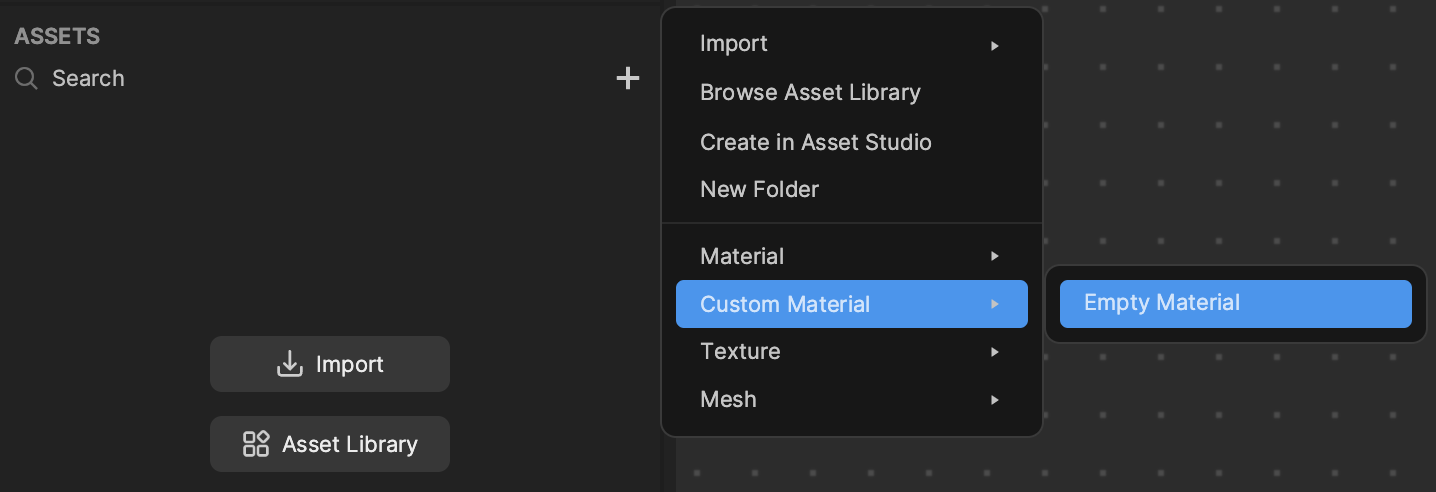
Set up a new Material Editor
To access Material Editor, click on the Add button [+] in the Assets panel, go to Custom Material, and then select Empty Material. You can rename your new material by right-clicking on it in the Assets panel and selecting Rename.
Assign the new material to your 3D object. Select the object in the Hierarchy panel or Scene panel, then go to the Inspector panel and click on the Material field. Then select your new material. You should now be able to see any changes you make in Material Editor reflected on your object in the Preview panel.

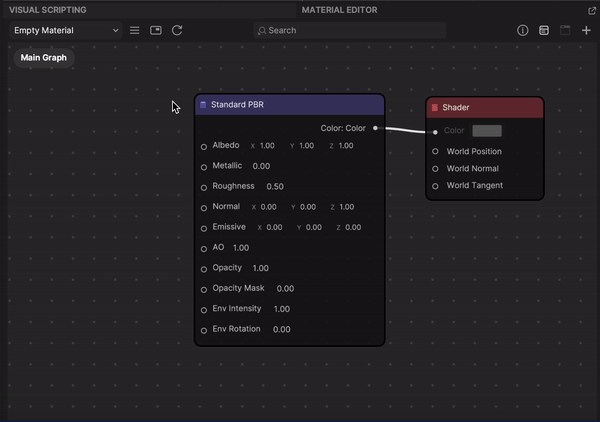
Add a Shading Model to the Material Editor
Now it’s time to start building your material. Double-click on the dotted space to access the Node menu, go to Material Mode, and then select Standard PBR. Standard PBR is a shading model that uses physically-based rendering (PBR) to make the material appear as it would under real-world lighting conditions. You can use other Material Modes to change how you want your material to react to light, or you can build your own material mode by connecting basic nodes that control attributes of the mesh, light direction, and more.

Connect the Color: Color output of the Standard PBR node to the Color input of the Shader node. This creates a basic material that reacts to your scene’s lighting in real time. You can play around with the orientation of the Directional Light to observe how the object appears under different lighting.
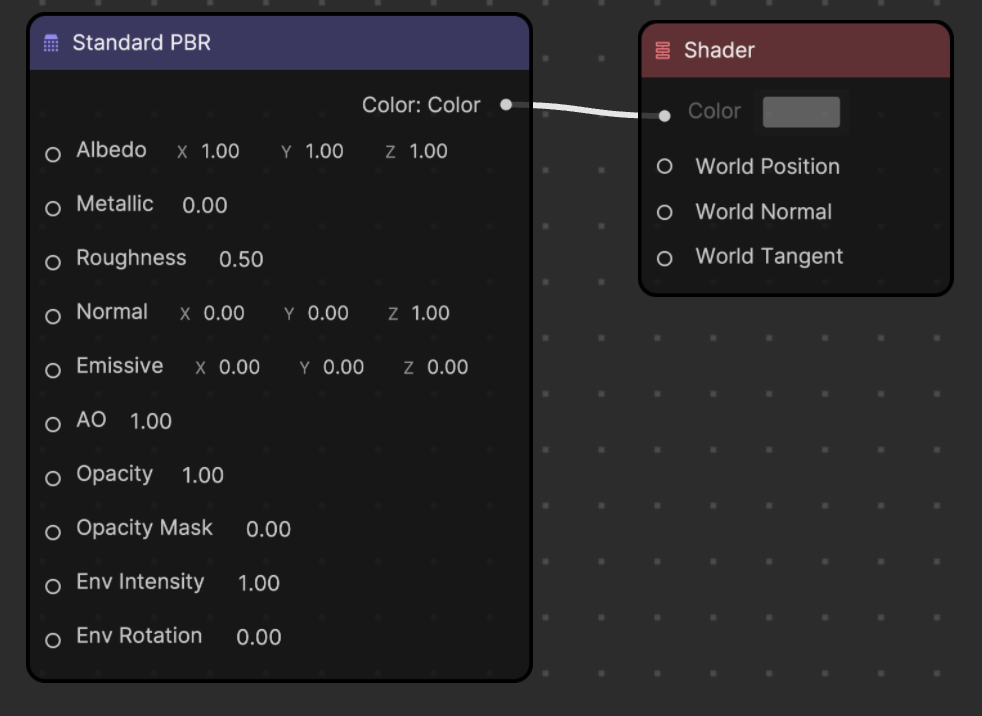
When building a material, the flow of logic always ends with the Shader node. As you begin to define parameters to create properties for your material, you will connect these parameters to the inputs of your shader model, which, in this case, is the Standard PBR node.
Add Parameters to Create Properties
The next step is to define your material’s properties, which will give it a characteristic appearance.
Color
To define the material’s color, go to My Items, click on the Add button [+] next to Parameter, and then select Color. To add the new Color parameter as a node, click on the button next to it.
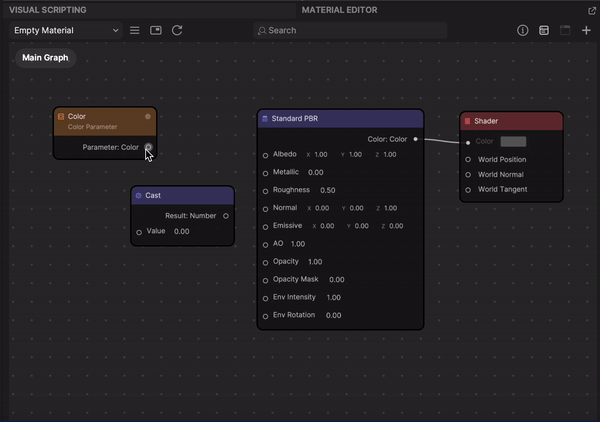
If you try to connect the Color parameter node’s output directly to the Albedo input of the Standard PBR node, the line turns red, indicating incompatibility between the data type. The Albedo input requires a vector 3 data type that corresponds to its X, Y, and Z values. Therefore, you must convert the Color parameter’s data output using a Cast node.
Add a Cast node, then connect the Color parameter node’s output to the Cast node’s Value input. Now you must change the Cast node’s output type to match the Albedo input’s data type. To do so, select the Cast node, and then click on the Details button in the Material Editor toolbar. Change the Cast Type to Vec3 in the dropdown. This creates compatibility with the Albedo input’s X, Y, and Z values.
Connect the Cast node’s output to the Albedo input of the Standard PBR node.
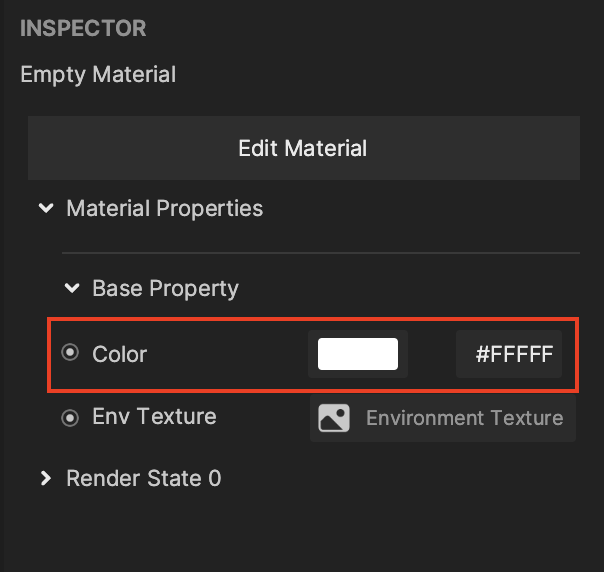
Select your new material in the Assets panel, and then view the Inspector panel. The Color property now appears under Material Properties. Click on the Color field and choose your desired color from the color picker.
You can also use a texture instead of color as an input to Albedo. To do so, add a Sample Texture 2D node, and connect it to the Albedo input. Then go to My Items, click on the Add button [+] next to Parameter, and then select Texture 2D. To add the new Texture 2D parameter as a node, click on the button next to it.
Metallic
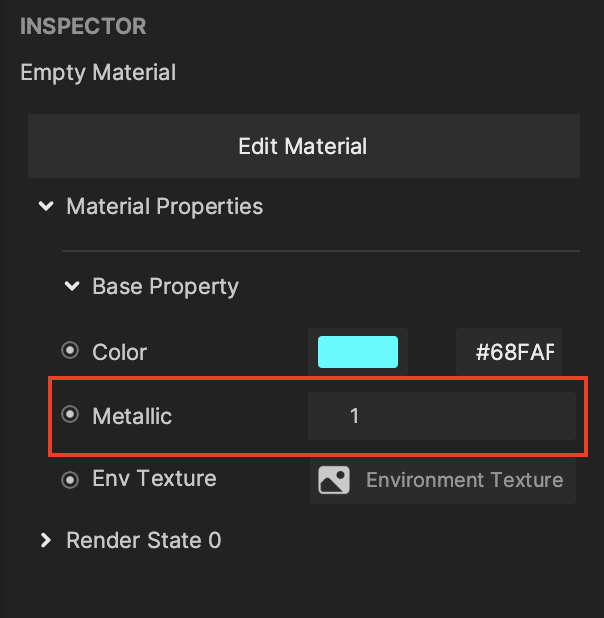
To modify how metallic the material looks, go to My Items, click on the Add button [+] next to Parameter, and then select Float. The Float parameter is a number with a decimal place. Rename the new Float parameter to “Metallic“. To add the new Metallic parameter as a node, click on the button next to it. The Metallic parameter node matches the data type of the Standard PBR node’s Metallic input, so you can connect them directly. Now you can change the value of the Metallic property in the Inspector panel. Choose a value between 0 and 1.
Roughness
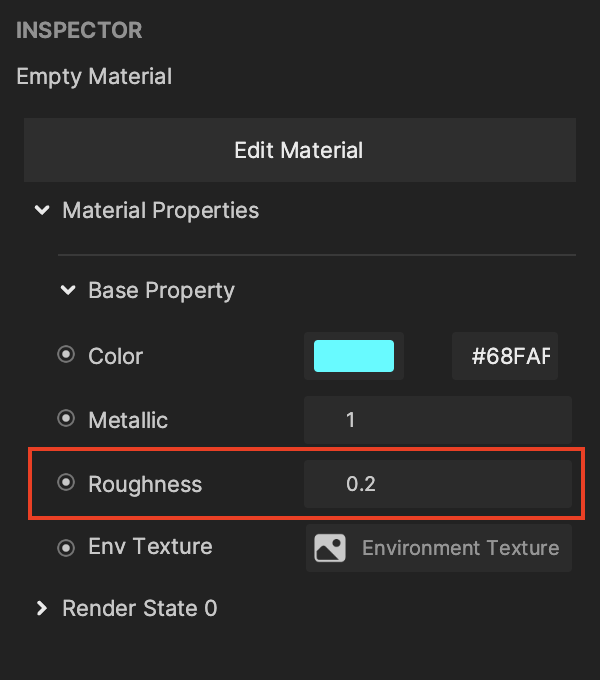
To modify how metallic the material looks, go to My Items, click on the Add button [+] next to Parameter, and then select Float. Rename the new Float parameter to “Roughness“. To add the new Roughness parameter as a node, click on the button next to it. The Roughness parameter node matches the data type of the Standard PBR node’s Roughness input, so you can connect them directly. Now you can change the value of the Roughness property in the Inspector panel. Choose a value between 0 and 1.
Remaining Inputs
You can continue to create parameters that connect to the remaining inputs of the Standard PBR node, or keep the material the way it is. Just make sure the data types of the parameters match the data types of the inputs. Congrats! You’ve just created a material from scratch.
Use Visual Scripting with Material Editor
You can manipulate your material’s properties with visual scripting. When your material is selected in the Assets panel, you can view and modify each of the material’s properties in the Inspector panel. Click on the button next to a property to Get or Set its variable as a node in the Visual Scripting panel. This allows you to directly manipulate material properties using visual scripting logic or interactions. For example, you can animate your material with visual scripting to create dynamic materials like water, terrain, fur, and more.
