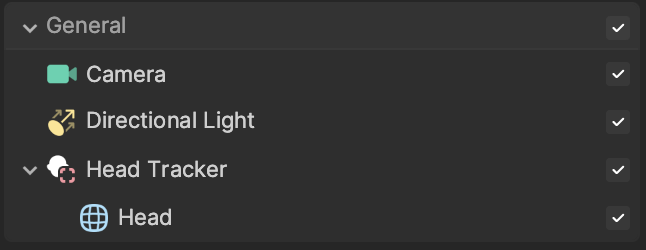
Head Tracker
Head Tracker detects an onscreen head and provides information about the 3D position of the head in virtual space. This is a robust and widely-used functionality that allows you to track 3D objects to the head and face.
Add a Head Tracker Object
Add a Head Tracker by clicking the Add button [+], going to AR Tracking, then selecting Head Tracker in the Hierarchy panel. The Face Binding component is included when a Head Tracker object is added.
Adding a Head Tracker object will add a Head object by default. The Head is parented under the tracker object so that it follows the head movement.
Head Occluder
The Head object is a head-shaped mesh with Occluder material that allows you to mask the onscreen head.
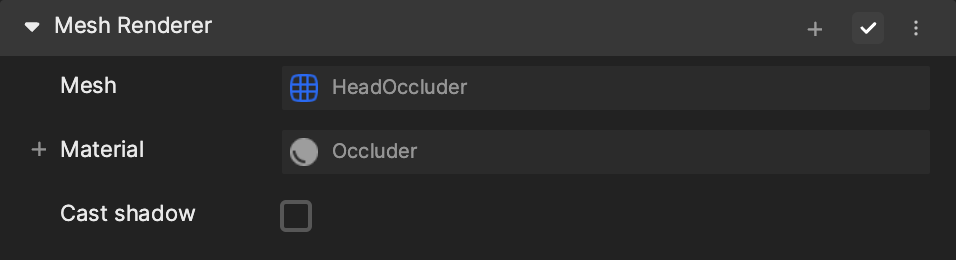
With the Occluder material, the head model can be used to occlude other 3D objects in the scene. For example, if a hat model wraps around the head, you can occlude the back of the hat so that it appears to be sharing the same 3D space as the head onscreen.
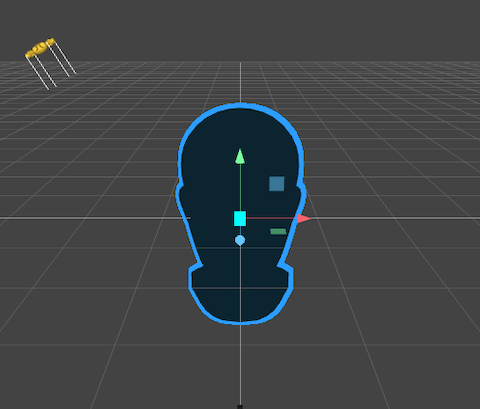
Head Occluder Model
Download the Head Occluder model for 3D scale reference here.
Use the Head Tracker Object
You will need a 3D object to parent under the Head Tracker object. You can also use multiple head trackers if there is more than one person in the preview.
Put a 3D Object on a Head
Navigate to the Hierarchy panel and click the Add button [+], go to 3D, and then select Sphere. To ensure that the object follows the head, you need to parent the sphere object under the Head Tracker. Then it will follow the head tracking movement.
Use Multiple Head Trackers
Add Multiple Head Trackers to the Scene
Up to 5 faces can be detected at a time. A Head Tracker must be created and assigned to each you want to track.
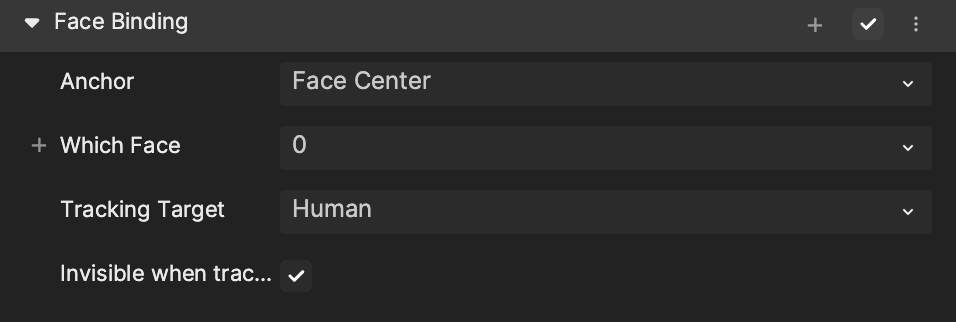
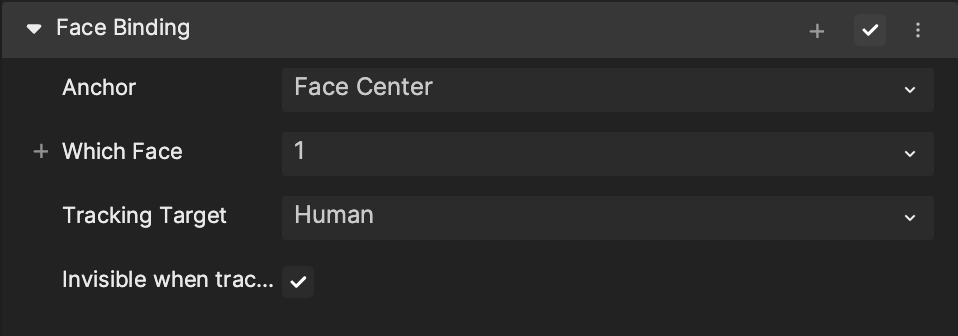
Adjust the Face Binding Properties
Values of Which Face must be changed to different values to apply the head effect to different people.
The face number assignment is based on the order of detection. The first face detected in the scene is assigned to 0, the second face is assigned to 1, and so on.
Components
The Head Tracker object is made up of the following components, found in the Inspector panel:
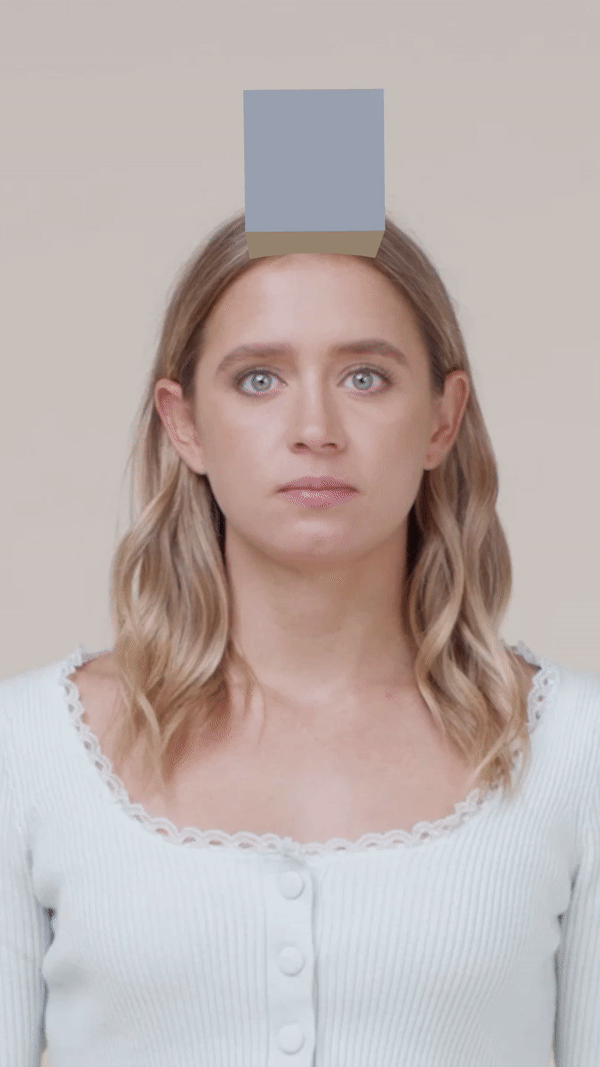
Demo Effect: Head Accessory
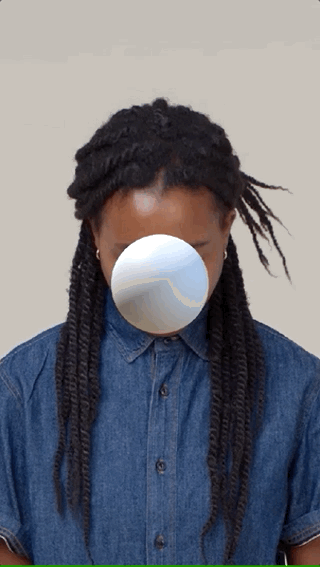
This demo puts a sphere on the onscreen head’s nose that stays in place using the Head Tracker! First you will learn how to add the head tracking capability and the initial setup. Then you’ll add the sphere and make some tweaks to finish the effect.
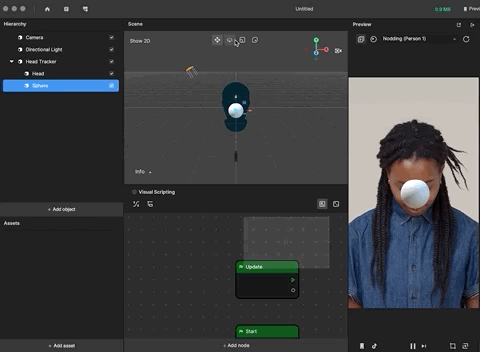
Add a Sphere to the Nose
Start by adding a built-in sphere to the scene by navigating to the Hierarchy panel and clicking the Add button [+] > 3D > Sphere. Now we can see a preview of the effect in the Preview panel. By default, the sphere does not follow the head movement.
To ensure that the object follows the head, you must parent the Sphere object under the Head Tracker.
You can see that the sphere is following the head onscreen. You can continue to make it a little more interesting! First, you’ll want to move and scale the sphere to track the nose.
Apply a PBR Material to the Sphere
You’ll need to create a new material for the sphere. Navigate to the Assets panel and click the Add button [+] > Material > Standard PBR.
Change the color of our new material from the default gray to something new! Select the Standard PBR material from the Assets panel to bring up its parameters.
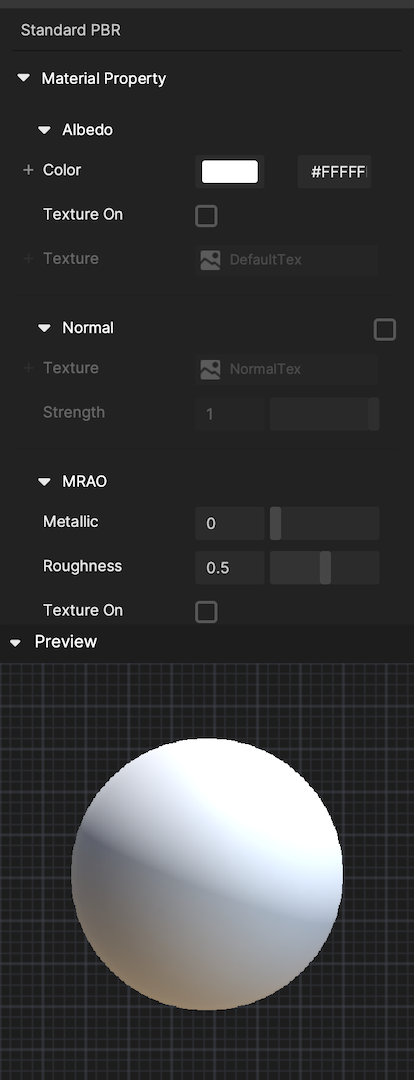
Change the material’s base color in the Albedo section. For this example, pink is selected, but you can use any color you’d like!
Now you can apply the material to the sphere. Select the sphere in the Hierarchy panel and navigate to the Mesh Renderer listed in its components. You can apply the Standard PBR to the Material section.
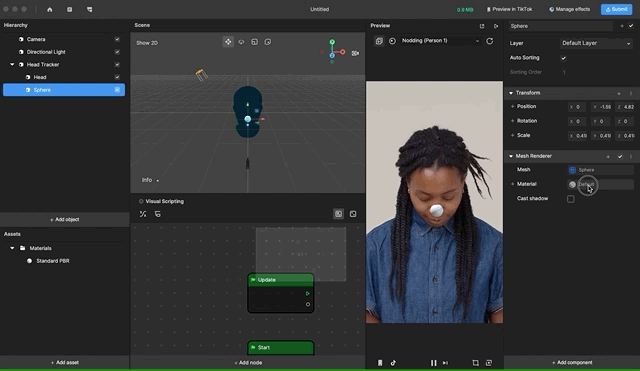
You can see the final result in the Preview panel!

Demo Effect: Face Avatar Drive
Check out this tutorial to learn how to create a Face Avatar Drive effect!