Body Avatar Drive
Body Avatar Drive allows you to control a 3D character with your body movement.
Requirements
The Body Avatar Drive object is used in conjunction with a 3D character model. Make sure you have a model to use with Body Avatar, such as this downloadable alien character.
Add a Body Avatar Drive Object
Go to the Hierarchy panel and click on the Add button [+], go to AR Tracking, and then select Body Avatar Drive. Body Avatar Drive maps the movement of the key points of your body that are recognized by the camera to the movement of the key joints of the model under the Body Avatar Drive object.
Use the Body Avatar Drive Object
To use the Body Avatar Drive object, you will need to rig and import a 3D character model, and then properly configure the component.
Prepare a 3D Character Model
To prepare your 3D character model for Body Avatar Drive, you must be mindful of the rigging, naming convention, and hierarchy of your model.
Character Rigging
Rigging can take a lot of time. You can download the BodyRigTemplate and use it as a reference for the key points of a 3D body.
If you want to use the automatic map provided by the Body Avatar Drive component, you can do the following:
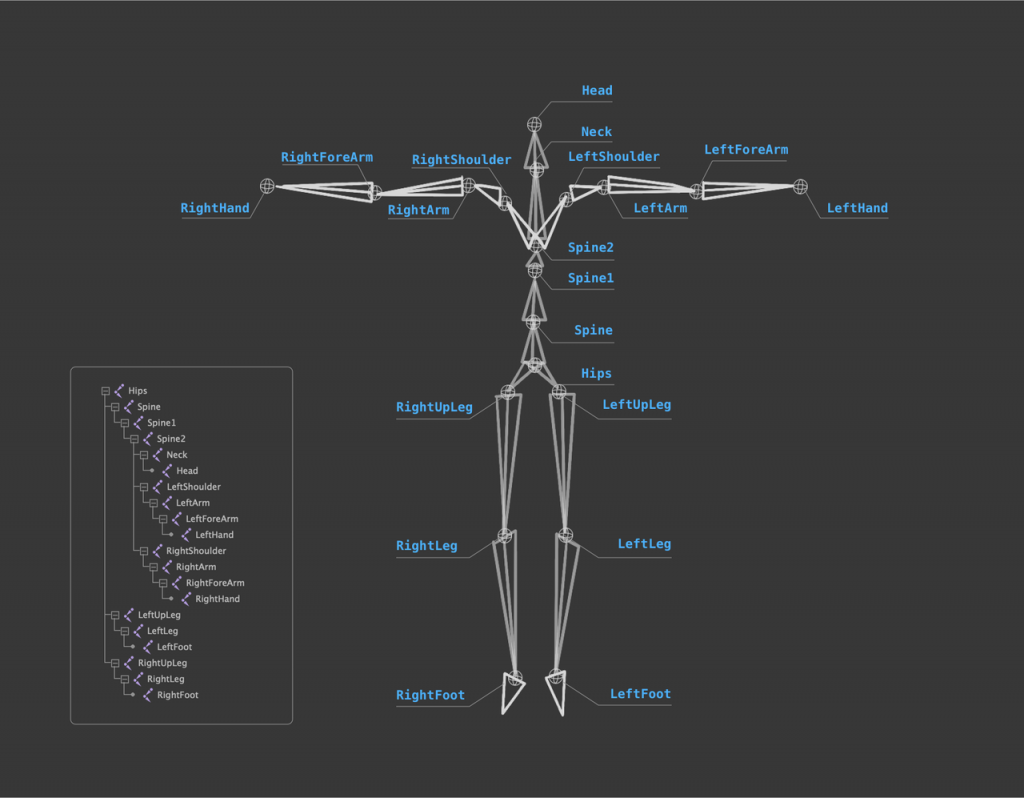
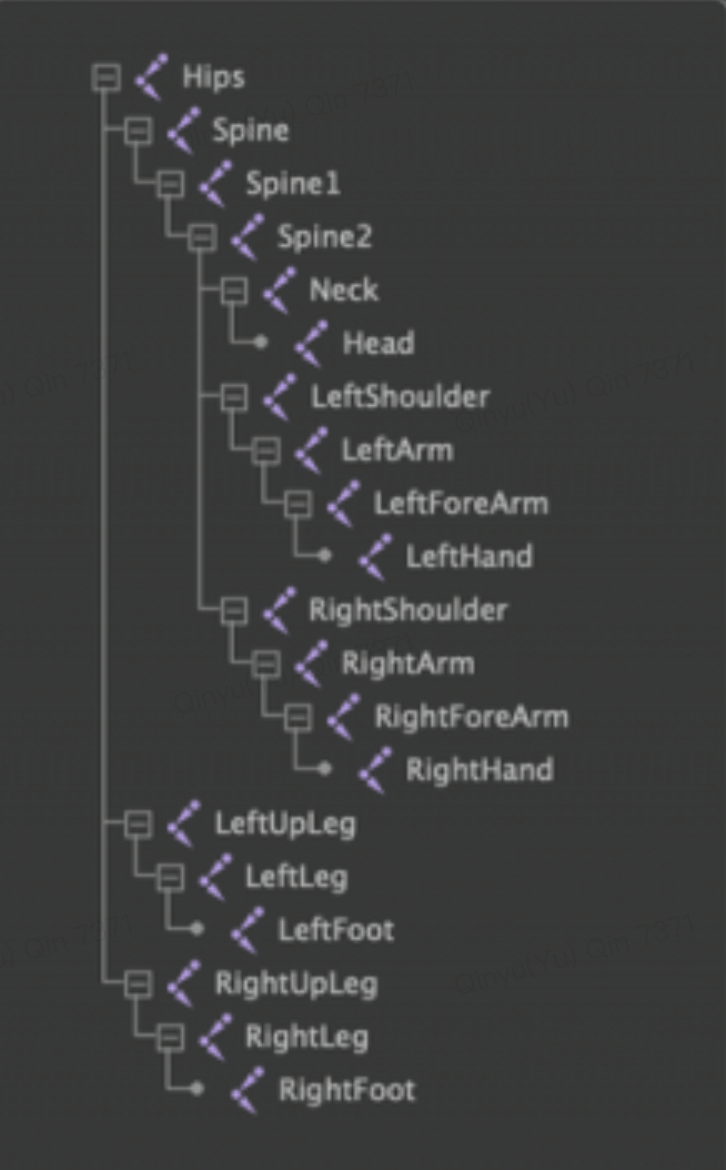
- Name your joints the same as the image shown below.
- Order the joints hierarchy the same as the image shown below.
It is recommend that you use some automation rigging tool, like Autodesk®, Maya®, or Adobe® Mixamo®. Adobe® Mixamo® technology uses machine learning methods to automate the steps of the character animation process, including 3D modeling, rigging, and 3D animating.
When creating a Body Avatar Drive model in Adobe® Mixamo®, you must consider the following for the best results:
- Export the Skeleton LOD with a value of less than 50.
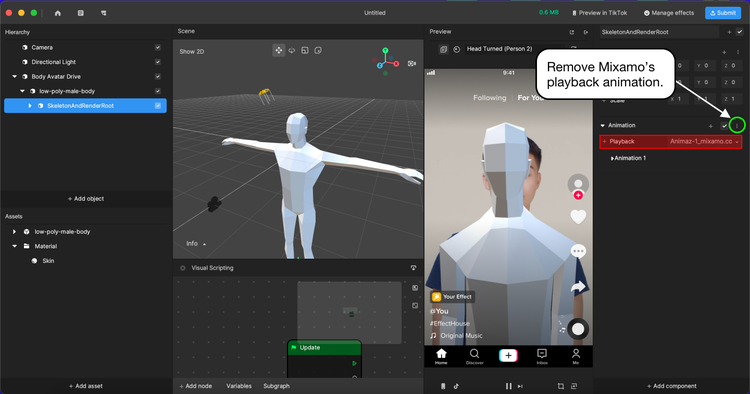
- When exporting a model with an animation into Effect House, you must remove the Mixamo® playback animation component when dragging the model into the scene.
Import a 3D Model
You can import assets by dragging them to the Assets panel or clicking the Add button [+] > Import > From Computer.
Add a 3D Model to the Hierarchy panel
Loop the model under the Body Avatar Drive object you created.
Configure a Body Avatar Drive Component
Click the Match Rigging button of the Body Avatar Drive component in the Inspector panel. It will fill or refresh the joints that match to a specific part of the human body based on the names of the joints.
You can also manually drag the joint model to the specific slots.
Now you can try to control your avatar!
Components
The Body Avatar Drive object is made up of the following components, found in the Inspector panel:
Demo Effect: Character Drive
Check out this tutorial to learn how to use the Character Drive template to apply your position and rotation of joints onto the character
Demo Effect: Control the Character Drive With the Body Detection Node in Visual Scripting
The Body Detection node detects if there’s a body in the camera view to set up related interactions. Learn more about the Body Detection Visual Scripting node.

For example, set a basic interaction. If a full body is not detected, make the alien avatar invisible. If a full-body is detected, display the character at the bottom of frame and match the user’s movements.
Demo Effect: Clothing Try-On
Check out this tutorial to use the Body Avatar Drive component to create a clothing try-on effect.