Create a Heart Effect Using Signed Distance Fields
This tutorial teaches you how to use the Signified Distanced Fields feature, otherwise known as SDF, to create a dynamic heart effect in Visual Effects (VFX) Editor.

Set Up Your VFX Environment
After you've created a new project in Effect House, you will need to set up a VFX environment. You can utilize one of the two methods outlined below. For more information on the VFX Editor, check out the VFX Editor Overview.
Method 1
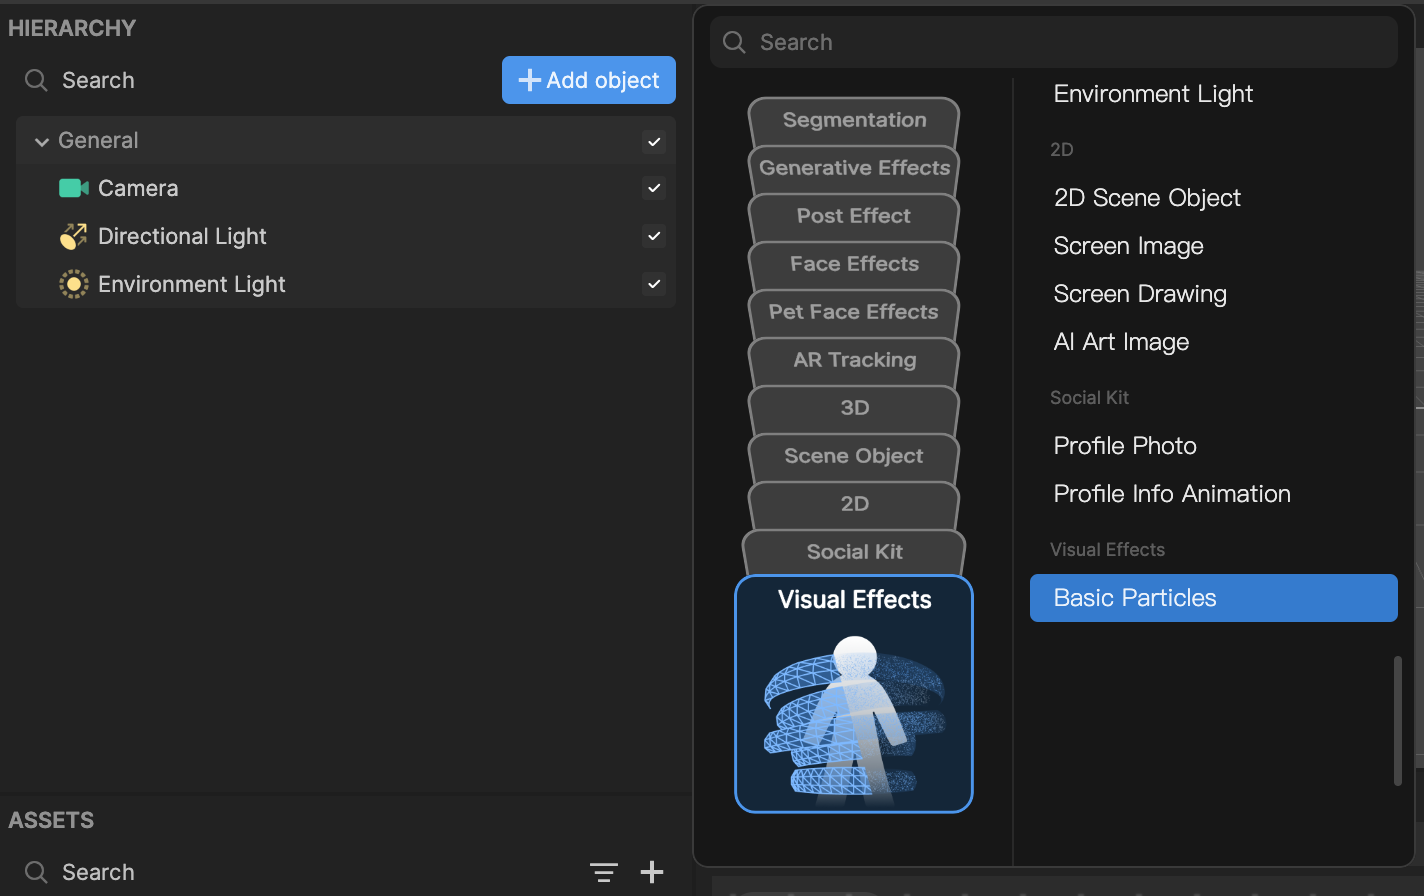
- Go to the Hierarchy panel
- Click the Add object button [+]
- Go to Visual Effects
- Select Basic Particles
Method 2
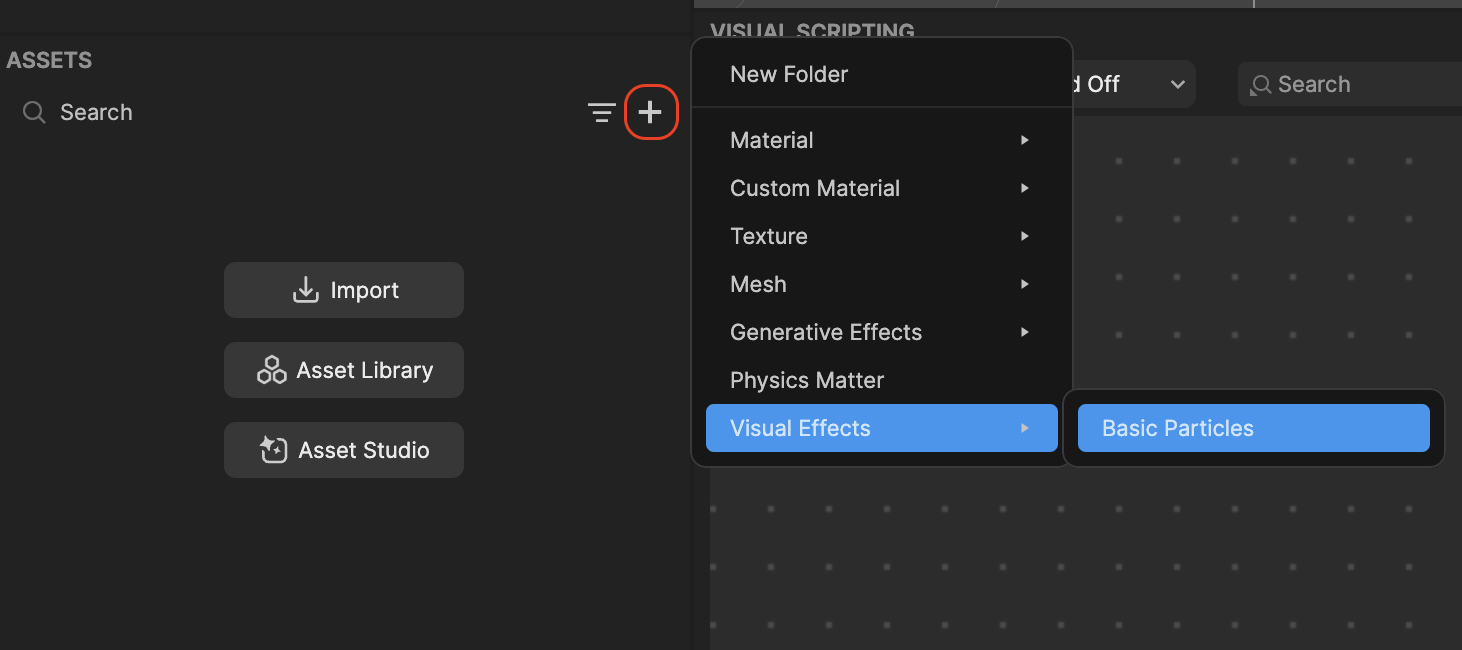
- Go to the Hierarchy panel
- Right click on the panel to view the menu popup window
- Navigate to Add object
- Go to Visual Effects
- Select Basic Particles
Once you've added the Basic Particles object, you will see the Visual Effect Graph. You should also notice white particles moving in the Preview panel.
To see your changes immediately as you make them, enable the Auto Compile option by clicking the Auto Compile button. If this option is not enabled, you’ll need to manually click the Compile button after each update to view your changes.
Import a 3D Texture
You need a 3D texture asset, in the form of a VF or FGA file, to use the SDF node. To get started with this tutorial, you can import the following file:
To import a 3D texture asset:
- In the Assets panel, click the Add asset button [+]. The Assets menu appears.
- Go to Import and click From Computer
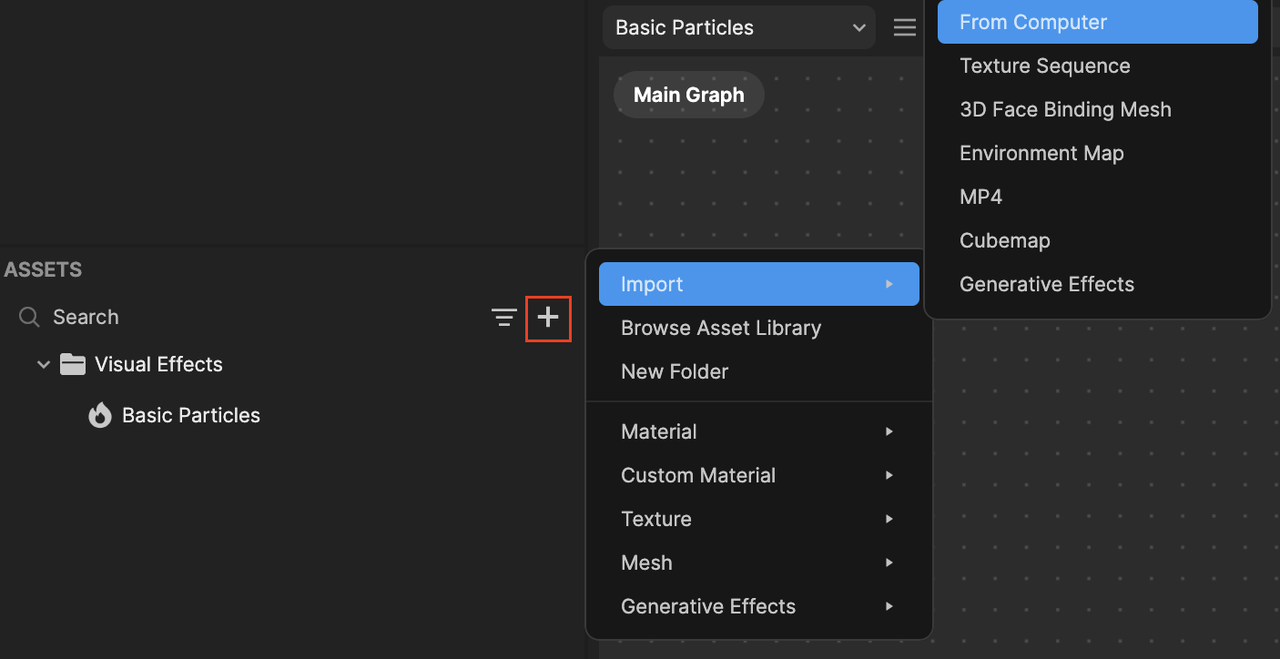
- Select the 3d_heart.vf file and import
Set Up Signed Distance Field
To understand the basics of the SDF function, make the following changes:
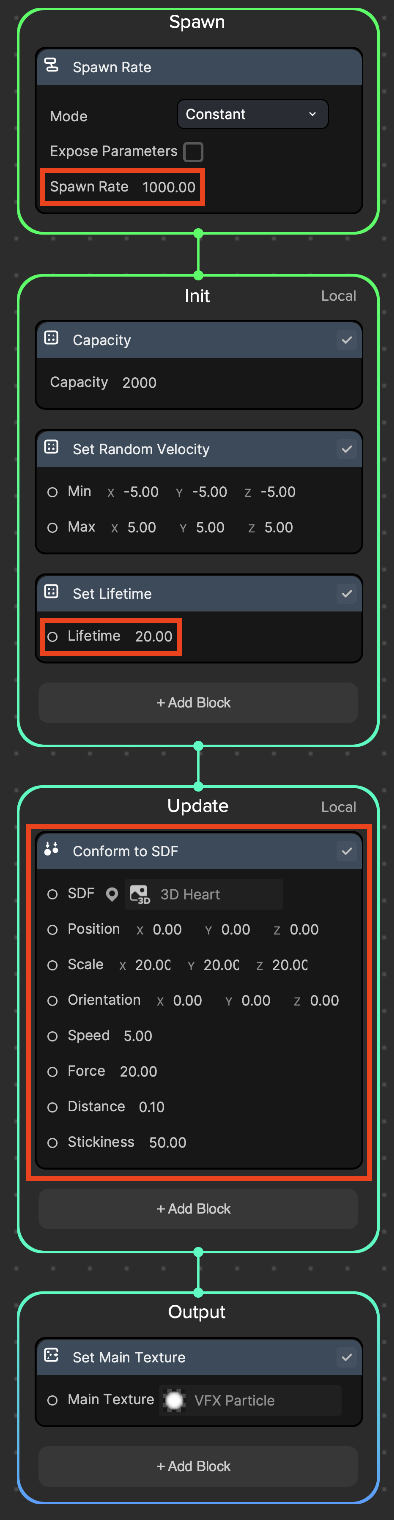
- In the Spawn logic, set the Spawn Rate value to 1000.00. This means all 1,000 particles are spawned at once at the beginning of the effect.
- In the Init logic:
- Set the Capacity value to 1000.00. This is the maximum supported particles in the simulation.
- Define the minimum and maximum values of Set Random Velocity:
- Min: (-5.00, -5.00, 5.00)
- Max: (5.00, 5.00, 5.00)
- Set the Lifetime value to 20.00. This means each particle has a lifespan of 20 seconds.
- In the Update logic, add the Conform to SDF node and do the following:
- Assign the imported 3d_heart.vf asset to the SDF field
- Set the values of Scale to (20.00, 20.00, 20.00) to resize the 3D heart texture
- The particles are spawned from the center of the screen and gradually move to form a heart shape, achieved through the use of the Conform to SDF node.

Adjust Particle Spawn Position and Movement
You can further customize the heart formation by changing the spawn location, like to the bottom of the screen. In this case, the particles will then move upward to form a heart shape using SDF.
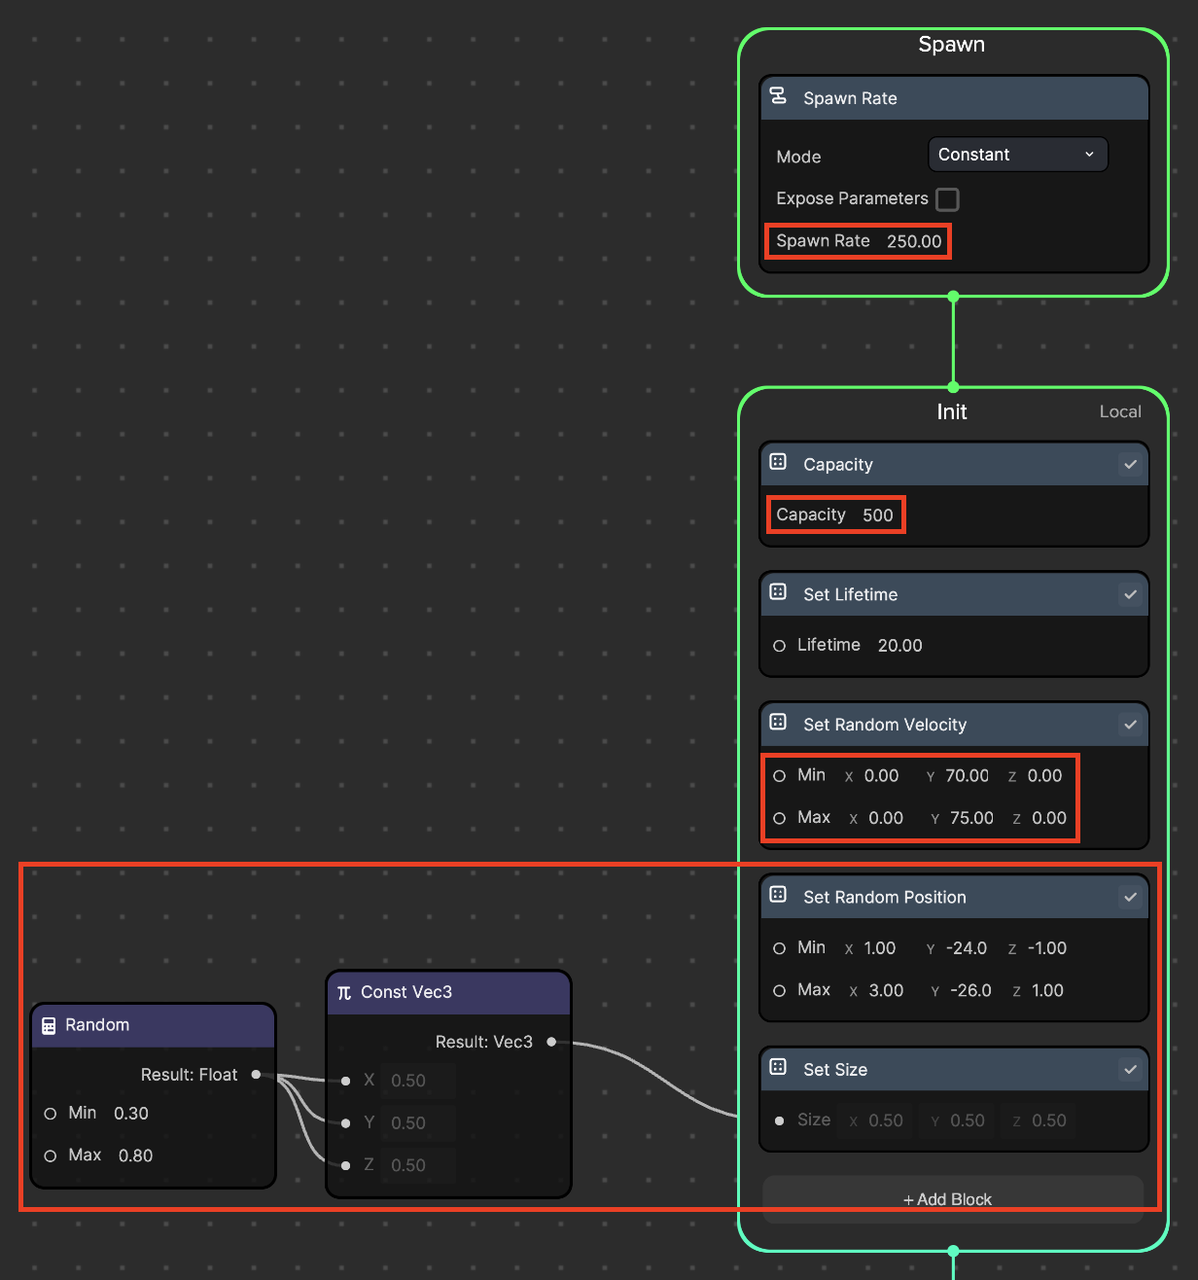
- In the Spawn logic, set the Spawn Rate value to 250.00. This means 250 particles are spawned per second.
- In the Init logic:
- Set the Capacity value to 500.00. This is the maximum supported particles in the simulation.
- Define the minimum and maximum values of Set Random Velocity so that the particles move upward on the screen:
- Min: (0.00, 70.00, 0.00)
- Max: (0.00, 75.00, 0.00)
- Add the Set Random Position node and set the following minimum and maximum values:
- Min: (1.00, -24.00, -1.00)
- Max: (3.00, -26.00, 1.00)
- Add the Random and Const Vec3 operator nodes, connect to Set Size, and set the following minimum and maximum Random values:
- Min: 0.30
- Max: 0.80
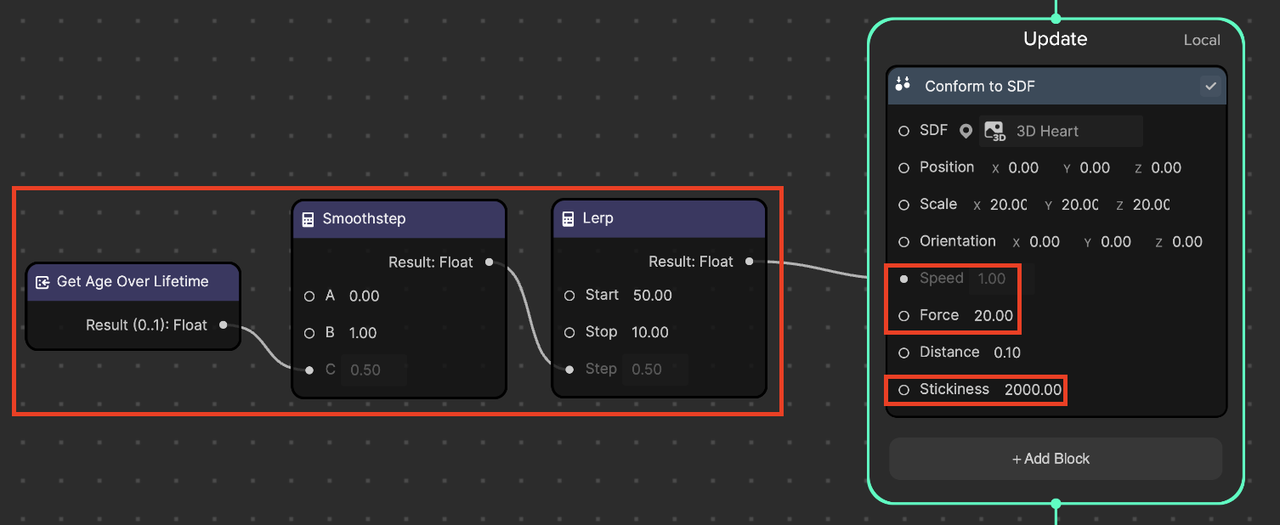
- In the Update logic:
- Add the Get Age Over Lifetime, Smoothstep, and Lerp operator nodes.
- Connect Get Age Over Lifetime to Smoothstep, Smoothstep to Lerp, and Lerp to the Conform to SDF node.
- Set the following Smoothstep values:
- A: 0.00
- B: 100
- Set the following Lerp values to lower each particle's speed from 50 to 10 seconds during their lifespan:
- Start: 50.00
- Stop: 10.00
- Set the following Conform to SDF values to make the particles move around the 3D heart shape:
- Force: 20.00
- Stickiness: 2000.00
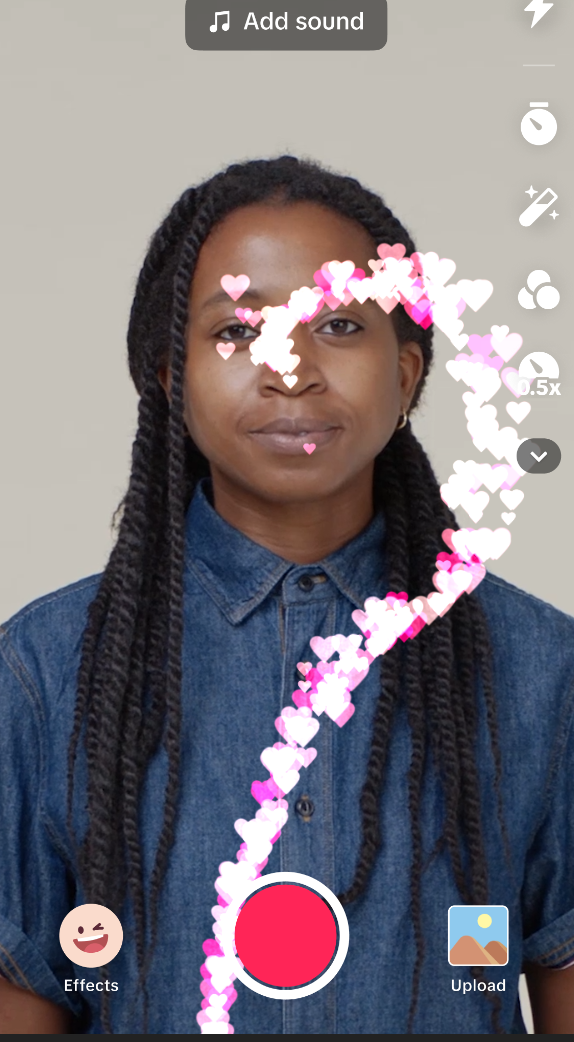
With the changes that you've made above, the particles will now spawn from the bottom of the screen, and then ascend towards the SDF shape, creating a heart.

Add Colors and Textures
Enhance your effect by incorporating colors and textures into the particles.
- Download the following ZIP file and extract it to access its files:
↓ color_gradient_and_heart_shape.zip
- In the Assets panel, click the Add asset button [+]. The Assets menu appears.
- Go to Import and click From Computer
Select the Color Gradient.png file and import
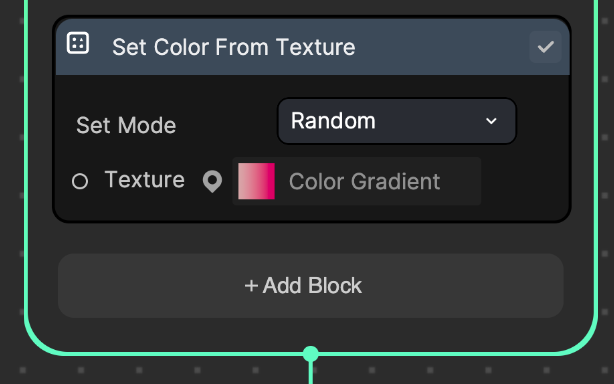
In the Init logic:
- Add the Set Color From Texture block node
- Define Set Mode as Random and set the texture to the Color Gradient image. This will give each particle a random color from the image by selecting pixels within the UV coordinates (0,0) to (1,1) of that image.
- In the Output logic, assign the Heart Shape image as Main Texture. This will result in 2D heart-shaped particles instead of circles.
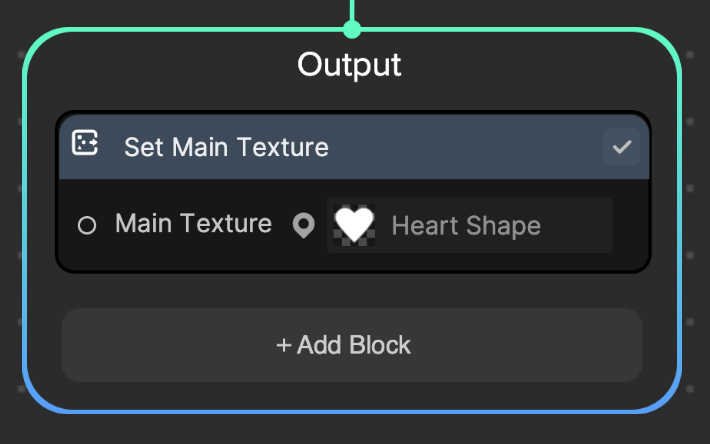
- You can see pink hearts spawn from the bottom of the screen and form a heart shape.

Improve Particle Movement
The current transition of particles moving upward to create the heart shape is not very smooth or natural. You can make some adjustments to enhance their movement.

Before Change
After Change
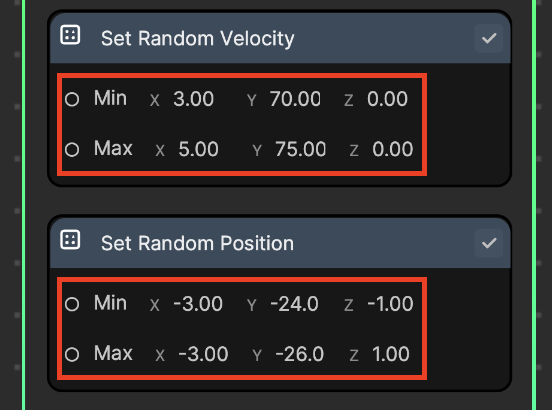
- In the Init logic:
- Set the following minimum and maximum values of Set Random Velocity so that the particles move slightly diagonally towards the top-right corner of the screen:
- Min: (3.00, 70.00, 0.00)
- Max: (5.00, 75.00, 0.00)
- Add the Set Random Position block node and set the following minimum and maximum values to spawn the particles from the left-bottom corner of the screen:
- Min: (-3.00, -24.00, -1.00)
- Max: (-3.00, -26.00, 1.00)
- In the Update logic, add and modify the following nodes to make the particles initially form a curved line moving upward before forming a heart shape:
- Add an Add Force context node
- Add the following operator nodes:
- Get Age Over Lifetime: Returns 0 at the beginning of each particle's lifetime and increases to 1 when its lifespan ends
- One Minus: Calculates the difference between 1 and the input value
- Pow: Calculates the base value (A) when raised to the exponent value (B). Set the B value to 30.00.
- Const Vec3: Stores and returns an instance of a vector3. Set the values to (40.00, 50.00, 0.00)
- Multiply: Calculates the product of two input values
- Connect all the newly added nodes. These operations will cause the particles to draw an arc instead of a straight line.

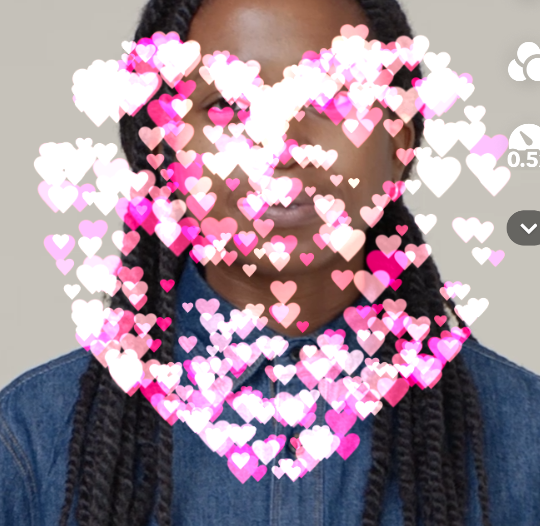
The particles now draw an arc before starting to naturally form a heart shape.

Optional: Understand Blend Mode
VFX Editor comes with several blend modes: Additive, Alpha, Opaque, and Alpha Premul. If you change the blend mode from Additive (default) to Alpha, the color of the heart particles will appear with their full color and no transparency.

Blend Mode: Additive
Blend Mode: Alpha
- Select the Output context node and the Details button. The Details menu appears.
- Change Blend Mode to Alpha
- You can see the full color of the heart particles.