Create a Fire Effect
In this tutorial, you will learn how to create a simple fire effect using the Visual Effects (VFX) Editor! You will also learn how to add interactions using Visual Scripting.

Set Up Your VFX Environment
After you've created a new project in Effect House, you will need to set up a VFX environment. You can utilize one of the two methods outlined below. For more information on the VFX Editor, check out the VFX Editor Overview.
Method 1
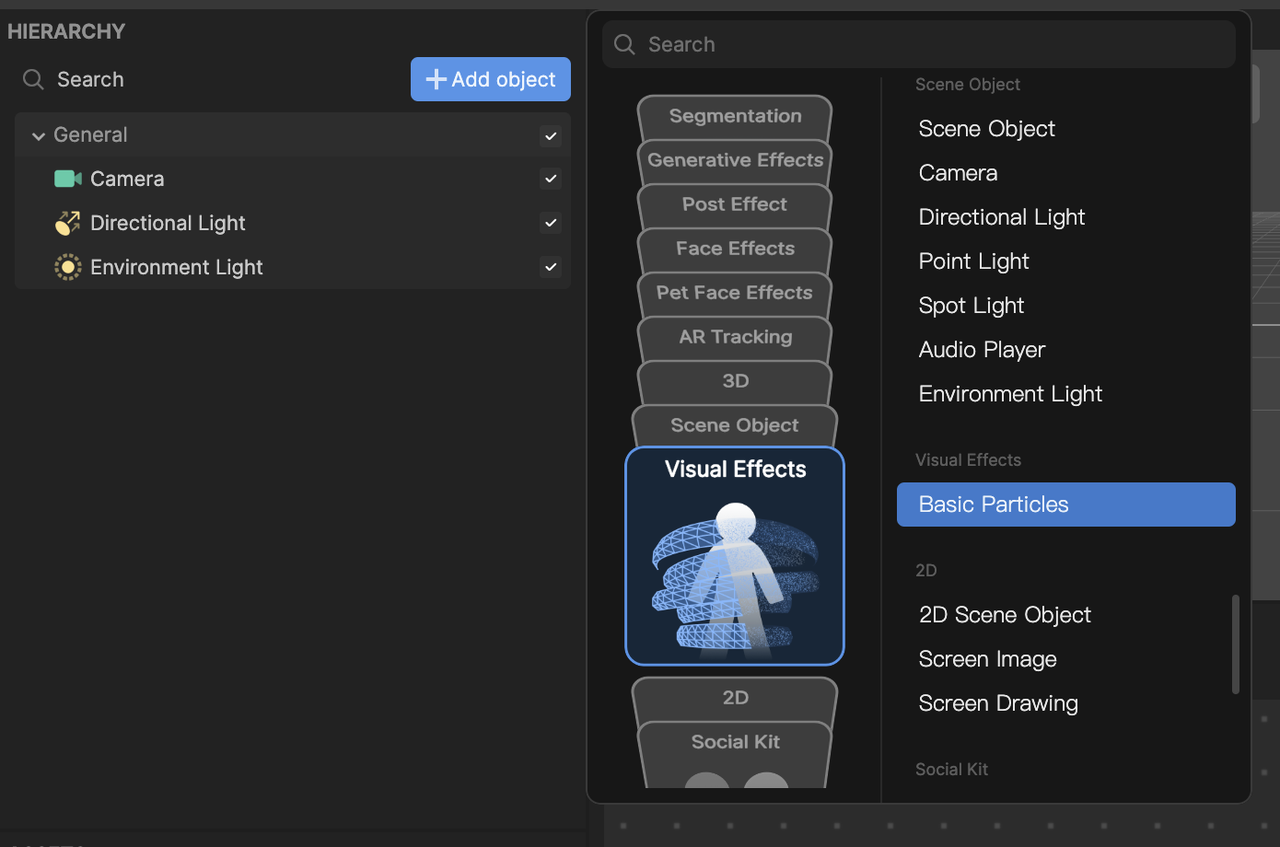
- Go to the Hierarchy panel
- Click the Add object button [+]
- Go to Visual Effects
- Select Basic Particles
Method 2
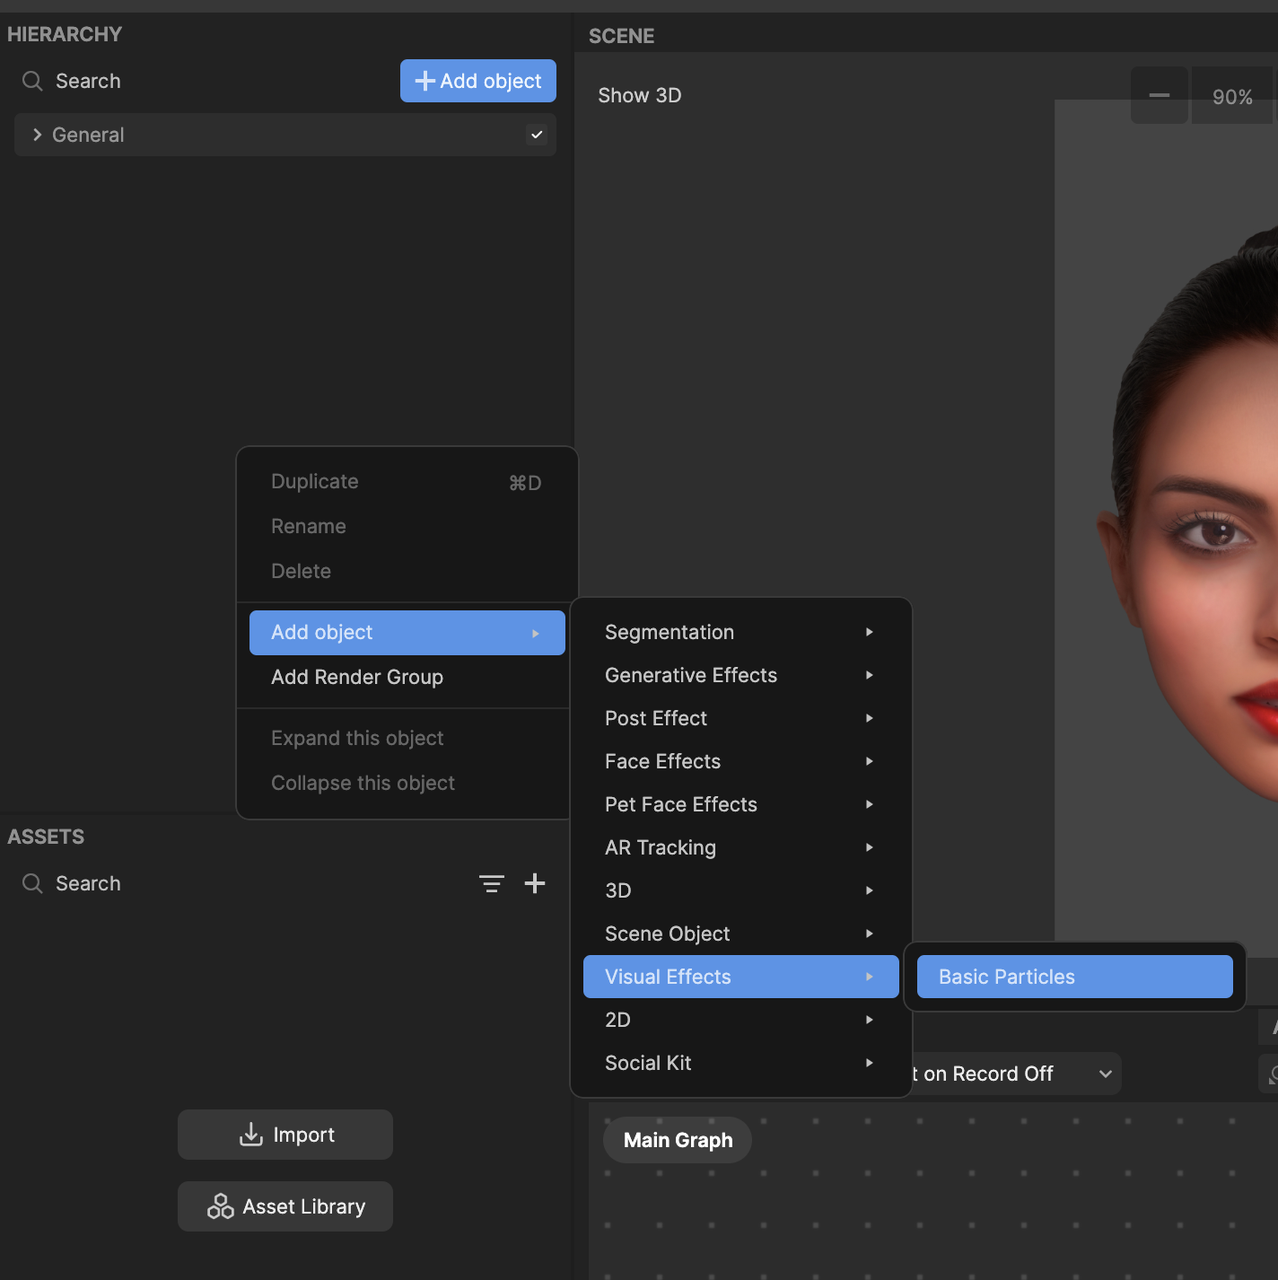
- Go to the Hierarchy panel
- Right click on the panel to view the menu popup window
- Navigate to Add object
- Go to Visual Effects
- Select Basic Particles
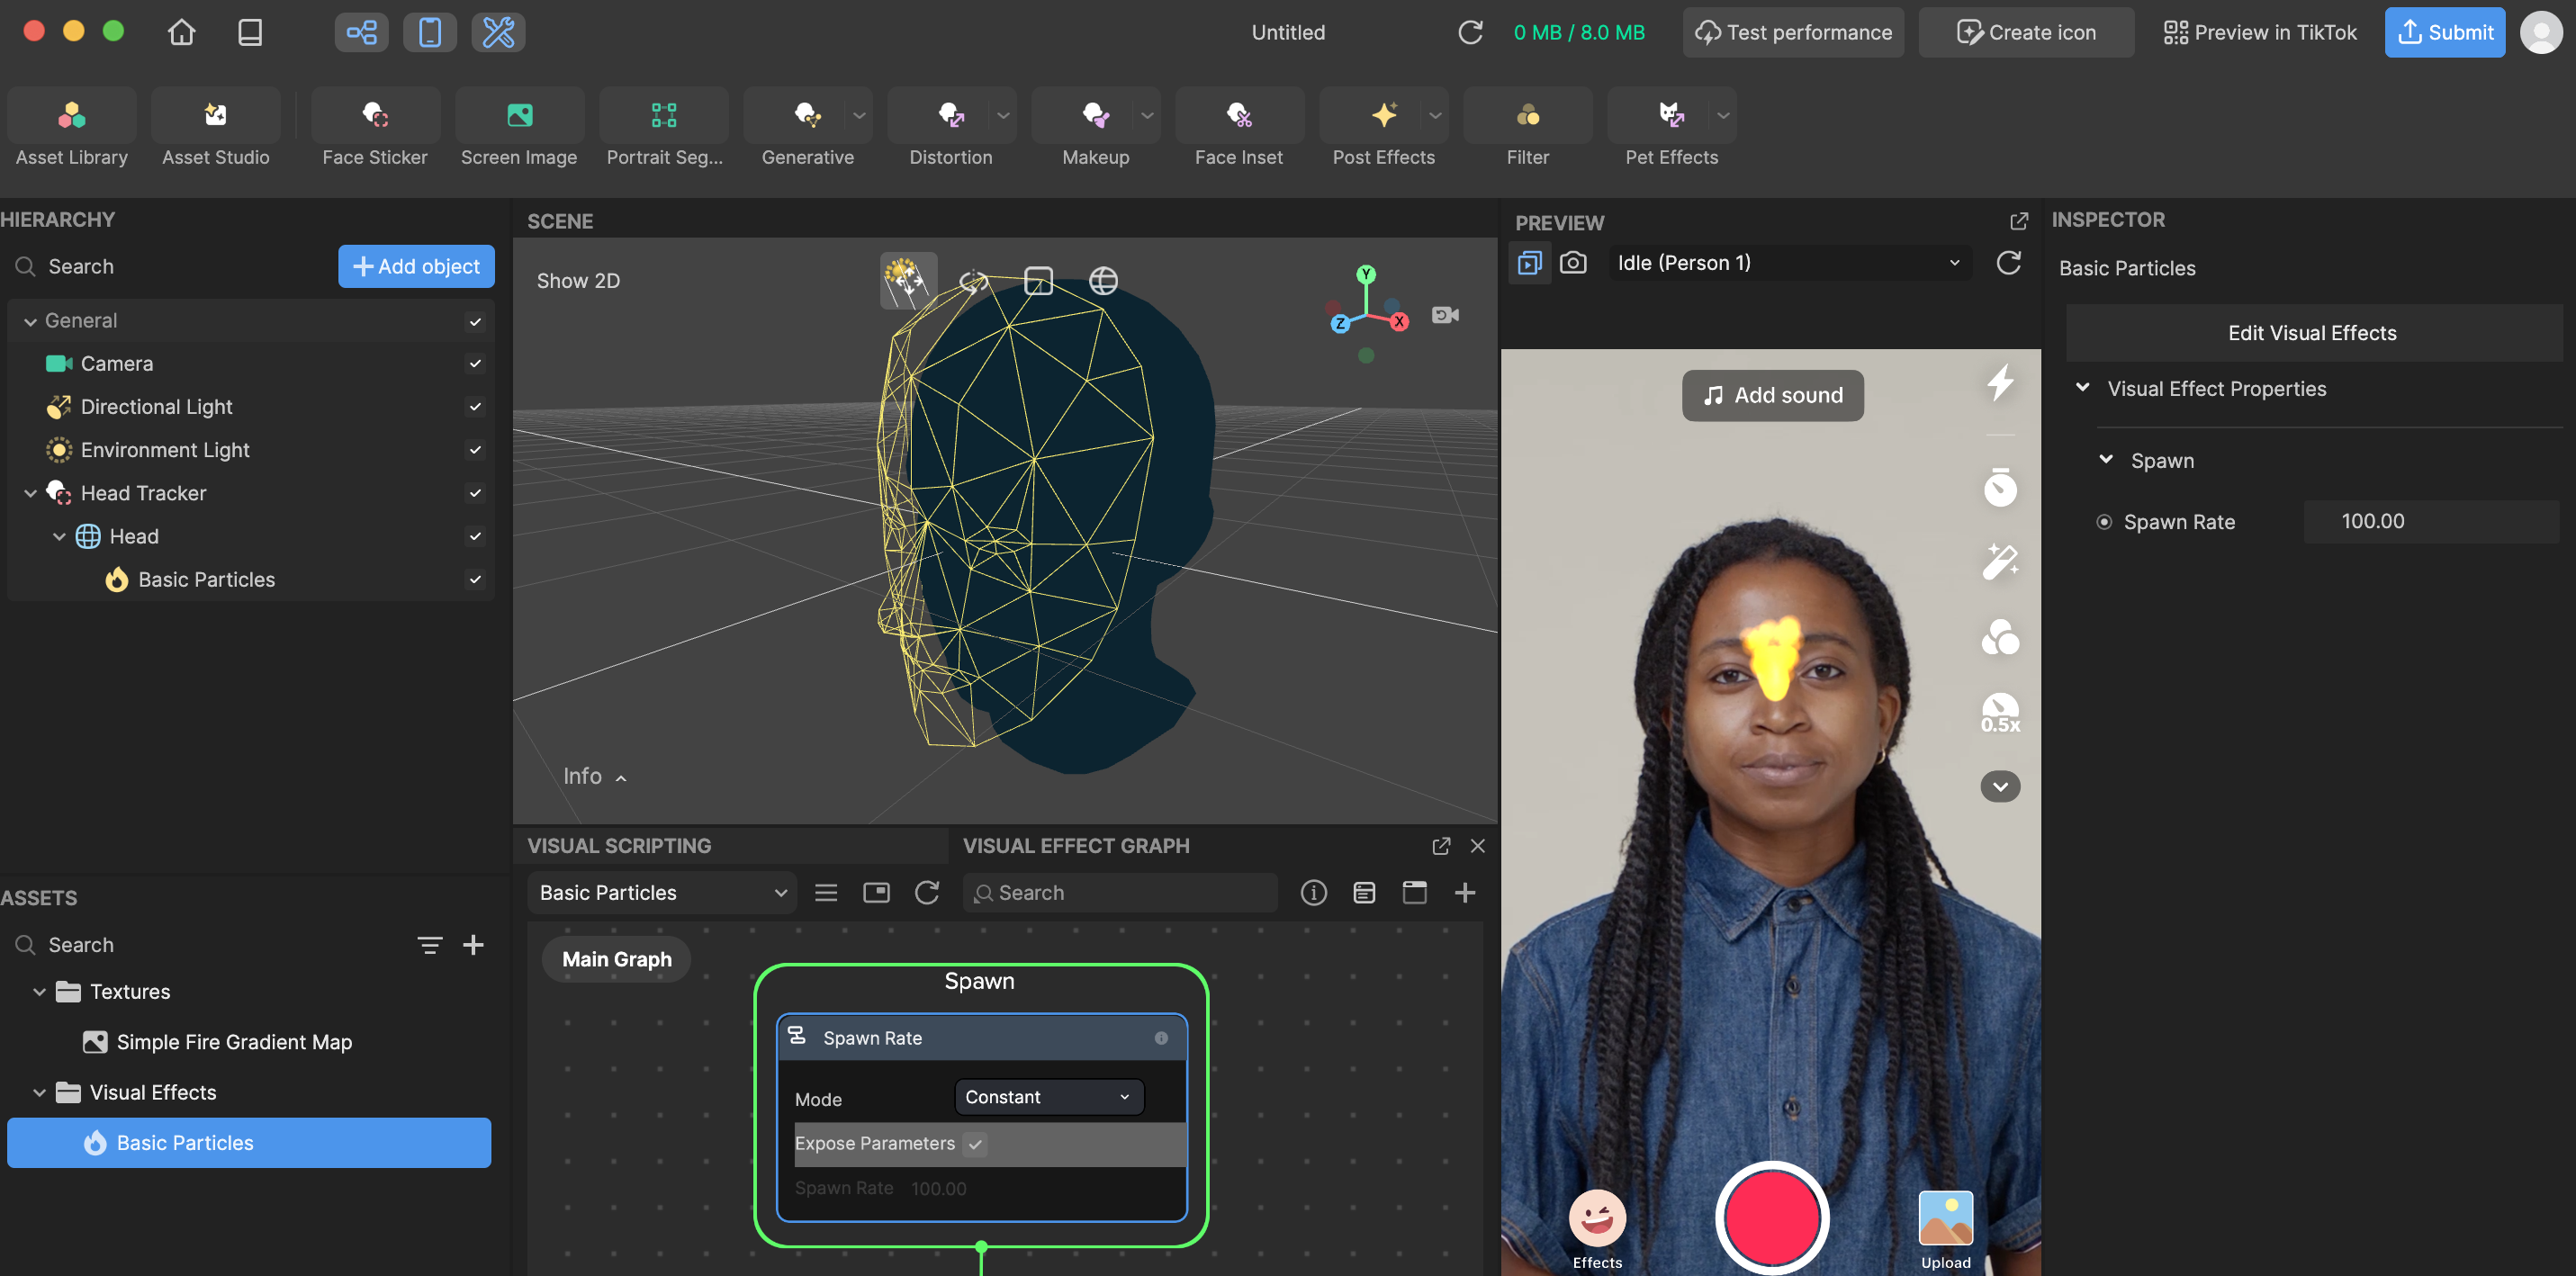
Once you've added the Basic Particles object, you will see the Visual Effect Graph. You should also notice white particles moving in the Preview panel.
To see your changes immediately as you make them, enable the Auto Compile option by clicking the Auto Compile button. If this option is not enabled, you’ll need to manually click the Compile button after each update to view your changes.
Create the fire effect
When the VFX graph is initially generated, you will notice that the particles in the Preview panel are created, or spawned, from the center of the screen and move away in a random direction. This is caused by two factors:
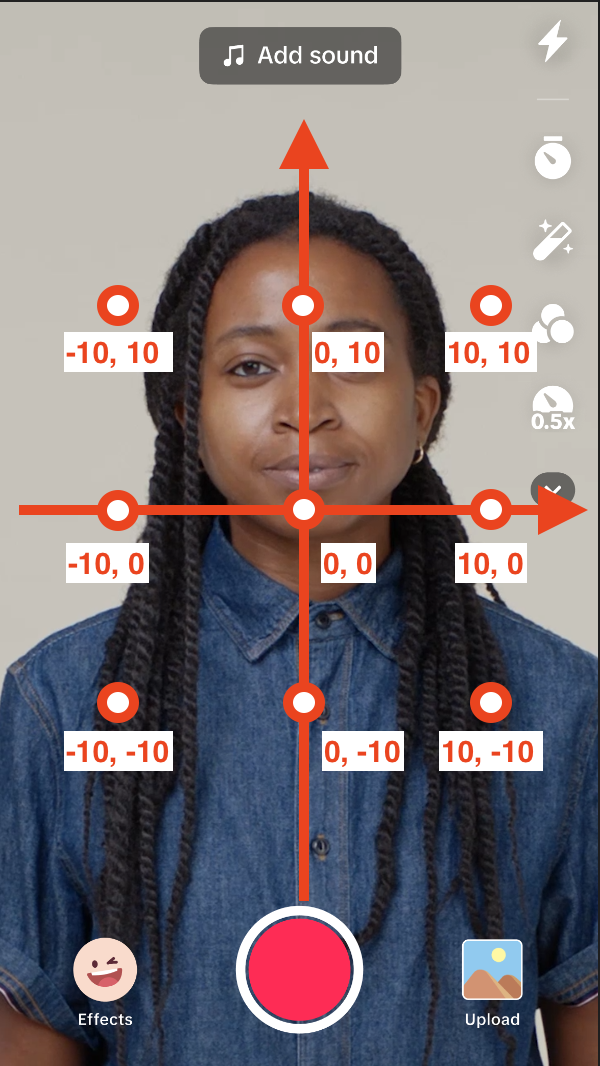
- The center of the screen is set to (0, 0) in the VFX screen coordinate system by default. You can modify the position by creating a Set Position node in the Init context node.
- Set Random Velocity is used to set a random velocity on each particle, with a value range from -5 to 5.
To make the particles' movement look similar to fire, the following changes should be implemented:
- In the Spawn node, change the spawn rate to 100, which will create 100 particles per frame.
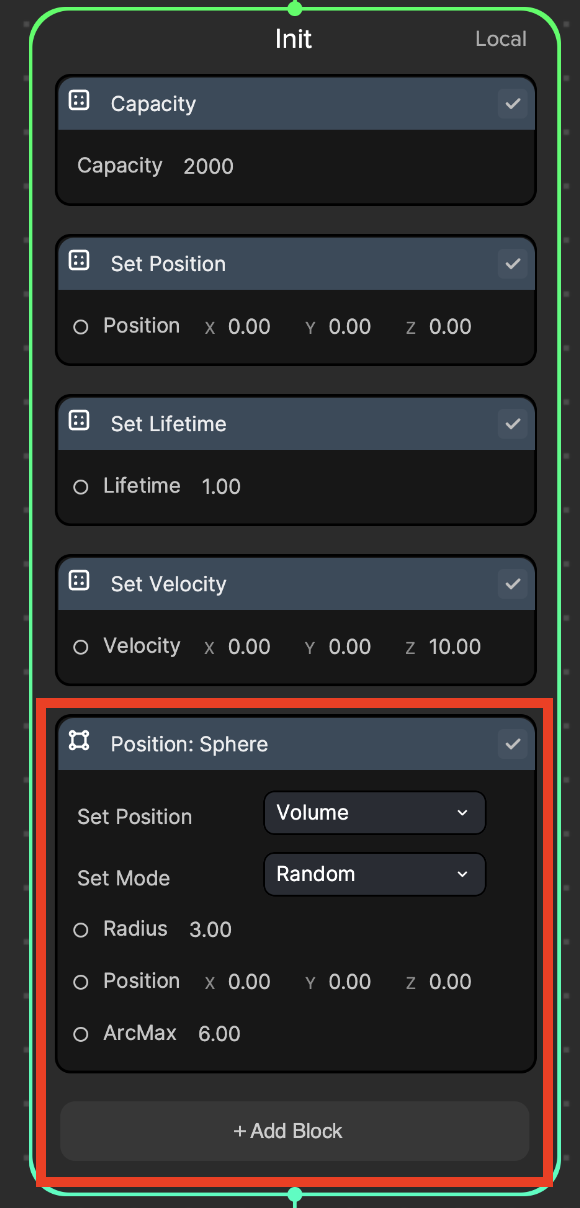
- The Capacity node controls the maximum allowed particles in the scene. You can leave it at 2,000 for now.
- In the Set Position node, keep it as (0, 0, 0) to initiate particles from the center of the screen.
- The Set Lifetime node controls how long each particle will appear on the screen before disappearing. Set it as 1.00, so that each particle will appear for one second.
- In the Set Random Velocity node, change the Min to (-2, 3, 0) and Max to (2, 5, 0), so that the particles will spread out in an upward direction.

Next, modify the color of the particles, to resemble that of fire.
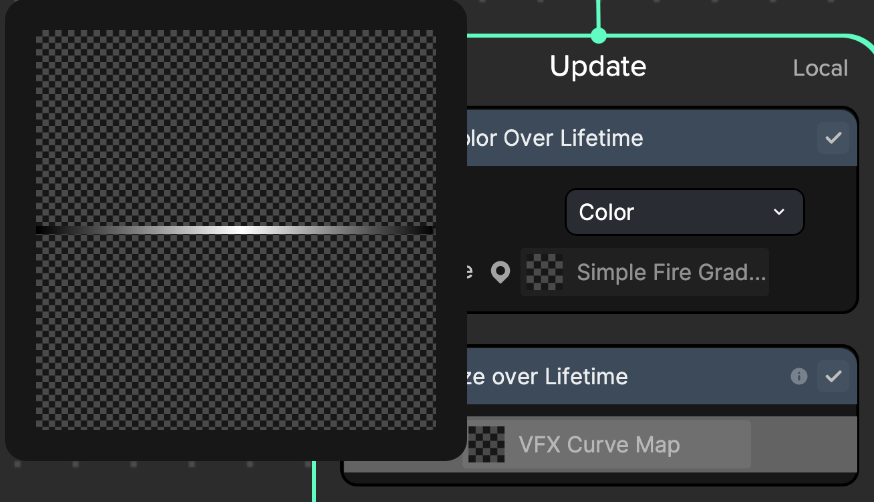
- Use a node called Set Color Over Lifetime in the Update context node. This node requires a color gradient texture, which can be downloaded below.
↓ simple_fire_gradient_map.zip
- The Set Color Over Lifetime node will take an image texture and change the color of the particles over time, moving from the left to the right of the image, based on each particle's life span.

You have now created a simple fire effect in the VFX Editor!
Adding interactive features to VFX particles using Visual Scripting
Enhance this effect further by refining it to achieve a "blowing fire effect" when an open mouth is detected.
You'll need to add a Head Tracker object to attach VFX particles onto:
- Go to the Hierarchy panel
- Click the Add object button [+]
- Go to AR Tracking
- Select Head Tracker
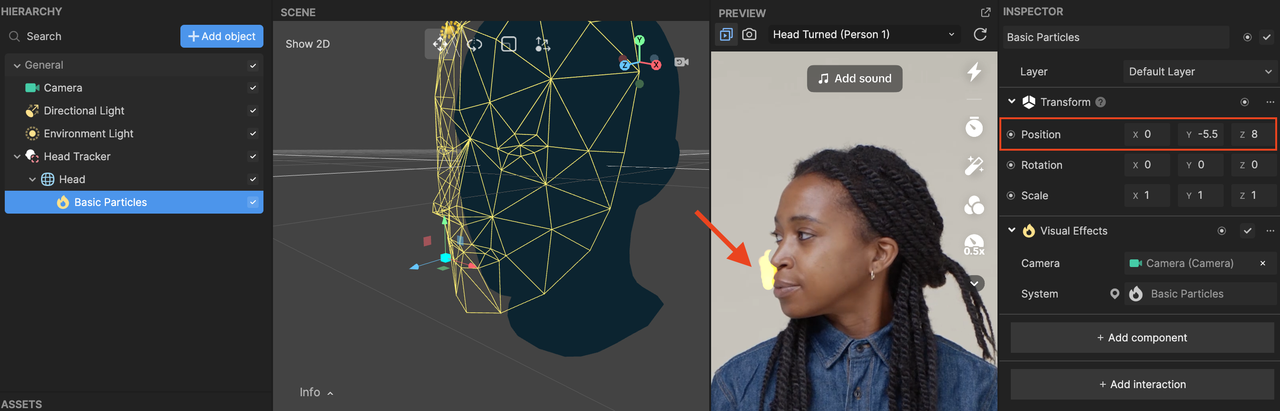
Select the Basic Particles object in the Hierarchy panel then drag and drop it under the Head mesh. Make sure to move the Basic Particles entity forward in the scene, so that it is not hidden inside the Head mesh.
To place the fire particles at the mouth, change the position to (0, -5.5, 8).
Then, to have control over the Spawn Rate from the VFX Graph in the Visual Scripting graph, you will need to expose the parameter by checking the Expose Parameter option in the Spawn context node.
In the Visual Scripting graph, add a Mouth Close Event node. Then,
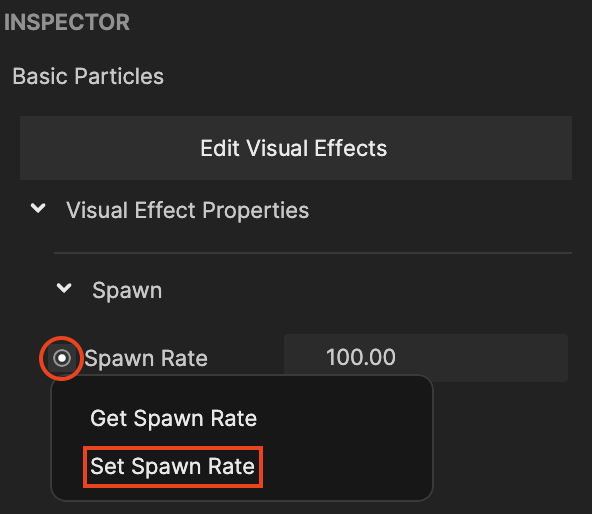
- Select Basic Particles in the Assets panel
- Click on the icon to the left of the Spawn Rate property in the Inspector panel
- Select the Set Spawn Rate node
When creating get/set nodes from the VFX Graph to the Visual Scripting graph, make sure that the Visual Scripting graph tab is selected. Otherwise, get/set nodes from the VFX Graph will NOT be created.
To build out the mouth open/close trigger:
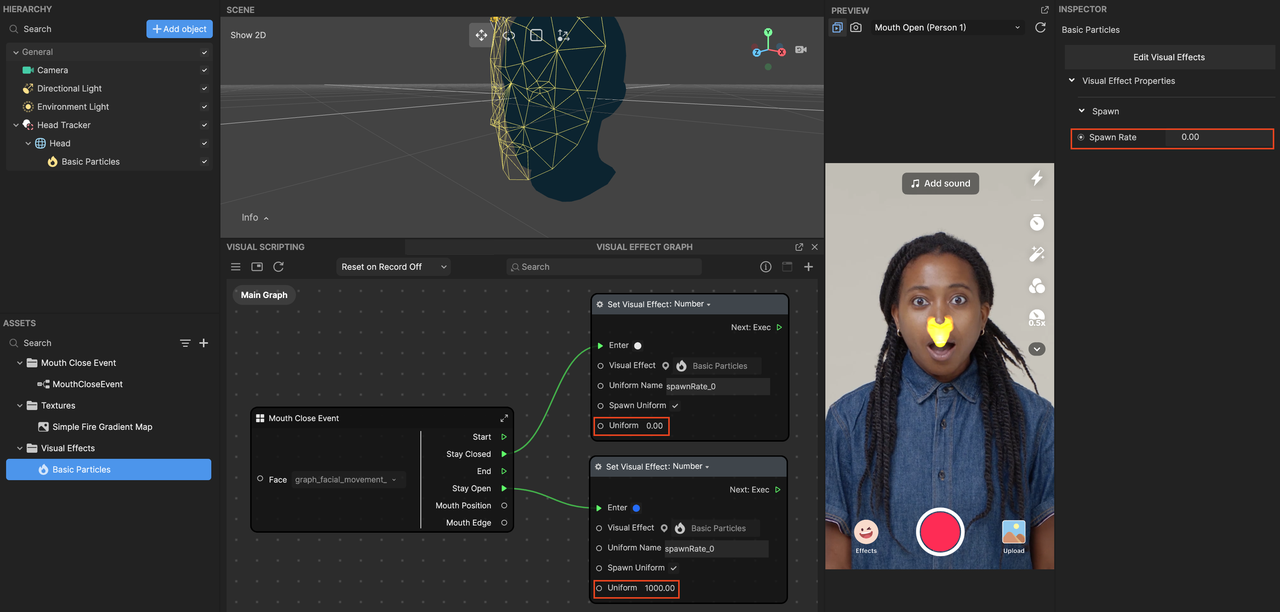
- Make a copy of the Set Spawn Rate node in the Visual Scripting graph.
- In the Mouth Close Event node, create a connection from Stay Closed to Enter in one of the two Set Visual Effect: Number nodes. Then, change the Uniform value to 0.0, so that the particles are not created when the mouth is closed.
- In the Mouth Close Event node, create a connection from Stay Open to Enter in the other Set Visual Effect: Number node. Then, change the Uniform value to 1,000.0, so that the particles are created at 1,000 particles per frame rate when the mouth is opened.
- Set the Spawn Rate property in the Inspector panel to 0, so that the particles are not spawned in the initial stage.
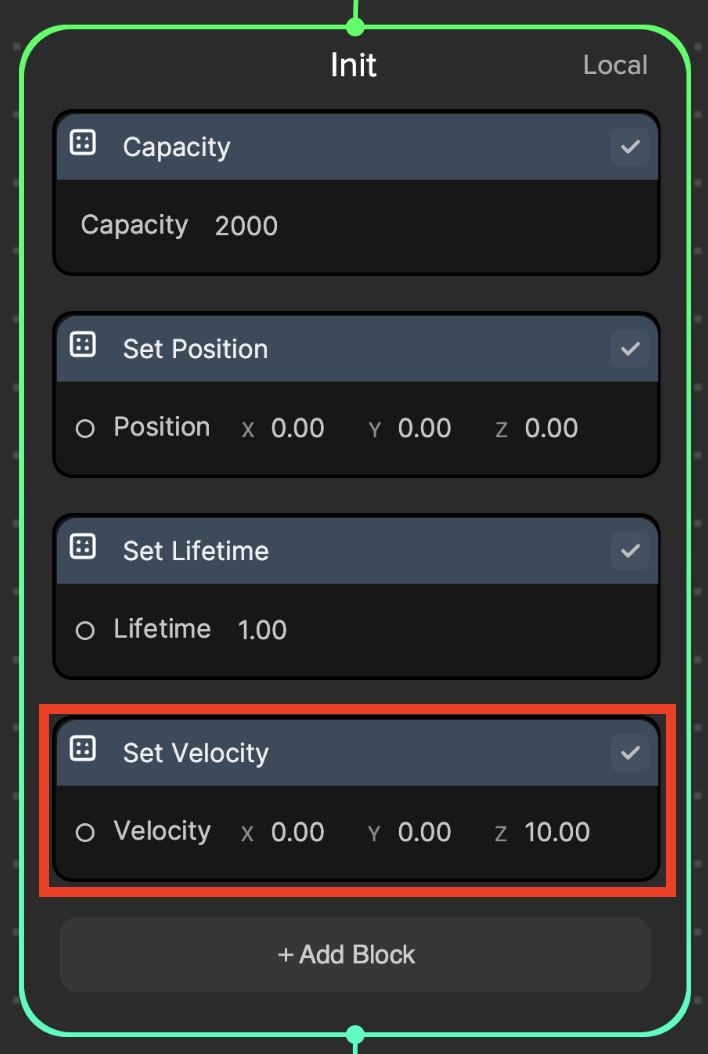
The fire particles are triggered when the mouth is opened, but they need to be modified to move in a forward direction instead of an upward direction.
This can be fixed by changing the velocity value. Remove the Set Random Velocity node from Init and add the Set Velocity node instead. Change the value to (0, 0, 10), so that you can see the particles move forward.
The particles are now moving in a forward direction, but they look very plain because they're moving in a linear direction. To make it look a bit more interesting, in the Init node, add the Position: Sphere node a radius of 3. This will set particles' position to a spherical shape.

To make it look even better:
- In the Init node:
- Change the value of Capacity to 20,000 to see more particles.
- Replace Set Lifetime with Set Random Lifetime, then set the Min as 0.3 and Max as 1.0. This will set the particles' lifespan from 0.3 to 1.0 seconds.
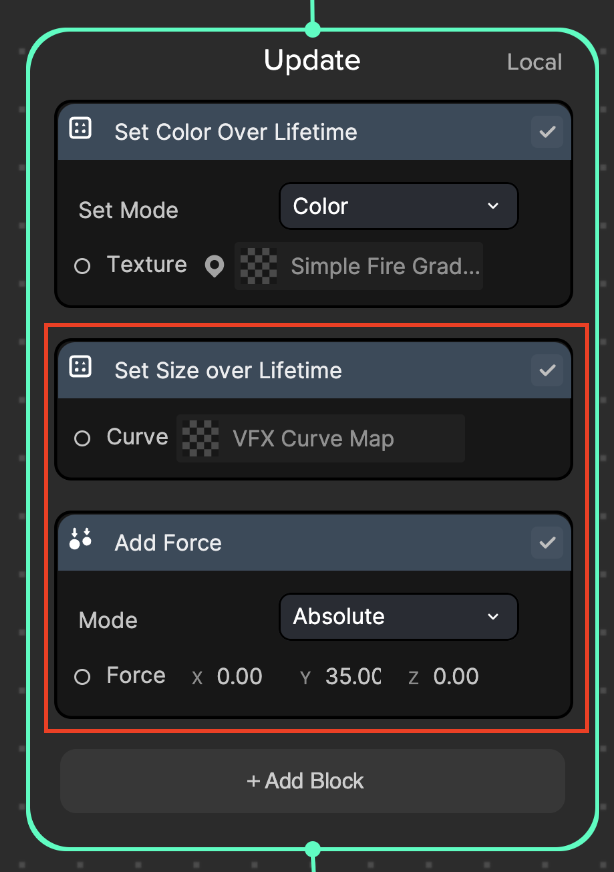
- In the Update node:
- Add the Set Size Over Lifetime node. This will set the particles' size based on its life span. The node comes with a default texture that will increase the size of the particle in the middle and decrease at end of its lifespan.
ii. Add the Add Force node. This will add force to the particle in a specified direction. In this case, the fire will have an upward force added to it.

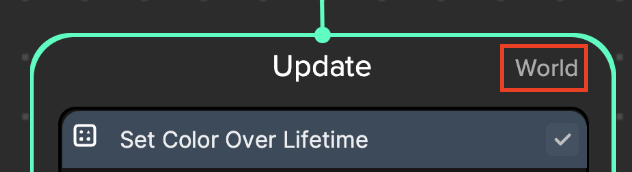
The VFX fire particle looks great, but there's one last issue to address: the particle follows the head's rotation in runtime.
To fix this, change the Update context node to use World Space instead of Local Space. This will allow each particle to get the head's position in the Init stage, then update the behaviors that include position and velocity in World Space. This does not get affected by the head's position in runtime.

Congratulations! You have now created a cool fire breathing effect triggered by mouth movement!