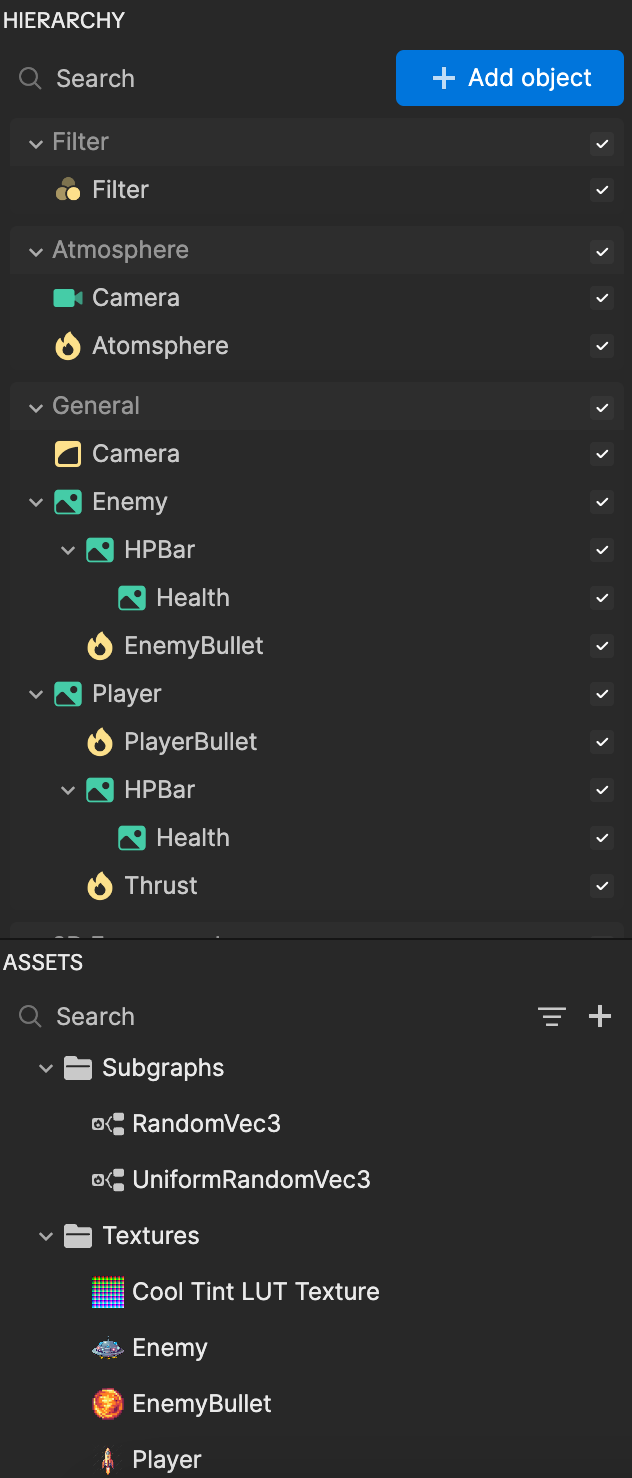
Create a Danmaku Game
In this tutorial, we will show you how to use VFX particles as interactive bullets in a danmaku game! We'll guide you through creating bullet patterns with VFX, setting up collisions between particles, enemies, and players, and utilizing the VFX Buffer to track collision data and determine win or loss conditions.
Import Assets
To get started, download the following zip file to obtain the project:
Once you've downloaded the zip file, open the Effect House project file, which will automatically import everything you'll need to the Hierarchy and Assets panel.
You can also manually import the assets:
- Go to the Assets panel
- Click the Add asset button [+]
- Go to Import
- Select From Computer
- Select the assets from the downloaded zip file. The assets are now added to the Assets panel.
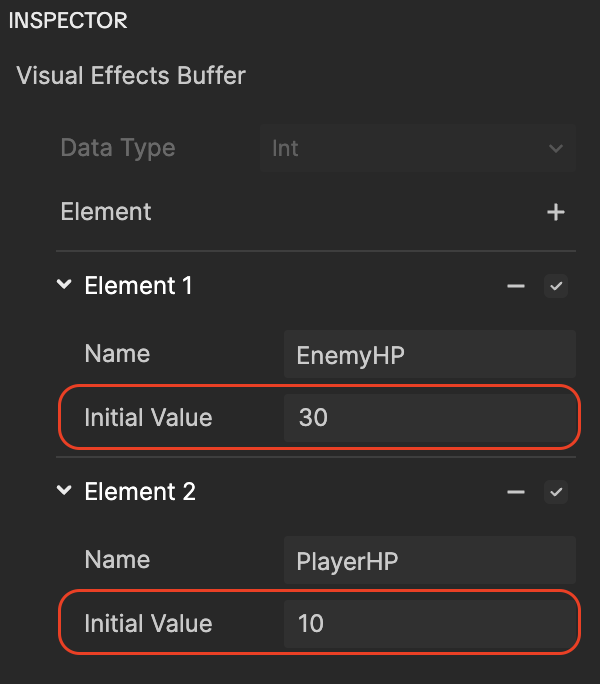
Visual Effects Buffer
The Visual Effects Buffer contains the health values for both the Enemy and the Player. You can increase these values to make either the enemy or the player live longer, or decrease them to make the game more difficult.
To change the Initial Value:
- Go to Assets panel
- Click Visual Effects Buffer
- Go to the Inspector Panel
- For Enemy Health:
- Go to Element 1
- Set the Initial Value to any number between 1 and 10, where 1 represents the lowest health.
- For Player Health:
- Go to Element 2
- Set the Initial Value to any number between 1 and 30, where 1 represents the lowest health.
- For Enemy Health:
Visual Effects
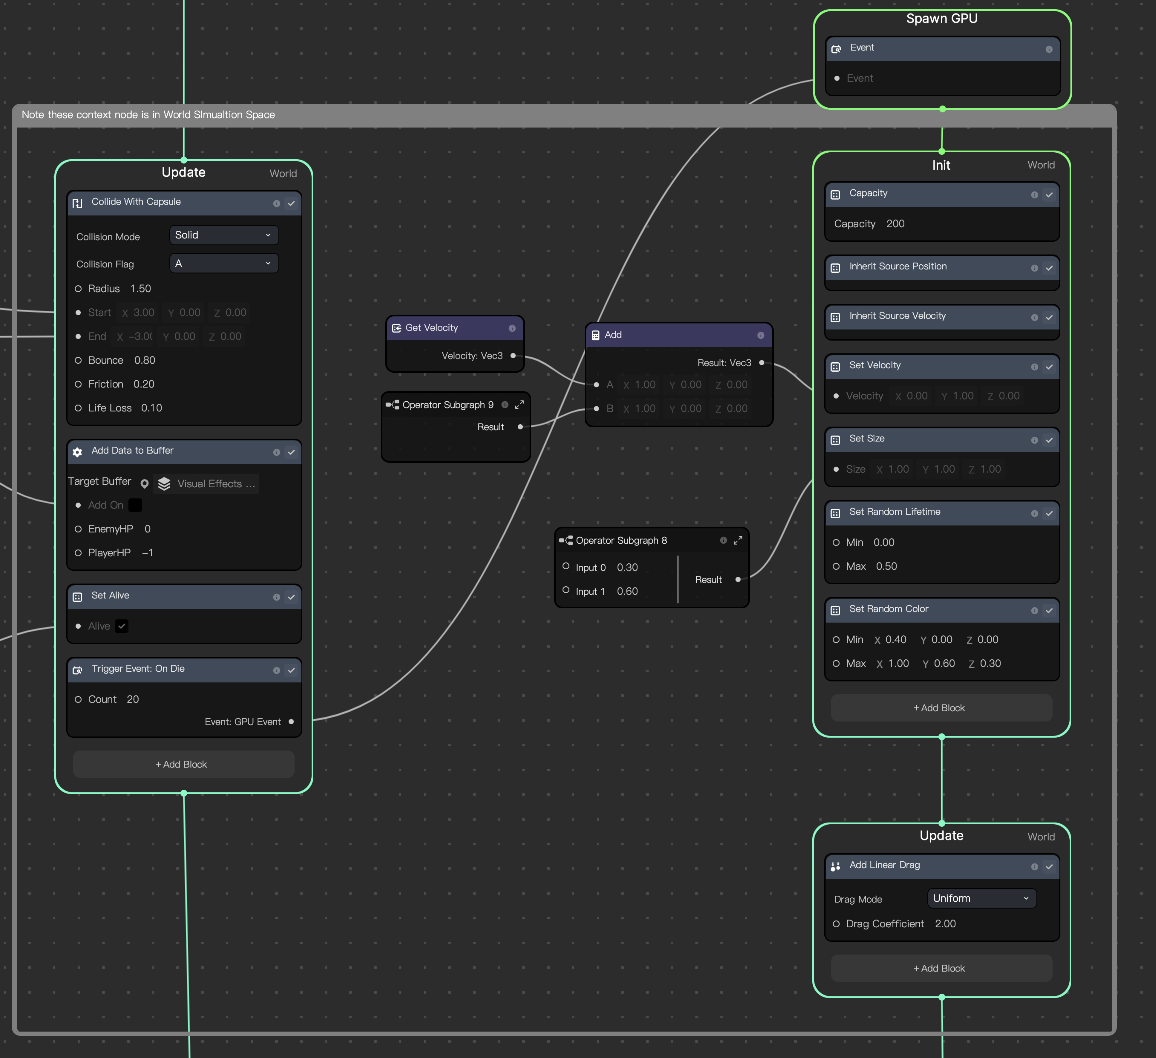
This project contains 4 VFX in total. The Atmosphere and Thrust effects are primarily for visual enhancement and will not be covered in this guide. Instead, we will focus on the EnemyBullet and PlayerBullet effects.
Enemy Bullet
Let's take EnemyBullet as an example and learn how it works:
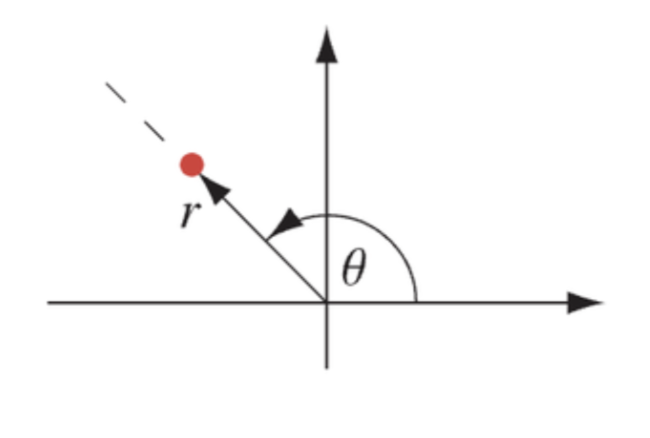
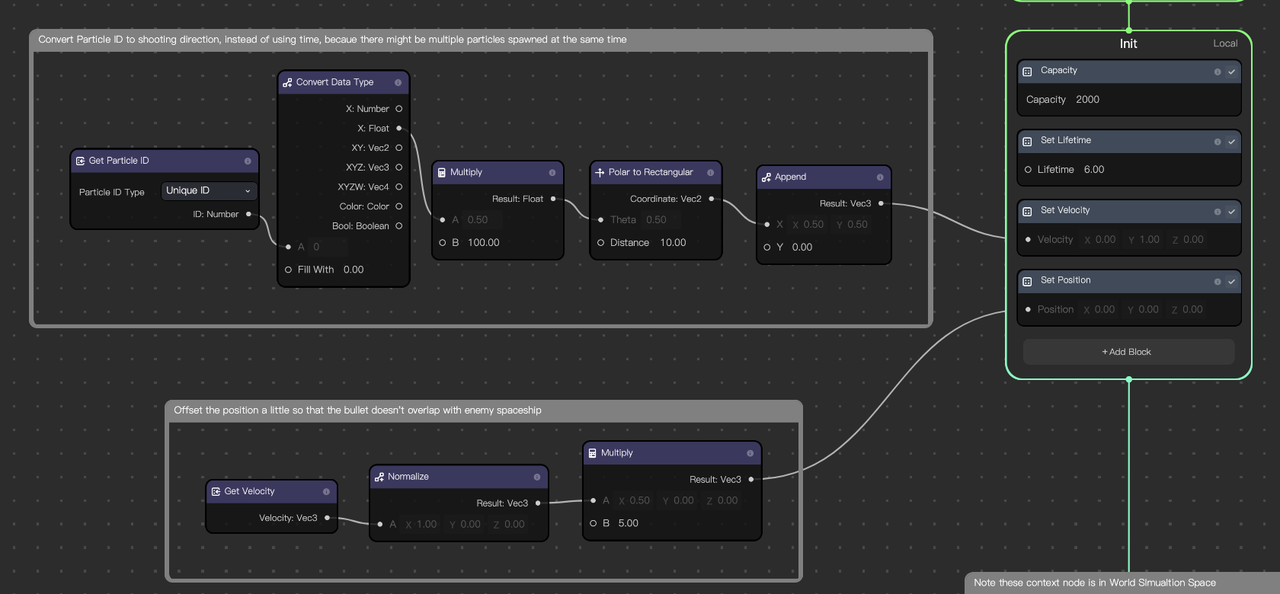
The first part involves the spiral movement of the bullets, which is a common feature in danmaku games. In the example below, we use Get Particle ID to determine the position in polar coordinates.
We use Get Particle ID instead of the current total time because, at high spawn rates, multiple particles can be spawned simultaneously, which might cause them to overlap at the same location.
Next, let's learn about the key part of using the Visual Effects Buffer.
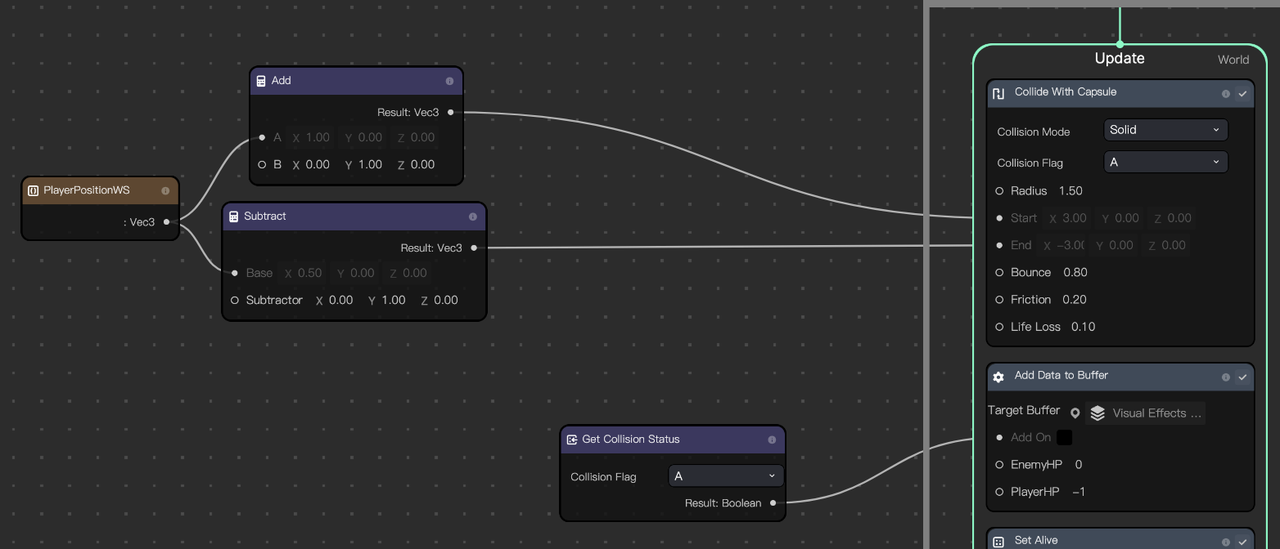
We use the PlayerPositionWS node in the Visual Effect Graph panel and set it as the collider position. In this case, we use a Collide With Capsule node since the player in this project is shaped similar to a long rocket.
If an enemy bullet particle hits the player's collider, the Get Collision Status node's Collision Flag A will be triggered. We then use this flag as a condition to modify the data from the VFX Buffer we created earlier. Specifically, we subtract 1 from PlayerHP and leave EnemyHP unchanged (set to 0).
This means that when a particle collides with the player's collider, PlayerHP will decrease by 1.
Since we want the bullet to disappear immediately after it hits the player, the Alive property is set to false under the following conditions:
- The Collision Flag A is true
- The bullet's age has not yet exceeded its lifetime We also use the And node here to ensure that if the bullet misses the player, it will still disappear once its lifetime is over.
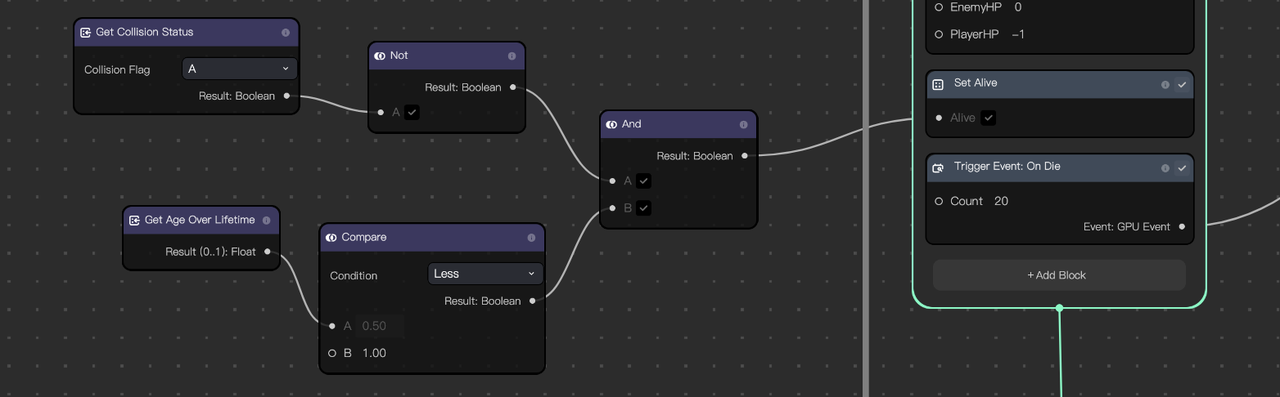
- (Optional) Add a die GPU event to create an explosion effect.
Visual Scripting
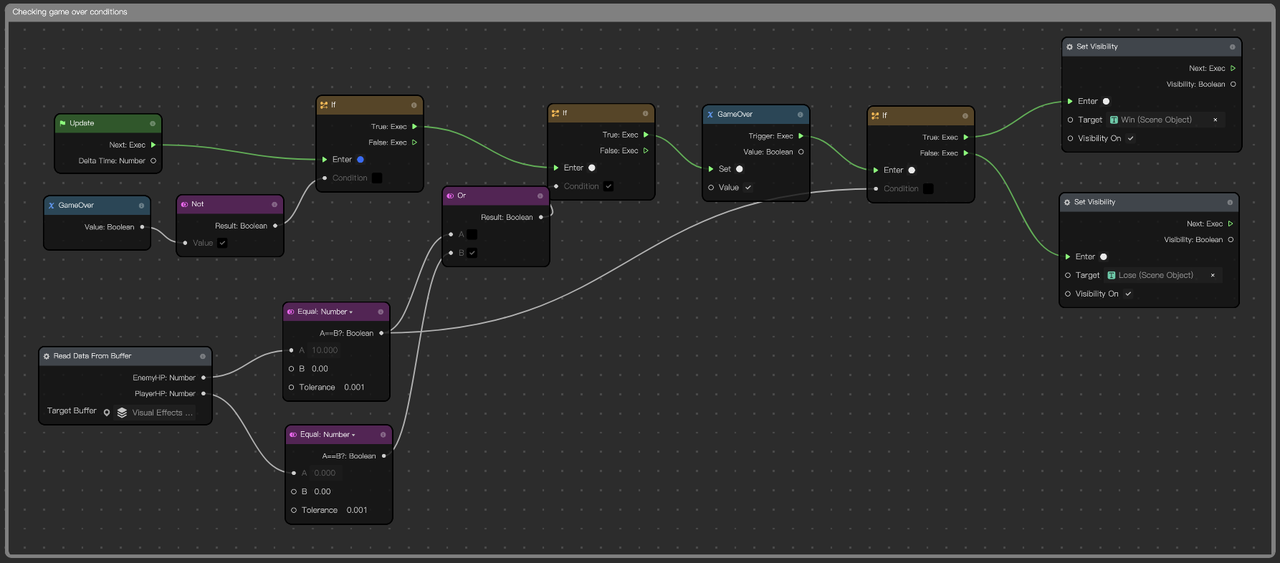
Read the VFX Buffer's data to check if either PlayerHP or EnemyHP is equal to 0. If so, the game is over.
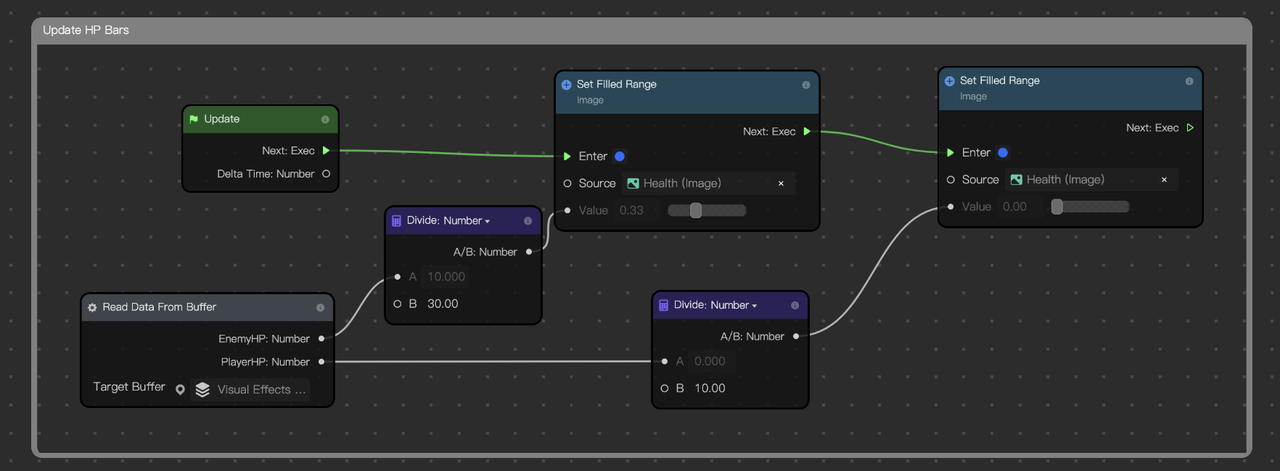
This data is also used to create other effects, such as the HP bar:
Adjust the bullets' spawn rate in Visual Scripting to create effects like a 10x shooting rate or varying game difficulty levels.