Filter
Use Filter to transform color inputs. You can make effects black and white or enhance your effect with fun cinematic colors.
Add Filter
To add a Filter component:
- Go to the Inspector panel.
- Click + Add Component.
- Go to Post Effect.
- Click Filter.
Properties
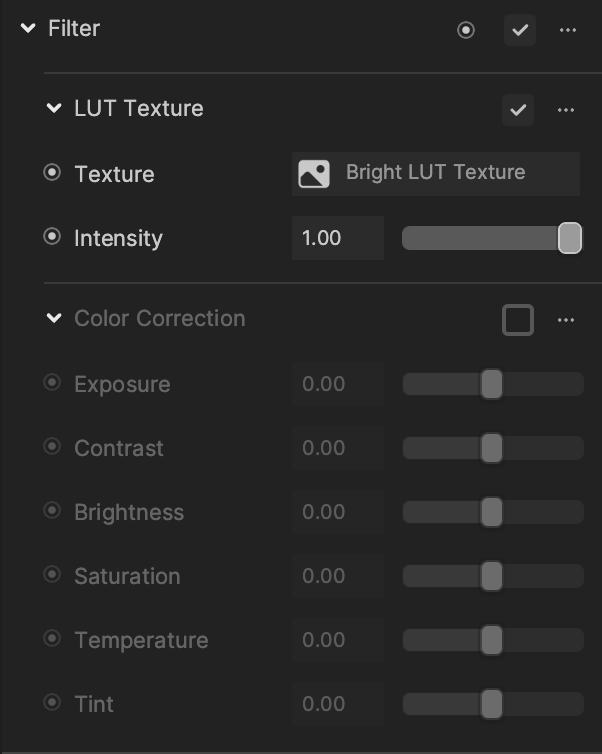
| Property | Description |
|---|---|
| Texture | Select a built-in texture or use your own. The default is Bright LUT Texture, a bright color lookup up table texture. |
| Intensity | Adjust the intensity of the filter to a value between 0 and 1. Default is 1.0. Range is from 0 to 1, where 0.00 = no filter applied and 1.00 = full filter applied. |
| Color Correction | Tweak the filter without having to repeatedly edit the LUT. The available properties are:
|
tip
We recommend that you do not add components that depend on the Mesh Renderer component to the Filter object. Doing so will make the mesh invisible.