2D Brush
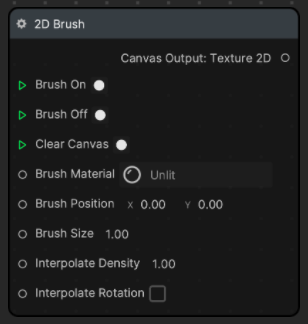
Outputs a saved finger drawing as a 2D texture. Can be set to other 2D texture properties, such as 2D image.
Input
| Name | Data Type | Description |
|---|---|---|
| Brush Down | Exec | Activate the drawing state |
| Brush Up | Exec | Deactivate the drawing state. No drawing will appear even if the brush position changes. |
| Clear Canvas | Exec | Clear all drawings |
| Brush Material | Material | The material used to render on the mesh quad |
| Brush Position | Vec2 | The current position of the brush |
| Brush Size | Number | The size of the mesh quad brush material |
| Interpolate Density | Number | The number of interpolated rendering times in between frames. The range is from 0 to 100, the actual value will be clamped to 0, ..., .33(1/2), .5(1/2), 1, 2, 3, ... , 100; 0 will draw nothing, .5 will draw once every 2 frames, 1 will draw once every frame, 2 means twice every frame, and so on. When it is equal to or greater than 2, the interpolation will implement Catmull-Rom spline algorithm, thus the first and last segment will not be drawn; when it is equal to or less then 1, there will be no actual interpolation, then the first frame will be drawn. |
| Interpolate Rotation | Boolean | Control whether brush stroke is rotated while drawing across the canvas. It only works when interpolate density is equal to or greater than 2. |
Output
| Name | Data Type | Description |
|---|---|---|
| Canvas Output | Texture 2D | The result of the finger drawing as a 2D texture |
Example
To use the 2D Brush node, follow the visual scripting setup below. First add the 2D Brush node to the Visual Scripting panel. Then go to the Assets panel, click the Add button [+], go to Material, and select Unlit. Assign the Unlit material to the Brush Material parameter of the 2D Brush node.
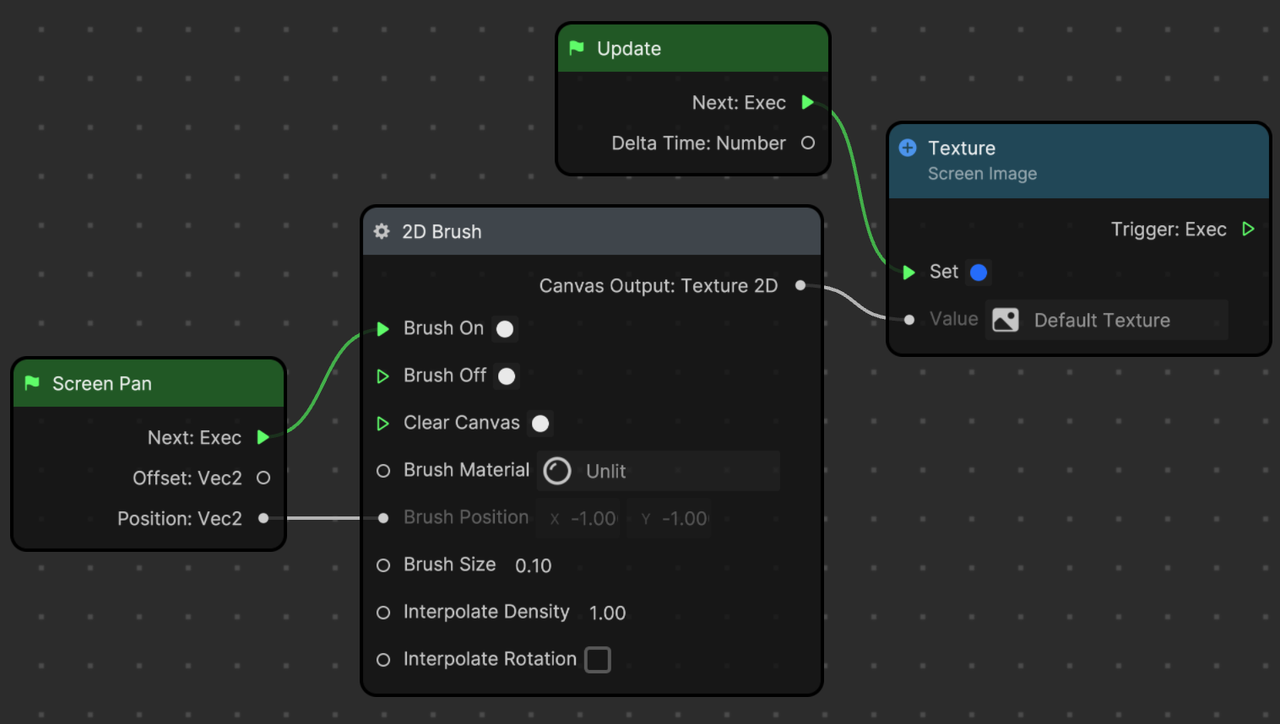
Add a Screen Image to the Hierarchy panel by clicking + Add object, going to 2D, and selecting Screen Image. Go to the Inspector panel, then click the button next to the Texture property of the Image component. Select Set Texture. Make sure the 2D Brush node outputs to the Value input of the Texture node. Connect the Update node to the Set input of the Texture node as well.
Use the Screen Pan node to control the Brush On and Brush Position of the 2D Brush node. This creates the most basic setup for a drawing effect. You can add controls to the other parameters of the 2D Brush node, like a facial movement that controls Brush Off or Clear Canvas, for example.
To modify the texture of the brush you're using, click the Unlit material in the Assets panel, go to the Inspector panel, and swap out the Texture under Albedo. You can use any imported 2D texture as your brush.