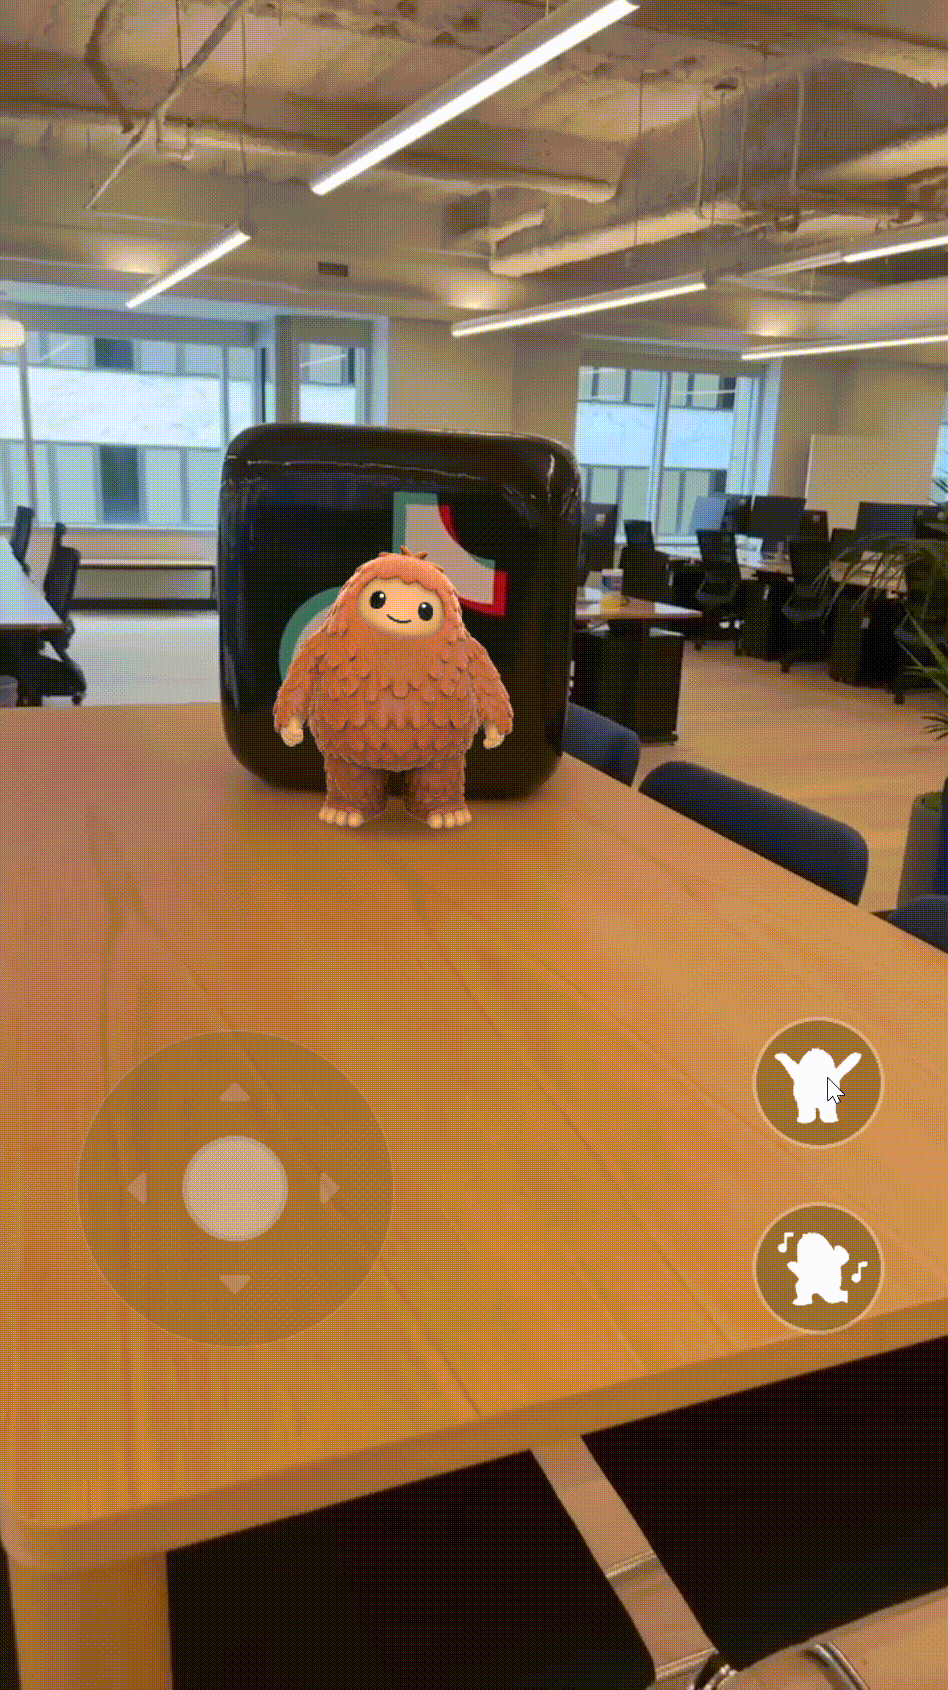
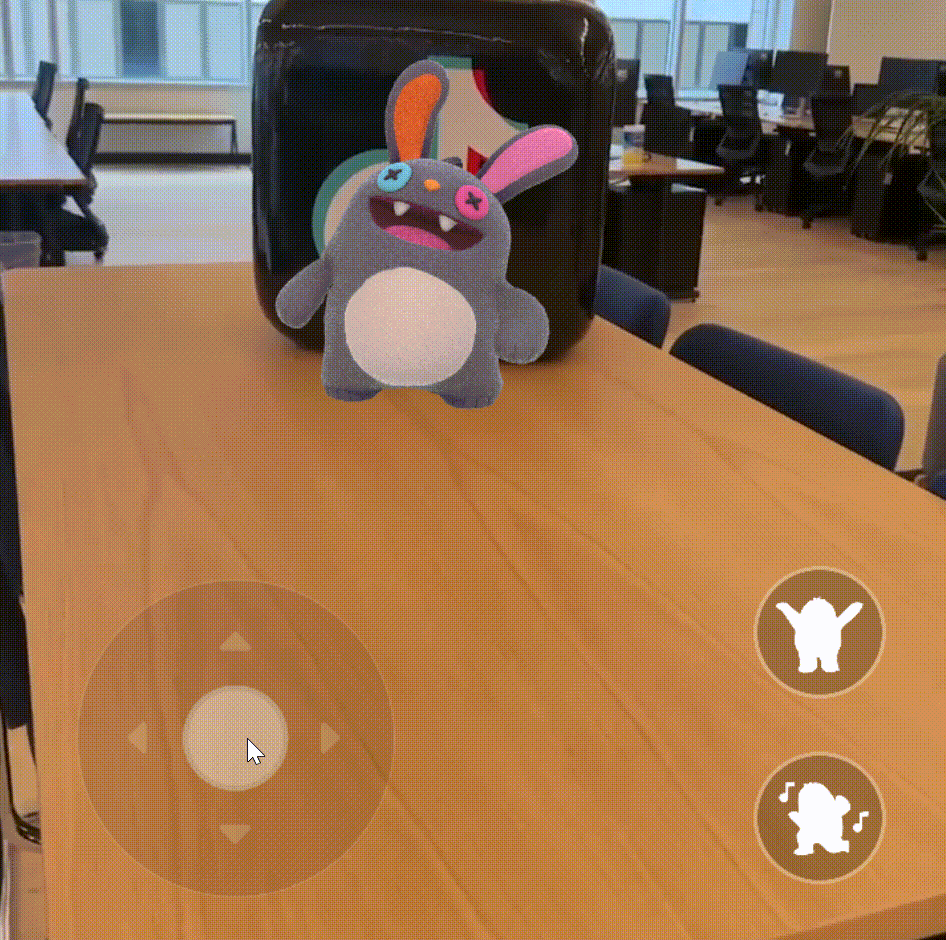
AR Game Controller
The AR Game Controller template is a customizable foundation for building interactive AR experiences. It includes a script component that controls both the UI and 3D character assets, all managed through a parent node for easy organization. Simply swap in your own assets to personalize and create your own unique AR game.
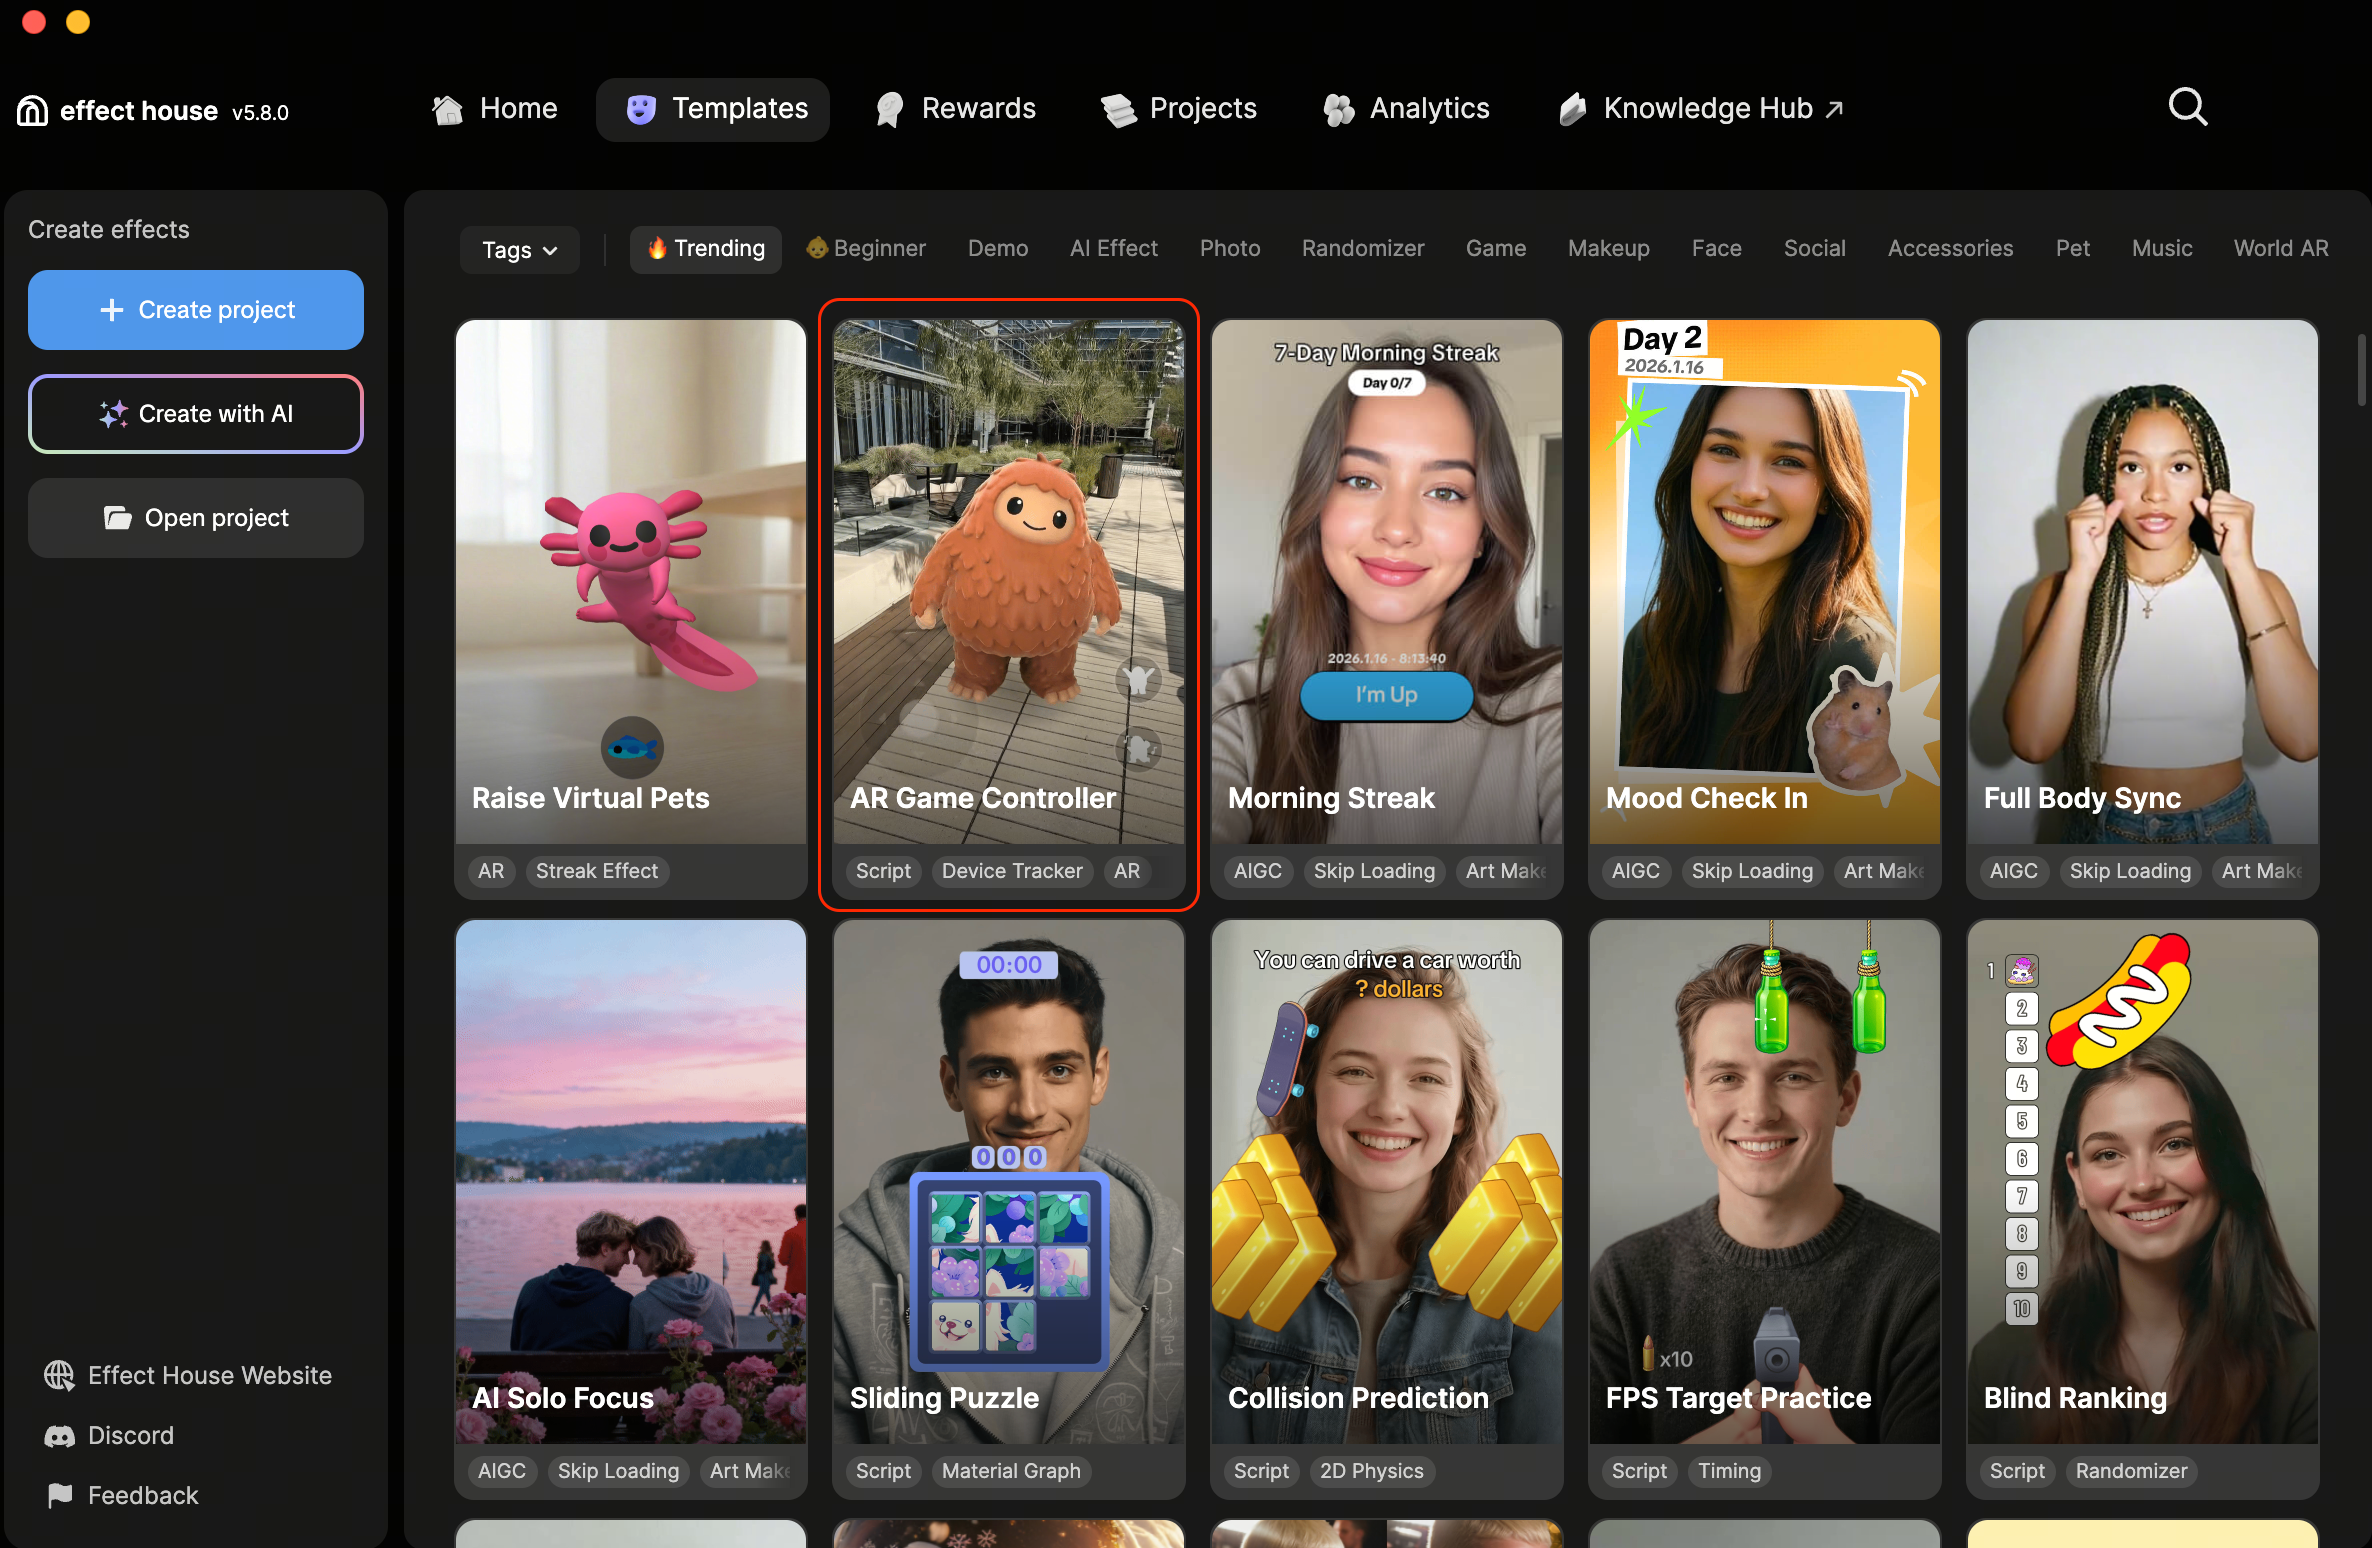
Open the Template
To use this template in your Effect House project:
- Go to Templates
- Select the AR Game Controller template
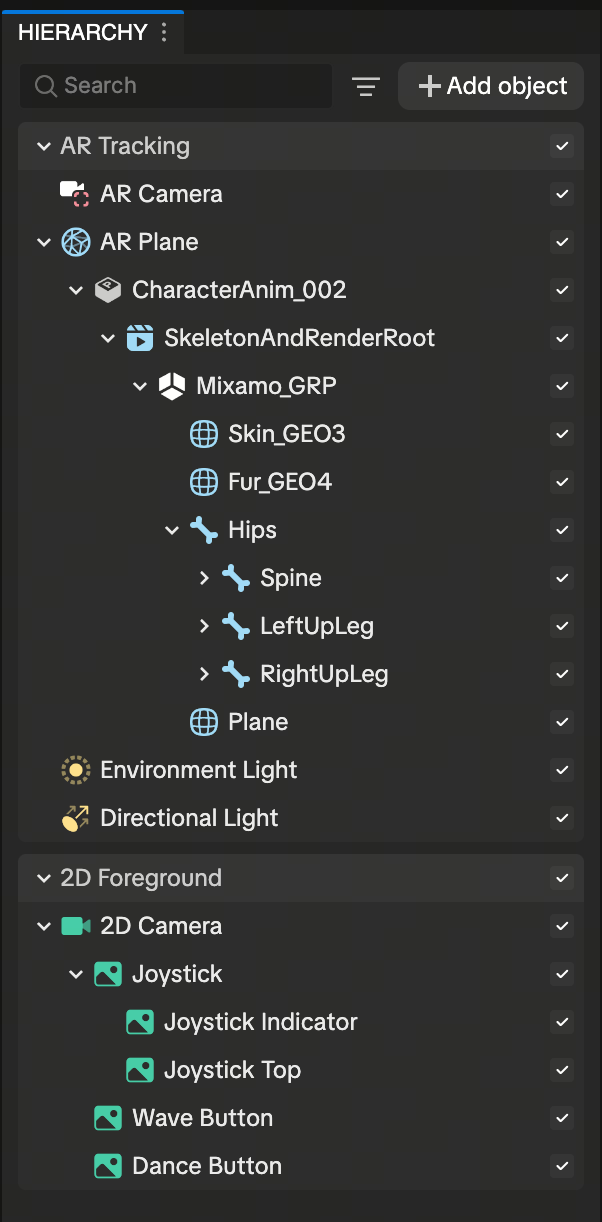
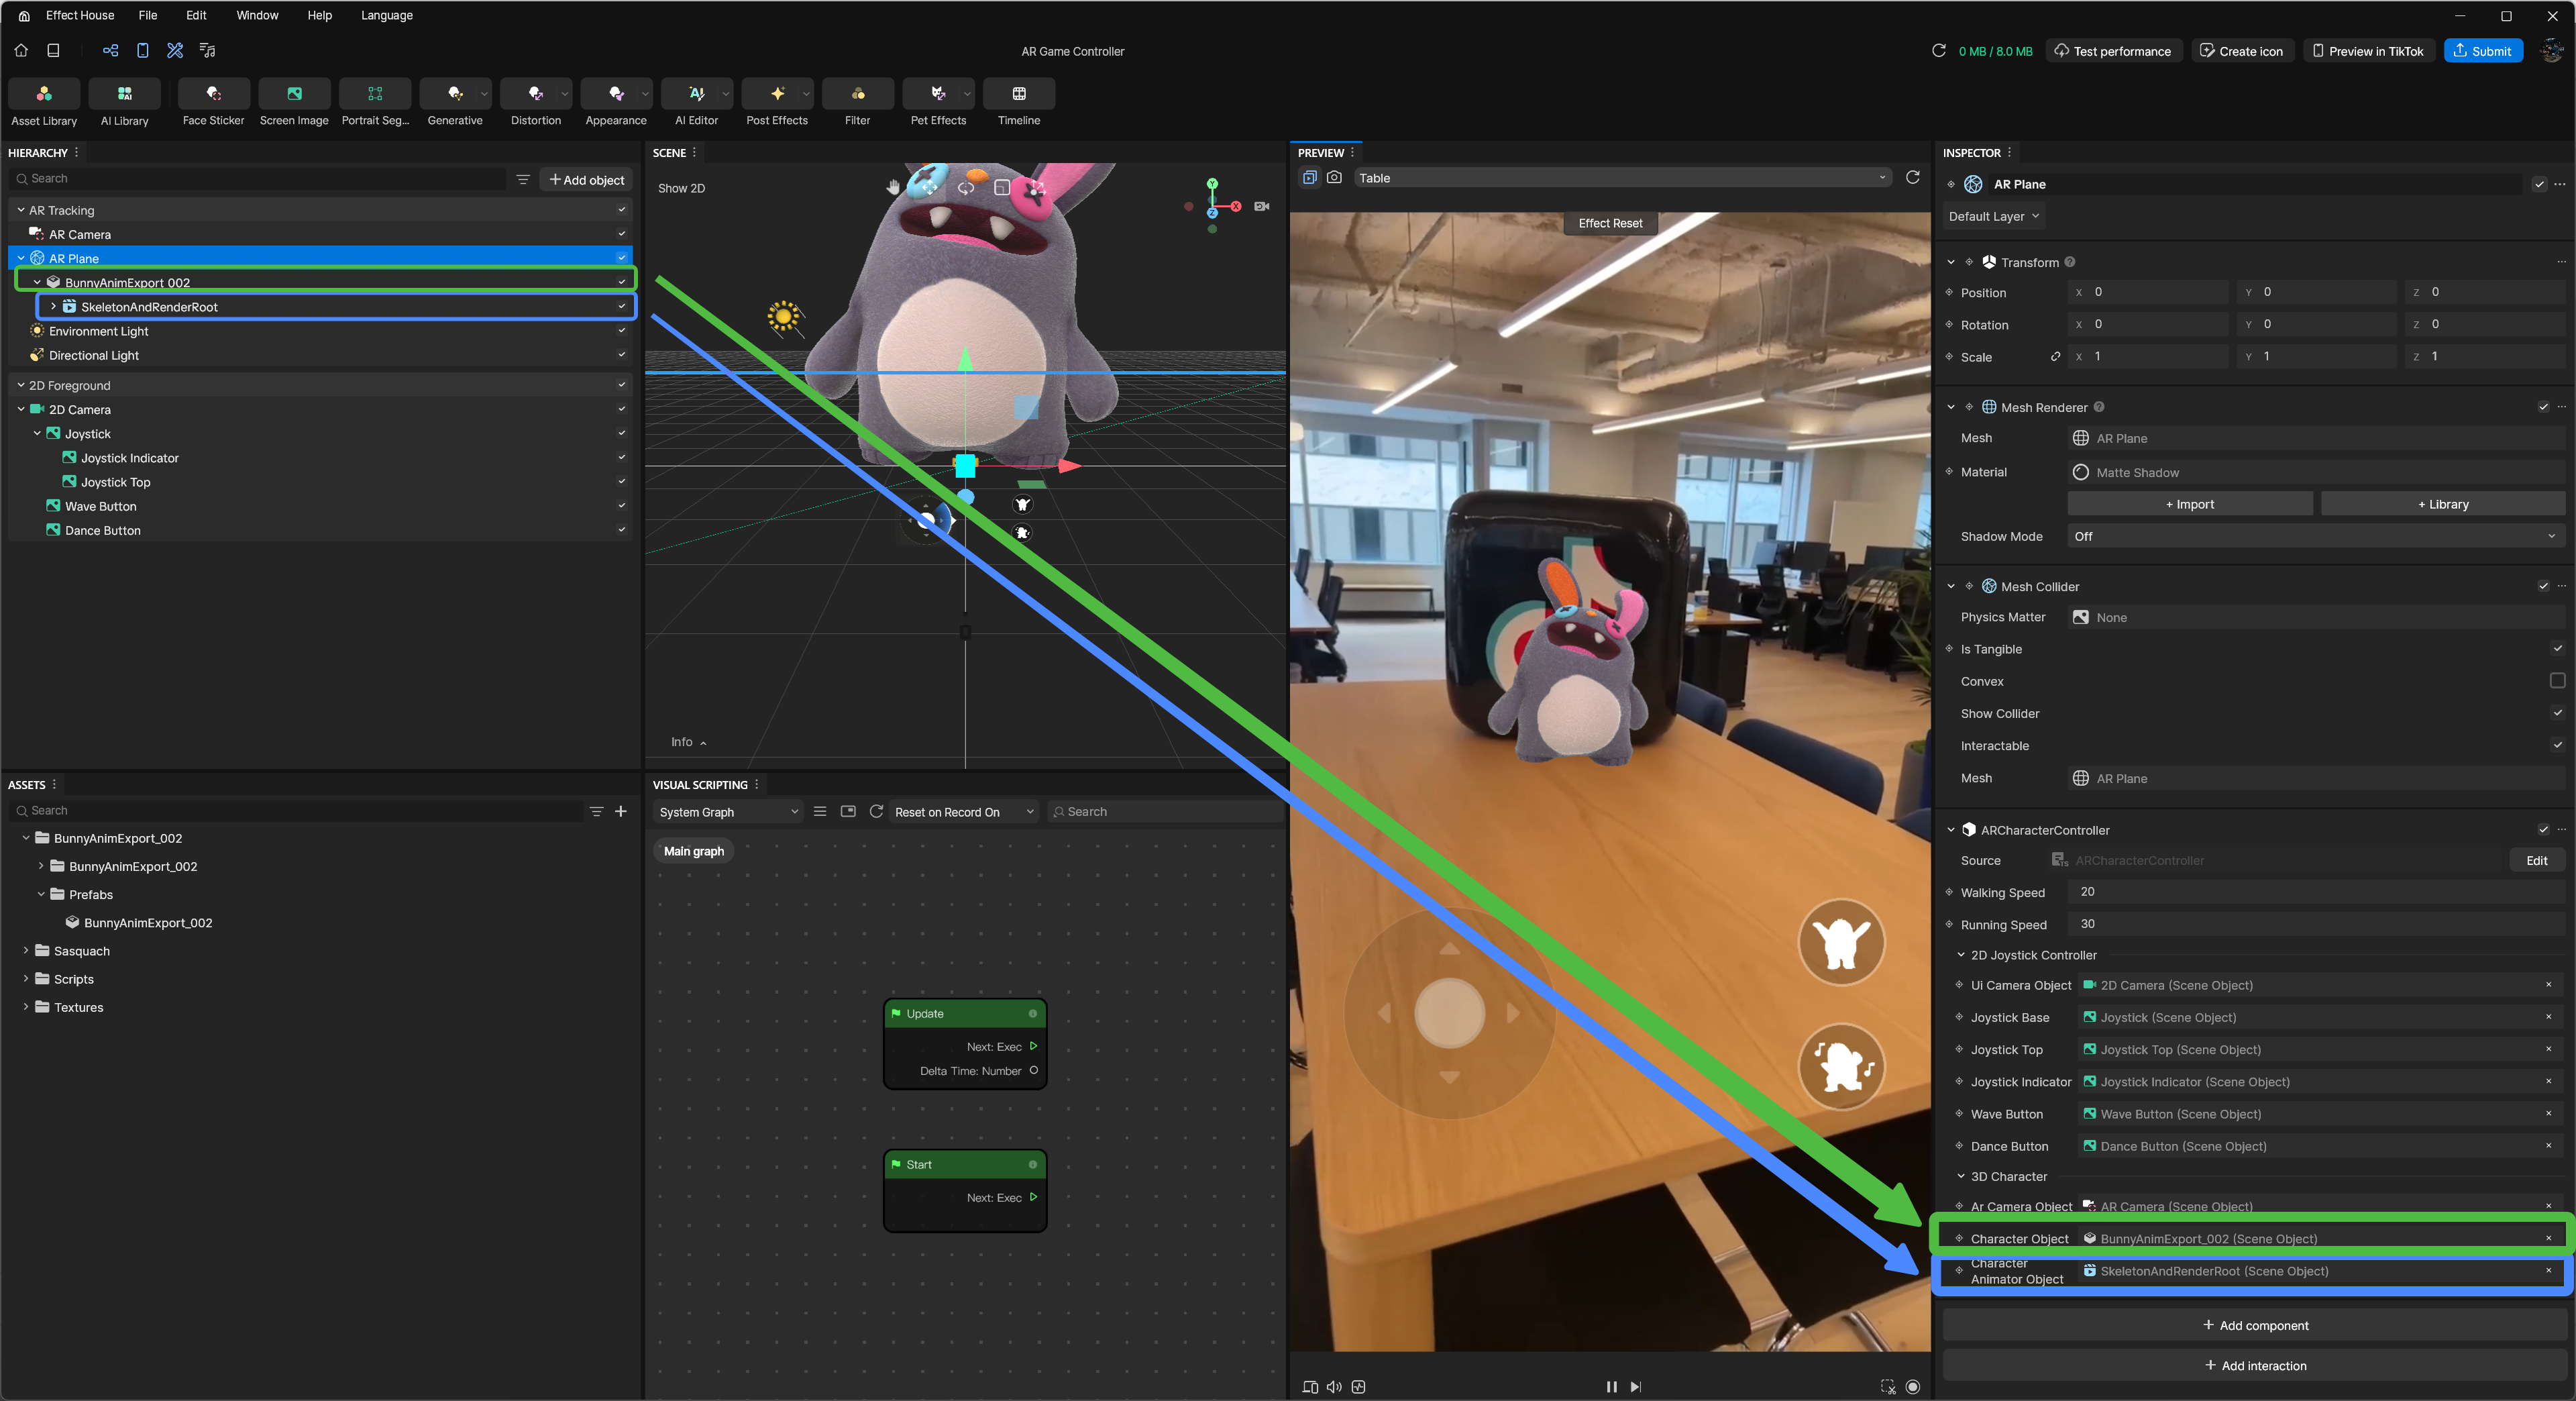
Hierarchy
The Hierarchy panel consists of the following render groups:
- AR Tracking contains AR camera, AR plane, character, and scene lighting
- 2D Foreground contains the 2D camera and UI controls
Customize the Template
You can customize this template by swapping out the assets with some of your own!
Follow the steps below to recreate the effect, or download the completed project file to see the final setup.
Project file: ↓ ARGameController.zip
Import Assets
First, let's import your images into the Assets panel.
To import your own assets:
- Go to the Assets panel
- Click the Add asset button [+]
- Go to Import and click From Computer
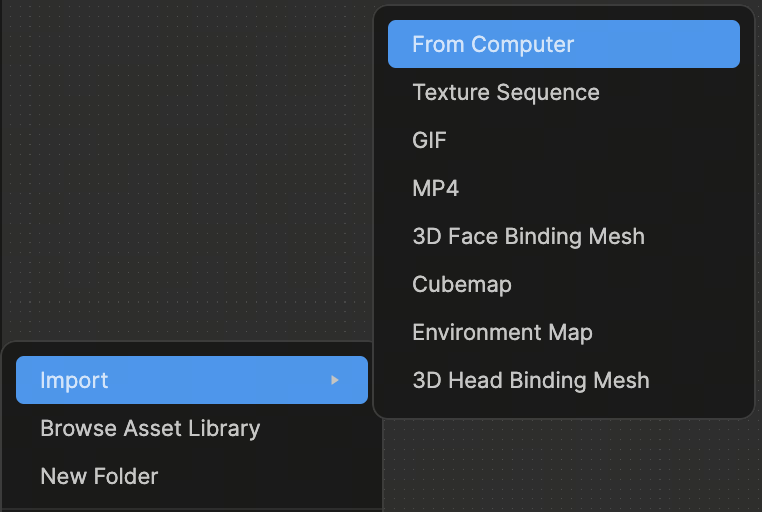
- Select your images and click Open
To add multiple images at the same time, Command + click (Mac) or Control + click (Windows) onto the images you'd like to select before clicking Open. You can also simply drag the images directly from your computer folder into the Assets panel.

Swap Assets
Now that your images are imported, you can now swap them out in the ARGameCharacterController component.
To swap the assets:
- Go to the Hierarchy panel
- Click AR Plane

- Drag your new assets into the AR Plane section of the Hierarchy panel

To make previewing your effect easier, you can temporarily hide assets in the Hierarchy panel by unchecking the box next to them. 
Assign Character Components
Next, we'll assign the corresponding Character Object and Character Animator Object:
- Go to the Inspector panel
- Go to ARCharacterController
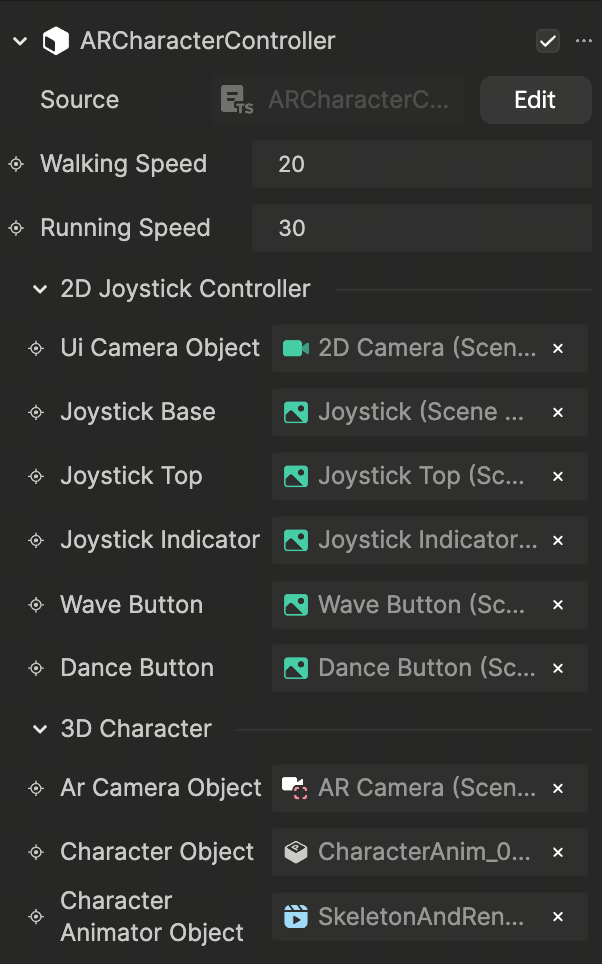
- Click on Character Object and Character Animator Object
- Choose your new assets
- Click Ok
Animation Order
The Animation component should follow the same sequence of animations:
- Idle
- Walk
- Run
- Action 1
- Action 2

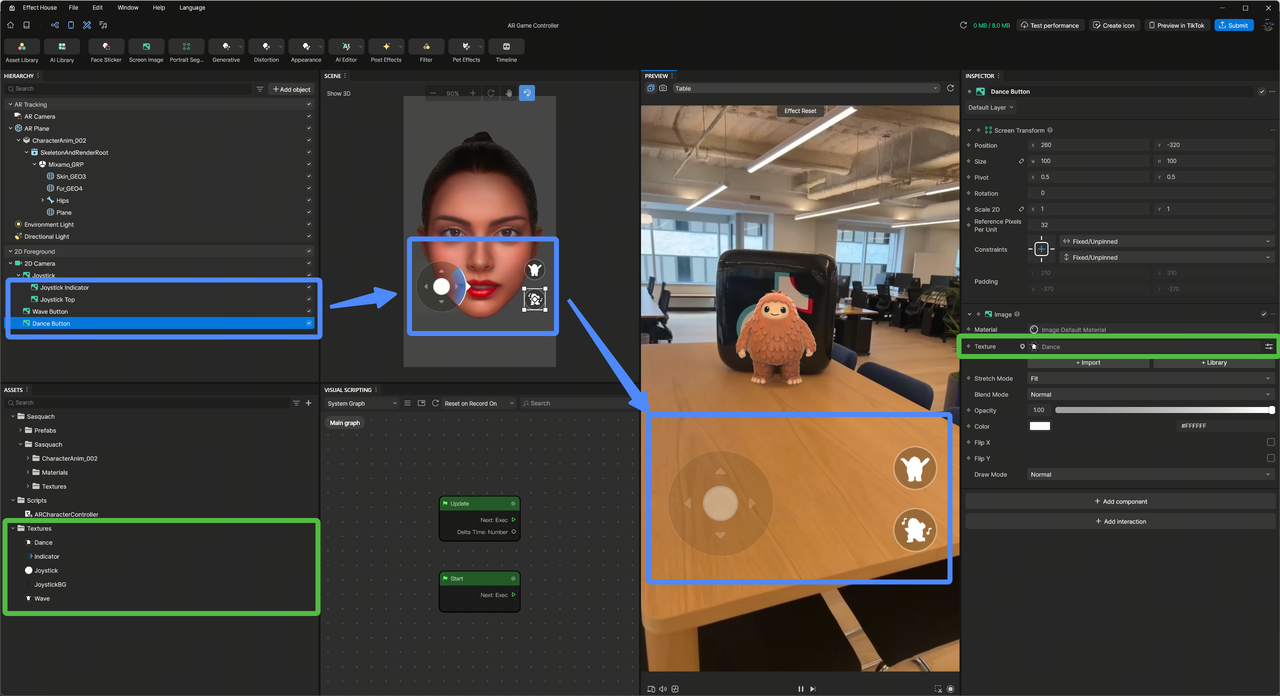
Adjust UI Assets
Replace or adjust UI elements as needed to match your new assets.
The AR Game Controller template is now updated with your new creation!
Asset Preparation Recommendations
Before importing your assets, follow the guidelines below to help ensure optimal performance and efficient file sizes.
Export Assets as Prefabs
Export assets as a Prefab from a separate Effect House project before importing them into your main project. This helps keep projects organized and avoids unnecessary dependencies.
Maintain Efficient Asset Sizes
Keep individual assets within the 3 MB to 4 MB range to help keep the overall effect size optimized.

Use Opacity Maps for Transparency
When creating transparent materials, use Opacity maps instead of PNG transparency. This helps reduce file size and improves rendering performance.
Use JPG Textures for Most Materials
Texture assets should be exported as JPEG or JPG files whenever possible to help reduce the final package size.
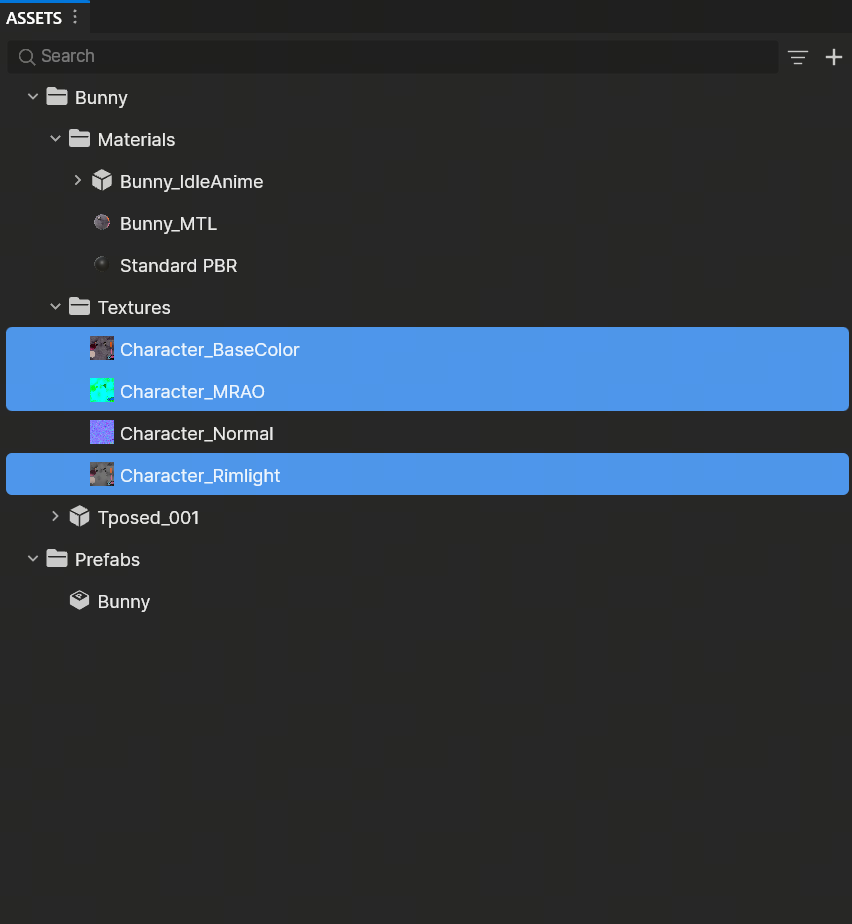

Use PNG for Normal Maps
Normal map textures should be exported as PNG files to avoid visual artifacts and preserve detail.


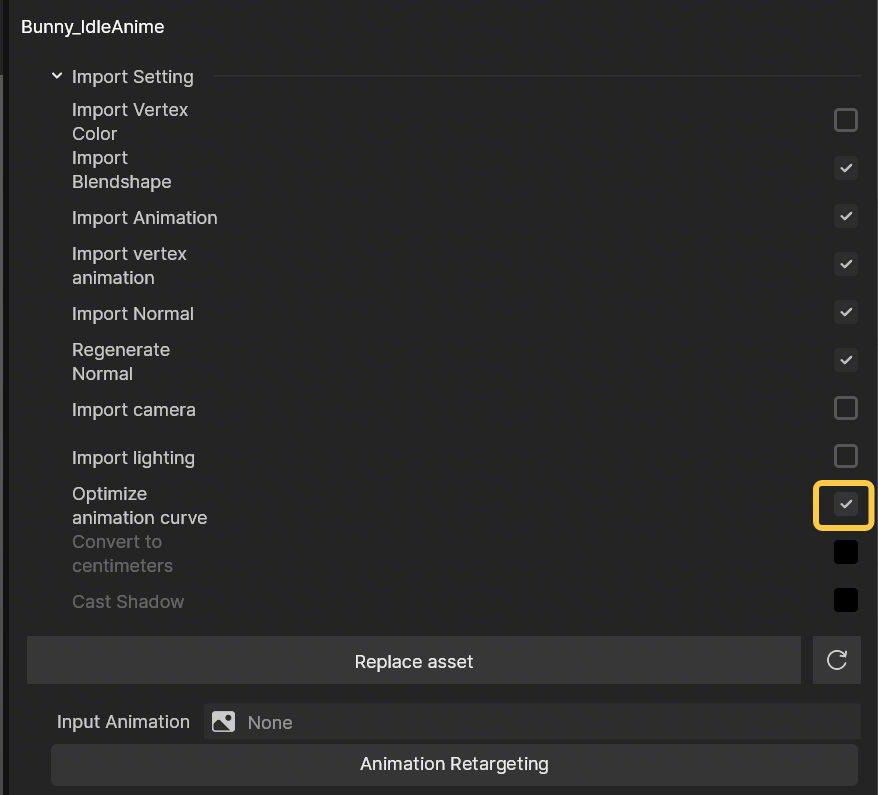
Optimize Animation Curve
If you notice discrepancies between exported and imported animations, try disabling Optimize Animation Curve before exporting.