Image Picker
Customize how your images are displayed and interact on the screen using prefab assets from the Image Picker in the Assets Library.
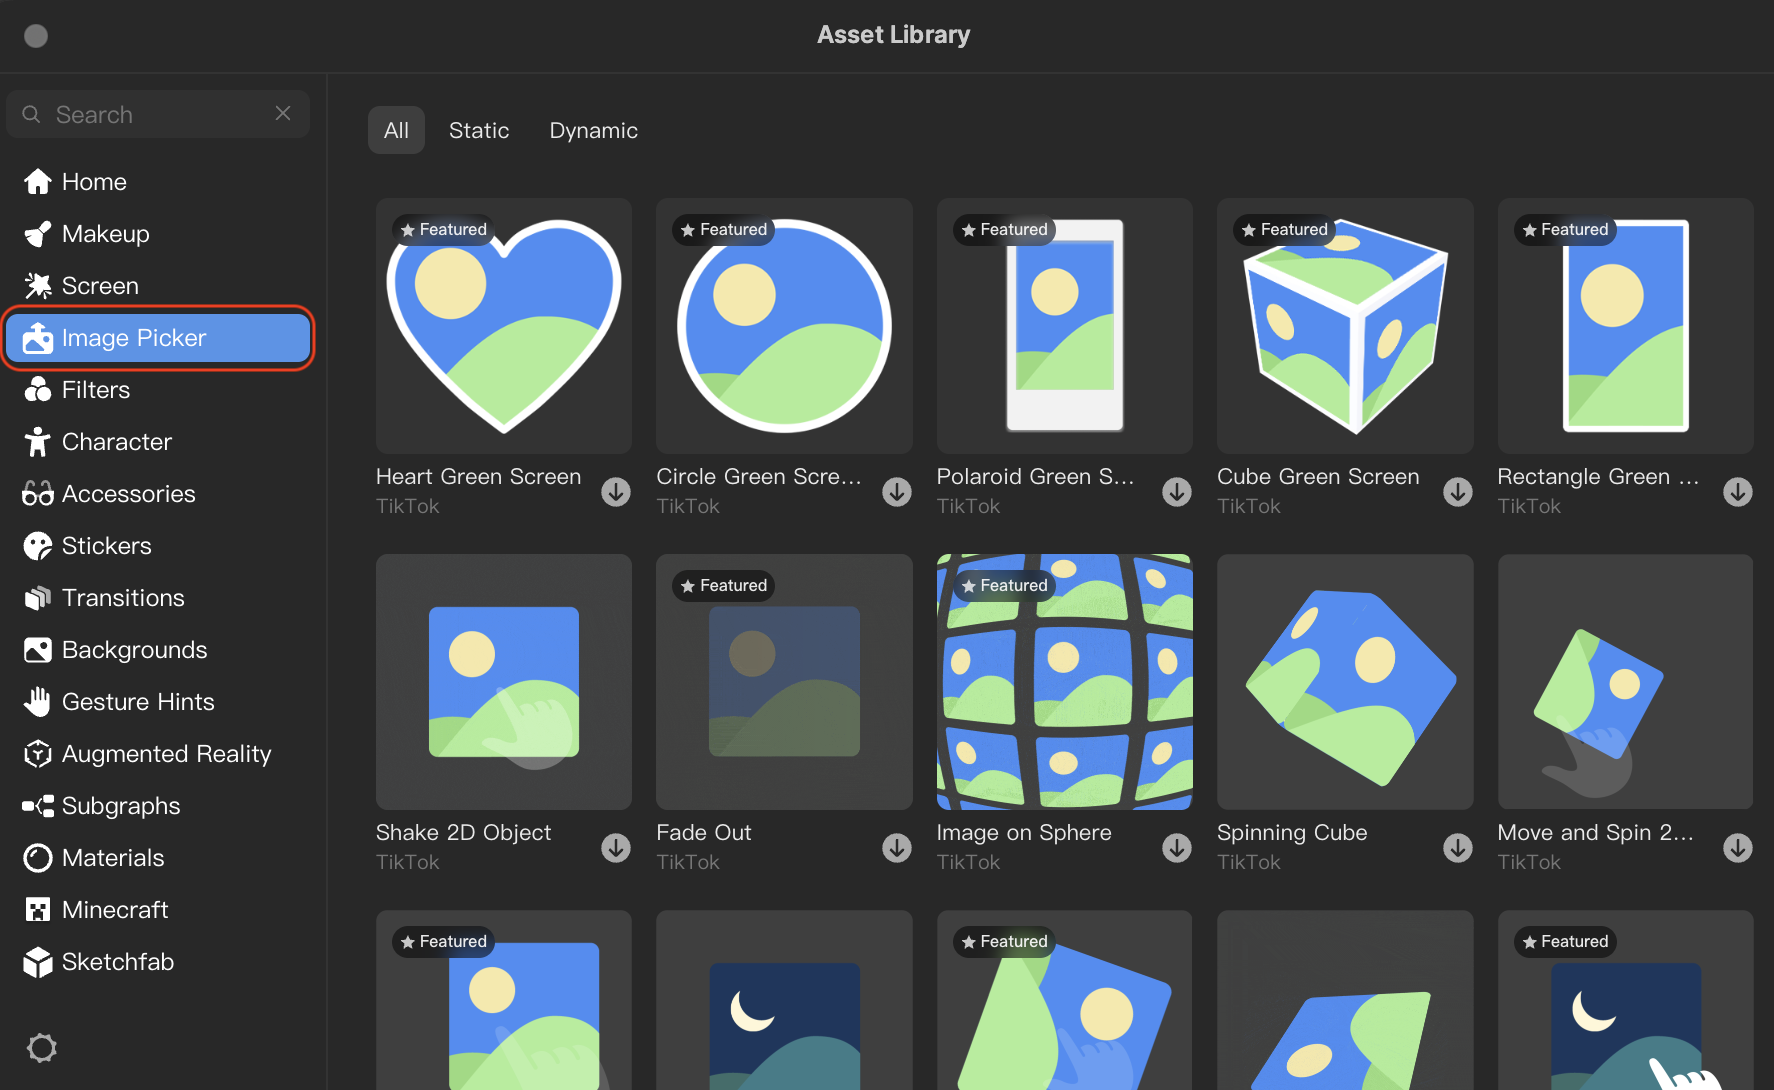
Open Image Picker
To open the Image Picker:
- Click the Asset Library button

- Click Image Picker
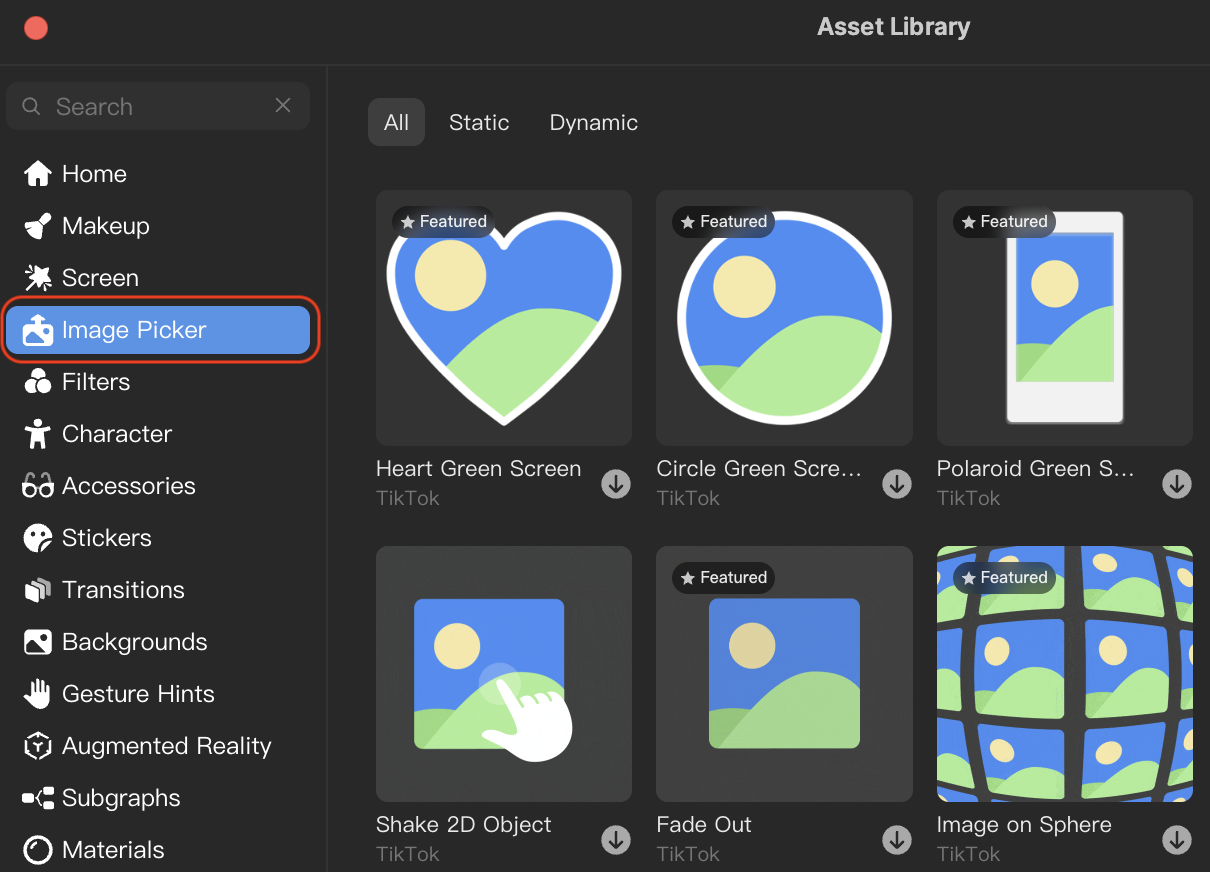
Import and Apply a Prefab Asset
Now that the Asset Library is open, let's apply a prefab asset to your project:
- Go to Image Picker
- Click the Import and apply button. The prefab asset is automatically added to the Hierarchy panel and the Assets panel!
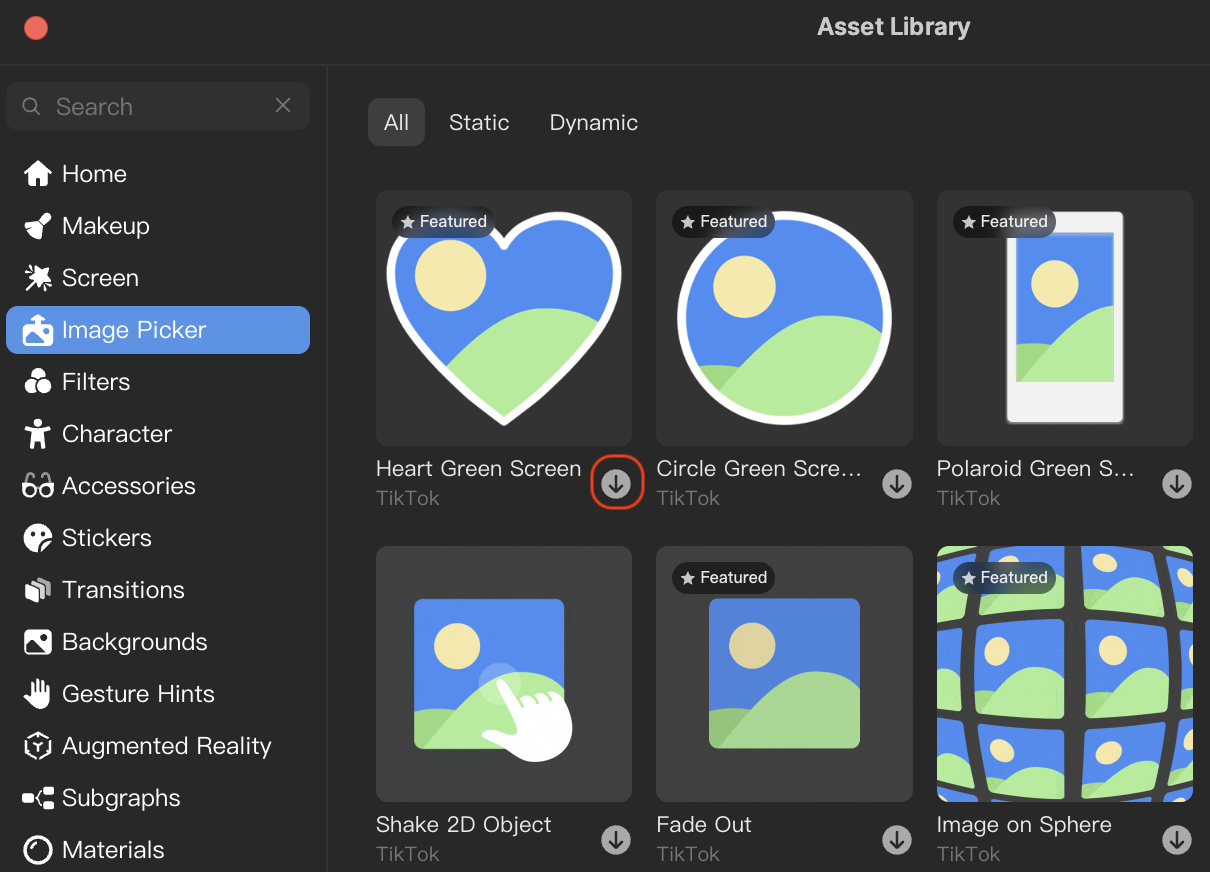
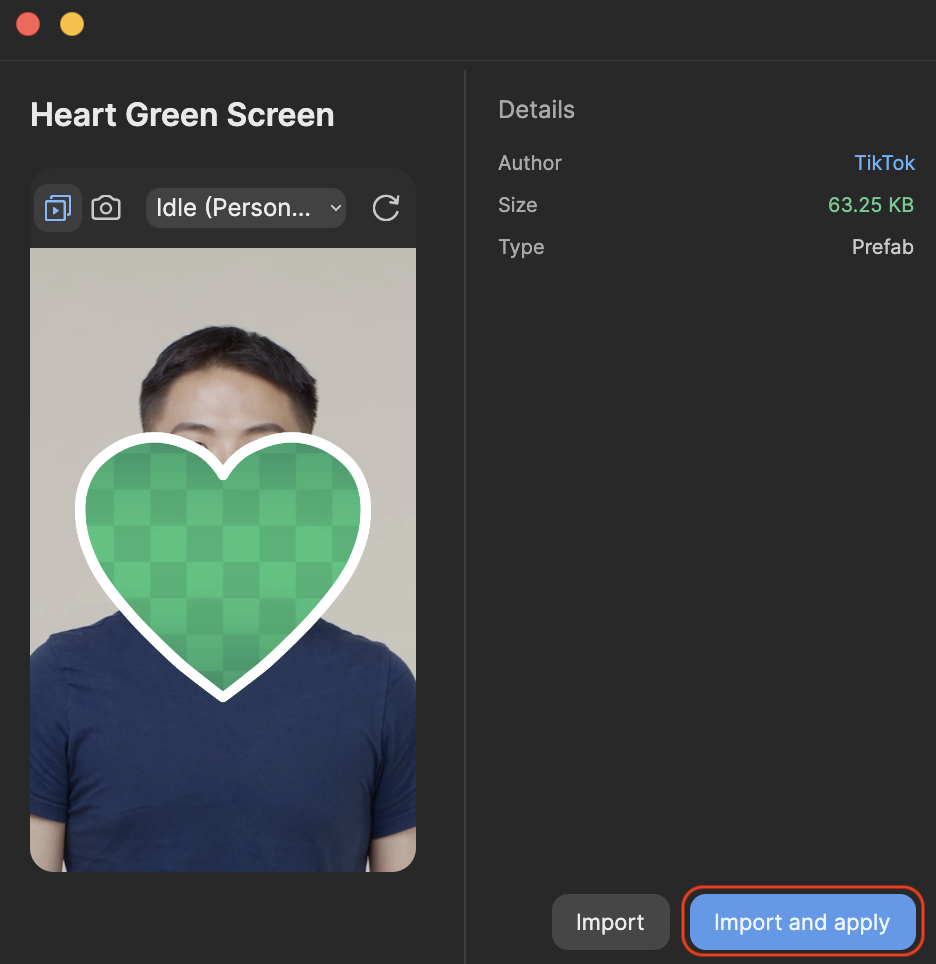
You can also click Import and apply while the asset is open. If you click the Import button instead, the package will still be imported into the Assets panel, but you'll need to manually drag the prefabs into the Hierarchy panel.
Use Prefabs and Subgraphs
Let's explore how you can incorporate prefabs and subgraphs from the Assets panel and into your projects.
Prefabs
Prefabs are located in the Prefabs folder and can be dragged into the Hierarchy panel:
- Go to the Assets panel
- Open the Prefabs folder
- Drag the prefab into the Hierarchy panel Now that your prefab is added to the Hierarchy panel, you can change its parameters within the Inspector panel.
Subgraphs
Subgraphs are located in the Subgraphs folder and can be dragged into the Visual Scripting panel or added directly by adding a node:
- Go to the Assets panel
- Open the Subgraphs folder
- Drag the subgraph into the Visual Scripting panel
You can also add a subgraph by right-clicking anywhere within the dotted space in the Visual Scripting panel, select Add Node, and then choose Subgraph from the list.
Next, let's customize the subgraph by adding a scene object and a screen tap node to it.
- Go to the Hierarchy panel
- Click the Add object button [+]
- Go to 2D
- Select Screen Image
- Drag the Screen Image object onto the Scene Object
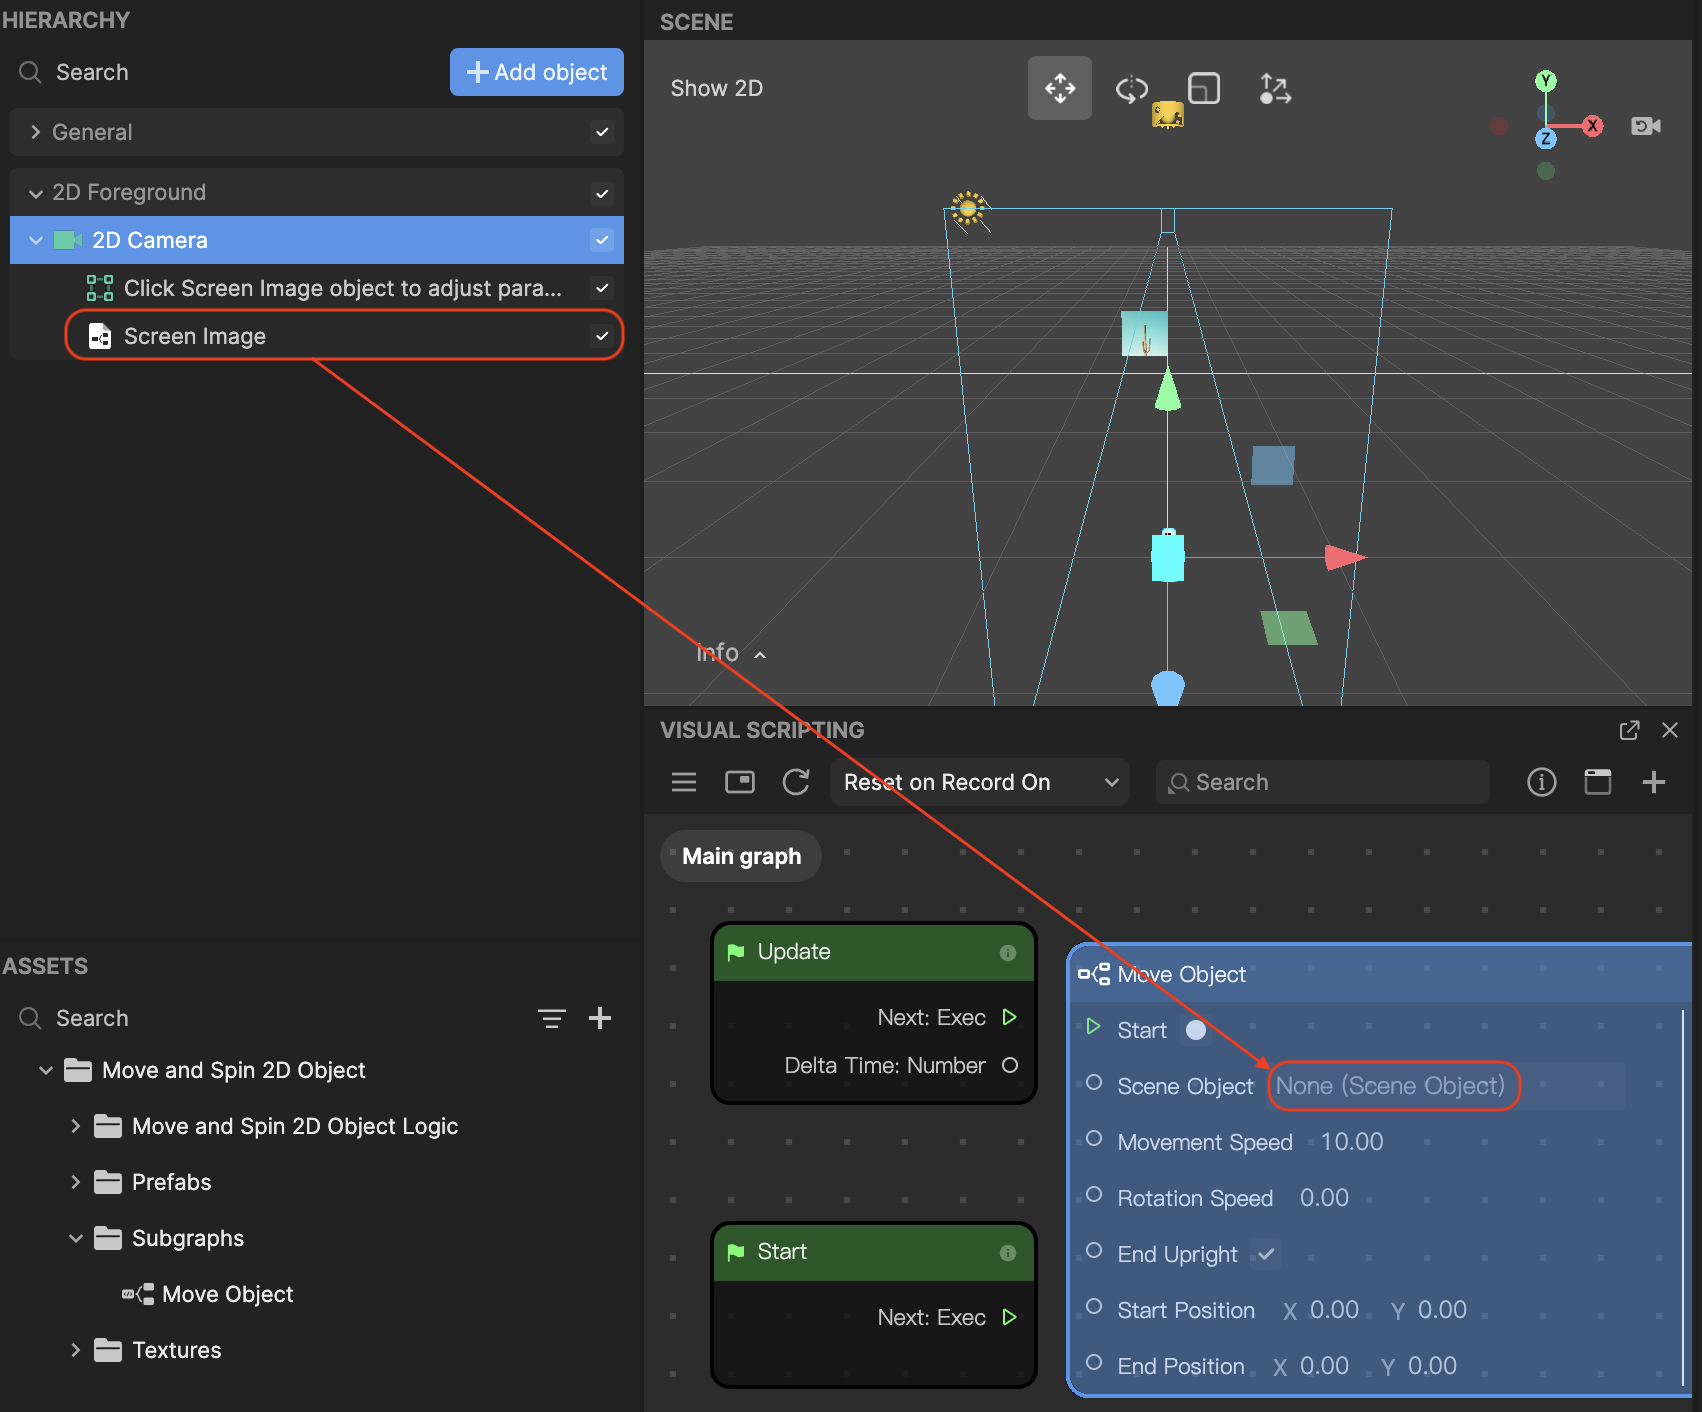
Now let's add a Screen Tap node:
- Go to the Visual Scripting panel
- Right-click anywhere in the dotted space, then select Add node
- Add the Screen Tap node
- Connect Next: Exec to Start
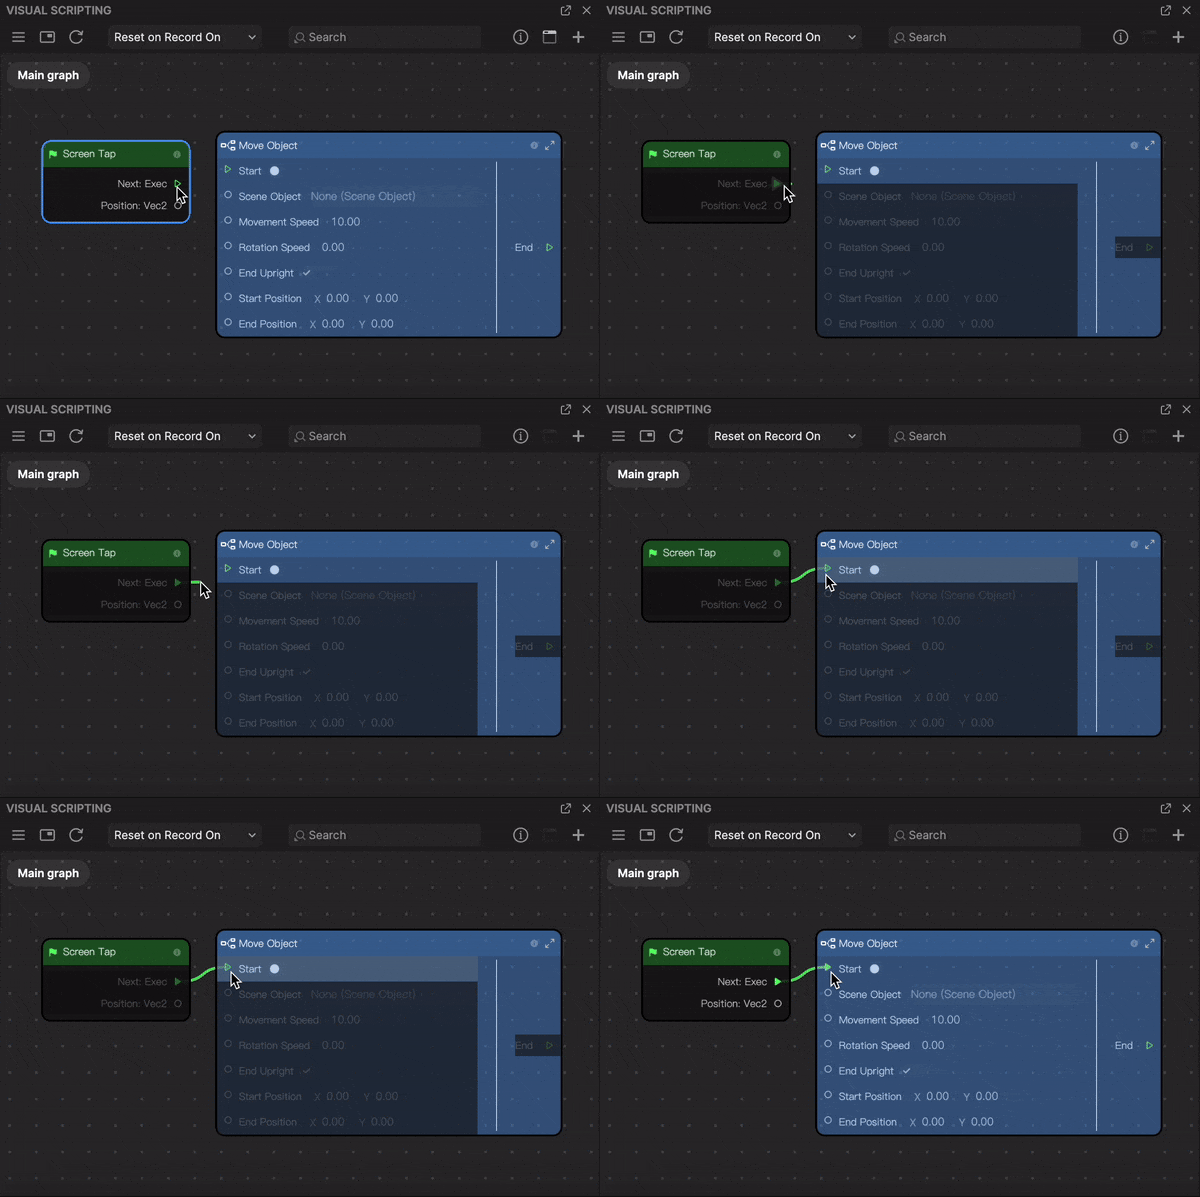
- In the subgraph node, set the Start Position and End Position to your liking
Use Component Script to Spin an Image
Let's go over an example of how to make your image spin using prefab logic:
- Go to the Inspector panel
- Click Trigger Once
- Select Set Trigger Once
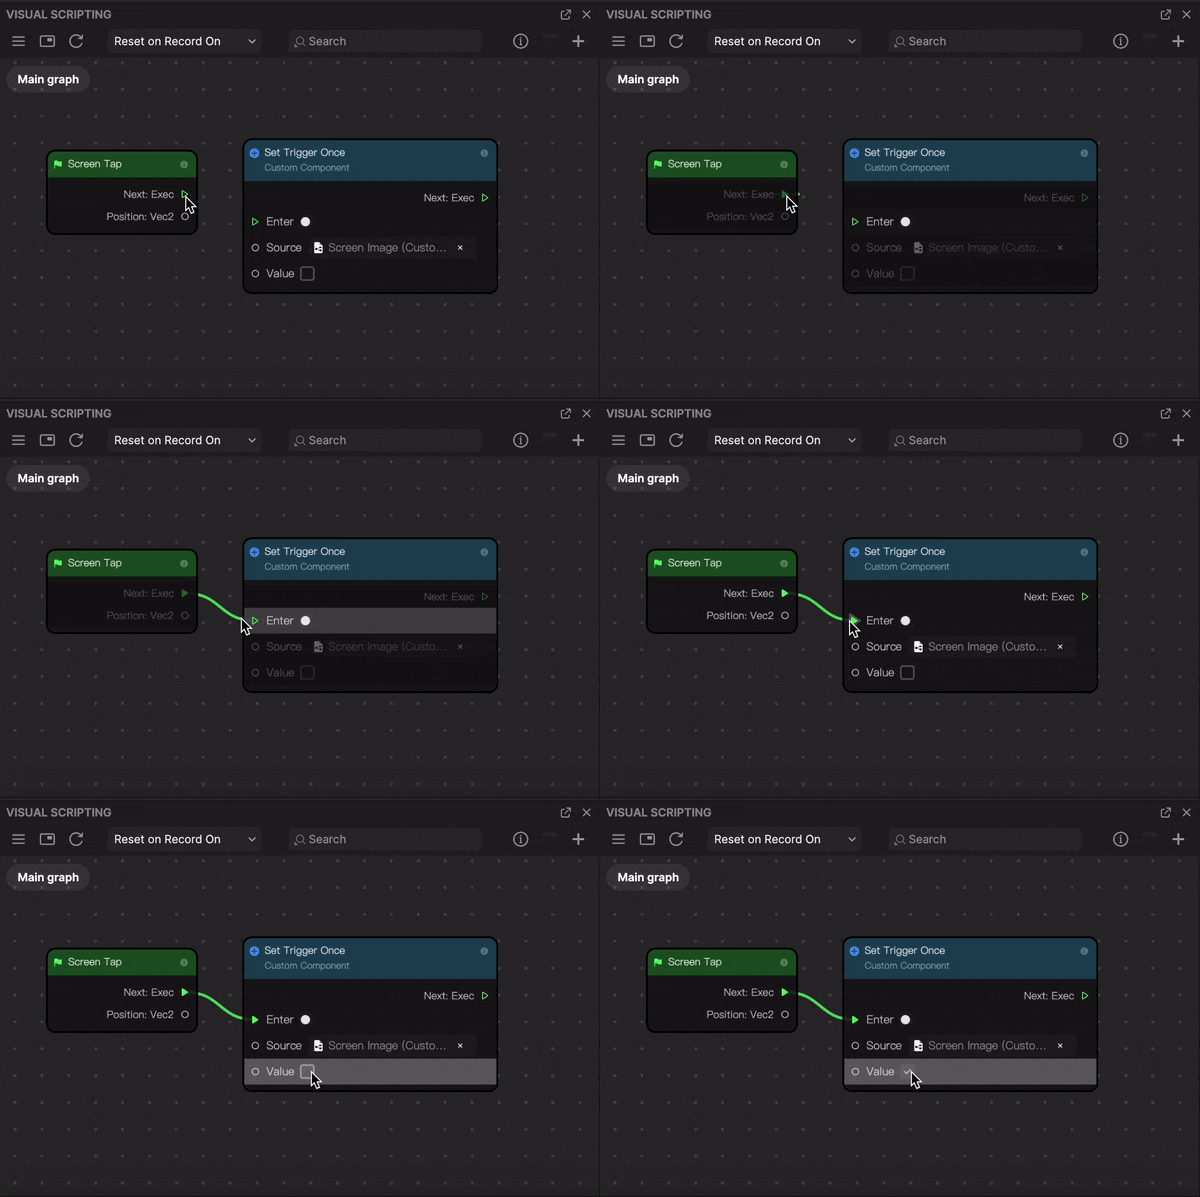
Now let's add a Screen Tap node:
- Go to the Visual Scripting panel
- Right-click anywhere in the dotted space, then select Add node
- Add the Screen Tap node
- Connect Next: Exec to Enter
- Select the Value checkbox. You'll now notice that the image spins!
Use Multiple Subgraphs on One Image
First, let's apply the Fade Out prefab to your project:
- Click the Asset Library button

- Click Image Picker

- Go to Fade Out
- Click the Import and Apply button. The Fade Out prefab should now be added to the Hierarchy panel and the Assets panel.
Using the same logic above, add the Move 2D Object prefab to your project. The Move 2D Object prefab should now be added to the Hierarchy panel and the Assets panel.
Now let's add a 2D Scene Object:
- Go to the Hierarchy panel
- Click the Add object button [+]
- Go to 2D
- Select 2D Scene Object
- Go to the Inspector panel
- Click Add component
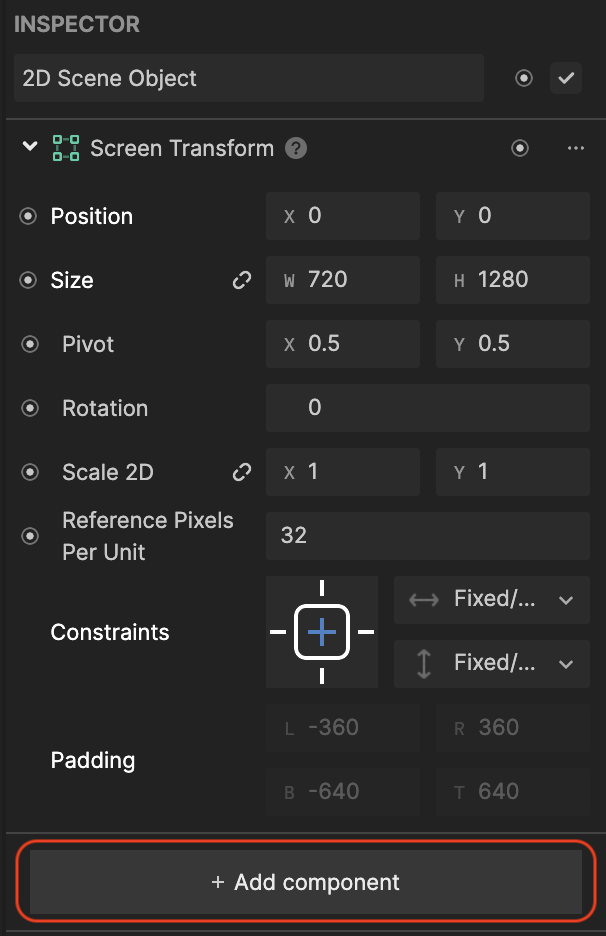
- Go to Custom Component
- Select Move 2D Object Logic
- Go to the Inspector panel and locate the Scene Object component
- Click None (Scene Object) and select Screen Image. Your new image is now applied!
You can also add the Move 2D Object by dragging it from the Subgraphs folder from the Assets panel and into the Visual Scripting panel. Make sure you change the Object component to Screen Image.
Now let's adjust the start, end, and speed:
- Go to the Inspector panel
- Set the Start Position to (200, 100), End Position to (-200, -100), Speed: 5. This now combines both logics together as one image!
Sequence Two Images With Prefabs
Let's learn how to set up a sequence of two subgraphs together using prefabs.
- Click the Asset Library button

- Click Image Picker

- Go to Fade Out
- Click the Import and Apply button. The Fade Out prefab should now be added to the Hierarchy panel and the Assets panel.
Using the same logic above, add the Move 2D Object prefab from the Asset Library to your project. You should now have two images on the screen together!
Next, we'll want to move the Screen Image to the side of the screen:
- Go to the Hierarchy panel
- Click Screen Image
- Go to the Inspector panel and locate the Screen Transform component
- Set Position to (500, 0)
- Locate the Move 2D Object component
- Click Trigger Once
- Select Set Trigger Once
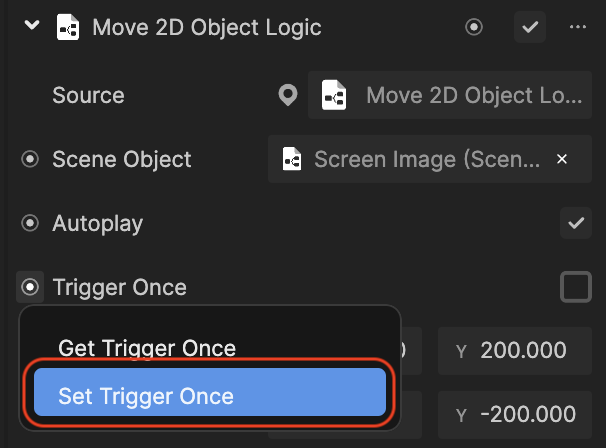
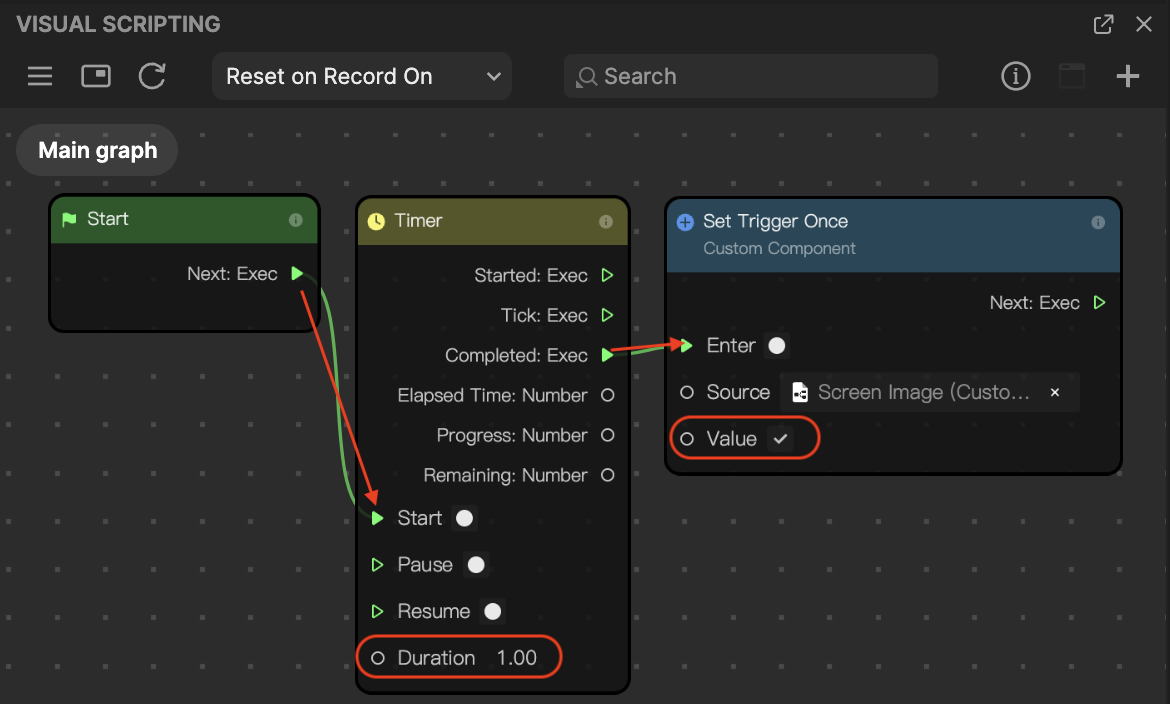
Now let's add a Timer node:
- Go to the Visual Scripting panel
- Right-click anywhere in the dotted space, then select Add node
- Add the Timer node
- Connect Next: Exec to Start
- Set Duration to 1
- Connect Complete: Exec to Enter
- Select the Value checkbox
Now let's adjust the position of the image:
- Go to the Inspector panel and locate the Move 2D Object Logic component
- Set Start Position to (500, 0), and End Position to (0, 0)
- Deselect Autoplay The final step is to set up the Timer and Set Trigger Once nodes:
- Go to the Visual Scripting panel
- Go to the Timer node
- Set Duration to 1
- Connect Complete: Exec to Enter
- Select the Value checkbox. You'll now notice that the image moves from the start position to the end position!