Animated Texture
Animated Textures allow you to create animations from multiple textures. They can be applied wherever a Texture property is used, with the simplest implementation requiring an Image object.
Import a Texture Sequence
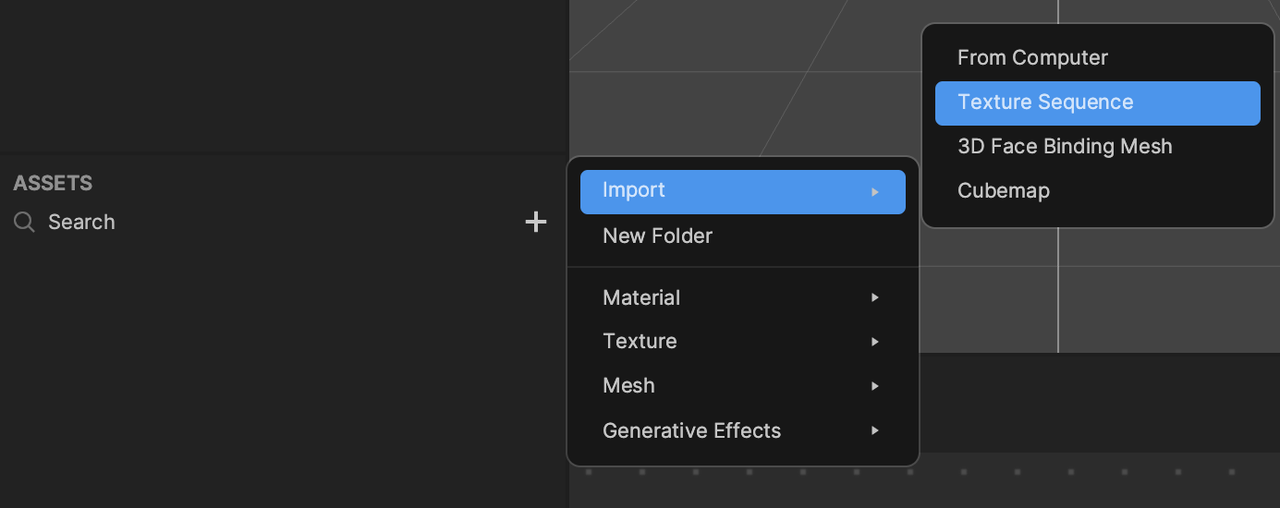
First import your texture sequence into the Assets panel. Click the Add button [+], go to Import, then select Texture Sequence in the Assets panel. Select the sequence of images you want to use for the animation from your computer.
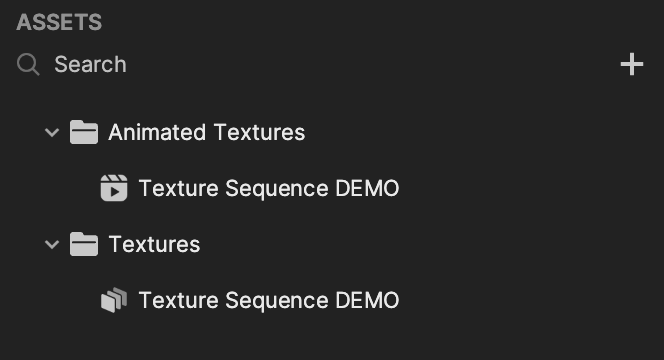
The imported images will automatically upload to the Assets panel as animated textures and texture sequences.
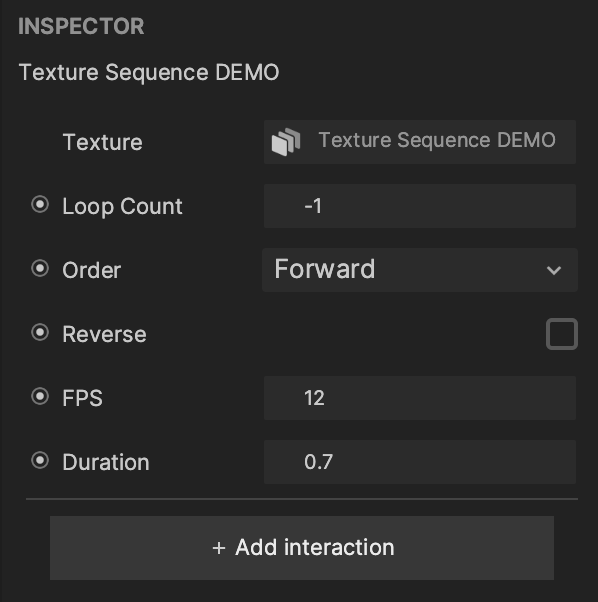
Select the animated texture under the Animated Textures folder in the Assets panel, then go to the Inspector panel to customize the animation’s playback features. A Loop Count of -1 indicates an infinte autoplay, while 0 indicates no playback.
Apply an Animated Texture to an Image
Go to the Hierarchy panel and click the Add button [+], go to 3D, then select Image.
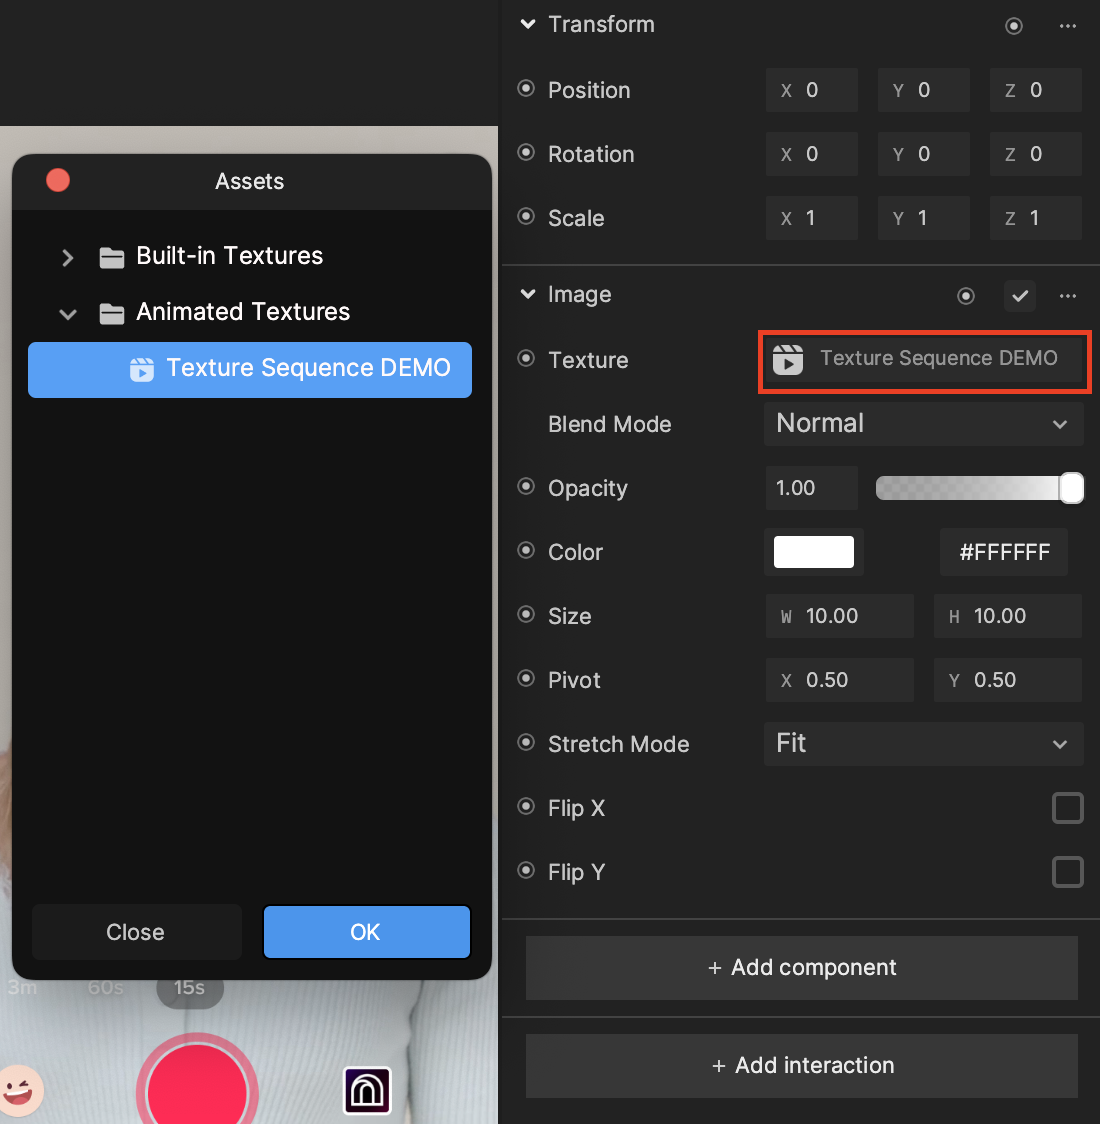
To assign the newly created animated texture to the Image, click the Image object in the Hierarchy panel, then go to the Inspector panel. Click the Image component’s Texture property, and select the animated texture under the Animated Textures folder, or simply drag the animated texture from the Assets panel into the Texture slot.
Apply an Animated Texture to a 3D Object
An animated texture can also be applied to 3D objects as a Material. Make sure you have a 3D object (such as a Cube or Sphere) added to the Hierarchy panel and an animated texture available in the Assets panel. Go to the Assets panel, click the the Add button [+], go to Material, then select a material such as Standard PBR.
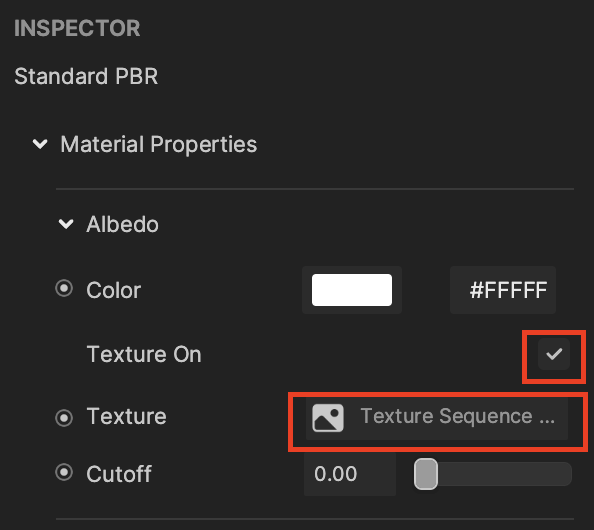
With the Standard PBR material selected in the Assets panel, go to the Inspector panel and enable the Texture On property within the Albedo component. Then click on the Albedo component’s Texture property, and select the animated texture, or drag the animated texture from the Assets panel into the Texture slot.
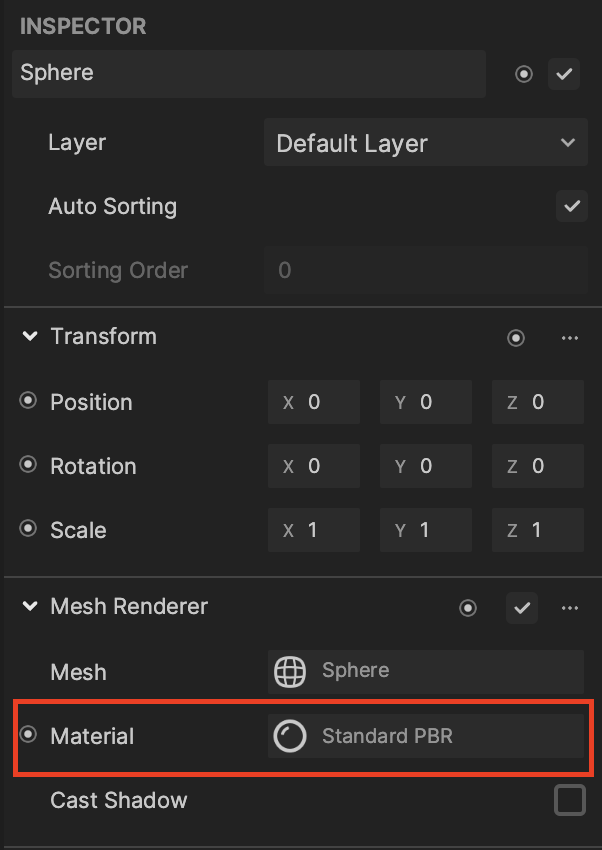
Click on your 3D object in the Hierarchy panel (such as a Cube or Sphere), then go to the Inspector panel and change the Material to the Standard PBR material you just configured.
Animated Texture Properties
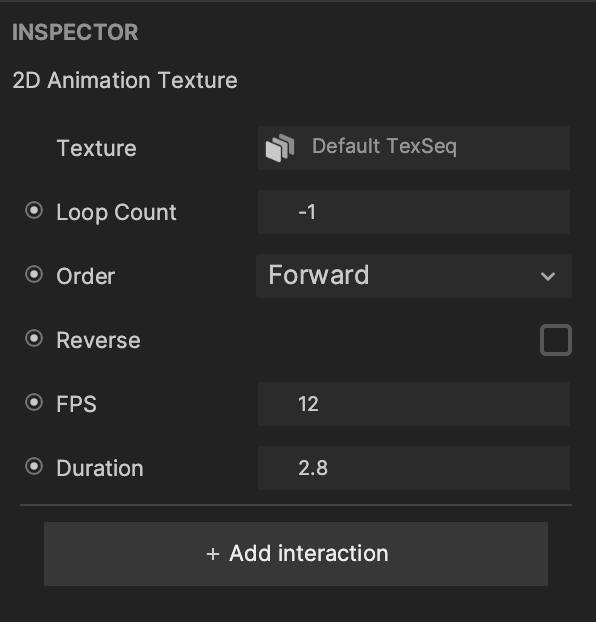
Loop Count: Determines how many times the animation plays. For example, if your sequence has 6 images, a loop count value of 1 means the 6 images will be played, and the seventh image will signify the second loop. Select a value between -1 and 999999.
- -1 represents an infinite playback. This is the default value.
- 0 represents no playback.
- 1 represents the first play.
Order: Select the playback mode of the animation sequence.
- Forward: The frames will play in the order they are selected in the file.
- Random: The frames will play in a random order and frames may repeat.
- Ping-pong: When you reach the end of the playback, the sequence of frames will “ping-pong” back and forth between the beginning and end of the sequence. For example, if your sequence has 5 images:
- The first loop will mimic the forward play mode (0-1-2-3-4)
- The second loop will ping-pong (4-3-2-1-0)
- Shuffle: The frames will play in a shuffled order without repeating the previous frame.
Reverse: Select this property to play in reverse order.
FPS: Adjust the frames per second (FPS) to speed up or slow down the animation. The default value is 12. A higher FPS means a smoother animation, but more frames, which will affect the performance. It is recommended that you do not exceed 12 FPS.
Duration: Displays the playback duration of the sequence with the current FPS setting. Modifying the duration will also modify the FPS.