Filter
Use Filter to transform color inputs. You can make effects black and white or enhance your effect with fun cinematic colors.
In the Demo Effects section, you will learn how to apply filters to different parts of the screen. Download the following files to get started:
Here are some filter textures you can use:
Add a Filter Object
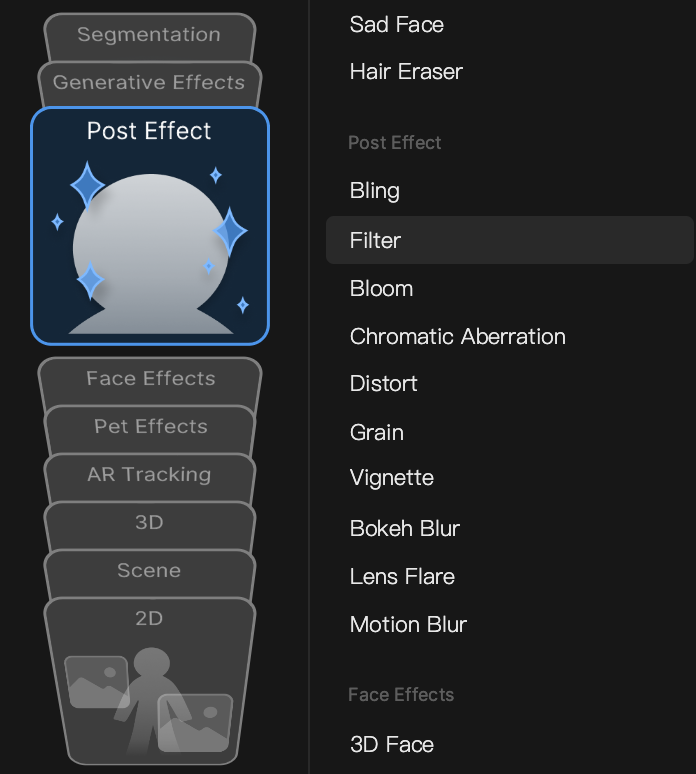
To add a Filter object:
- Go to the Hierarchy panel
- Click the Add object button [+]
- Go to Post Effect
- Select Filter
Adding a Filter object automatically adds a Camera component in the Inspector panel. This makes it easier to apply filters to that camera’s render texture.
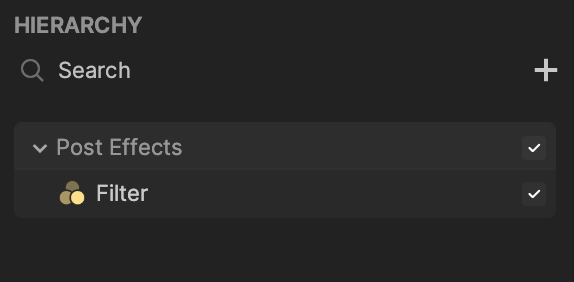
Object Hierarchy
Starting in Effect House v2.0.0, the Filter object is automatically added to the Post Effects render group in the Hierarchy panel. Learn more about render groups.
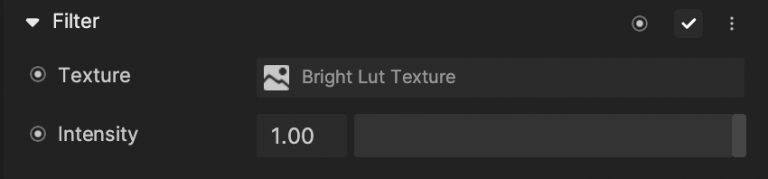
Components
The Filter object is made up of the following components, found in the Inspector panel:
Create a LUT Texture
A lookup table (LUT) contains a preset filter texture. You can easily apply a LUT filter to color grade your effect. You can use a built-in LUT asset for your filter effect or create your own.
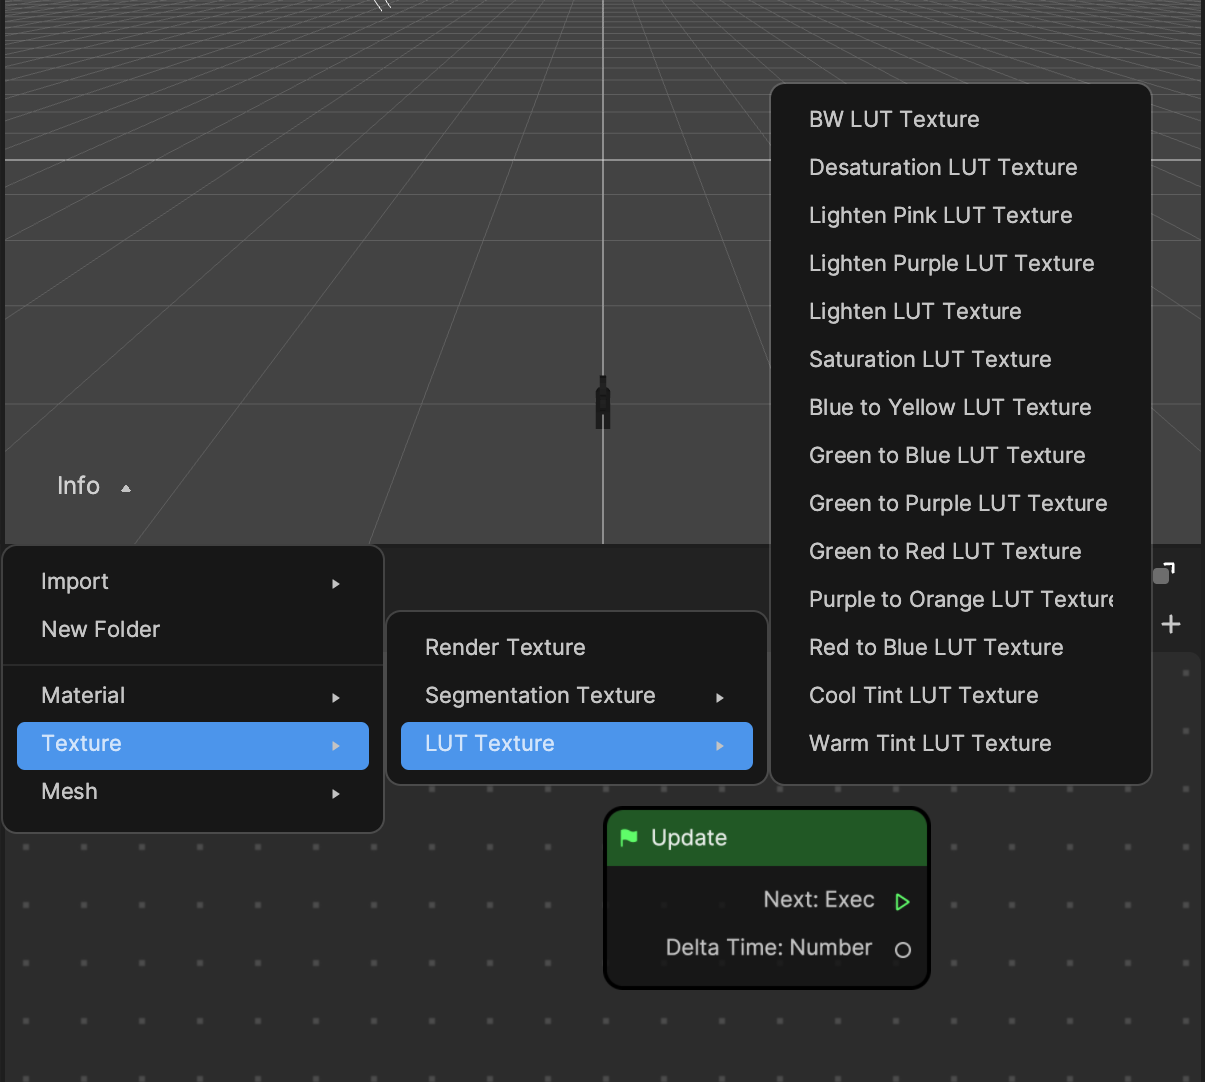
Use a Built-In LUT Texture
To use a built-in filter texture:
- Go to the Assets panel
- Click the Add button [+]
- Select Texture
- Choose LUT Texture
- Select a built-in filter texture option
Customize a Filter’s Texture
To create your own LUT filter texture, you can use an image editing application. In the following section, you’ll learn how to use Photoshop and the Colorcards_Template.psd file to make your own filter texture.
Check out the following demo video!
Download the following Photoshop file:
Here are some LUT textures you can download:
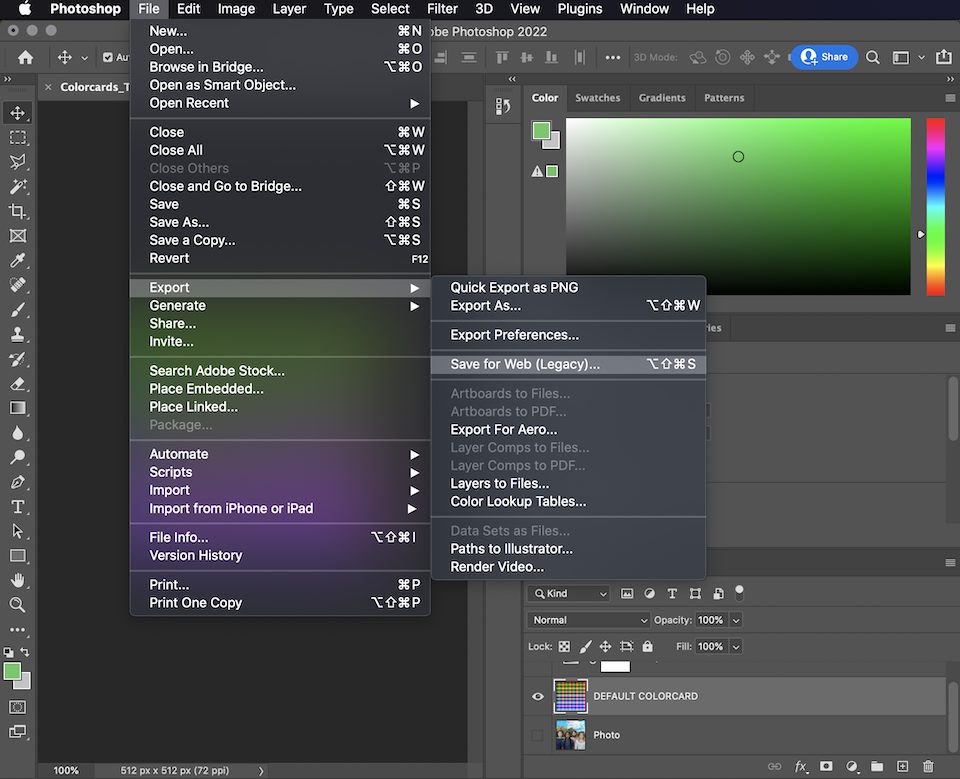
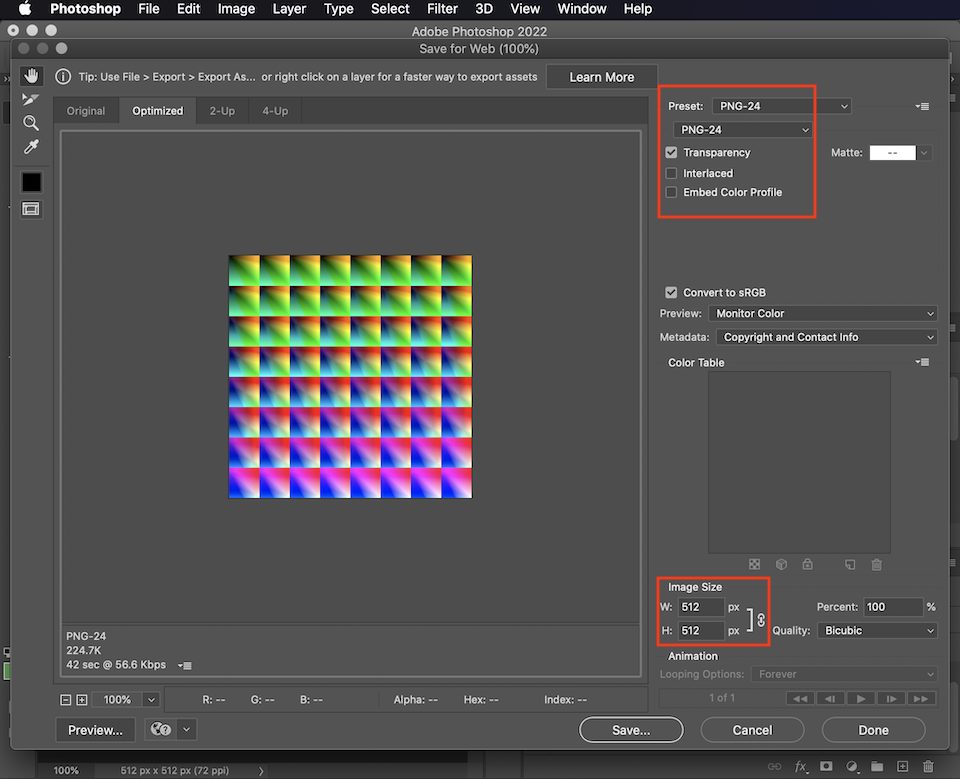
First hide the DEFAULT COLORCARD layer and add new adjustment layers with the default photo.
Once you’re satisfied with the result, hide the photo layer and show the DEFAULT COLORCARD layer. Make sure the DEFAULT COLORCARD layer is below the color layer.
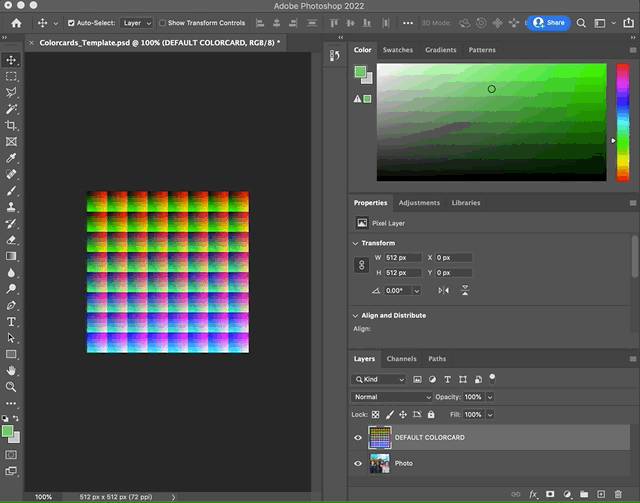
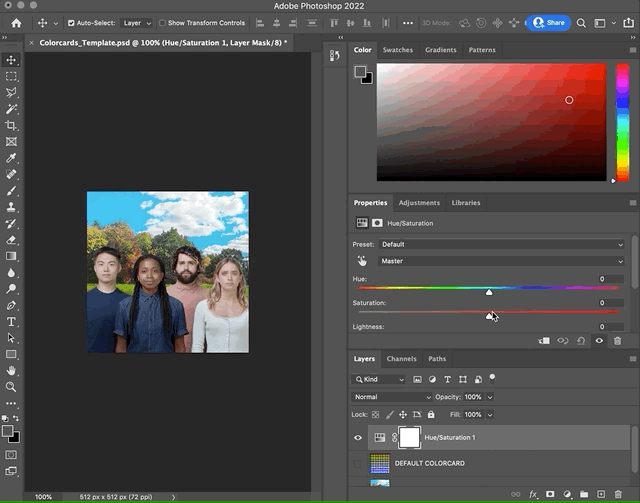
Save it as a PNG file.
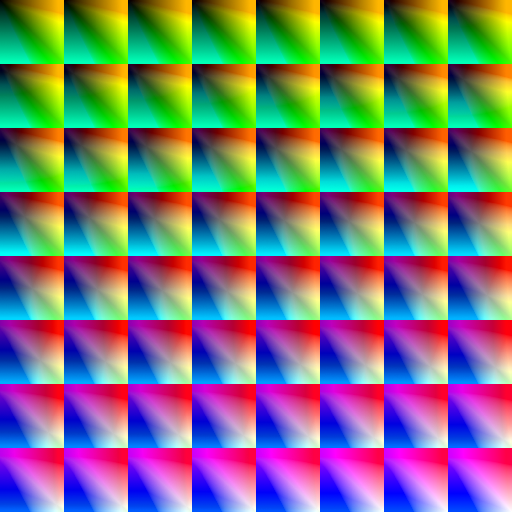
Your end result should look like a color card similar to the following image:
Import a Texture
To import your prepared filter texture (or color card):
- Go to the Assets panel
- Click the Add button [+]
- Select Import
- Choose From Computer
Learn more about the recommended texture specifications for your 2D image.
Apply a LUT Texture to Filter Texture
To apply a LUT Texture to the Filter Texture:
- Go to the Hierarchy panel
- Click the Filter object to access its properties in the Inspector panel
- Locate the Bright LUT Texture (the default texture)
- Replace Bright LUT Texture with your newly imported texture
Demo Effects
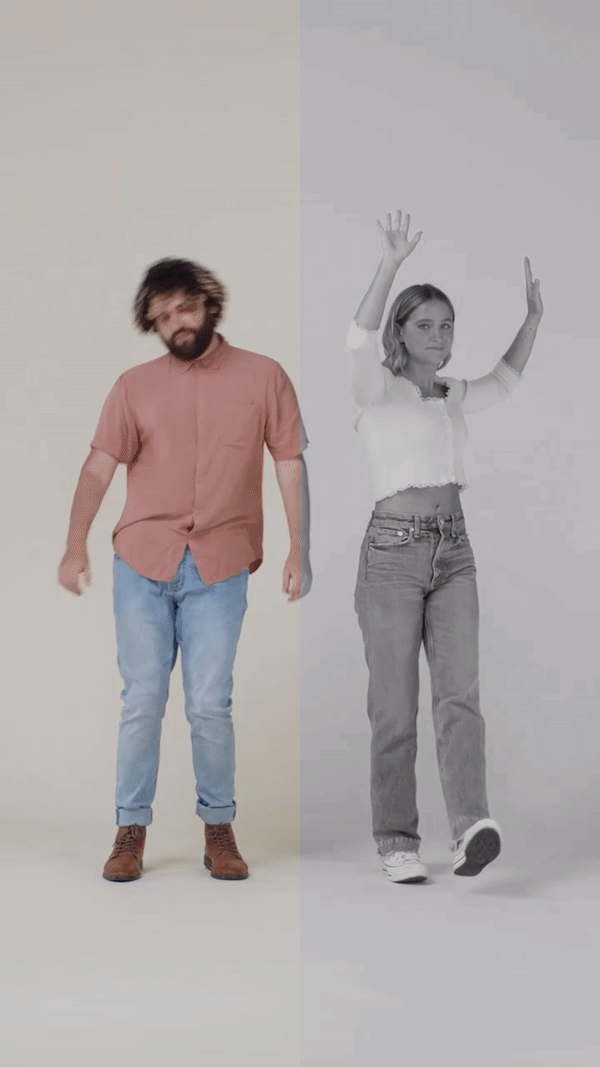
Demo Effect: Half and Half
In this demo, you will learn how to apply filters to parts of the screen.
If you haven’t already, download the following file:
Follow along with this video tutorial:
#### Steps to apply a Black and White LUT Texture using a Filter and Render Texture- Add a Filter object
- Go to the Hierarchy panel
- Click the Add button [+] > Post Effect > Filter
- Create a Render Texture
- Go to the Assets panel
- Click the Add button [+] > Texture > Render Texture
- Configure the Render Texture
- Select the new Render Texture in the Assets panel
- In the Inspector panel, set Input Texture to Final Render Output
- Link the Render Texture to the Filter
- Select the Camera object in the Hierarchy panel
- In the Inspector panel, locate the Camera component
- Replace the default Render Texture with the new Render Texture
- Add a 2D Image
- Go to the Hierarchy panel
- Click the Add button [+] > 2D > Image
- Set the Image Texture
- Select the new Image object in the Hierarchy panel
- In the Inspector panel, set the Texture property to the new Render Texture
- Reorient the Image
- In the Inspector panel, check Flip X
- Change Rotation to 180 degrees
- Adjust Advanced Settings
- Set Draw Mode to Filled
- Adjust Start Point to 0.5
- Add a Black and White LUT Texture
- Go to the Assets panel
- Click the Add button [+] > Texture > LUT Texture > BW LUT Texture
- Apply the BW LUT Texture to the Filter
- Go to the Hierarchy panel
- Select the Camera object
- In the Inspector panel, locate the Camera component
- Replace the LUT Texture component’s default Texture property with BW LUT Texture
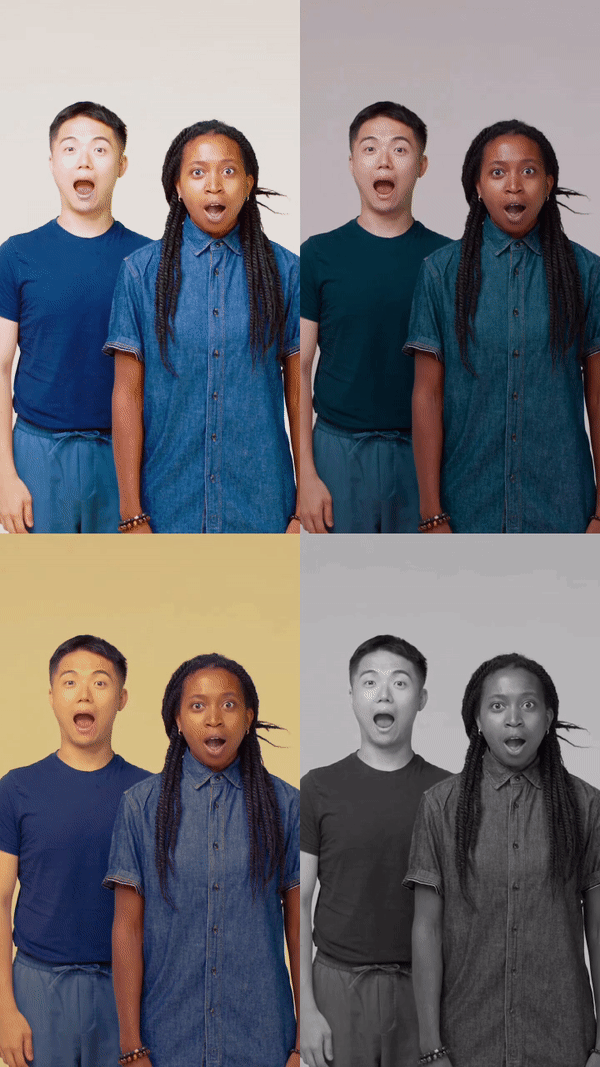
Demo Effect: Four Screens
In this demo, you will learn how to apply filters to four images on the screen.
If you haven’t already, download the following file:
Start by applying a filter to the first image:
- Add a Filter object
- Go to the Hierarchy panel
- Click the Add button [+] > Post Effect > Filter
- Create a Render Texture
- Go to the Assets panel
- Click the Add button [+] > Texture > Render Texture
- Set the Input Texture
- Select the new Render Texture in the Assets panel
- In the Inspector panel, change the Input Texture property to Final Render Output
- Configure the Filter's Camera component
- Select the Camera object in the Hierarchy panel
- In the Inspector panel, locate the Camera component
- Replace the Camera component’s default Render Texture with the new Render Texture
- Add a 2D Image
- Go to the Hierarchy panel
- Click the Add button [+] > 2D > Image
- Set the Image Texture
- Select the new Image object in the Hierarchy panel
- In the Inspector panel, change the Texture property to the new Render Texture
- Reorient the Image
- In the Inspector panel, check Flip X
- Change Rotation to 180 degrees
- Resize the Image
- Go to the Scene panel
- Resize the image to fit the upper left quadrant of the scene
Apply a filter to the second image:
- Duplicate objects
- Duplicate the Image object in the Hierarchy panel to create Image (1)
- Duplicate the Render Texture in the Assets panel to create Render Texture (1)
- Duplicate the Filter in the Hierarchy panel to create Filter (1)
- Update Filter (1)
- Select Filter (1) in the Hierarchy panel
- In the Inspector panel, replace the Camera component’s Render Texture with Render Texture (1)
- Add a Green to Purple LUT Texture
- Go to the Assets panel
- Click the Add button [+] > Texture > LUT Texture > Green to Purple
- In the Inspector panel, replace the LUT Texture component’s default Texture property with Green to Purple
- Update Image (1)
- Select Image (1) in the Hierarchy panel
- In the Inspector panel, change the Image component’s Texture property to Render Texture (1)
- Position the image
- Go to the Scene panel
- Drag and resize the image to fit the upper right quadrant of the scene
Apply a filter to the third image:
- Duplicate objects
- Duplicate the Image object in the Hierarchy panel to create Image (2)
- Duplicate the Render Texture in the Assets panel to create Render Texture (2)
- Duplicate the Filter in the Hierarchy panel to create Filter (2)
- Update Filter (2)
- Select Filter (2) in the Hierarchy panel
- In the Inspector panel, replace the Camera component’s Render Texture with Render Texture (2)
- Add a Black and White LUT Texture
- Go to the Assets panel
- Click the Add button [+] > Texture > LUT Texture > Black and White
- In the Inspector panel, replace the LUT Texture component’s default Texture property with Black and White
- Update Image (2)
- Select Image (2) in the Hierarchy panel
- In the Inspector panel, change the Image component’s Texture property to Render Texture (2)
- Position the image
- Go to the Scene panel
- Drag and resize the image to fit the lower left quadrant of the scene
Apply a filter to the fourth image:
- Duplicate objects
- Duplicate the Image object in the Hierarchy panel to create Image (3)
- Duplicate the Render Texture in the Assets panel to create Render Texture (3)
- Duplicate the Filter in the Hierarchy panel to create Filter (3)
- Update Filter (3)
- Select Filter (3) in the Hierarchy panel
- In the Inspector panel, replace the Camera component’s Render Texture with Render Texture (3)
- Add a Warm LUT Texture
- Go to the Assets panel
- Click the Add button [+] > Texture > LUT Texture > Warm
- In the Inspector panel, replace the LUT Texture component’s default Texture property with Warm
- Update Image (3)
- Select Image (3) in the Hierarchy panel
- In the Inspector panel, change the Image component’s Texture property to Render Texture (3)
- Position the image
- Go to the Scene panel
- Drag and resize the image to fit the lower right quadrant of the scene