3D Asset Preparation
This guide will help you prepare 3D assets for your Effect House projects.
Best Practices
Supported Formats
Effect House supports FBX, gITF, and OBJ formats for 3D models. Stay tuned as we work to enable support for more formats!
Mesh
- Use triangle polygons and quad polygons.
- Total triangles in the entire effect should be less than 60k for optimal performance. For each model, it is recommended that you keep each FBX file under 20k triangles.
- All UVs must be mapped.
Character Rigging
- Use a maximum of 100 bones per model.
- Use a maximum of 4 joint influences.
- Joint names must be unique.
Effect House does not support Segment Scale Compensate for joints, which is the default setting on Maya®.
Animation
- Use only bone animations.
- Only translation, rotation, and scale settings are keyable.
- Do not key visibility.
- Leave all visibility “on” or set to 1.
- Set the frame rate to 30 fps.
- Bake your animation and make sure to break connections on visibility.
It is recommended that you keep the duration of your animation under 15 seconds, which is the default TikTok video length.
Texture for 3D Objects
Effect House supports importing textures and materials information with meshes for FBX and glTF. Keep the following requirements in mind for textures used in materials:
- Format: PNG and JPG files are supported.
- Resolution limit: The maximum is 1024 x 1024 px. Your file will be resized if it is larger than 1024 x 1024 px.
- Single file size: Less than 1 MB.
- Image dimensions must represent a square and a power of 2 (for example, 256 x 256 px, 512 x 512 px, 1024 x 1024 px). The maximum dimension supported is 1024 x 1024 px.
- The recommended image size is 512 x 512 px.
- 1024 x 1024 px can be used if fine detail is required.
- Maps for different channels can be different sizes as long as they are a square shape.
Export From 3D Modeling Tools
Export From Autodesk® Maya®
FBX
Use the following settings for optimal performance when exporting FBX from Autodesk® Maya®:
- FBX file format export (Version 2014-2019)
- Follow the export settings below:
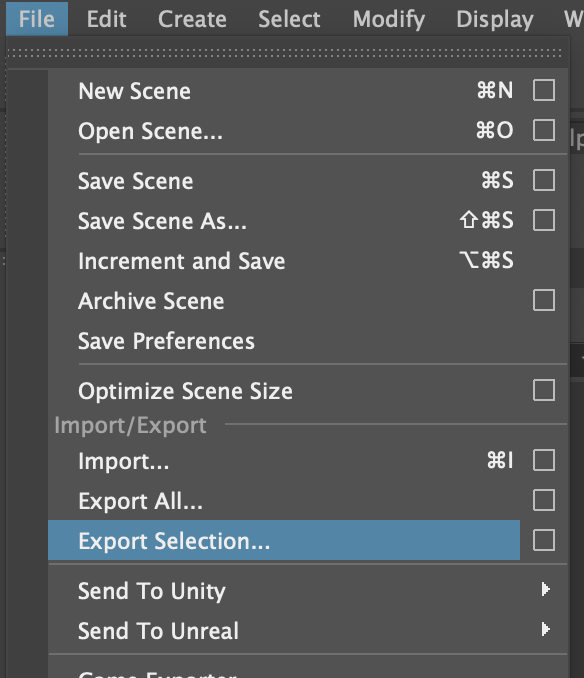
- Select the Embed Media checkbox when exporting your model if you want the textures and materials to come with the model when importing into Effect House. Deselect the Animation checkbox if it is not required.
- It is recommended to triangulate the model manually in Autodesk® Maya® and delete the non-deformation history first.
- It is not recommended to bake animations through the FBX exporter. You should bake animations separately in Autodesk® Maya® first.
OBJ
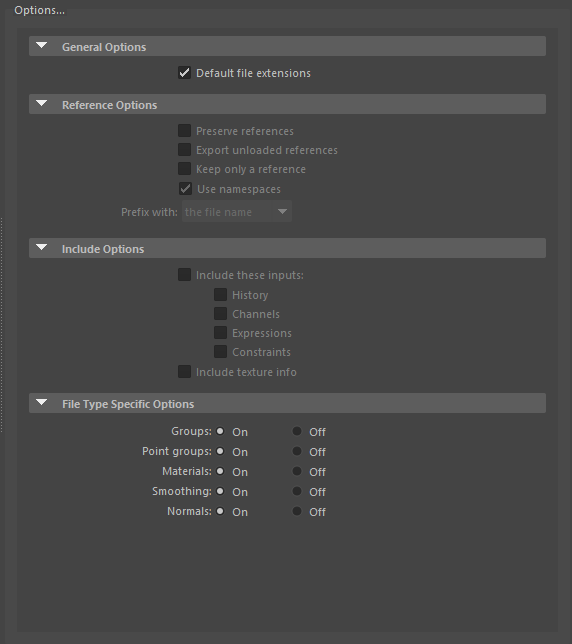
Here is the default setting when exporting OBJ files. OBJ file format doesn’t support animations or textures.
Export From Blender®
FBX
Use the following settings for optimal performance when exporting FBX from Blender®:
- When exporting an animation, set the animation frame rate to 30 fps.
- Select want you want to export and click File > Export > FBX (.fbx).
- Follow the export settings below:
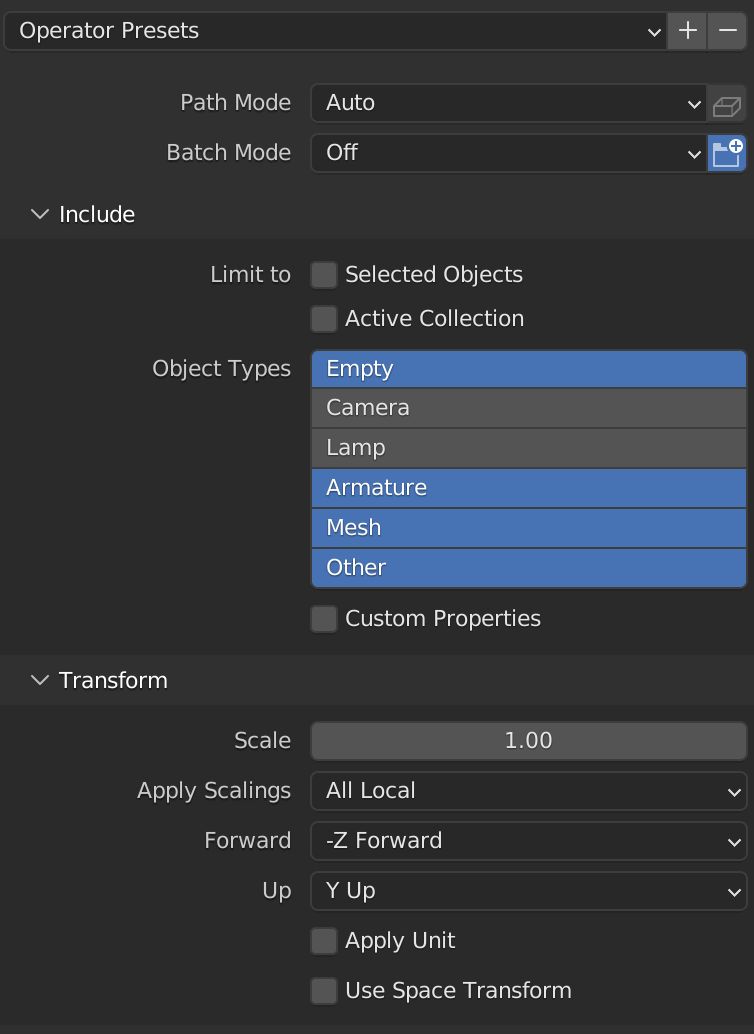
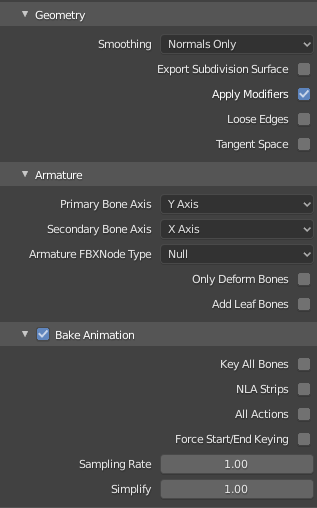
To choose multiple Object Types, press and hold Shift + click the object types you want to include.
- Deselect the Animation checkbox if it is not required.
GLTF
Use the following settings for optimal performance when exporting GLTF from Blender®:
- When exporting an animation, set the animation frame rate to 30 fps.
- Select want you want to export and click File > Export > gITF (2.0).
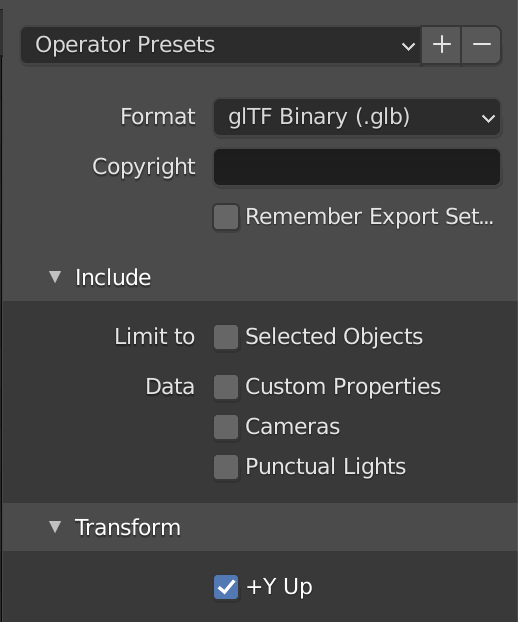
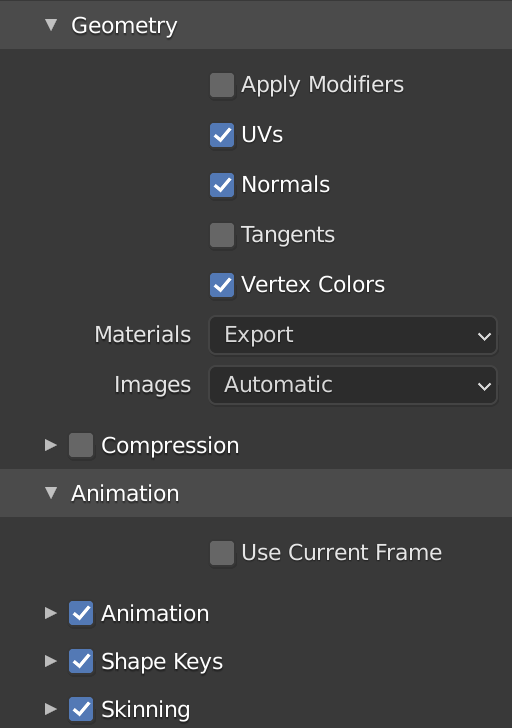
- Deselect the Animation checkbox if it is not required.
OBJ
Use the following settings for optimal performance when exporting OBJ from Blender®:
- When exporting an animation, set the animation frame rate to 30 fps.
- Select want you want to export and click File > Export > Wavefront (.obj).
- Follow the export settings below:
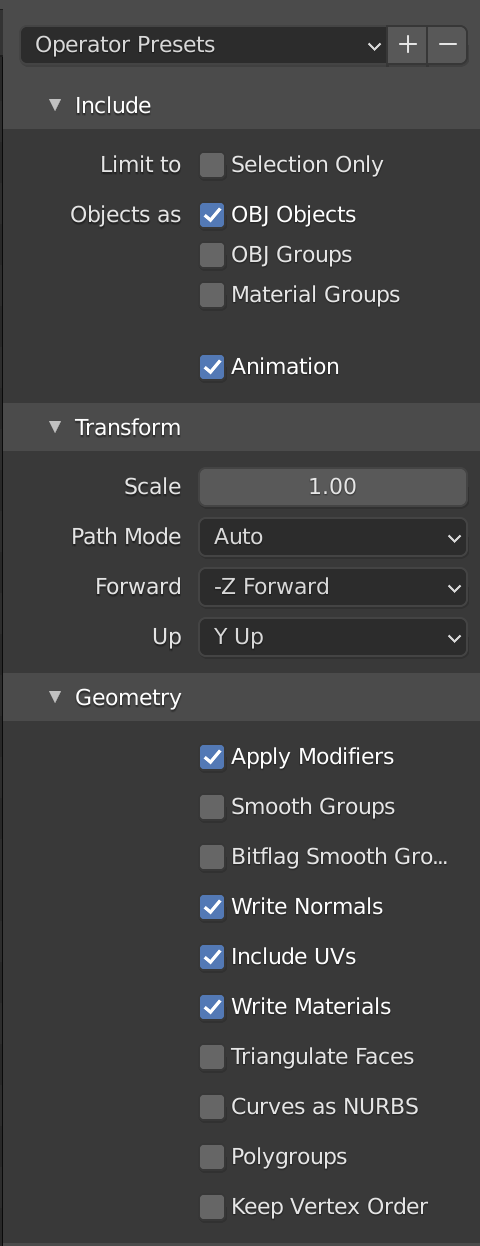
- OBJ files only store geometry data, so you can select the WriteMaterials checkbox to export the model with materials. However, you must import textures separately.
- Deselect the Animation checkbox if it is not required.
Asset Import
You can directly drag the object to the scene and it will be auto-assigned a standard PBR material that is generated from the FBX model. From there, you can customize your own material. Learn more about materials.
If your model has submeshes, you’ll find the auto-created materials in the Asset panel that map to the order of your submeshes. For example, submesh0 will map to the material lambert1, submesh1 will map to lambert2, and so on.
A submesh is a mesh defined as a subset of a given mesh. In a digital content creation tool, exporting an object with separate materials will give you separate submeshes.
GLTF Material Extensions
When importing any GLTF model, an Uber material will be created in the Assets panel to control its material properties according to the GLTF standard. The following material extensions are supported:
| Extension | Property | Description |
|---|---|---|
| KHR_materials_clearcoat | Coat | Simulates a clear coat over objects like clear varnish or plastic wrap |
| KHR_materials_transmission | Refraction | Simulates infinitely thin clear glass or plastic |
| KHR_materials_sheen | Fabric | Simulates cloth like satin, velvet, tweed, muslin, and more |
| KHR_materials_ior | IOR | Index of refraction. Changes how much light is refracted by the material |
| KHR_materials_iridescence | Thin Film | Applies iridescence, which changes colors depending on the view angle. Simulates materials like soap bubbles, oil films, or insect wings |
| KHR_materials_volume | Refraction | Sets the thickness of the material to refract light |
| KHR_materials_anisotropy | Anisotropy | Gives materials anisotropic properties, elongating specular reflections. Simulates materials like brushed metal |
| KHR_materials_specular | Specular | Adjusts the amount of specular light being reflected and to change the color of the specular light |
Asset Information
Mesh Information
- Bounding Box: The minimum or smallest bounding box of the model.
- Vertices Count: Display the number of vertices in the imported mesh.
- Vertices Attribute: Based on the complexity of your model, the asset information will include some of the following: Position, Texcoord0, Normal, Tangent, Binormal, Indices, and Weight.
- Submesh Count: Display the submesh count in the mesh. This property only displays when the mesh has submeshes (>=2 submeshes).
- Blend shape: This property only displays when your model has blend shapes.
Asset Preview
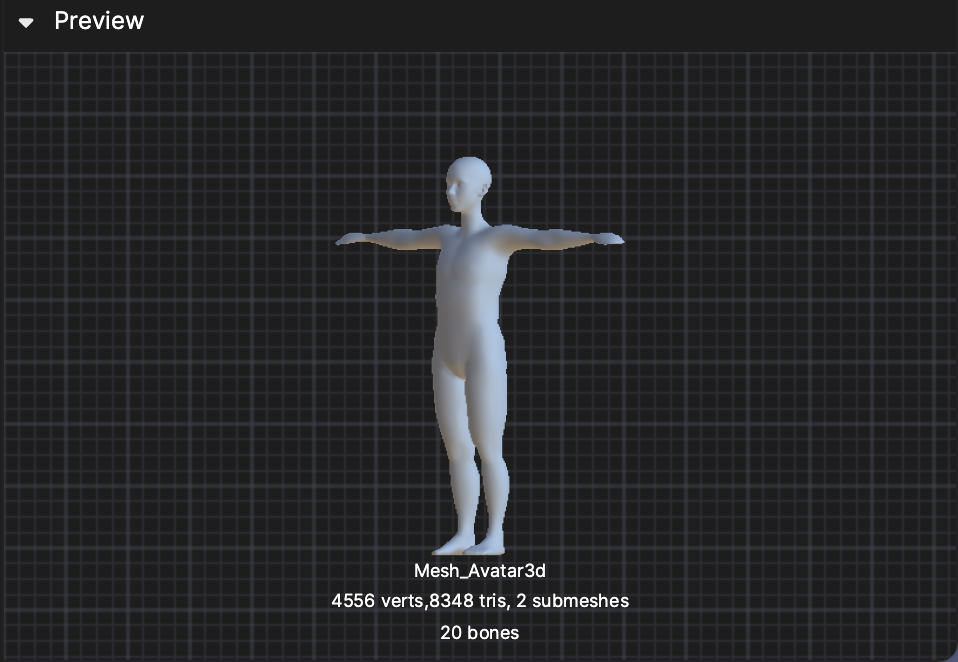
You can check the number of verts, tris, bones, submeshes, and blend shapes in the Preview panel.
