Asset Library
Asset Library provides a curated selection of high-quality, pre-made assets to enhance your effects quickly and effectively. Whether you're designing immersive effects, interactive experiences, or visually stunning animations, Asset Library provides an extensive collection of tools to enhance your workflow.

Access Asset Library
To open Asset Library:
- Go to the quick access bar located at the top of your Effect House window
- Click Asset Library

Alternatively, you can access Asset Library from the Assets panel:
- Go to the Assets panel
- Click the Add asset button [+]
- Click Browse Asset Library

Asset Categories
By default, Asset Library opens with featured assets, but you can explore a variety of asset categories, including:
| Category | Description |
|---|---|
| Create Image | Open the AI Image Generator to create custom 2D assets and textures using text prompts |
| Create GIF | Open the GIF Creator to generate animated GIFs from a text prompt and a reference image |
| Home | Browse featured, trending, and recommended assets across all categories |
| Makeup | Enhance faces with virtual makeup effects such as lipstick, blush, and eyeshadow |
| Screen | Add full-screen visual effects, such as pixelation or color grading overlays |
| Image Picker | Enable users to upload and use their own images and media in the effect |
| Filters | Apply color adjustments and artistic effects to transform the scene’s appearance |
| Character | Pre-made 3D characters or models for interactive or animated effects |
| Accessories | Add 3D props like hats, glasses, or jewelry to enhance character customization |
| Stickers | 2D graphical elements that can be placed or animated within the scene |
| Transitions | Smooth animations for shifting between scenes or images in an effect |
| Backgrounds | Replace or enhance the scene’s backdrop with custom 2D or 3D visuals |
| Gesture Hints | Visual cues to guide users on how to interact with the effect |
| Augmented Reality | Assets for creating AR experiences, like face or world tracking components |
| Subgraphs | Visual scripting templates for adding interactivity and logic to effects |
| Materials | Pre-configured shaders and textures to define the surface appearance of 3D objects |
| Minecraft | Official 3D models, blocks, and environment assets for creating Minecraft-themed effects |
| Sketchfab | A vast library of 3D models imported directly from Sketchfab for creative use |
| Game Modules | Pre-built Script Components for creating interactive effects faster, such as health bars, joysticks, and score counters |
Create Image Assets Using Image Creator
You can create custom image assets like stickers and backgrounds directly in the Asset Library using Image Creator. These assets can be used as overlays in your effects, with options like transparent backgrounds for easy placement.

Access Image Creator
- Go to the quick access bar located at the top of your Effect House window
- Click Asset Library
- Go to Create
- Click Image

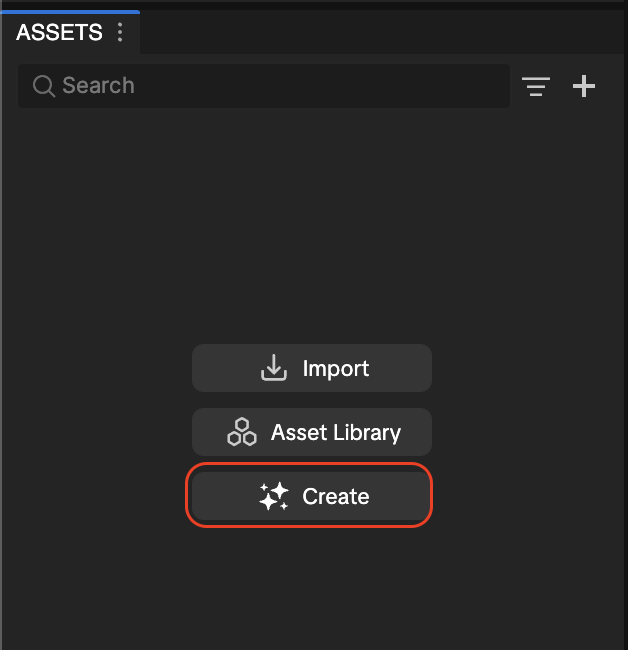
Alternatively, you can open the image creator directly from the Assets panel by clicking Create.
Create Image Assets
Enter a text prompt and optionally add a reference image to generate assets for your effect.
Input Options
- Prompt: Describe the image you want to create

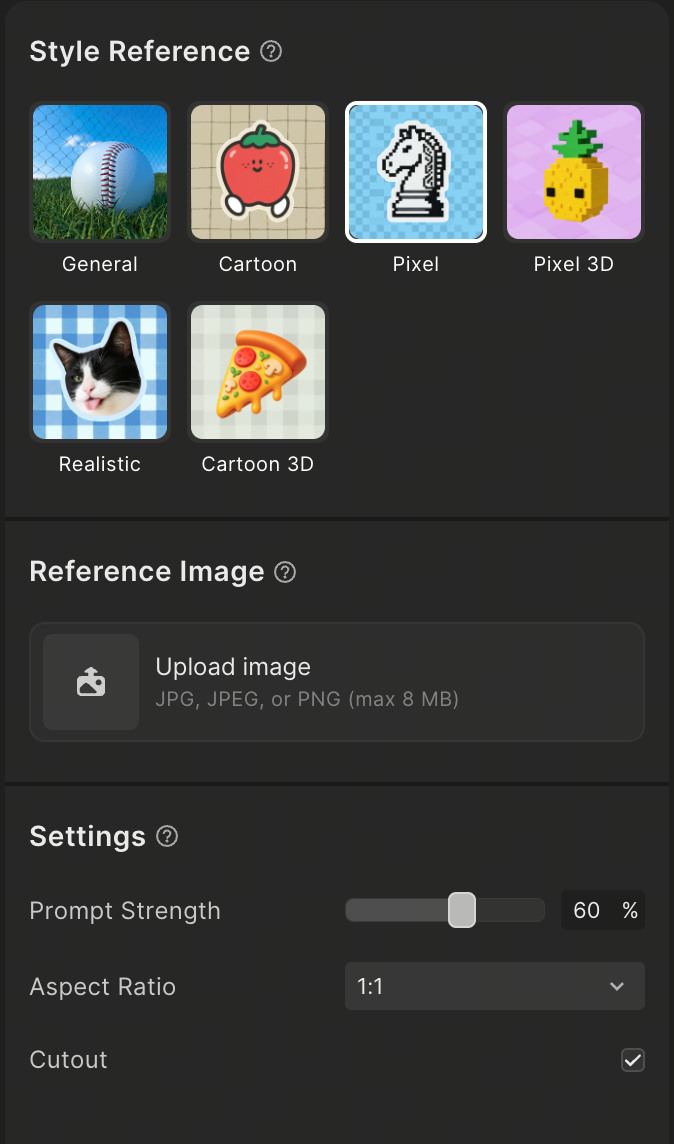
- Style Reference: Choose a style reference to help generate the asset
- Reference Image (Optional): Upload one JPG or PNG file to guide the result
- Click Upload image
- A thumbnail will appear after upload
- Click x to remove or replace the image
- Prompt Strength: Adjust how closely the result follows your prompt. Default is 60
- Aspect Ratio: Choose from 1:1, 9:16, 16:9, 3:4, 4:3, or set a custom ratio
- Cutout: Enabled by default to generate transparent images. Turn off to include a background
Generate and Apply Assets
- Click Generate after setting your options
- Review the 4 generated variations
- Hover over a result and click Import to add it to your Assets panel
- Click an image to preview it in a larger view

You can now use the imported asset in your effect.
Refine Your Results
After generating assets, you can continue iterating:
- Reprompt: Reopen your previous prompt and settings to make edits and generate new results
- Regenerate: Generate new variations using the same settings
Each action creates a new result, allowing you to explore different outputs.
Create GIF Assets Using GIF Creator
Asset Library also includes a powerful GIF Creator tool that allows you to quickly generate custom animated GIFs based on a reference image directly within your workflow. This feature helps you obtain unique animated assets tailored to your needs without leaving the application.
Access GIF Creator
To access the GIF Creator:
- Open Asset Library
- Click AI Creator and select GIF

Generate a GIF
To generate an animated GIF:
- Enter a Prompt: Type a description of the animation you want to generate in the Prompt input box

- Select a Reference Image: You must provide a reference image to generate a GIF. You can either:
- Click Upload image to select and upload a local JPG or PNG file
- Click Open image generator to select a result previously generated in your Image Creator historical sessions

To use Open image generator, first create a static image in Image Creator so it appears in your history
- Configure Settings:
- Duration: Adjust the duration of the animation from 3s to 12s
- Cutout: Enabled by default to generate transparent images. Turn off to include a background

- Generate: Click to generate. The tool will output one animated GIF based on your description and reference image
Import or Refine Results
- Import to Project: Hover your mouse over the generated GIF thumbnail (it will automatically play) and click the Import button to add it to your current project's assets
- Reprompt (Re-edit): Click Reprompt to bring your previous prompt and settings back into the input area. You can modify your description or settings and generate again
- Regenerate: Click Regenerate to produce a new GIF using your exact previous input configuration

If you see the error message "Unable to generate, please try again later," wait a moment and try again
Import and Apply Assets
The Asset Library also has preloaded assets that you can use. The process of importing and applying assets from Asset Library is simple and works consistently across all categories:
- Open Asset Library
- Browse through the categories or use the search bar to find the asset you need. Select an asset to view its details.

- Use the preview section to view the asset in your effect. You can change the preview media here.

- Import the asset:
- Click Import to add the asset to your Assets panel without applying it to the scene
- Click Import and apply to both import and immediately apply the asset to your scene
- If you imported the asset only, drag and drop it from the Assets panel into the Hierarchy panel. The asset will automatically group itself in the appropriate render group
- Once applied, use the Inspector panel to adjust properties, such as materials, positions, or animations, to better fit your effect
Work With Prefab Assets
Prefab assets are pre-configured building blocks for effects. These can be applied with one click or by dragging and dropping them into the Hierarchy panel. Prefab assets can be identified by clicking an asset and locating the Type field.

Use the Latest Assets
Stay updated with the latest assets with blue notification tags! In the quick access bar, the tag appears in the Asset Library icon when new assets are added, disappearing after the first click or after 7 days.

Additionally, notification tags are displayed next to specific categories in the Asset Library window, helping you identify updated sections at a glance!

Best Practices
- Preview assets: Use the Preview panel to see how assets appear before applying them
- Optimize performance: Be mindful of asset complexity to maintain optimal performance, especially for mobile devices
- Combine assets: Mix and match assets like materials, interactions, and effects for unique results