Face Inset
Use Face Inset to cut out selected parts of the face and add it to your scene. You can make cutouts of a user’s eyes, nose, mouth, eyebrows, and face. You can then add eyes around your face or create a mustache out of your eyebrows.
Add Face Inset
To add a Face Inset component:
- Go to the Inspector panel.
- Click + Add Component.
- Go to Face Effects.
- Click Face Inset.
Properties
| Property | Description |
|---|---|
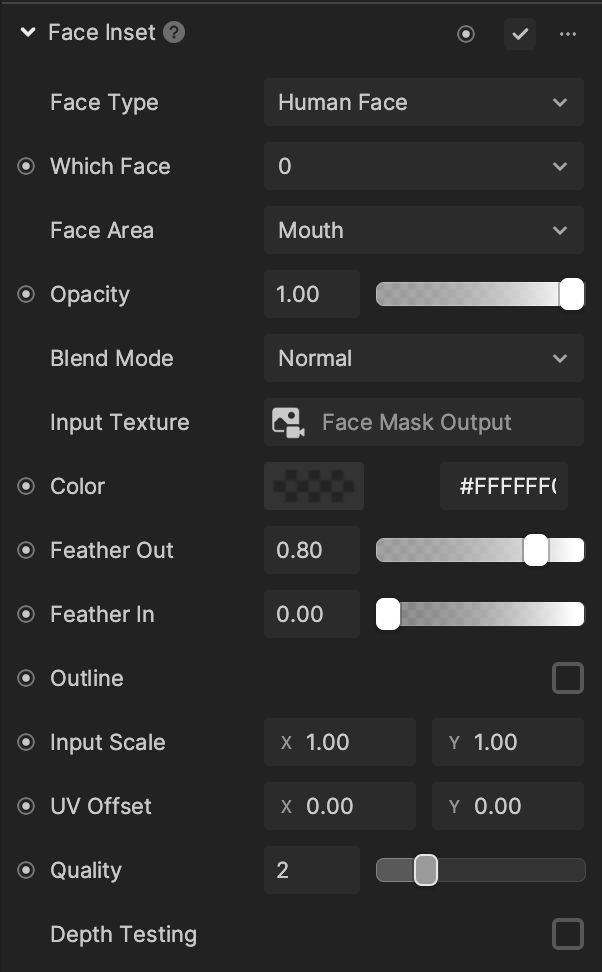
| Face Type | Specify if your face type is Human Face, Cat Face, or Dog Face
|
| Face Area | Choose which face area is used for the face inset. The Material property of the Mesh Renderer component will update accordingly with the selected face area.
|
| Opacity | Adjusts the final alpha value of the face inset result. Use the slider to set the opacity to a value between 0 and 1, with 0 being transparent and 1 being opaque (unless the edges are feathered). The default value is 1. |
| Blend Mode | Determines different calculations used to blend color and texture. Choose from the following blend modes:
|
| Input Texture |
|
| Color | Determines the color that will blend with the face inset. The default value is 0 with no tint. |
| Feather Out | Controls the radius of outward feathering |
| Feather In | Controls the radius of inward feathering when Feather Out is at its maximum radius |
| Outline | Controls the color of the Feather Out property. Select the Outline checkbox for additional properties:
|
| Input Scale | Scales the input texture |
| UV Offset | Shifts the input texture |
| Depth Testing | Determines if the Face Inset component will use depth in a 3D space to determine drawing order. If left unselected, the Face Inset component will use the sorting order. |
| Quality | The number of key points used in the creation of the face inset alpha mask |
note
The quality you set may affect the performance of the face inset.