Outline
Use the Outline component to identify the outline of a person, pet, hand, clothing, sky, ground, building, skin, or custom depth in an image or video, and apply various images or animation sequences along the contour.
Add the Outline Component
To add a Outline component:
- Go to the Inspector panel
- Click the + Add Component button
- Go to Utility
- Select Outline
Properties
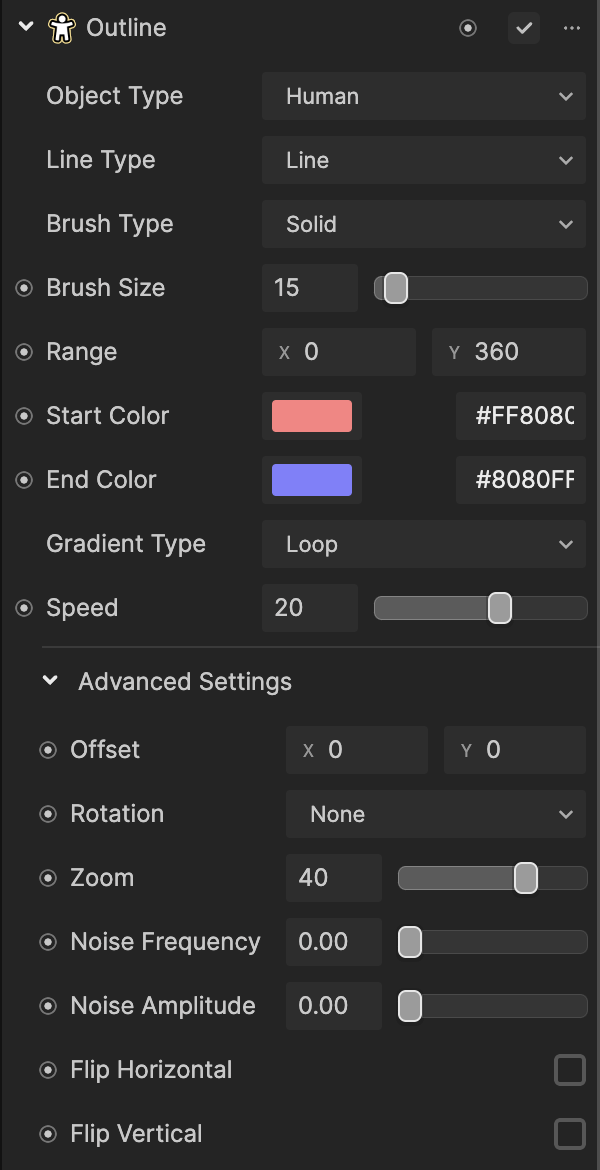
| Property | Description |
|---|---|
| Object Type | Allows you to change the object the outline is applied to with options for a Human, Pet, Hand, Clothing, Sky, Ground, Building, Skin, or Custom Depth. If Depth Bottom is selected, you'll have options for:
|
| Line Type | Allows you to change the line type. Choose between Line (solid line) and Dot (dotted line). |
| Brush Type | Allows you to change the brush type to Solid, Chalk, or Crayon. |
| Brush Size | Controls the dimensions of the line along the contour. Adjusting the size can create variations in the appearance and prominence of the applied line. The default is 15. |
| Range | Controls the range of the line. The default is (0, 360). |
| Start Color | Enables you to tint the selected lines with a specific color, allowing for creative customization and visual effects. |
| End Color | Enables you to tint the selected lines with a specific color, allowing for creative customization and visual effects. |
| Gradient Type | Allows you to change the gradient type to Loop or Endpoint.
|
| Speed | Adjusts the speed at which the lines Start Color and End Color flow along the contour. A higher range increases the speed. The default is 20. |
| Coverage | Controls the spacing between the lines along the contour. A higher value ensures even distribution, while a lower value increases the gap between lines. |
| Offset |
|
| Rotation | Select one of three alignment options (None, Normal, Tangent, and Random) that control the rotation of lines along the contour. This feature aligns lines with contour normals or tangents, enhancing visual accuracy. |
| Zoom | Allows you to scale the entire effect from the center. Negative values shrink the contour towards the center, while positive values enlarge it. |
| Noise Frequency and Amplitude | These properties control the Perimeter Growth noise frequency and amplitude for each individual line. Adjusting these parameters adds line variation and organic movement to the applied lines. |
| Flip Horizontally and Flip Vertically | These properties allow you to flip the contour along the X or Y axis, providing additional customization options for the applied lines. |