Visual Scripting Module 4: Kickstarting Your Visual Scripting Logic
Visual scripting allows you to control a wide range of interactive behaviors, like commanding an object's response to a screen tap, facial movement, or gesture. This versatility is accomplished through visual scripting graphs.
How a Visual Scripting Graph Works
A visual scripting graph is a flow of logic illustrated by connections between visual scripting nodes. A flow of logic refers to how nodes execute their functions in a sequence, defined by connections in the graph. Execution refers to how a computer reads and fulfills the instructions in a program, or in this case, the visual scripting graph.
A graph typically starts with an event or trigger that executes a command to the following nodes. In the graph, logic flows through connections from left to right.
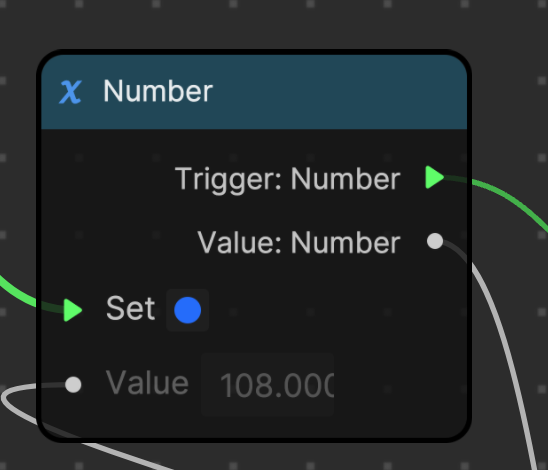
Recall that nodes have both control ports and data ports:
- Control ports, indicated by green triangles, are used to form connections that execute logic
- Data ports allow transfer of data and are symbolized by gray circles
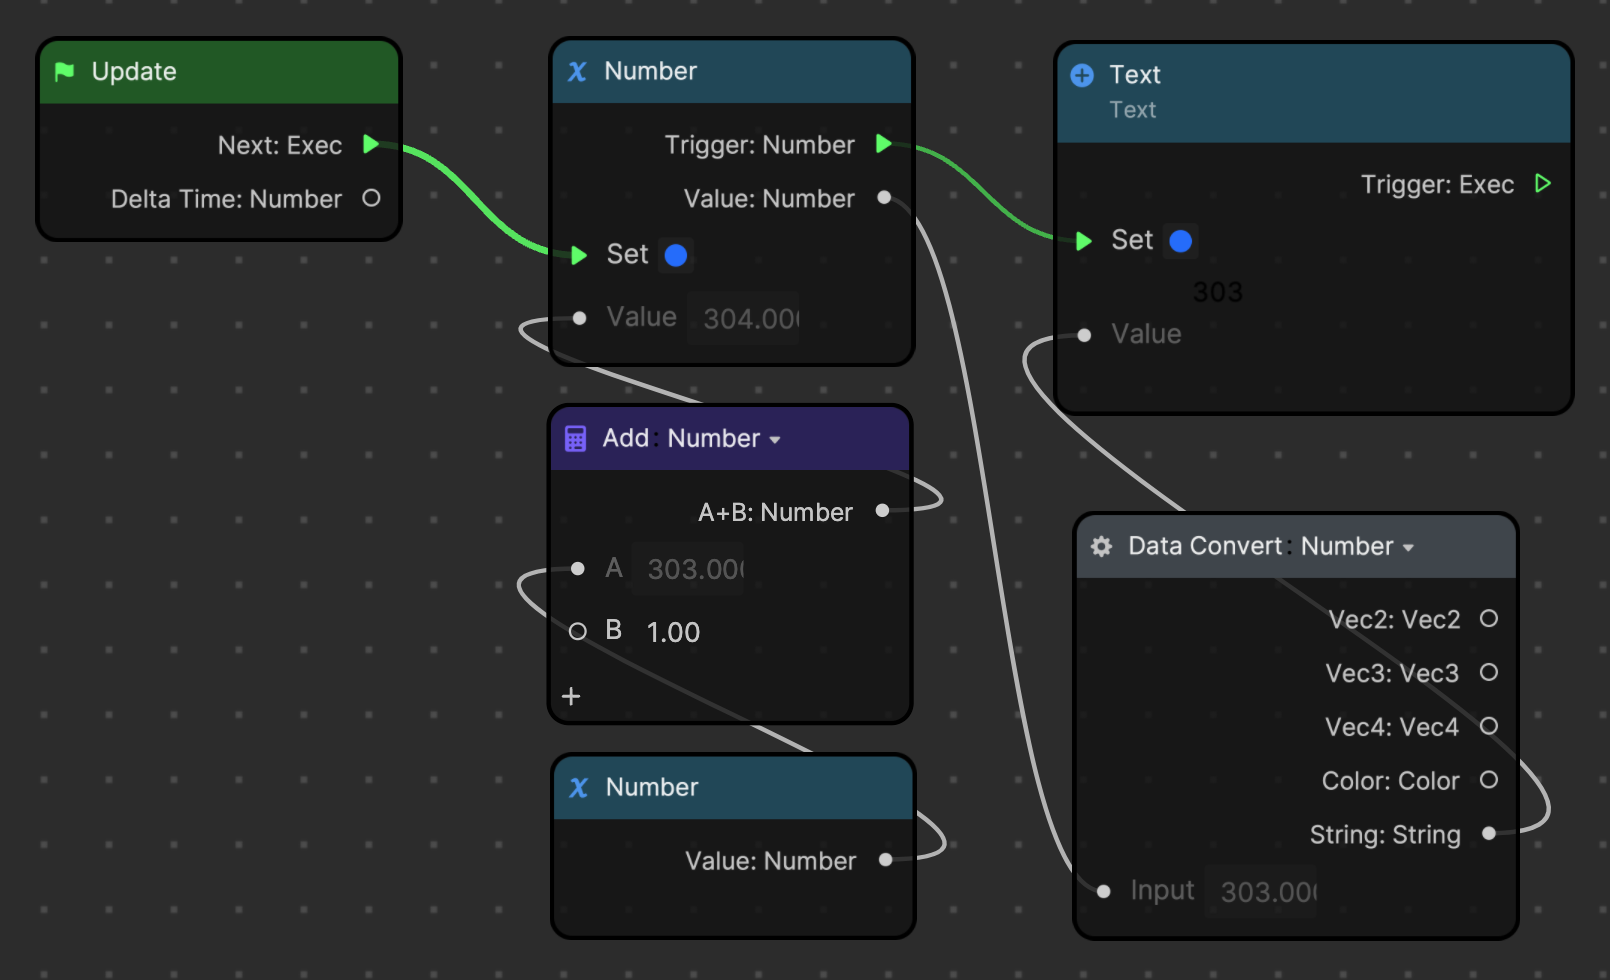
When a node receives an upstream command, a circle next to its port will turn blue. This means that the node is actively performing its function. Blue circles act as indicators of when the node is active.
Control Flow
Visual scripting in Effect House uses control flow to carry out commands. Control flow refers to the order in which instructions outlined by the visual scripting graph are executed. In Effect House, the script is run from the first node to the last node, but different types of statements in the graph can modify the flow of information. For example, certain nodes can restrict the script from running unless a certain condition is met, or tell the script to repeat a chain of statements, resulting in a loop.
Control flow can be traced through connections between control ports, symbolized by green lines. This way, you can follow the source of a command, ensuring clarity in the execution path.
Start the Flow of Visual Scripting Logic
In Effect House visual scripting, certain types of nodes are required to initiate control flow. These initiator nodes often signify an event or a trigger, and are broadly categorized into two types: Event nodes and detection nodes.
Event nodes: The Event node category contains nodes that trigger downstream logic in response to a certain event, like a screen tap or swipe. These nodes represent common events or actions that can be used to initiate other actions or sequences in your effect. Event nodes only feature output ports, since they are frequently used to begin the visual scripting graph.
Detection nodes: Detection nodes are nodes that detect behaviors or appearances, like a hand, eye blink, or a cat's face. Detection nodes scan for and confirm the presence of the desired behavior in every frame of the video. While detection nodes do not make up a distinct category in the Node menu, there are a few that are commonly used to initiate the visual scripting graph.
Not all nodes with the word "detection" can be used to execute functions. For example, all of the nodes in the Audio category only exchange data and do not contain control ports.
These types of initiator nodes can tell the computer to run the visual scripting graph only once, when an event or behavior is detected, or during every frame of the video.
Event Nodes
Nodes from the Event category are commonly used to initiate visual scripting graphs.
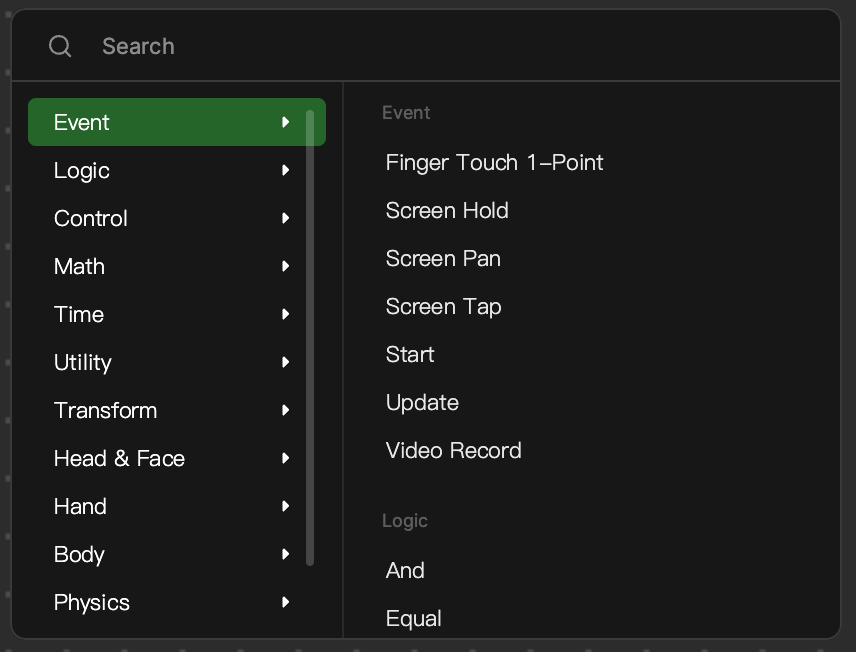
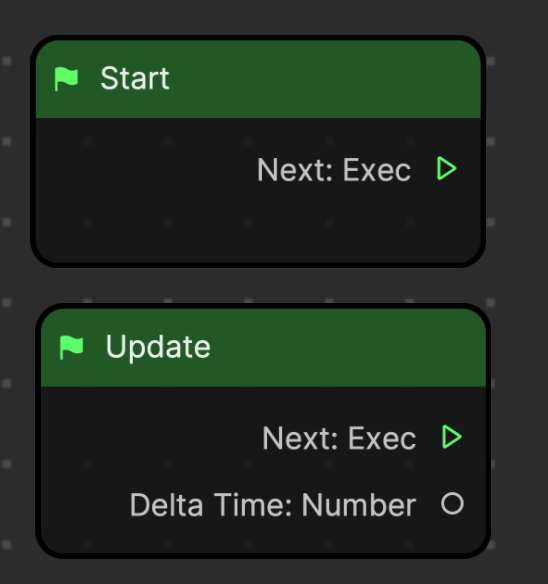
Consider the following Event nodes. Start and Update are always present in the Visual Scripting panel by default and are commonly used.
| Node | Description |
|---|---|
| Start | The Start node is triggered once as soon as the effect is opened. It is only executed once. This is useful for setting initial parameters or starting introductory animations, like a hint telling the effect user to tap the screen to trigger the effect. |
| Update | The Update node is triggered for every frame of the video, meaning it will repeatedly execute its connected logic as the effect runs. This is suitable for continuous animations or monitoring real-time changes in the environment. |
For example, the Side Scroll Jelly Game template uses the Start node to initialize variables like scroll speed and appearance of the bubbles, while using the Update node to manage the game's progress.
Execution Frequency
The key difference between these nodes is their execution frequency. The Start node triggers the next node one time once the effect starts, while the Update node triggers the next node for every frame of the video. Many initiator nodes contain similar output conditions. For example, some nodes execute continuously for every frame of the video, while other nodes only execute when a certain condition is met, like when a finger makes contact with the screen.
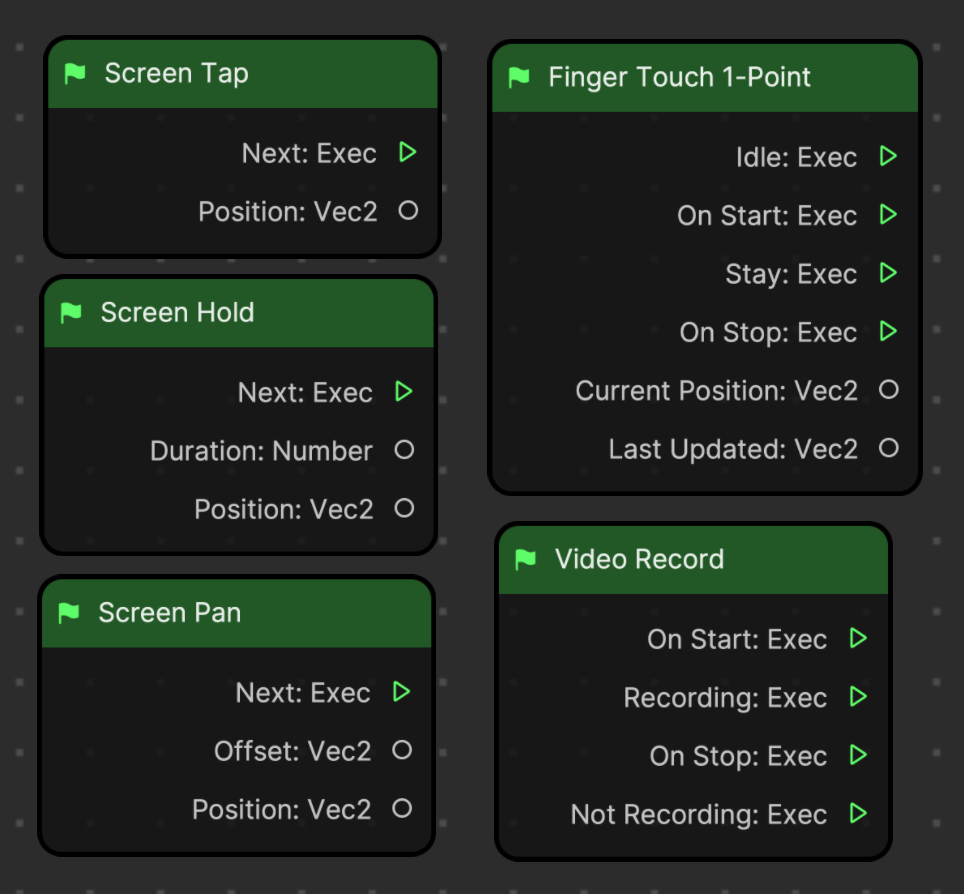
Several of the Event nodes trigger downstream nodes in response to how a person touches the screen, or when they start recording. Notice what kind of data each node contains in relation to its function.
| Node | Description |
|---|---|
| Screen Tap | Executes the next node when a person touches the screen. Passes information about where the screen was tapped. |
| Screen Hold | Executes the next node when a person touches the screen and holds. Passes information about the tapping position and duration of the hold. |
| Screen Pan | Executes the next node when a person touches and moves their finger over the screen. Passes information about the tapping position and offset. |
| Finger Touch | Triggers different executions when the screen is touched by one or two fingers and when the device screen is not touched. Passes information about tapping position and the position of the last updated tapping point. - Idle executes the next node when a finger touch isn't detected - On Start executes the next node when someone's finger touches the screen - Stay executes the next node when someone's finger stays on the device screen - On Stop executes the next node as soon as someone's finger leaves the device screen |
| Video Record | Controls how the effect responds during a video recording. It has multiple outputs that execute downstream nodes differently. - On Start executes the next node when the recording starts - Recording keeps executing the next node during recording - On Stop executes the next node when the recording is stopped or paused - Not Recording keeps executing the next node when not recording |
Detection Nodes
In addition to using nodes from the Event category, you may also use a wide variety of detection nodes to start the flow of logic.
While detection nodes do not make up a distinct category in the Node menu, there are a few that are commonly used to initiate the visual scripting graph.
| Node | Description |
|---|---|
| Face Detection | Detects the faces of people using the effect |
| Pet Face Detection | Detects if there are cats or dogs in the camera |
| Head Movement Detection | Detects a head movement. You can select which Head Movement is detected. |
| Facial Expression Detection | Detects facial expression in the camera. You can select which Facial Expression is detected. |
| Hand Detection | Detects one or two hands in the scene. You can select whether one or both hands are detected through the node's Type parameter. |
| Gesture Detection | Detects gestures. You can select which Gesture is detected. |
| Body Detection | Detects a body in the scene |
Knowledge Check: Review the Bling interaction demo from module 2. Examine the underlying logic of the Tap Screen to Toggle Visibility interaction's trigger and response subgraphs, and follow the control flow to understand how the interaction works.
Key Terms
- Visual scripting graph
- Flow of logic
- Execution
- Execution frequency
- Control flow
- Initiator nodes
- Event nodes
- Detection nodes
Next Steps
Apply your knowledge of control flow and initiator nodes to building visual scripting graphs in the next module.