Visual Scripting Overview
Visual Scripting in Effect House allows you to create interactive effects without having to worry about writing text-based code. Use nodes and variables to create complex logic.
Getting Started
To open the Visual Scripting panel, click the Graph icon on the top-left of the Effect House interface.
Visual Scripting Nodes
Visual Scripting is a node-based creation system where each node performs a different function within your logic flow. As you connect each node, they will receive and pass information along the sequence. This system of connections allows you to use Visual Scripting to add triggers, events, controllers, and more to your effects.
Explore Each Node Type
- By default, two nodes are automatically added to a project: Start and Update. Start will be called when the effect begins and Update will be called once every frame.
- Go to the Visual Scripting panel and click the Add button [+] > Add node at the top of the interface. A menu with every node will pop up. Select a node from the menu or type the name to search, and then click the node to add it to the panel.
You can also right-click on a blank area of the Visual Scripting panel and select Add node to perform this action.
View Node Variables
A variable is a symbol which works as a placeholder for expressions or quantities that may vary or change. It only needs to be initiated once and can be reused multiple times throughout the effect creation process.
Add a Variable
- Go to the Visual Scripting panel and right click to select Show/Hide variable. This will open the variable menu.
- Click + Add variable on the bottom of the menu to add a variable. You can click the text area to rename each variable, open the drop-down list to change the variable data type and assign an initial value to it. You can also click the small trash can icon to delete an existing variable.
- You can retrieve or set a variable by clicking the Add button [+] > Get/Set Variable. This will automatically create a variable node and add it to the Visual scripting panel.
Make Your First Effect With Visual Scripting
Try making a simple effect by using the Mouth open and Mouth close actions to change the visibility of a cube. You can also follow along in the sections below. Here is a demo of the final result and the project package:

Add an Object and Nodes
- To start, add a 3D cube object to the scene by Clicking the Add button [+] > 3D > Cube. Adjust the Position parameters of the cube to place it in the desired position on your screen.
- Since you are using mouth open/close actions as triggers, select a Mouth Open demonstration video from the drop-down list in the Preview panel to test the effect.
- Right click in the Visual Scripting panel, and search for and select the Facial Movement Detection. Set the Facial Movement property to Mouth Open.

- Then find and add the node Set Visibility to the panel.
- In the node information, check the required inputs. Since Set Visibility needs to take an Object, select the cube object from the Hierarchy panel and drag it to the Visual Scripting panel. This will create the cube object node automatically.
- Set the visibility value. There is a checkbox next to the Value of Visibility On. Select or deselect it to set the value to true (visible) or false (invisible), respectively.
Link the Nodes
- Link the Begin output of Facial Movement Detection to the Enter input of Set Visibility, link the Entity output of Cube to the Target input of Set Visibility, and then deselect the checkbox next to the Visibility On input of Set Visibility.
- Add a new Set Visibility node in order to make the cube visible when the mouth is closed. Link the newly added nodes accordingly and select the Visibility On checkbox this time. You can move the nodes around to clean up and organize your interface.
- Congratulations! Now that you’ve learned the basics of visual scripting, feel free to incorporate it into your own effects.
Node Types
There are 11 different types of nodes in Effect House that help you work with interaction, logic, and more.
| Node Types | Icon | Description | Example(s) |
|---|---|---|---|
| Event |  | Nodes that detect an event and output triggers accordingly. | Screen Tap captures a touch event. |
| Logic |  | Checks the logic of the input(s), often comparing two values. | Greater Than checks if one input value is greater than another. |
| Control |  | Use these nodes to control the flow of triggers. | For Loop, If, and Sequence. |
| Math |  | These nodes perform math functions. | Random, Floor, and Multiply. |
| Time |  | Nodes relating to time. | Get Time tracks the time in seconds since the start of the effect. |
| Utility |  | The root level of entity and component status. | Set Visibility sets the visibility of an object. |
| Transform |  | The root level of transform related triggers. | Local Transform Info outputs the local transform data of a scene object. |
| Head & Face |  | Nodes related to the head and face. | Facial Movement Detection triggers the next node when a particular movement is detected. |
| Hand |  | Nodes related to the hand. | Hand Detection triggers the next node when a hand is detected on screen. |
| Body |  | The root level of body triggers. | Body Detection triggers the next node when there is a body detected in camera view. |
| Audio |  | Nodes related to audio. | Beat Detection outputs the imported audio’s beat. |
Node Information
You can view a node’s basic information by following the menu. Let’s use the Body Detection node as an example:
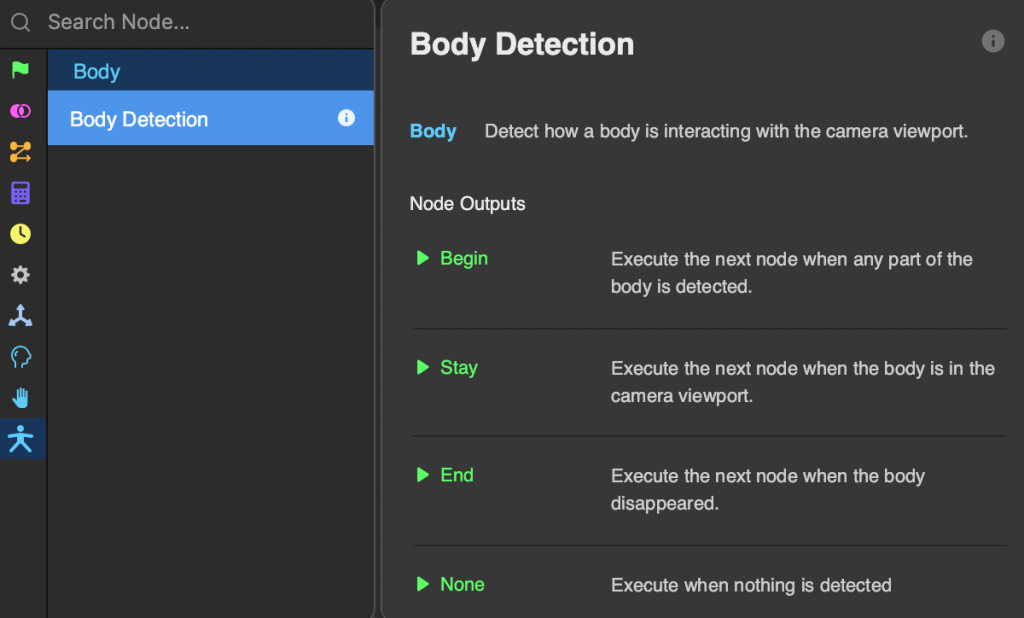
- Name: The name of the node is at the top of the node's basic information.
- Description: A description of the node’s primary functionality.
- Inputs and Outputs: Ports along the left side of a node are known as “node inputs”. Ports along the right side of a node are called “node outputs.” You’ll link one node to another by making a connection from an output port to an input port.
Right-clicking on an added node and selecting Node info, or directly clicking the ⓘ icon, will show the node's information.
Manage the Visual Scripting Panel
Subgraphs
Subgraphs are a set of nodes grouped together that can help organize your Visual Scripting.
Create a Subgraph
- Select the nodes you want to group.
- Right-click on the nodes, then select Create subgraph. You can change the name of the subgraph by double-clicking on the name at the top of the node.
Edit a Subgraph
- Double-click the subgraph node to dive into it and edit the grouped nodes.
- Click on the Main graph button on the top-left corner of the Visual Scripting panel to go back to the top-level graph. You can also right-click on a subgraph node to un-group it.
Create a Subgraph Asset
You can turn your subgraph into a subgraph asset that appears in the Assets panel. The subgraph asset can be dragged from the Assets panel to the Visual Scripting panel.
- Right-click a subgraph.
- Click Create a subgraph asset. The subgraph asset can be found in the Subgraphs folder in the Assets panel.
You can also import subgraphs from the Visual Scripting section of the Asset Library.
Export a Subgraph Asset
You can save a subgraph as a subgraph file on your local machine from the Visual Scripting panel. You can share the exported subgraph file and reuse them in other Effect House projects.
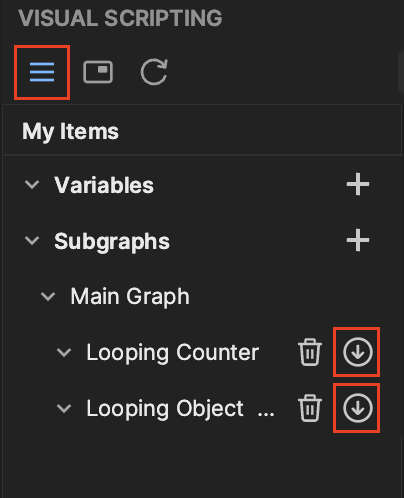
- Click the My Items button.
- Under Subgraphs, locate a subgraph you'd like to export.
- Click the Download button.
- Enter a file name, select a location, and click Save.
Save a Subgraph to the Menu
Easily reuse a subgraph in any Effect House project by saving it to the node menu.
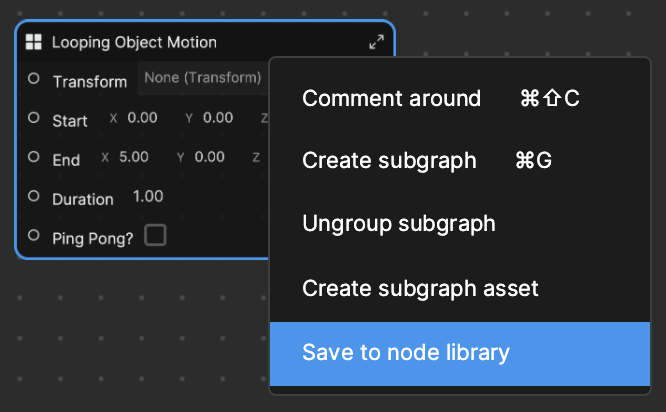
- Right-click a subgraph.
- Click Save to node library.
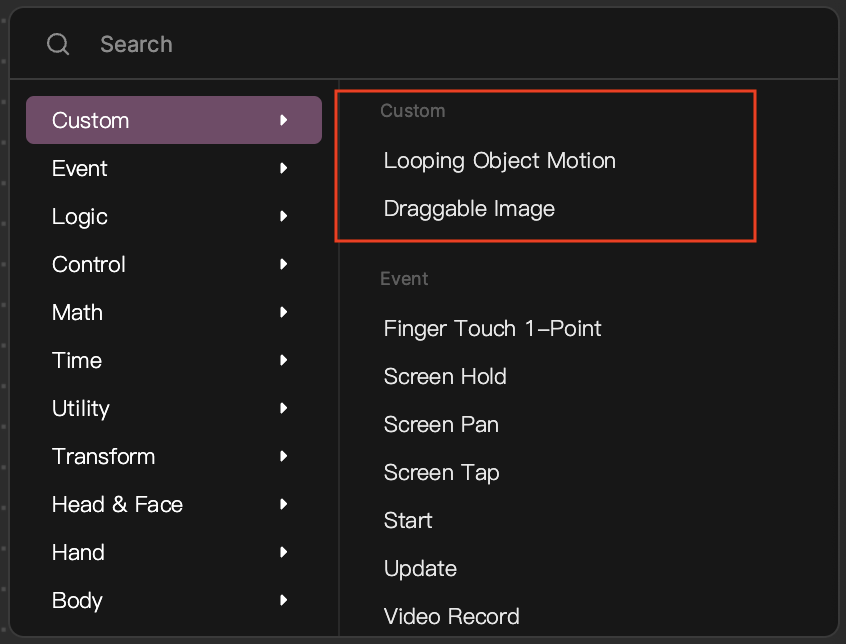
You can now open a new Effect House project and access the saved subgraph from the Custom tab of the node menu without having to open the subgraph file.
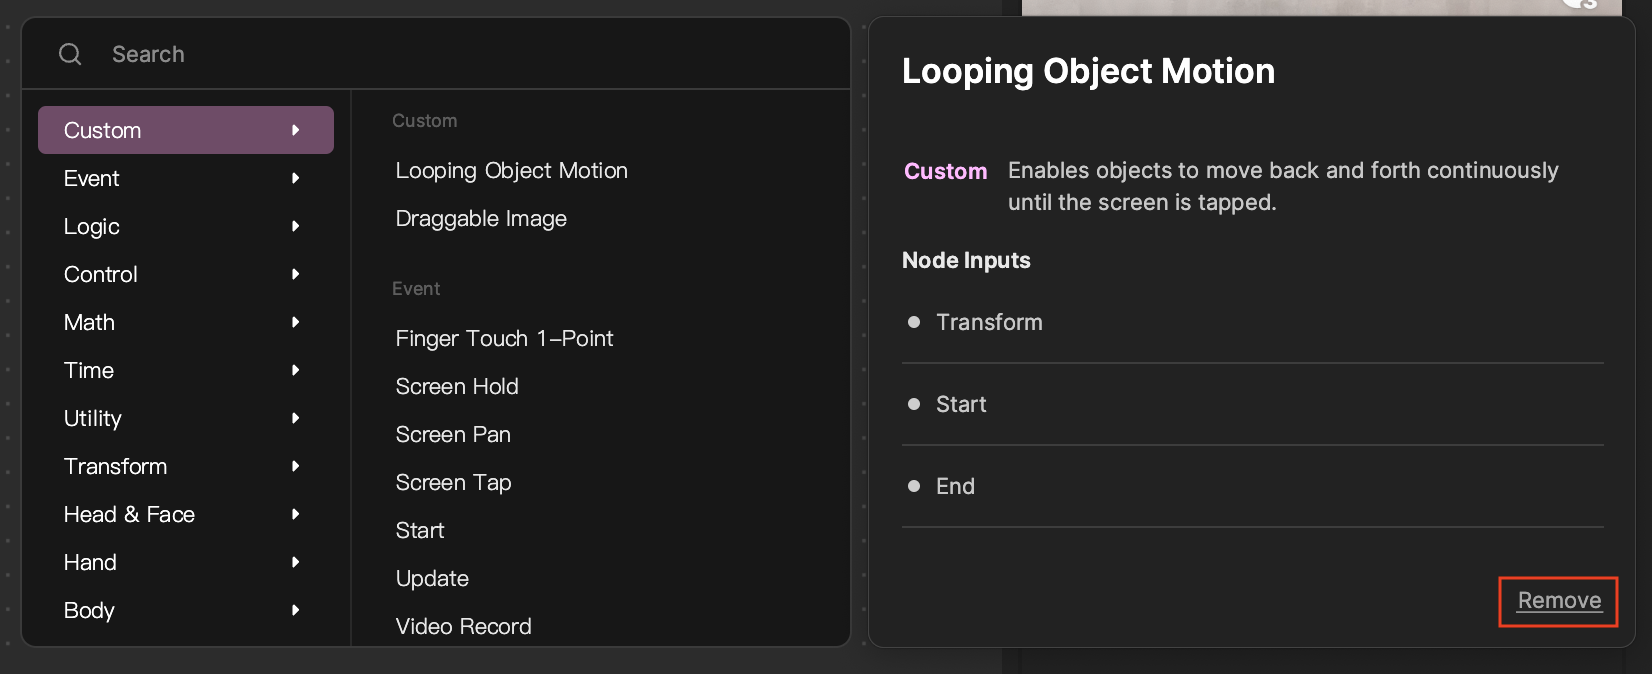
You can also delete a saved subgraph from the Custom tab of the node menu.
- Click the Add button [+].
- Go to the Custom tab and hover over a subgraph.
- Click Rename.
Use the Minimap to Navigate
| Name | Icon | Description |
|---|---|---|
| Minimap |  | The minimap icon on the top-right corner of the Visual Scripting panel allows you to toggle the minimap on and off. When the minimap is open, you can drag the rectangle on it to navigate the panel. |
| Reset Graph view |  | The zoom button centers the nodes on the panel. |
Effect Reset on Record
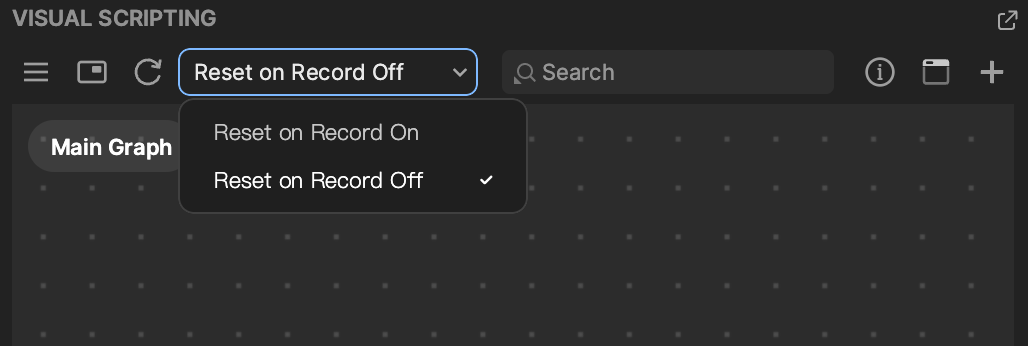
The Visual Scripting panel has an effect reset dropdown. Selecting Reset on Record On will reset the effect whenever the record state is triggered. Selecting Reset on Record Off will default to the visual scripting setup. Use the in-tool preview record button to test this out.